When you purchase through links on our site, we may earn an affiliate commission. Here’s how it works.
5 Best VPNs for Gaming in 2025


Our experts have reviewed 53 VPN providers, which were put through extensive rounds of testing. To learn more about that process, here’s how we review VPNs, where we explain our criteria and our policy of being fully transparent.
Lag, high ping, and DDoS attacks can ruin your gaming fun, especially during intense matches. On top of that, some Internet providers slow down your connection or block access to certain game servers. That’s where a good gaming VPN can make all the difference. It hides your IP, protects you from attacks, and lets you connect to servers around the world, so you can play faster, as well as safer.
But not every VPN is made for gaming. That’s why the TechNadu team tested over 60 VPNs to find the 5 best VPNs for gamers. In this guide, apart from sharing our top picks, we’ll also show you how to use a VPN for gaming, explain why you need one, how a VPN affects your ping, which VPN location to pick for gaming, how to fix technical issues, avoid potential VPN bans, answer some FAQs, and more.
Editor's Picks: Best Gaming VPNs
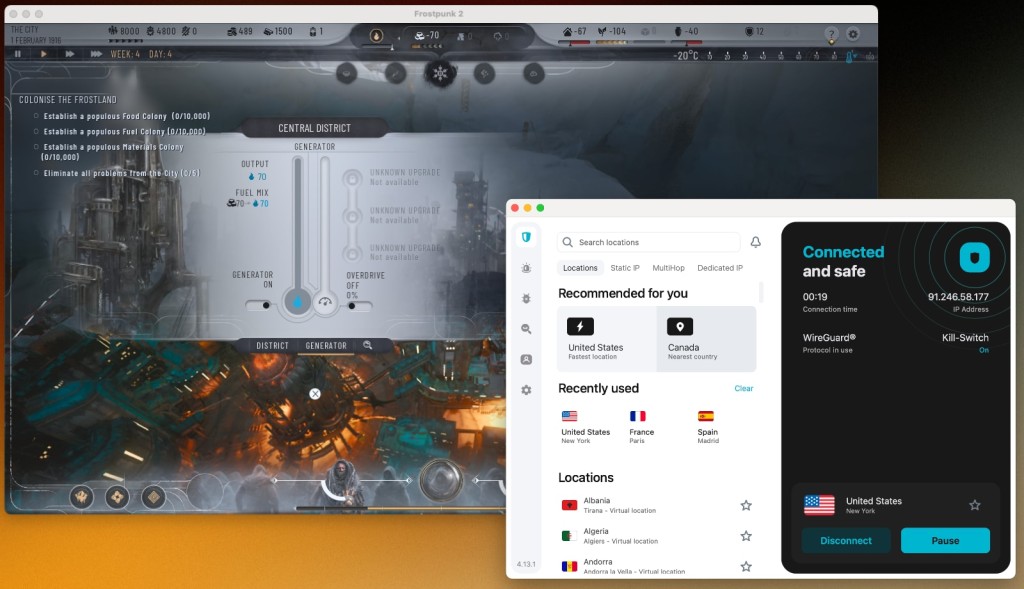
- NordVPN - Our best-rated VPN for gaming due to ultra-low latency, huge server network, and blazing-fast speeds. It offers advanced DDoS protection, Meshnet for LAN-like gaming with friends, and SmartPlay for uninterrupted access to game servers worldwide. Ideal if you want the fastest response times, global access, and an edge in competitive gaming.
- ExpressVPN - Fully obfuscated servers to keep your gaming traffic hidden from ISPs, network throttling, and DDoS attacks. It offers stable ping, top-tier encryption, and native apps for every device, including consoles via router support. Perfect for gamers who prioritize stealth, security, and cross-device consistency.
- Surfshark - A beginner-friendly VPN that delivers fast speeds, strong privacy, and a wide server network. With low ping and unlimited device connections, it’s a solid pick for casual gamers, families, or anyone gaming on multiple devices. Great if you’re new to VPNs but still want performance and protection.
- Private Internet Access - Offers unmatched configurability, low-latency servers, and robust encryption options. PIA’s fine-tuned controls are ideal for advanced users who want to customize performance, block ads, and minimize lag. Best for gamers who want full control and maximum reliability.
- Proton VPN - Delivers high-speed servers, advanced security protocols, and a no-logs policy backed by Swiss privacy laws. With features like VPN Accelerator for lower latency and Secure Core to mask your IP, it’s a strong choice for privacy-conscious gamers. Recommended for players who want elite privacy without sacrificing gaming speed.
How to Choose the Best VPN for Gaming?
Gaming online can be thrilling, but it also comes with its own set of problems. Whether you're playing competitively or just for fun, these issues can seriously affect your experience. Then what should you do? Well, choosing the right VPN is key to smooth, secure gameplay. Here’s what to look for in a VPN for a lag-free gameplay.
- Being Able to Access Bot Lobbies: Games like Fortnite, CoD Warzone, Apex Legends, and PUBG offer bot lobbies for easier matches. To access those, you'll need a VPN with servers in countries where those bot lobbies are most often found.
- Sizeable and Evenly Distributed Server Fleet: If you force your data to travel more, you'll experience slowdowns - unless you find a VPN that optimizes remote connections. In short, find a VPN with a sizeable server fleet, covering as many VPN virtual locations as possible.
- Strong DDoS Protection: Competitive gamers know the frustration of getting knocked offline by DDoS attacks. Pick a VPN that offers built-in DDoS protection to keep your connection stable during intense matches.
- Gaming-Friendly VPN Protocols: When it comes to gaming, you'll want robust VPN protocols such as WireGuard and OpenVPN, for example.
- Privacy-Friendly Jurisdiction: It's wise to pick a VPN based outside the 14-Eyes Alliance, as those countries are known for aggressive data logging practices. Go for a VPN based in a country with no mandatory data retention laws.
- Native and Easy-to-Use Software: To get an enjoyable and lag-free gaming session, use native software. That means you need to install your chosen VPN and then run it in the background each time you launch any game.
- Device Support: Gaming often happens across multiple devices, including PCs, consoles, smartphones, and tablets. Pick a VPN that supports a wide range of devices natively and allows multiple simultaneous connections.
- Latency-Friendly and Fast Performance: Remember not to trust any marketing messages out there. Instead, find a VPN with plenty of servers, multiple VPN protocols, and fast speed, which is always a good starting point, performance-wise,
- Extra VPN Features (Split-Tunneling, Kill Switch, Dedicated IP): Split tunneling allows you to create two tunnels for your data. A kill switch will keep you protected if your connection drops. And a dedicated VPN IP helps you bypass even the strongest anti-VPN blocks.
- Sufficient Number of Parallel Connections: Most VPNs offer 5-10 simultaneous connections, while some don't impose such limitations. So, think about how many devices you'll need to cover, including your gaming and non-gaming gadgets.
- Multi-Purpose Functionality: You'll want a VPN that works for more than just gaming. Make sure your chosen provider supports the types of activities you plan to do, which can include privacy protection, streaming, torrenting, and more.
- No-Questions-Asked Money-Back Policy: Pick a VPN that gives you at least 30 days to ask for a refund if you change your mind. Some VPNs can give you up to 45 days.
- Pricing and Value: As a gamer, you certainly appreciate finding a good deal. In terms of VPNs, you don't have to spend a lot of money, especially if you invest in a long-term subscription, as that's where you'll find the steepest discount.
- Reliable Customer Support: When technical issues appear, you'll be happy to have a VPN that offers 24/7 live chat support, which is always the fastest way to resolve any problems.
The Best VPNs for Safe and Fast Gaming in 2025
Want to game online without lag, DDoS attacks, or annoying region blocks? As established above, a solid VPN is key to keeping your connection fast, secure, and stable while you play. But which VPN delivers the best mix of low latency, strong protection, and global servers for gaming? After testing over 60 VPNs, our experts have handpicked these 5 best VPNs for gaming in 2025:
1. NordVPN
NordVPN gives you access to bot lobbies while providing plenty of gaming-centric VPN features. It's known for encrypting connections flawlessly. In other words, you'll end up with a high level of online privacy while ensuring your ping and latency are at their minimum.
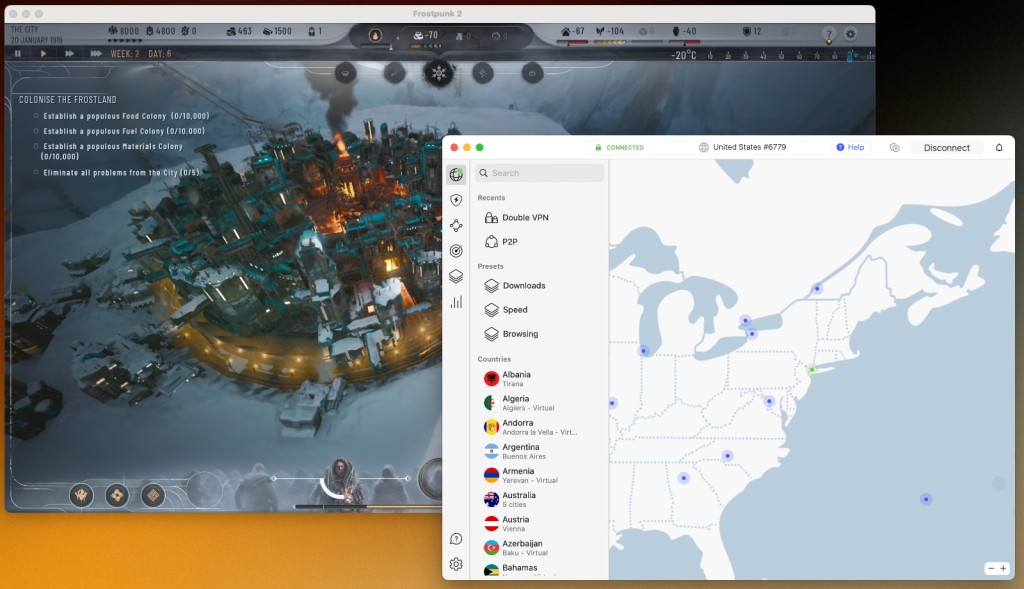

In terms of its server network, you'll find 7,400+ servers in 118 countries. On top of that, it's among the fastest VPN providers right now, bringing fast speeds across nearby and remote servers. Based on our tests, it managed to create a 482 Mbps VPN connection on our 700 Mbps baseline Web connection while keeping our ping in check. Plus, it features stable performance even during extra-long gameplay sessions.

NordVPN's 'DoubleVPN' encryption system is designed so that it encrypts both outbound and inbound data using AES-256-GCM and ChaCha20 twice. In other words, if you want to protect your gaming sessions from DDoS attacks and prevent online trackers, NordVPN should be your pick. Furthermore, NordVPN is absolutely ready as it has rolled out post-quantum encryption across all devices, making it one of the most secure VPNs for gamers looking ahead to evolving cyber threats.
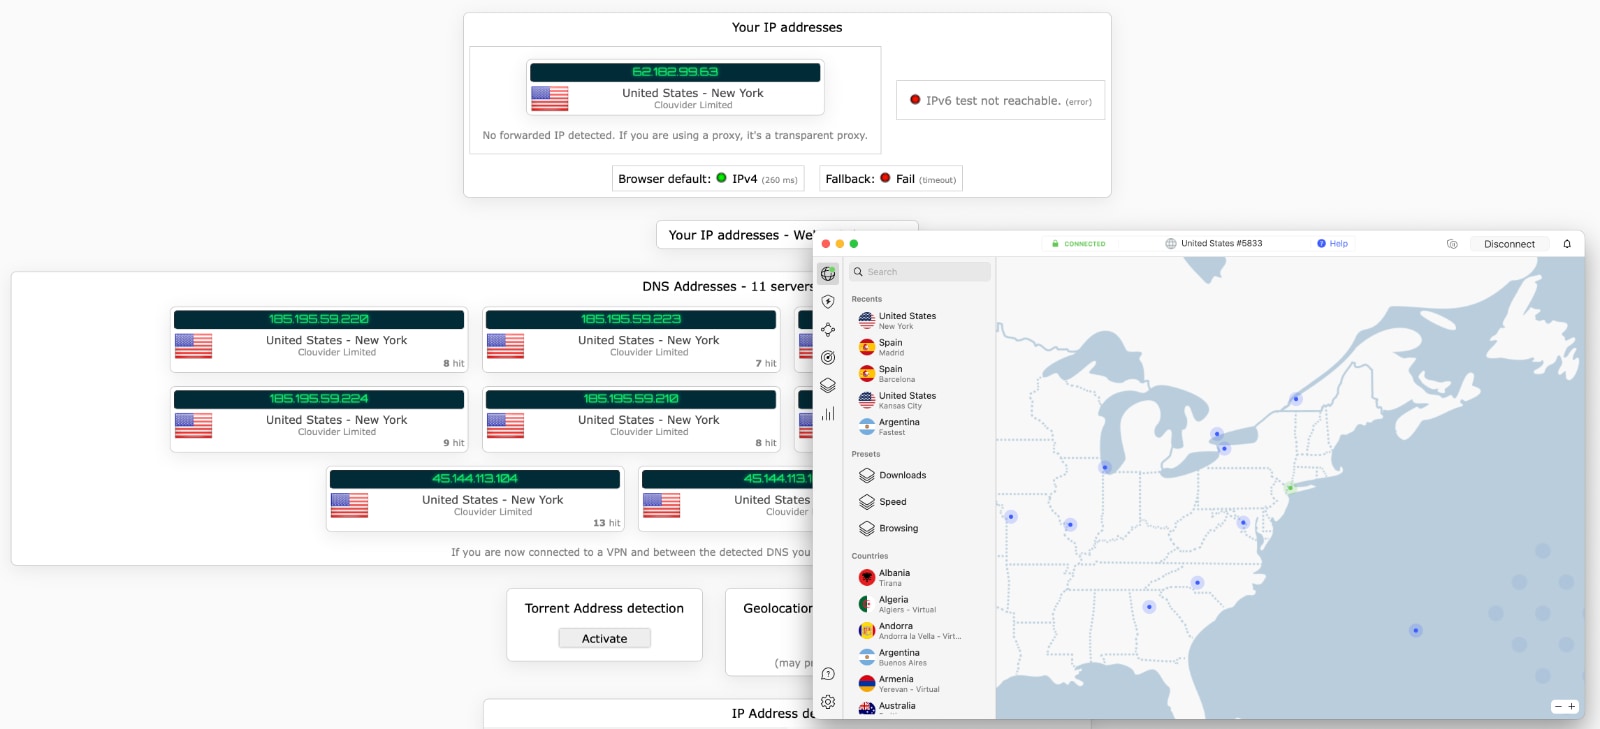
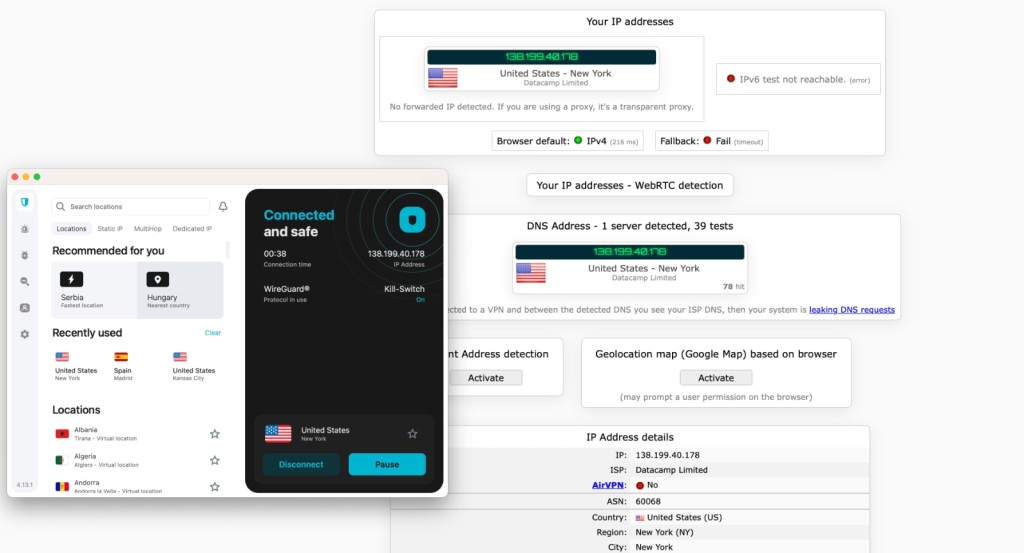
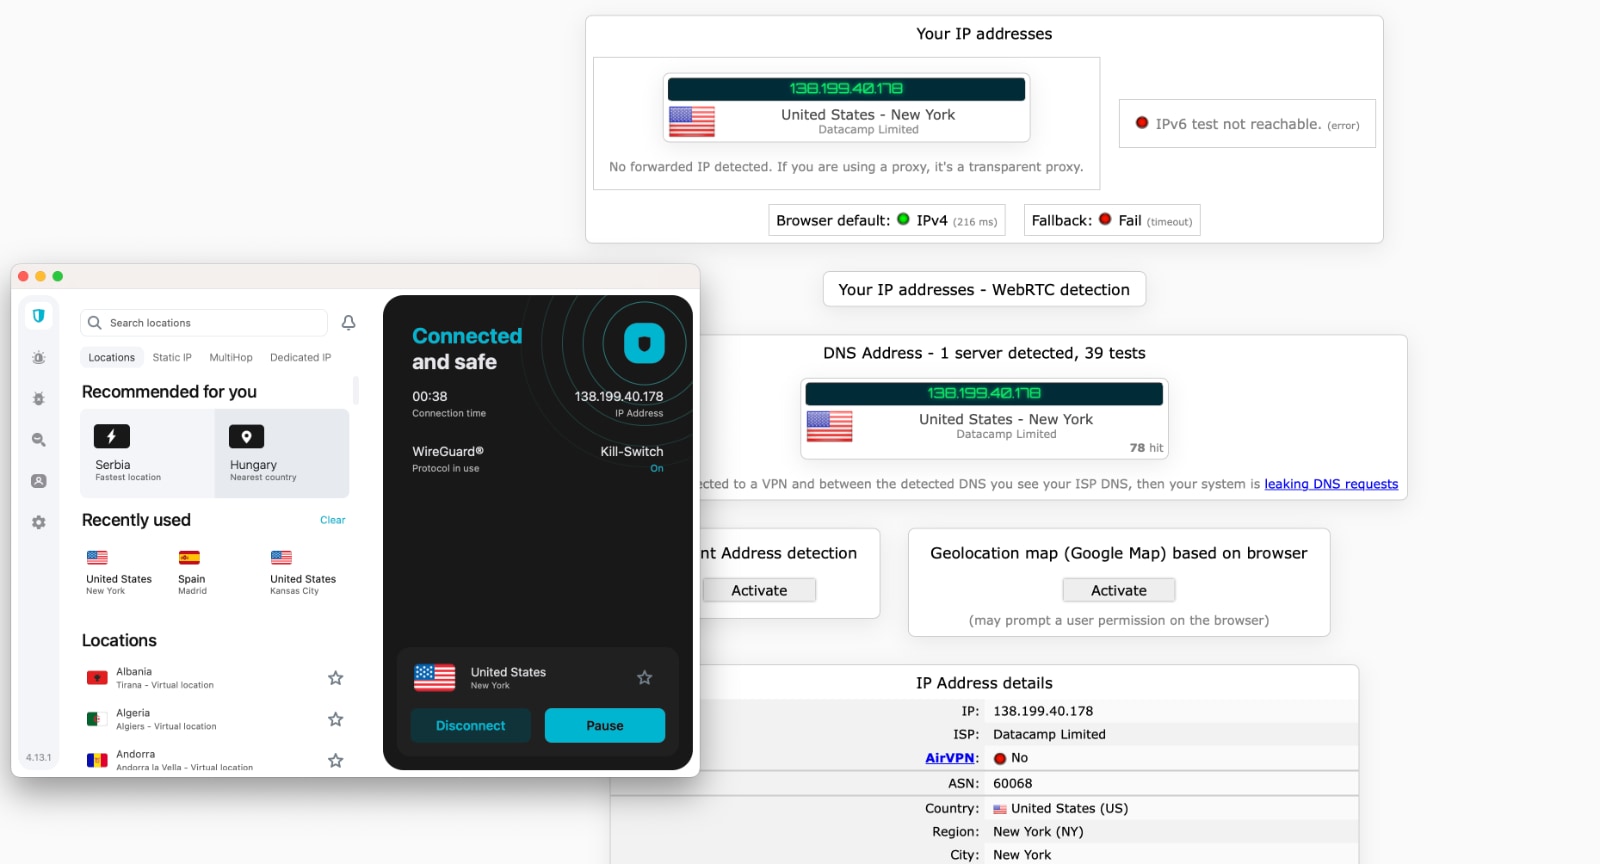
NordVPN's obfuscated servers are especially handy for hiding your data, which is why this Panama-based VPN unblocks even the toughest-to-unblock game marketplaces out here. You also get split tunneling, a kill switch to prevent data leaks, and strong protocols (NordLynx, NordWhisper, IKEv2/IPsec, and OpenVPN). Let's not forget to mention that NordVPN comes free of IP, DNS, or WebRTC leaks.

Despite its high-end privacy-protecting features, this VPN can help lower your ping, which means you'll ensure minimal latency. This makes NordVPN suitable even for fast-paced online shooters, as any game you play will retain its responsiveness.
Let's not forget that NordVPN offers easy-to-use applications for computers and mobile devices, and it supports routers as well, so you can use it on your Xbox, PlayStation, and Nintendo Switch. You'll get up to 10 simultaneous connections, so you can use this VPN even on the go.
Lastly, NordVPN comes priced at $3.39 per month for 24 months. It also has a 30-day money-back guarantee, so you'll buy its subscription without risk. There's also 24/7-available live chat support.
Want to see if NordVPN fits your budget? Take a look at their different pricing plans and choose what works best for your budget. Looking to save a little extra? You can grab a special discount with TechNadu’s exclusive NordVPN coupons! Not sure yet? There’s also a free trial available, so you can test the speed and performance before committing. Need a hand getting started? Here’s a quick guide on how to install NordVPN on any device.
Some Standout NordVPN Features for Gaming:
- Ultra-Low Latency Servers: Optimized servers designed to minimize ping and reduce lag, giving you a competitive edge in fast-paced games.
- Advanced DDoS Protection: Keeps you safe from attacks that can disrupt your connection during intense multiplayer matches.
- Meshnet Feature: Allows you to create a secure virtual LAN with friends for private, low-latency gaming sessions no matter where you are.
- SmartPlay Technology: Automatically bypasses geo-blocks on game servers and streaming platforms without slowing your connection.
- WireGuard-Based NordLynx Protocol: Combines strong encryption with lightning-fast speeds, perfect for maintaining smooth gameplay without compromising security.
- Kill Switch & Leak Protection: Ensures your real IP never leaks if the VPN disconnects unexpectedly, keeping you secure during crucial gaming moments.
- Multi-Device Support: Connects up to 6 devices simultaneously, letting you protect your PC, console (via router), and mobile devices with one account.
PROS
- Fast speeds with NordLynx protocol.
- Access to bot lobbies via region switching.
- DDoS protection for competitive gaming.
- Meshnet for LAN-style connections.
- Split tunneling for better performance.
- RAM-only servers for secure sessions.
- Obfuscated servers bypass game bans.
- SmartDNS support for consoles.
- Works well on restricted networks.
- 24/7-available customer support.
- 30-day money-back policy.
CONS
- Pricey monthly subscription plans.
2. ExpressVPN
ExpressVPN is one of the most comprehensive VPNs out there. It gives you access to bot lobbies in any game, including Call of Duty, Apex Legends, Fortnite, PUBG, and more. Also, it has a wide server network, high-end protocols, strong encryption, and impeccable customer support.
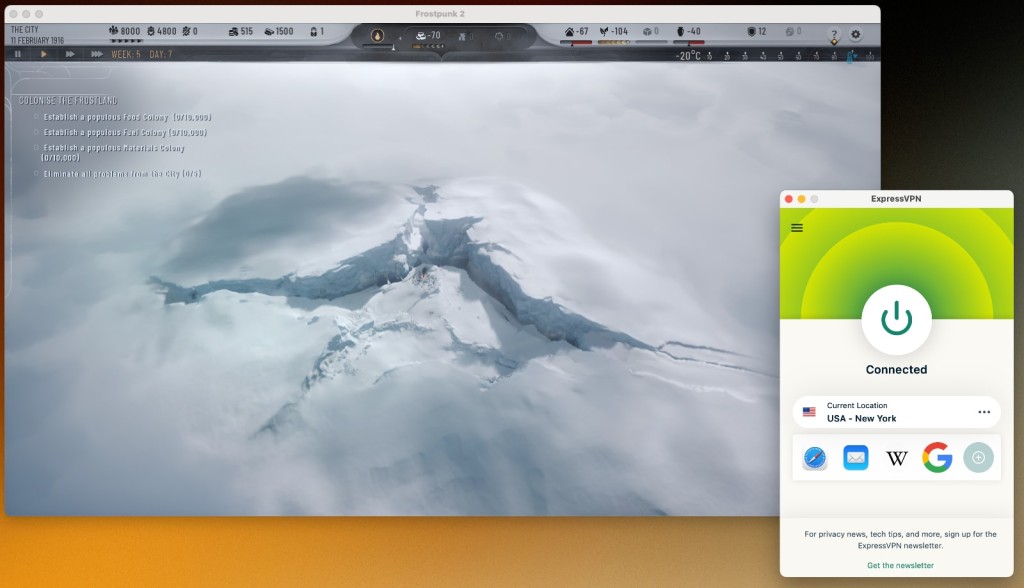

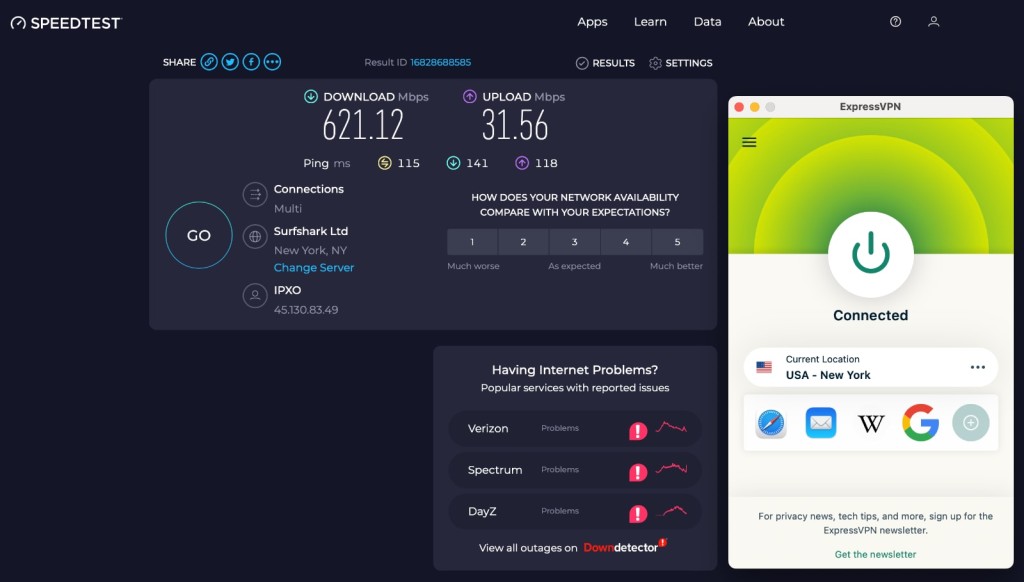
Based on our hands-on tests, this is among the fastest VPNs. On top of that, it offers several ways to minimize your ping and eliminate the latency, regardless of the server you pick. Learn more about that in our guide on how to use ExpressVPN for gaming. When it comes to some concrete numbers, this VPN managed to achieve 621 Mbps on a 700 Mbps connection while controlling our ping as well.

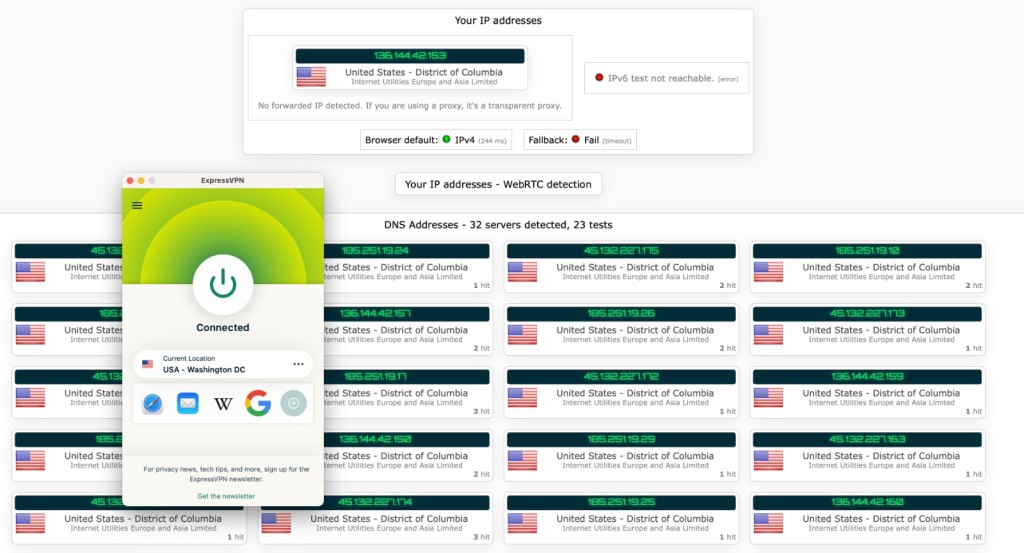
This British Virgin Islands-based VPN also has an extensive server network - an undisclosed number of servers in 105 countries, all of which are obfuscated. That means you'll get to unblock geo-restricted games, as well as buy games cheaper by unblocking other countries' marketplaces. They’re also pushing boundaries with zero-knowledge tech, Rust-based protocols, and a focus on embeddable VPN frameworks to enhance privacy.
You'll also get polished applications for any device, as well as 8 simultaneous connections, which seems quite generous. And if you're into gaming on an Xbox, PlayStation, or Switch, know that ExpressVPN works on a range of routers.
In terms of protecting your privacy, this is an award-winning VPN with many years of experience. So, it's safe to say that you'll be covered more than well. But if you need details, know that ExpressVPN is powered by OpenVPN, Lightway, and IKEv2 protocols, all of which are suitable for gaming and keeping away DDoS attacks. Plus, it knows how to create leak-free data tunnels.

Everything listed above is available at $4.99 per month for 24 months. Explore ExpressVPN’s pricing plans to find the one that suits your gaming needs. In the end, we'll mention that ExpressVPN comes with a 30-day money-back guarantee. You'll also get to count on its 24/7-available live chat customer support. Still, we recommend testing the ExpressVPN free trial first to experience all its features firsthand.
Need help getting started? Here’s a quick guide to setting up ExpressVPN on any device.
Some Standout ExpressVPN Gaming Features:
- Obfuscated Servers: Hides VPN usage from networks and ISPs, helping you bypass geo-blocks and throttling for uninterrupted access to global game servers.
- Ultra-Stable Speeds & Low Latency: ExpressVPN’s high-speed Lightway protocol is designed for minimal ping and smooth real-time gameplay, even on long-distance connections.
- Built-in DDoS Protection: Shields you from targeted DDoS attacks, which is crucial for competitive gamers and streamers.
- TrustedServer Technology: Ensures that all servers run on RAM only, which implies that no data is ever written to a hard drive, providing top-notch privacy during multiplayer sessions.
- Cross-Platform Compatibility: Works flawlessly on PC, mobile, and even consoles (via routers or MediaStreamer), making it a go-to option for gamers across all platforms. Recently, ExpressVPN has released AircoveOS v5.3, a firmware upgrade that improves router-based VPN performance, perfect for console gaming. For a smooth gaming session, learn to use ExpressVPN on your router.
- Split Tunneling Support: Allows you to route only your gaming traffic through the VPN while keeping the rest of your connection local, great for reducing overall network load.
PROS
- Very fast and stable connections.
- Easy access to bot lobbies.
- Low latency for FPS games.
- RAM-only TrustedServer tech.
- Split tunneling support.
- Obfuscation enabled by default.
- Works on routers and consoles.
- Lightway protocol is efficient.
- 24/7-available customer support.
- 30-day money-back policy.
CONS
- Limited customization.
- On the pricier side.
3. Surfshark
Surfshark is a powerful VPN that's also incredibly simple to use. It works entirely on its own. All you need to do is connect to a server and keep this VPN active in the background, and you'll get to use bot lobbies in any online shooter and optimize your gameplay experience.

This Netherlands-based VPN supports several protocols (WireGuard, IKEv2, and OpenVPN), which work great for controlling latency and ping and it promises not to collect your data. It has been audited many times, so you can rest assured that your sensitive data will never leave your device. On top of that, we encountered no IP/DNS/WebRTC leaks whatsoever.
To enhance privacy, Surfshark has filed a patent for an encryption method that reduces metadata leaks. The recently introduced ‘Everlink’ tech also improves connection reliability, going beyond standard kill switches.
Also, let's not forget to mention that you get unlimited simultaneous connections with this VPN. It also includes a special "NoBorders" mode, which means it's suited for countries with Internet-related restrictions. And speaking of its server network, you'll gain access to 3,200+ servers in 100 countries. Surfshark has also introduced GPS spoofing on Android, useful for location-based mobile games and accessing geo-locked content.
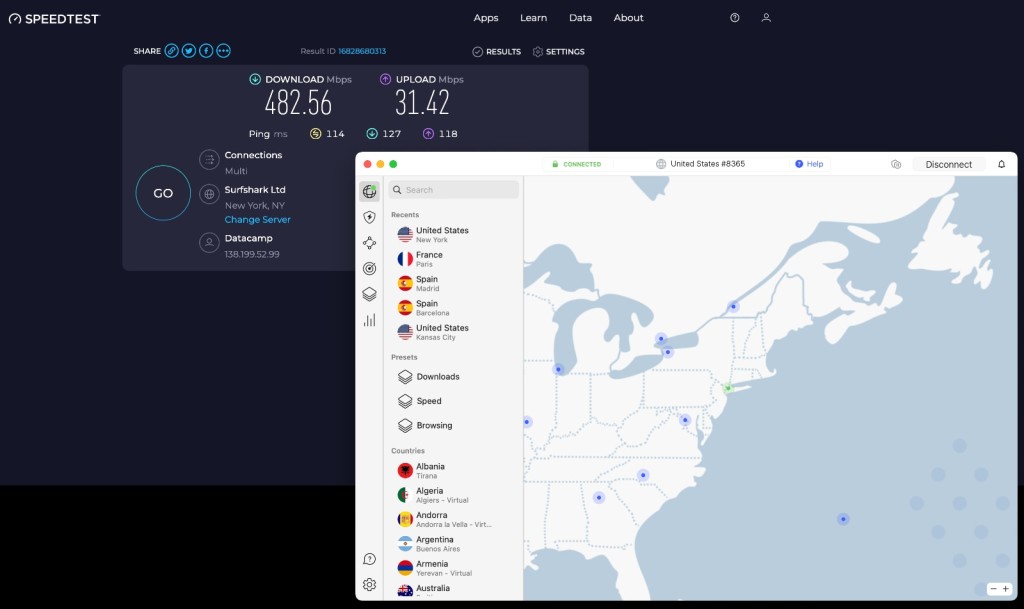
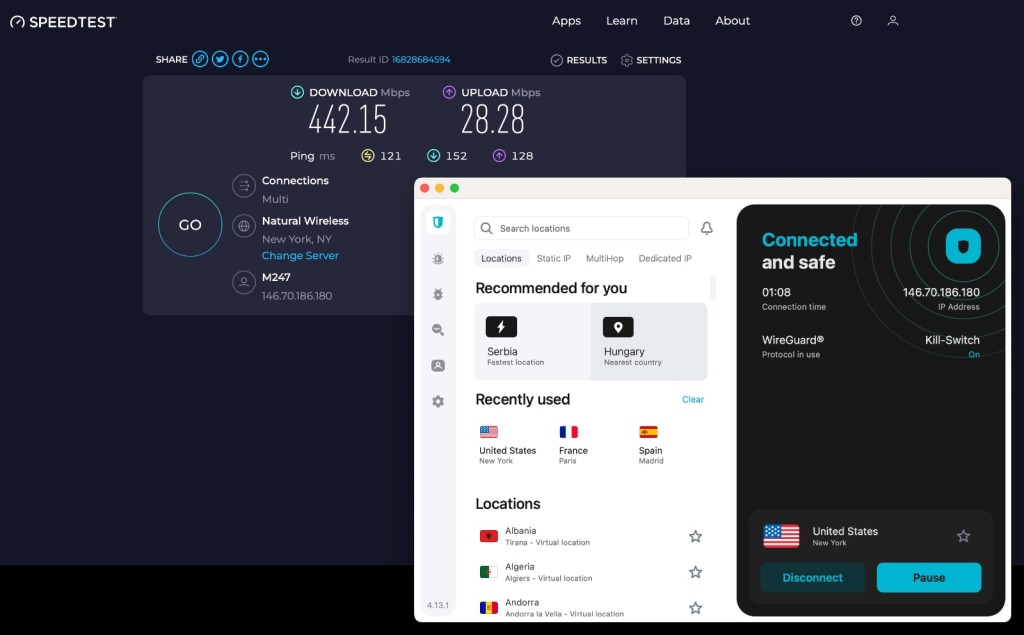
All that said, we still haven't mentioned Surfshark's best gaming-related feature, and that would be its speed. This VPN can provide fast speeds without fine-tuning, even when using remote servers. During our testing, we got 442 Mbps on a 700 Mbps connection. Plus, Surfshark knows how to handle your ping, bringing no performance fluctuations even in the long run.

Surfshark is also compatible with a huge number of devices. No matter if you game on a PC, Mac, Android, or iOS - Surfshark will be there to support you. It works even on routers, making it compatible with gaming consoles like PlayStation, Xbox, Steam Deck, and Nintendo Switch.
Let's not forget that Surfshark features 24/7-available live chat support. All that comes priced at $2.19 per month for 24 months. Lastly, you can also count on its no-questions-asked 30-day money-back guarantee.
Some Standout Surfshark Gaming Features:
- WireGuard Protocol: Delivers ultra-fast speeds and low ping, making it ideal for smooth, lag-free gaming even during high-traffic hours.
- Unlimited Device Connections: Play on multiple devices at once, or share with your household, without ever hitting a connection limit.
- CleanWeb Ad & Malware Blocker: Blocks ads, trackers, and malware to keep your gaming sessions distraction-free and potentially improve loading times.
- Split Tunneling (Bypasser): Lets you route only your game traffic through the VPN, preserving local speeds for other apps or services. As the best part is, Bypass mode is now available for macOS, too.
- Private DNS on Each Server: Reduces the risk of DNS leaks and can speed up server lookups for quicker game connections.
- Camouflage & NoBorders Modes: Helps you bypass network restrictions and play from school, work, or regions with heavy internet censorship.
- No-Logs Policy & RAM-Only Servers: Ensures your gaming activity stays completely private and untraceable.
PROS
- Unlimited device connections.
- Fast speeds with WireGuard.
- Easy server switching for bot lobbies.
- Blocks ads with CleanWeb.
- Supports split tunneling.
- Obfuscation via NoBorders mode.
- Multi-hop adds privacy.
- Console setup via SmartDNS/router.
- 24/7-available customer support.
- 30-day money-back policy.
CONS
- Can take a moment to connect.
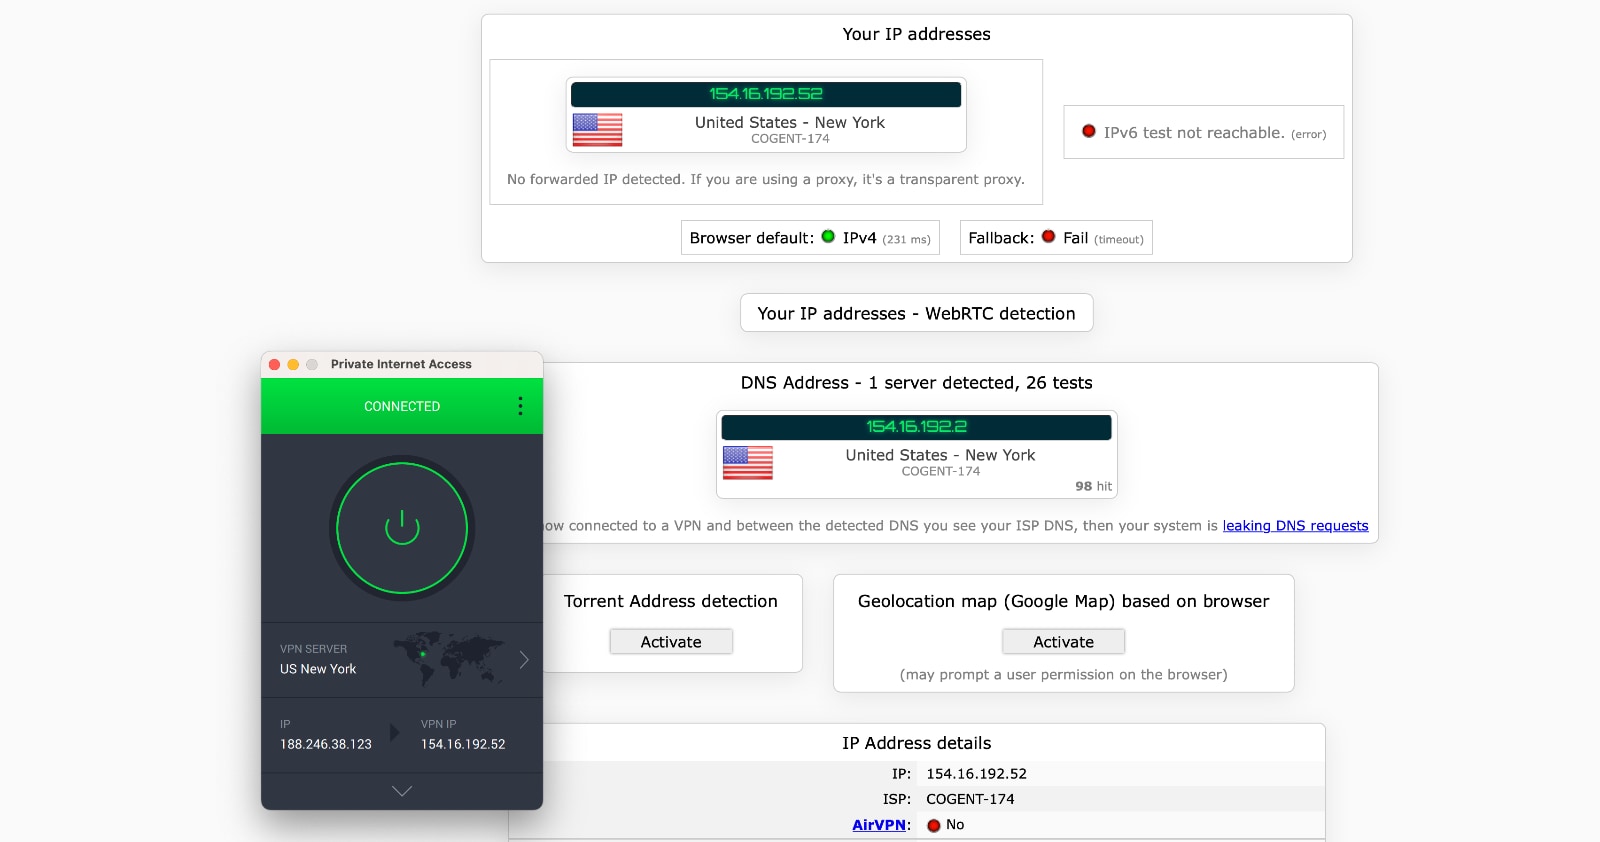
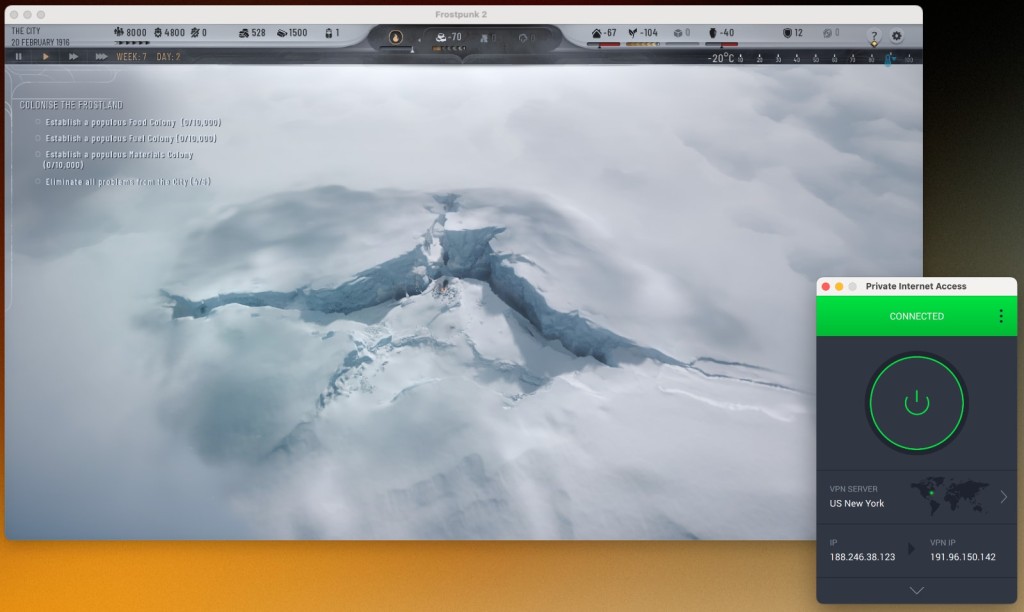
4. Private Internet Access
PIA (Private Internet Access) is a long-standing VPN from the USA, known for high-end features and expanding its set of options quite aggressively. So, if you need a more advanced gaming VPN that gives you access to bot lobbies even in anti-VPN games, Private Internet Access is what you'll want to try.
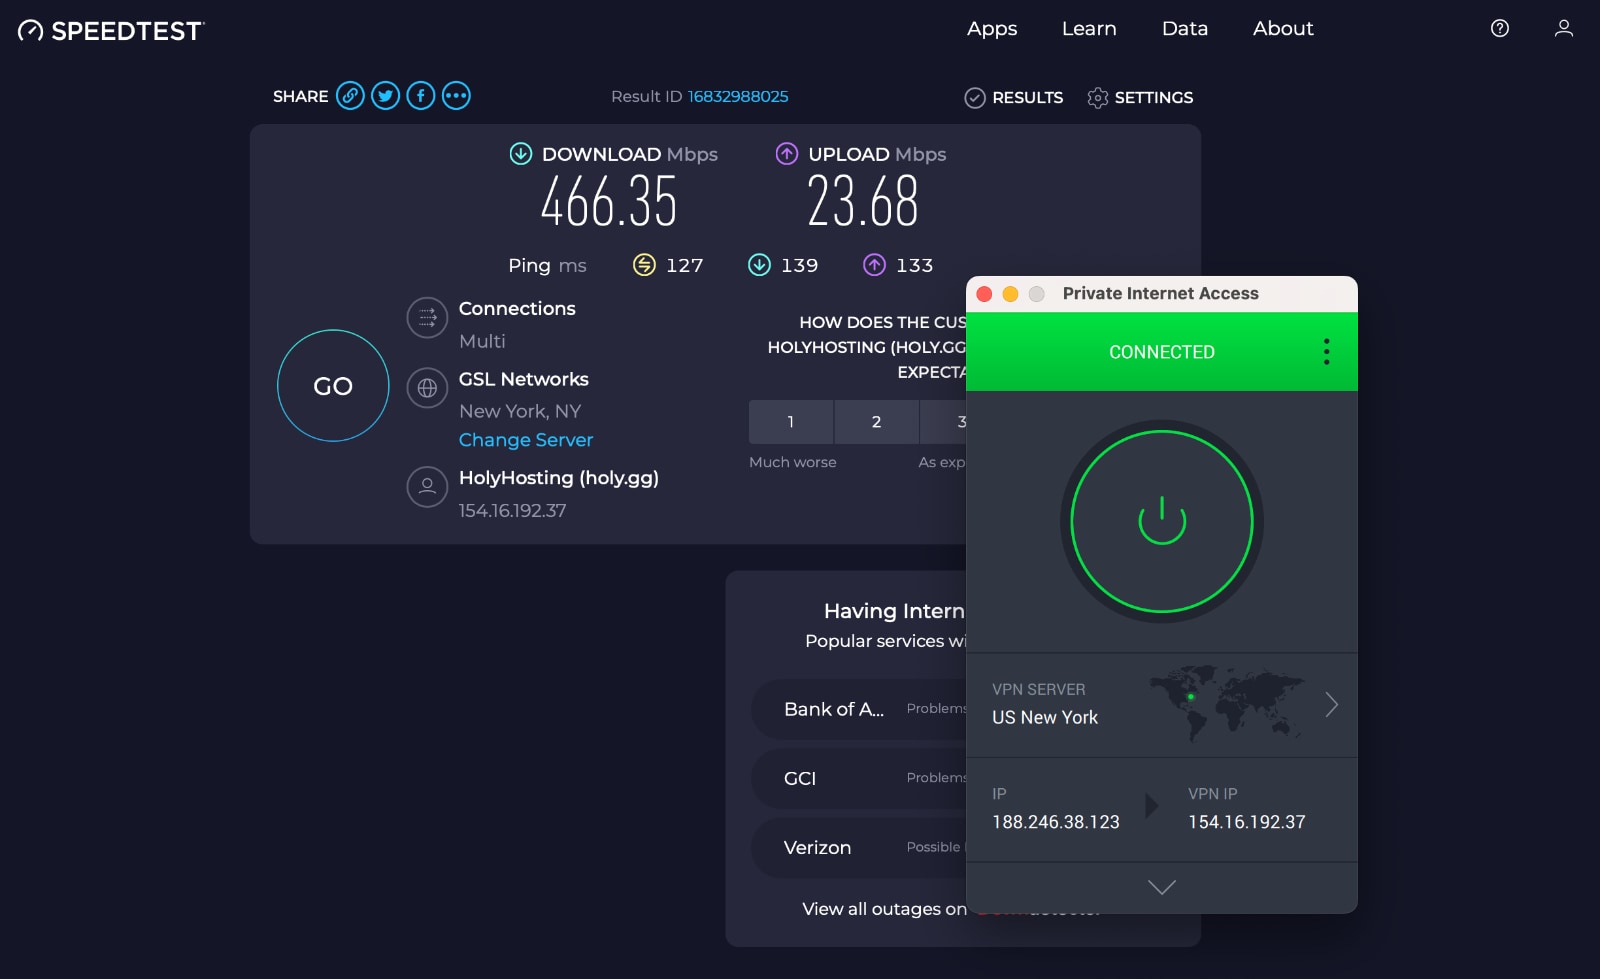
It works out of the box just fine, but since it brings a plethora of options and customizations, it requires you to spend some time working on this VPN. As a result, you'll get a low ping, making PIA a capable VPN for cloud gaming. On a 700 Mbps connection, this VPN delivered 466 Mbps. It kept our ping in check even when using highly remote servers.

Also, PIA's ultra-tough protocols (WireGuard, OpenVPN, and IPsec (IKEv2)) can block any DDoS attack. If you want to take it one step further, you can even get a dedicated IP. PIA offers dedicated IPs that can be associated with the US, Germany, the Netherlands, the UK, and Japan. Let's not forget that you won't have to worry about IP/DNS/WebRTC leaks with this VPN.

Know that PIA is one of the VPNs with the highest number of servers - offering an undisclosed number of servers in 91 countries. That comes in handy if you want to unblock gaming marketplaces in specific countries. That said, PIA allows you to play games with minimal ping and latency while getting access to more games, more game-streaming services, and new game marketplaces.
This VPN supports unlimited simultaneous connections. On top of that, it brings apps for practically any device, including gaming-friendly devices like computers and phones. This VPN also supports routers, which means it works with PlayStation, Xbox, and Nintendo Switch consoles.

This VPN is available at $2.19 per month for 24 months. In the end, we'll mention that PIA comes with 30-day money-back guarantee. So, there's no risk involved. If you like to tinker with VPNs, this one is an excellent pick - especially since it features extra-helpful 24/7-available live chat support.
Some Standout PIA Gaming Features:
- Low-Latency Servers: Gives you more precise server options for reduced ping, especially if you're playing on U.S.-based game servers.
- Advanced Port Forwarding: Useful for gamers hosting servers or using P2P multiplayer games that require direct inbound connections for smoother gameplay.
- DDoS Protection Built-In: Helps shield your connection from targeted attacks during competitive matches or while hosting game servers.
- WireGuard Support: Delivers ultra-fast, stable connections with minimal impact on ping, ideal for latency-sensitive online games.
- Split Tunneling Feature: Route only your game traffic through the VPN while keeping other apps on your regular connection for better bandwidth management.
- Massive Server Network: Thousands of servers worldwide help you find the best route to game servers, minimize congestion, and avoid ISP throttling.
PROS
- Port forwarding helps with gaming.
- Access to bot lobbies by region.
- DDoS protection included.
- Blocks game ads with MACE.
- WireGuard support.
- Split tunneling available.
- Unlimited device connections.
- Console setup via router.
- Very large server network.
- 24/7-available customer support.
- 30-day money-back policy.
CONS
- Requires some fine-tuning.
- Best for more experienced users.
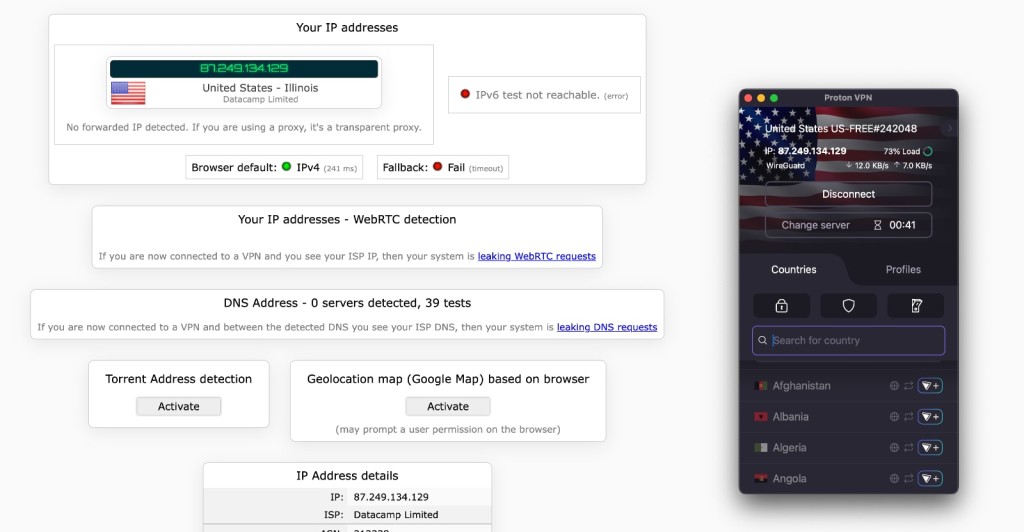
5. Proton VPN
Proton VPN is a high-performance VPN that delivers a smooth, secure, and lag-free gaming experience. It offers access to 9,600+ servers in 117 countries, many of which are optimized for speed and stability, essential for competitive and latency-sensitive games. Due to advanced obfuscation technology, it also helps gamers bypass network restrictions or VPN blocks on school or public Wi-Fi networks.
Proton VPN supports a kill switch to prevent accidental IP leaks, plus split tunneling on Windows and Android, so you can route just your game traffic through the VPN while keeping the rest of your apps on your regular network. You also get a strict no-logs policy, AES-256 and ChaCha20 encryption, and secure VPN protocols like WireGuard, OpenVPN, IKEv2, and Stealth, which are crucial for protecting your data while you game.

Proton VPN stands out for its VPN Accelerator feature, which boosts speeds on distant servers, making it perfect for connecting to game servers in other countries or accessing early game releases. In our tests, it reached speeds of 436 Mbps on a 700 Mbps baseline connection, showing that you won’t have to sacrifice performance when using a VPN.
With consistent speeds on both nearby and remote servers, strong leak protection, and stable connections, Proton VPN is an excellent choice for long gaming sessions, especially if you're serious about privacy and smooth performance.
Proton VPN is available from $3.59 per month for 24 months, and comes with a 30-day money-back guarantee.
Some Standout Proton VPN Gaming Features:
- VPN Accelerator Technology: Reduces latency and improves connection stability by boosting VPN performance, which is ideal for smoother, lag-free gaming.
- Secure Core Servers: Routes your traffic through multiple privacy-friendly servers to protect against DDoS attacks and network-level tracking, perfect for competitive gamers who need extra security.
- No-Logs Policy & Swiss Jurisdiction: Keeps your gaming activity completely private under strict privacy laws, great for players who value anonymity.
- WireGuard Protocol: Delivers ultra-fast connection speeds with minimal ping, offering a responsive and high-performance experience for real-time gaming.
- Unlimited Bandwidth: No data caps means you can enjoy marathon gaming sessions or large game downloads without interruptions.
- Cross-Platform Support: Works on PC, mobile, and even routers, making it easy to secure your gameplay across all devices, even consoles.
PROS
- Good speeds with WireGuard/Stealth.
- Works for bot lobby switching.
- NetShield blocks game trackers.
- Based in Switzerland (privacy-friendly).
- Stealth protocol bypasses firewalls.
- Split tunneling included.
- Streaming servers bypass geo-blocks.
- RAM-only Secure Core servers.
CONS
- Port forwarding only available on paid plans.
- No live chat support.
How We Rank the Best Gaming VPNs in 2025?
Our team has created a series of testing steps to check how well each VPN is equipped for gaming. Also, we tested over 50 VPN providers in total, so let's walk you through our entire procedure of reviewing VPNs, which lets you learn how we came up with our shortlisted recommendations.
1. Verifying VPN Server Locations
For gaming, you need servers in popular VPN "destinations," such as the US, the UK, across Asia, and Australia. However, you'll also want more exotic locations to access bot lobbies. So, in this first step, we examine each VPN's server network size and distribution. We prioritize those providers that let you pick the best country to connect to for gaming while focusing on VPNs outside the 14-Eyes countries, so you get high-end privacy as well.
2. Testing VPN Connection Speeds
Having a fast Internet connection is crucial for an optimal gaming experience. So, we connect to servers in the US, Canada, the UK, India, and Australia. After each successful connection, we calculate download and upload speeds. Then, we compare those numbers with the speed of our baseline connection. We use Ookla's SpeedTest to shortlist the fastest-performing providers.
3. DDoS Protection
DDoS (Distributed Denial of Service) attacks are a real threat in competitive gaming, particularly in esports and ranked online matches. Therefore, we assess whether the VPN has server-level protection, automatic IP refresh capabilities, and anti-DDoS filtering mechanisms. VPNs that offer dedicated IP addresses or stealth servers to mitigate targeting are rated more highly for gamer security.
4. Checking Ping and Latency
Alongside calculating each VPN's speed, we also check its latency, which is done by testing each VPN server's ping value. We get those results from Ookla's SpeedTest, where the lowest ping values are prioritized. Remember that you need a low ping if you plan on playing an online multiplayer game or if you want a VPN for GeForce Now, which is purely based on gameplay streaming.
5. Examining Overall Connection Stability
Each of the VPNs we tested was used for an extended period of time. We used tools to check for packet loss or disconnections during that time. This step aims to check how well each VPN works in the long term and whether it can provide a stable VPN session. After all, you don't want to experience connection drops, which can kick you out of your online gaming session.
6. Gaming-Optimized/Specialty Servers
The scope and specialization of a VPN's server network directly impact its gaming performance. We look for providers offering high-speed or gaming-optimized servers, especially those located near gaming hubs like Los Angeles, London, Tokyo, Frankfurt, and Sydney. We also verify the number of countries covered and the distribution of server types (physical vs. virtual).
7. Evaluating VPN Impact on Gameplay
Even though we run extensive speed and latency tests, we also check how each VPN works in real life. As described above, each VPN we tested was used to play actual gaming. We focused on a wider range of games, including FPS and MMOs that require low latency. The best score was given to those VPNs with the lowest latency and lag and the smoothest gaming experience overall.
8. Performing Tests on a Wider Range of VPN Servers
Today's VPN provider often bring sizable server networks, and we wanted to be sure that their entire server networks are suitable for gaming. In this step, we tried a range of nearby and remote servers to check how they affect latency and speed. In other words, our recommendations guarantee that you'll get the best possible experience no matter which server you decide to use.
9. Assessing Gaming-Friendly VPN Features
Regarding gaming-friendly VPN features, those are split tunneling, obfuscation, a dedicated gaming mode, or special servers optimized for gaming. We check each provider for those features and then prioritize those that offer extra ways to maximize your gameplay experience. Of course, we want to ensure those aren't just marketing gimmicks, so we test them ourselves.
10. Going Over VPN Security Features
Of course, we never forget the basics of VPNs. We evaluate each VPN's security features, including its supported protocols and VPN data encryption. We also check for no-logs policies and inspect what kinds of data are collected. Plus, to check for data leaks, we use IPLeaks.net. That's how we check if the VPN leaks IP, DNS, or WebRTC data, which shouldn't happen in a capable provider.
11. Evaluating the Quality of Customer Support
If any technical issues arise with your chosen VPN, you wouldn't want to spend much time resolving the issue by yourself. So, the quality of customer support is crucial. We interact with each VPN's support team via email or live chat based on which option is available. Then, we assess each team's overall knowledge and responsiveness in assisting with gaming-related questions.
12. Reviewing Pricing and Overall Value
As you know, VPN prices can fluctuate quite a bit. That's why we compare the prices of multiple VPNs, check if any special VPN deals or promotions are active, and check each VPN's overall value. The purpose of this VPN is to showcase that a high-quality VPN doesn't have to cost a lot. So, our shortlisted VPNs are proper examples of that, checking all the right boxes at an affordable price.
13. Drawing Final Conclusions
We draw our final conclusion Upon completing all the steps described above. We compare each VPN's server network, performance, ability to handle ping, and various other gaming- and security-related features. By comparing the results we got from our hands-on tests, we shortlist the VPNs that feature the best possible compatibility with gaming-related needs.
How to Set Up and Use a VPN for Gaming
Gaming safely and with the best possible performance takes more than just downloading a VPN; it’s about setting it up correctly to protect your privacy, reduce lag, and unlock regional content. Here’s a step-by-step guide to help you securely set up and use a VPN for gaming:
- Pick a VPN optimized for gaming (we recommend NordVPN).
- Head over to the official VPN website or your device’s app store, and install the app for your platform.
- Launch the app and sign in with your account credentials to access full features.
- Choose a server close to your game’s server region to reduce lag and ping.
- Enable These Gaming-Specific Features
- Kill Switch: Prevents your real IP from being exposed if the VPN disconnects.
- Obfuscation / Stealth Mode: Helps bypass VPN blocks in countries or on networks that restrict gaming VPN use.
- DNS Leak Protection: Ensures your ISP can’t track your gaming traffic or throttle your speeds.
- Split Tunneling: Route only your game traffic through the VPN, keeping other apps on regular internet to save bandwidth and maintain speed.
- DDoS Protection: Blocks malicious attacks that could crash your game or lag you out, crucial for competitive gaming.
- Before launching your game, check for IP and DNS leaks using trusted leak test tools to make sure your real IP is hidden and you're fully protected.
- You're ready to play! Whether you're bypassing geo-restrictions, avoiding lag, or shielding yourself from DDoS attacks, keep the VPN connected for the entire session to enjoy maximum performance and protection
Why Skilled Gamers Use VPNs for Their Gaming Sessions?
Highly-trained and expert gamers use VPNs to lower their ping, ensure the lowest latency, protect their privacy, and even bypass geo-blocks that let them play games early. Here's more info:
- Enhance Your Gameplay Performance: By rerouting your internet traffic through optimized servers, a VPN can help reduce your ping and provide a more responsive gaming experience. Also, a VPN helps bypass ISP throttling, giving you better speeds and helping you lower your ping.
- Reach Bot Lobbies: To access bot lobbies, you'll need a VPN that gives you access to special services with bots, letting you improve your stats quickly.
- Protection from DDoS Attacks: Skilled gamers often face targeted attacks that can knock them offline during crucial matches. Using a VPN provides built-in DDoS protection, keeping their connection stable and secure even under attack.
- Avoid IP-Based Blocks/Bans: A VPN helps you replace your IP address each time you connect to a server, which is how you'll bypass IP-based blocks and bans.
- Bypass Geo-Restrictions: If some games are blocked in your county or region, a VPN will help you unblock that content by making it look like you're in some other country. Plus, you'll get to play games early by changing your time zone. Also, VPNs hide your IP, so you'll make it harder for malicious individuals to reach your device, and you can forget about DDoS attacks.
- Reach Less Crowded Servers: If you're experiencing performance issues, know that a VPN can re-route your traffic, connecting you to a less crowded game server.
- Access to Early Game Releases: Many gamers use VPNs to connect through servers in regions where new games or updates launch earlier. This lets them play fresh content ahead of others without waiting for local release dates.
- Avoid Network Blocks: If you're a gamer who likes to use public Wi-Fi networks to play games on the go, a VPN will come in handy, as it encrypts any web connection. In other words, you'll get to access gaming servers from your school, workplace, or any restricted network.
- Acquire Cosmetics & Add-Ons for Free: Many games offer region-based cosmetics and add-ons, which you can redeem by changing your IP address using a VPN.
- Buy Games Cheaper: If games or add-ons are too expensive in your region, a VPN will help you change your virtual location and buy games for cheap.
- Hide Your Online Activity: Your Internet provider sees everything you do online. To hide what you do online, connect to a VPN server and start encrypting your traffic.
Is It Legal to Use a VPN for Gaming?
Yes, it's legal to use a VPN for gaming. However, know that specific games might ban VPNs or block VPN traffic as a precautionary measure. In terms of their legality, VPNs are 100% safe. They protect your right to privacy, so you can feel free to pick any commercial VPN service out there. Still, there's a very small group of countries where VPNs are illegal, and those are primarily countries with authoritarian regimes. So, be aware of your country's laws.
VPN Use and Game Developer Policies
While gaming with a VPN is not illegal, some online games (MMORPGs mostly) may prohibit the use of VPNs, as per their Terms of Use and other legal documents. Since VPNs can give you a competitive edge, they could be considered a way of cheating. Let's have a look at policies of some of the major gaming platforms:
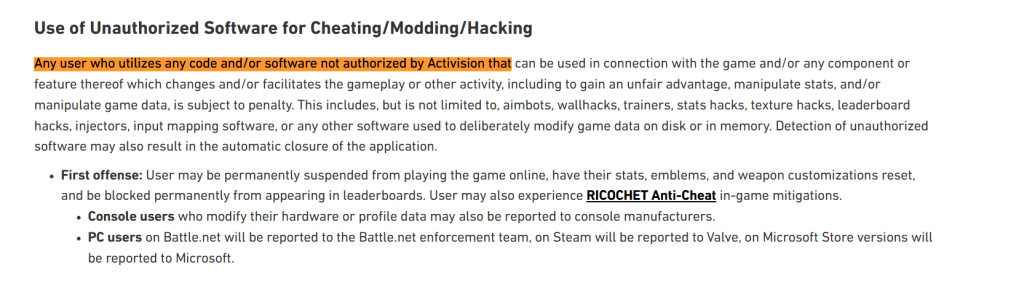
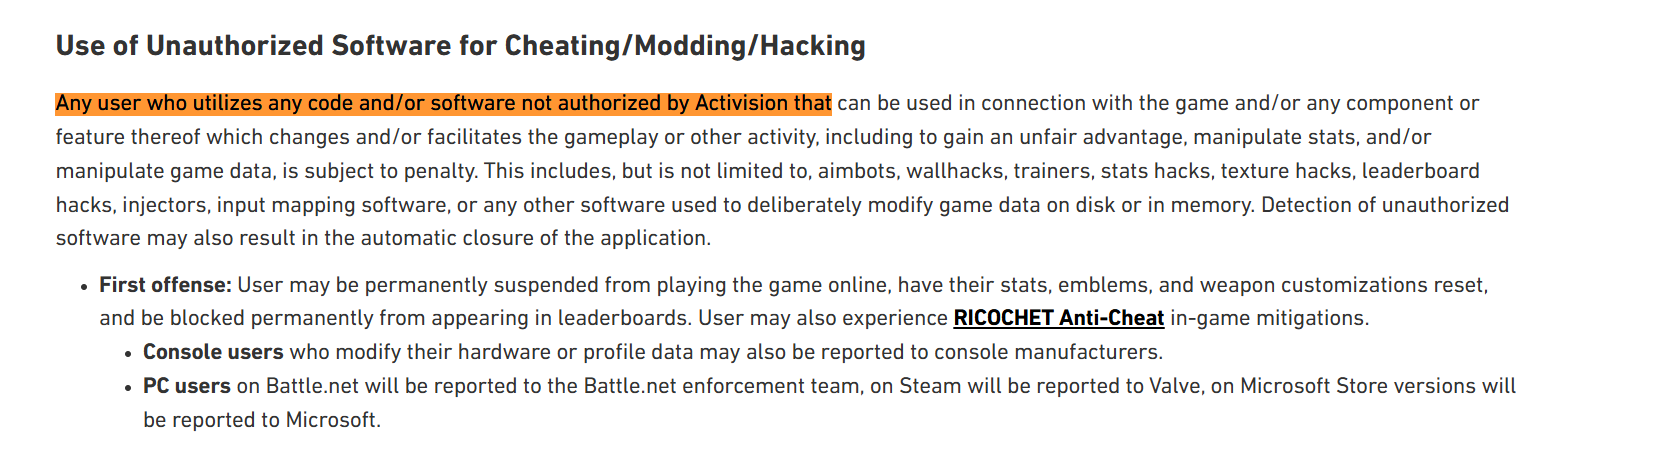
1. Call of Duty (Modern Warfare / Warzone) – Activision
Call of Duty is a globally popular first-person shooter known for its fast-paced multiplayer and Warzone battle royale modes. While VPNs are commonly used to reduce ping or avoid SBMM (Skill-Based Matchmaking), Activision's Terms of Use warn against unfair advantages, which may include manipulating matchmaking with VPNs.
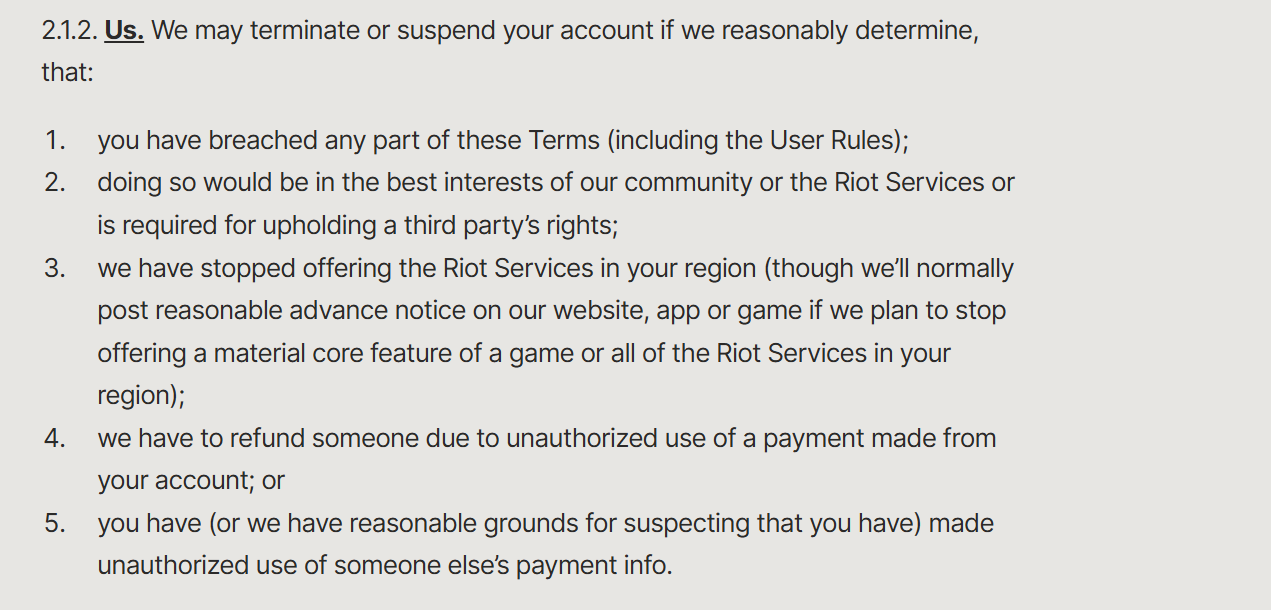
2. Valorant – Riot Games
Valorant is a competitive tactical shooter where split-second latency can mean victory or defeat. Riot's Terms of Service emphasize fair play, and they may flag VPN usage as suspicious activity, particularly if it changes your region or is used to evade bans.

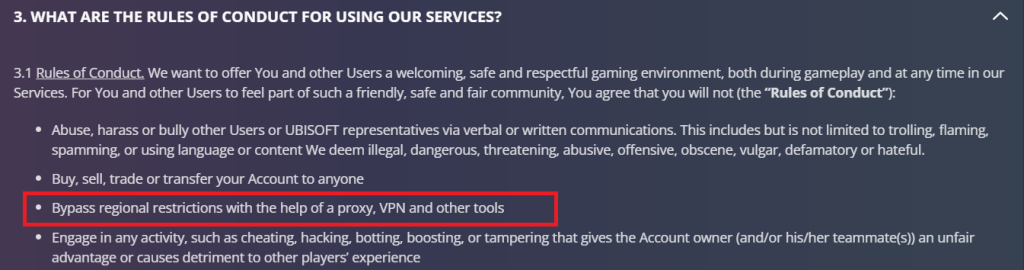
3. Rainbow Six Siege?
Ubisoft doesn’t prohibit VPN usage outright. However, if a VPN is used to gain unfair advantages, like bypassing regional restrictions or manipulating matchmaking, it may result in disciplinary action, including suspensions or permanent bans. This is clearly addressed in Ubisoft’s Terms of Use:
When Is VPN Use Considered Safe for Gaming?
Using a VPN for gaming is generally fine when:
- You're trying to reduce ping or avoid throttling from your ISP.
- You’re playing a region-locked game not available in your country (but not against the game’s TOS).
- You want to secure your connection on public Wi-Fi.
- You aim to avoid DDoS attacks in competitive matches.
However, always read the Terms of Service of the game you’re playing. A VPN might keep your identity private, but it won’t protect you from account bans if the platform detects a policy violation.
What Are the Best VPN Servers for Gaming?
In terms of a server location, you need to take your pick based on your ultimate goal. For example, if you want DDoS protection or to bypass ISP throttling while getting the fastest possible performance, pick any nearby server to minimize ping.
If you want to bypass certain geo-restrictions (like getting into bot lobbies or unlocking skins only available in particular regions), connect to a server where you want to appear to be located. This is different for each game, so let's give you some examples of the best VPN country to connect for gaming:
What Is the Fastest VPN for Gaming?
The best-performing VPN right now is NordVPN. According to our tests, NordVPN provides the best speeds on the market. This provider will introduce barely noticeable slowdowns, making it ideal for high-quality gaming with low ping and no lag.
Furthermore, when you connect to longer-distance servers with NordVPN, you get much better performance and speed compared to other VPNs. So, it won’t matter if you want to play on servers in countries thousands of miles away - you’ll still enjoy a great gaming experience.
A suitable gaming VPN will reduce ping in games and offer a much better connection than your ISP alone can provide because your traffic won’t experience network congestion. That said, using NordVPN for gaming is our #1 recommendation.
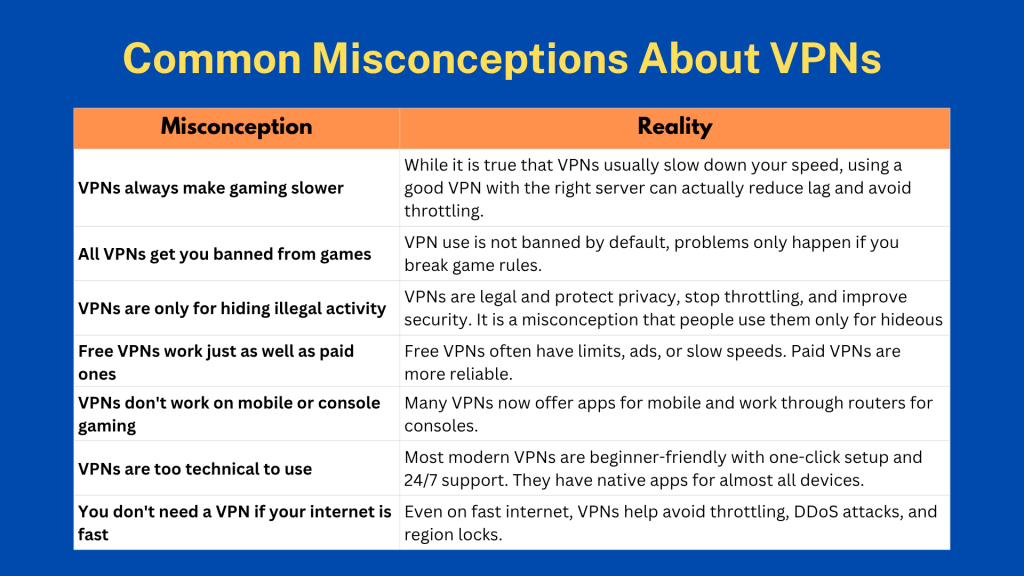
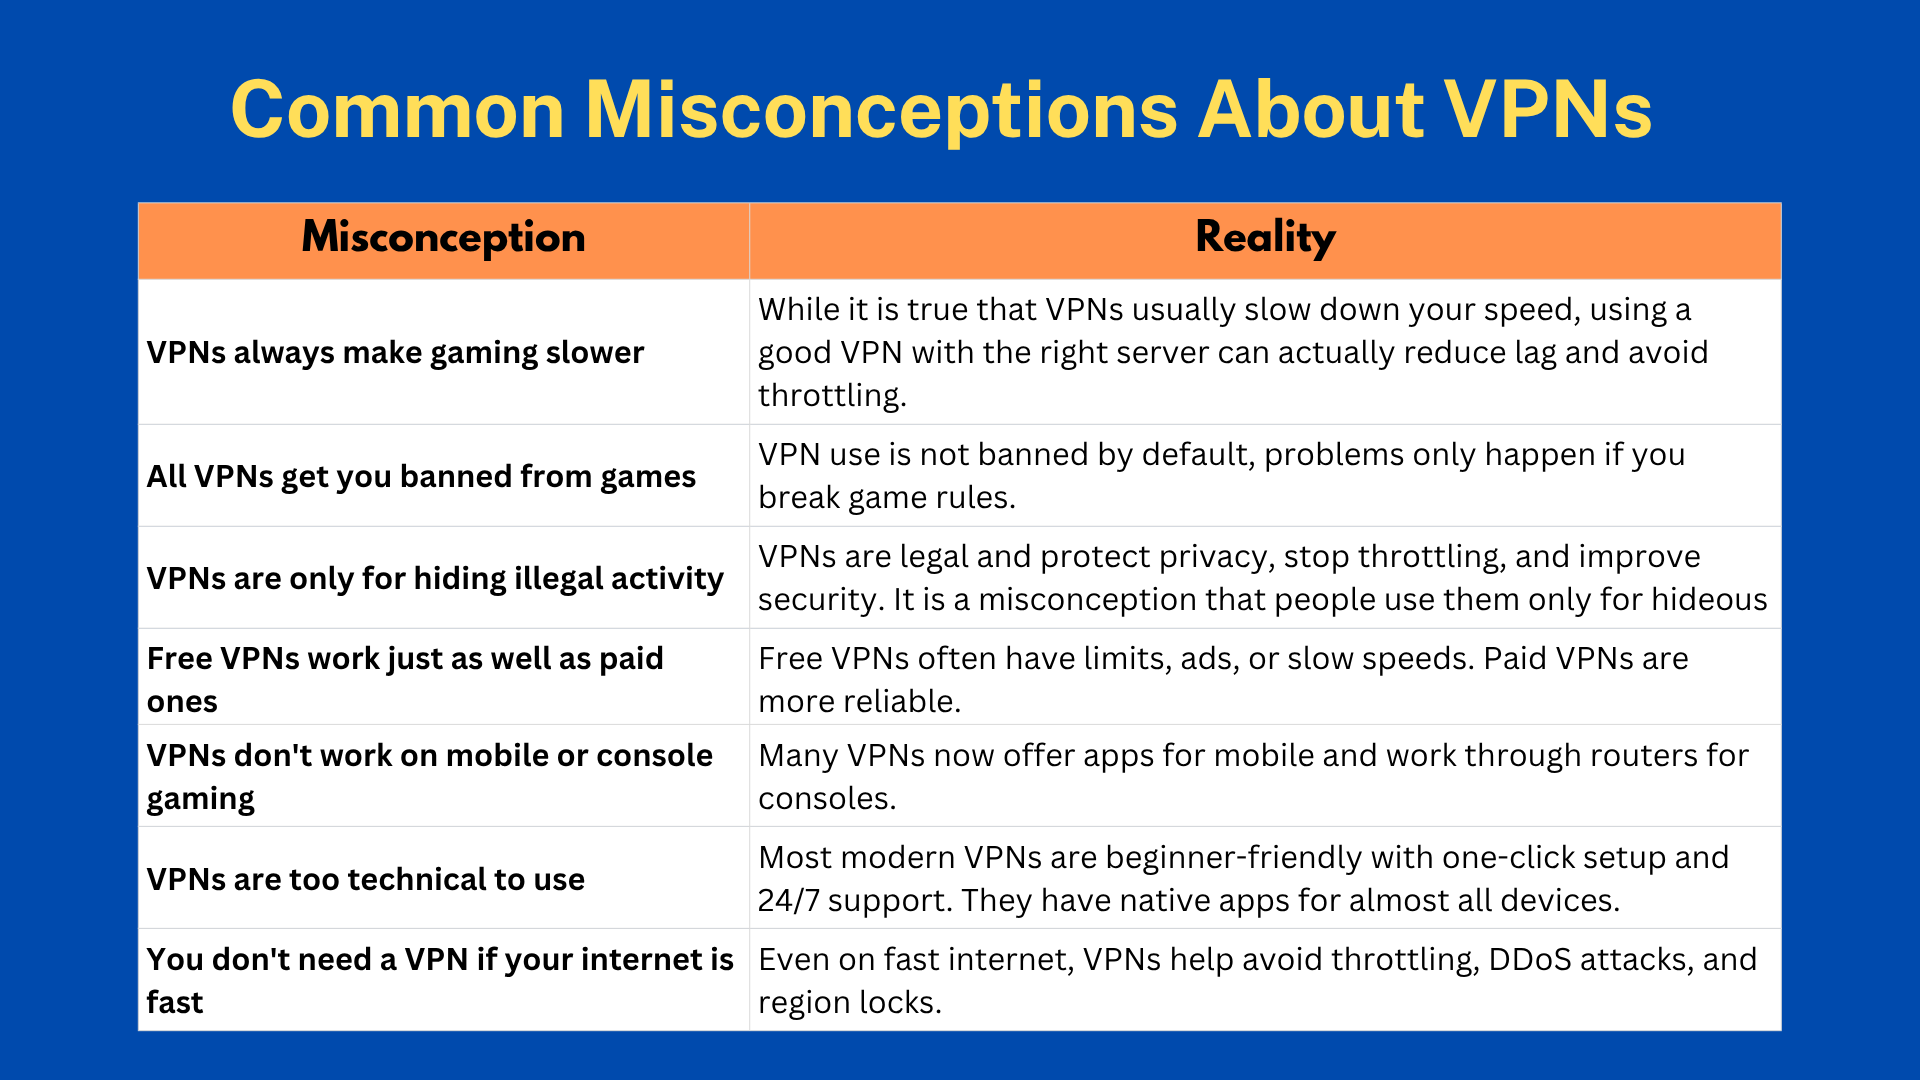
Common Misconceptions About VPNs
Many people misunderstand what VPNs actually do, especially when it comes to gaming. Let’s clear up some of the most common myths and show how VPNs can actually help.
Risks and Considerations of Using a VPN
While using a VPN is highly preferable, here are some things that you must consider before getting one. Let's have a look at each of them:
- Lag or Slower Speeds: A VPN can sometimes make your connection slower if you use a faraway or crowded server.
- Blocked by Games: Some games detect VPNs and may block you from logging in or playing online.
- Breaking Game Rules: Using a VPN to change regions or bypass restrictions can go against the game’s terms and get you banned.
- False Privacy Claims: Some VPNs say they don’t log data or are fast, but they might not be telling the truth.
- Not Made for Gaming: Certain VPNs are too slow or unstable for gaming and can disconnect often.
- Hard to Use on Consoles: VPNs don’t work easily on Xbox, PlayStation, or Switch unless you set them up through a special router.
- Wasted Money: If the VPN doesn’t improve your gaming or causes issues, you might feel like you wasted your money.
That said, let us clarify that the VPNs that we have recommended are free of all these risks. TechNadu's team has already tested them on all these parameters; therefore, you can choose any of them and rest assured.
Why Your Games Lag, Crash, or VPN Fails – And How to Fix It
Gaming should be smooth and immersive, but nothing ruins the experience faster than lag, crashes, or a malfunctioning VPN. These issues often stem from common but overlooked causes. Below is a practical table that outlines the most frequent gaming and VPN-related problems and offers straightforward solutions to get you back into the action quickly.
Here's more guidance on reducing lag, fixing crashes, and improving connection stability in Genshin Impact, Fortnite, Roblox, and Warzone.
Can You Use a Free VPN for Gaming?
Yes, you can use a free gaming VPN, but you'll encounter a very limited experience. We don't recommend free VPNs because they come with various restrictions that can ruin your gameplay experience and even leave you with a banned/blocked account. Let's have a quick look why we don't recommend free VPNs and what you should look for instead.
Nothing can replace a capable premium VPN. If you wish to go risk-free, go with a free VPN trial. That's how you'll get premium features for a limited time and experience how a truly capable VPN should work. We recommend the NordVPN free trial, which can be activated on Android, but this VPN also has a 30-day money-back guarantee that applies to all other devices.
Final Thoughts
A good gaming VPN can help lower your ping, reduce latency, bypass ISP throttling, and protect you from DDoS attacks and swatting. It also gives access to geo-specific servers and even bot lobbies. But not all VPNs are built with gamers in mind, many focus more on streaming or security.
Among all, NordVPN stands out as the best gaming VPN in 2025 due to its ultra-fast performance, army of servers worldwide, high-end privacy, and compatibility with any device. On top of that, NordVPN is equally suitable for first-timers and experienced users.
Surfshark stands out with its unlimited device connections and GPS spoofing, perfect for mobile gamers and those on a budget. ExpressVPN, on the other hand, is all about stability and performance, with its Lightway protocol delivering consistently low ping across regions. CyberGhost offers a user-friendly interface with specialized gaming servers that cater well to console players and newcomers alike. Lastly, PIA VPN brings advanced customization and port forwarding options, giving experienced users more control over their in-game network performance.
That would be all that we've prepared for this guide on 'best VPNs for Gaming in 2025.' If you have any questions or doubts, let us know via the comments section below. Lastly, thanks for reading!