

Does NordVPN Have a Kill Switch? – How to Enable/Disable it on Your Devices
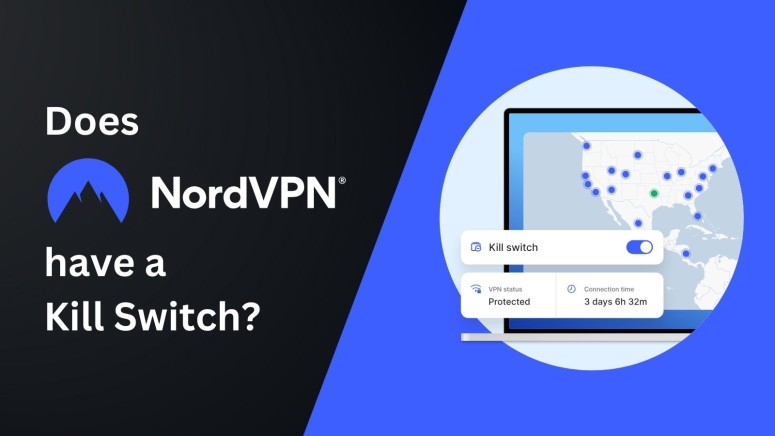
Yes, NordVPN does have a kill switch, and it’s one of the core features designed to protect your privacy. Why? Because a kill switch prevents accidental data leaks by cutting off your Internet access if the VPN connection drops. This ensures that your real IP address or sensitive data never slips through. Since this feature is essential for online security, NordVPN includes it in its apps across all major platforms.
In this guide, we'll explain how NordVPN's kill switch works across multiple platforms, how to enable and disable this feature on desktop and mobile platforms, as well as walk you through some troubleshooting steps.
How Does the NordVPN Kill Switch Feature Work?
As discussed above, NordVPN's kill switch is designed to prevent sensitive data from leaking. Once enabled, it works continually in the background, observing your connection to a VPN server. If the connection to the VPN server drops for whatever reason, the kill switch activates and blocks specific apps or your entire operating system from using the Internet, thus preventing leaks.
There are several scenarios when the VPN kill switch becomes active, including:
- When your Internet connection becomes unstable or drops temporarily.
- During a VPN server failure or maintenance.
- If there’s a software conflict like with antivirus or firewall settings (we will discuss what to do under such a scenario in later sections).
- When the VPN connection is manually disconnected.
- If the device switches between networks (like from Wi-Fi to mobile data).
- In rare cases of unexpected system behavior or crashes.
The kill switch feature in NordVPN functions in two different ways, depending on the device you’re using. To make things easier, here’s a quick look at the two types of kill switches the VPN provider offers.
That said, the type of kill switch you get and how it works depends on the platform you’re using. To make things clearer, here’s a quick breakdown of how the kill switch feature in NordVPN behaves across different platforms:
How to Enable/Disable NordVPN's Kill Switch on Your Devices
Before you can turn the kill switch on or off, you’ll need to have NordVPN installed on your device. If you haven’t done that yet, check out our guide on how to download, install, and use NordVPN. Once you're set-up, here’s how you can enable or disable the kill switch feature on NordVPN, depending on the device you’re using.
1. Windows
- Launch NordVPN and click on the cogwheel button (bottom-left corner).
- Click 'Kill Switch' from the main settings screen.
- Toggle the switch next to 'Internet Kill Switch' to enable the system-level kill switch.


- Toggle the switch next to 'App Kill Switch' to enable the app-level kill switch.
- Select the apps to shut down using the 'Add Apps' button.
2. macOS
- Launch NordVPN and click the cogwheel button in the button-left corner.
- Pick 'Kill Switch' using the left-placed sidebar/menu.
- Click 'Add New App' and select the app(s) you'd like to include.


- Below "Add new app," toggle the switch next to 'Quit apps in this list if connection to NordVPN is dropped.'
3. iOS
- Launch NordVPN and click the 'Profile' icon (bottom-right corner).
- Access the settings through the cogwheel icon in the top-right corner.
- Tap 'Auto-Connect' and pick 'Always.'


- Decide on the server you'd like to use.
- The kill switch will now be active at all times.
4. Android
- Open NordVPN and go to the app settings.
- Scroll down and tap 'Kill Switch.'
- Tap 'Open Android Settings.'
- You should now see an option to adjust NordVPN settings.
- Enable the 'Always-On VPN' option.
- Flip the switch next to 'Block Connections Without VPN.'
5. Linux
- Make sure you're logged in to your NordVPN application.
- Use the 'nordvpn set kill switch on' to enable the kill switch.
- You can check its status with the 'nordvpn settings' command.
- To disable the kill switch, use 'nordvpn set kill switch off.'
Why Is NordVPN Kill Switch Not Working?
There could be a few reasons why NordVPN's kill switch might not work in your case. What you can do is switch to another server, use a different kill switch variation, run the VPN with admin privileges, and more. Here's more information about each troubleshooting step.
1. Switch to Another VPN Protocol
Each VPN protocol handles your Web data differently. Therefore, when you switch to a new protocol, this changes your encryption and how your VPN's kill switch works. That makes switching to a new protocol a good solution if NordVPN’s kill switch doesn’t work. So, do the following:
- Launch NordVPN on your device.
- Navigate to the application’s settings.
- Make sure you’re on the 'General' tab.
- Look up 'VPN Protocol.' Then, switch to a new protocol.
- Return to NordVPN’s home screen and try re-connecting.
2. Try Another Kill Switch Mode (Windows)
As noted above, NordVPN offers a couple of different kill switch mechanisms on specific platforms, such as Windows. You can try an alternative kill switch in the following way:
- Launch NordVPN on your Windows PC.
- Navigate to the application’s settings.
- Make sure to pick 'Kill Switch' on the left.
- Now, enable the type of kill switch you want to use.
- Flip the switch next to 'Internet Kill Switch' or 'App Kill Switch.'
- Return to NordVPN’s home screen and try re-connecting.
3. Install & Run NordVPN as Administrator (Windows)
As mentioned earlier, NordVPN requires higher-end privileges to run on Windows machines. This applies to the software's installation and regular operation. So, you might want to install and run NordVPN as an 'Administrator.' Here's how to do that.
- First, make sure to uninstall NordVPN from your Windows PC.
- Now, go to NordAccount.com and log in to your account.
- Select 'Downloads' on the left. Then, download NordVPN for PC.
- Right-click on the installer and pick 'Run as Administrator.'
- Confirm your choice by picking 'Yes.'
- Finish installing NordVPN on your Windows PC.
- Once done, make sure that NordVPN doesn’t run.
- Find NordVPN’s executable (in the 'Program Files' folder).
- Right-click on the executable and pick 'Properties.'
- Pick the 'Compatibility' tab and enable the 'Run This Program as Administrator' option.
Now, feel free to launch NordVPN. It will automatically get the highest possible privileges for running on your Windows PC. Log in to your account, connect to any server, and check whether the kill switch works as it should.
4. Restart NordVPN’s Service (Windows)
In this step, we’ll show you how to restart NordVPN’s service on Windows, forcing the app to reload upon its next launch. Do the following:
- Make sure to disconnect from NordVPN’s server.
- Then, close the VPN app as well.
- Access the Start Menu and type in 'Services.'
- Locate the 'Services' app and launch it by selecting its icon.
- Locate 'nordvpn-service' in the right-hand section of the window.
- Right-click on that service and pick 'Properties.'
- The 'Startup Type' parameter should be set to 'Automatic.'
- Close the 'Properties' window. Make sure 'nordvpn-service' is still selected.
- Click the 'Restart the Service' hyperlink on the left-hand side.
- Launch NordVPN, connect to a server and test its kill switch.
5. Check Your Antivirus and Firewall Settings
In some cases, antivirus and firewall applications can prevent VPN apps from working properly. More precisely, they can block VPN connections, which can cause the kill switch to behave erratically. To resolve this issue, you need to visit your cyber-sec app's settings.
If you use a dedicated antivirus or firewall, you need to open the app and visit its settings. There should be an option to allow certain apps to bypass security rules, which is where you need to add NordVPN. Some applications allow you to set a custom level of security, so you might want to lower that.
If you don't have a dedicated antivirus/firewall on your PC, you can try disabling Windows' built-in firewall by going to Settings > Privacy & Security > Windows Security > Firewall & Network Protection.
This is where we conclude our list of things to do when NordVPN’s kill switch doesn’t work. Still, if your issues persist, we recommend turning to NordVPN’s support team (they offer a live chat functionality via their website). Also, if you need extra tips, you can check our central guide explaining why your VPN doesn't work or our suggestions on how to fix NordVPN if it's not connecting.
Final Thoughts
Certainly, NordVPN is one of the best VPNs with a kill switch feature, offering top-tier protection that plays a crucial role in keeping your digital privacy intact if your VPN connection unexpectedly drops. While issues with the kill switch can occasionally happen, they're usually easy to resolve, and this article walks you through the necessary steps.
Apart from its kill switch, NordVPN is notable for its extensive suite of privacy tools. Regardless of the device you're using, it has a number of protections designed to protect your data. NordVPN is a good option if you're searching for a VPN that strikes a mix between robust privacy safeguards and user-friendliness.
In addition to the kill switch, NordVPN also offers several other advanced tools and features, including:
- Double VPN: Routes your traffic through two servers for an extra layer of encryption.
- Obfuscated Servers: Helps bypass VPN blocks and deep packet inspection.
- Meshnet: Lets you create secure private tunnels between devices.
- NordLynx: A high-speed protocol based on WireGuard, optimized for performance and privacy.
- NordWhisper: A new protocol that mimics regular web traffic to bypass censorship and filters.
That's all we have to say about NordVPN's kill switch. If you have anything to add, please do so in the comments section below. Thanks for reading!
Related