When you purchase through links on our site, we may earn an affiliate commission. Here’s how it works.
How to Set Up and Use NordVPN on AsusWRT-Merlin
Last updated May 17, 2024

If you use an ASUS router with AsusWRT-Merlin firmware, you can configure NordVPN on your device through its OpenVPN client. This process requires you to change your router's settings manually, which is a lengthier process than simply installing its native app on your device.
However, since NordVPN's native app is not available on every device, especially certain Smart TVs and gaming consoles like PlayStation, Xbox, and Nintendo Switch, you may feel the need to configure it on your AsusWRT-Merlin router. The goal is to secure all your household devices connected to Wi-Fi.
In this article, we have provided detailed instructions on how to set up and use NordVPN on AsusWRT-Merlin firmware.
How to Configure NordVPN on AsusWRT-Merlin
You can configure NordVPN on a router running AsusWRT-Merlin by uploading your chosen server's config file via the router's settings, updating its DNS settings, and adding your service credentials. Here's a step-by-step guide that you can follow.
1. Get a NordVPN subscription by visiting its official website on your PC.
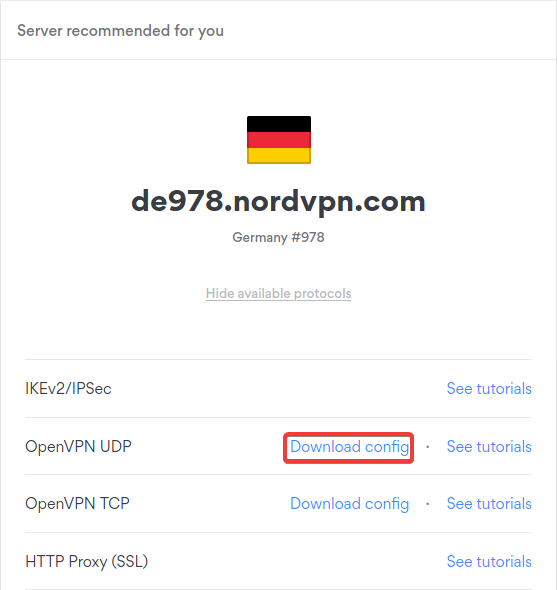
2. Go to the NordVPN server tool to pick a server in your preferred location.
3. Click on the 'Show available protocols' option.
4. Choose 'Download config' next to OpenVPN (UDP or TCP).
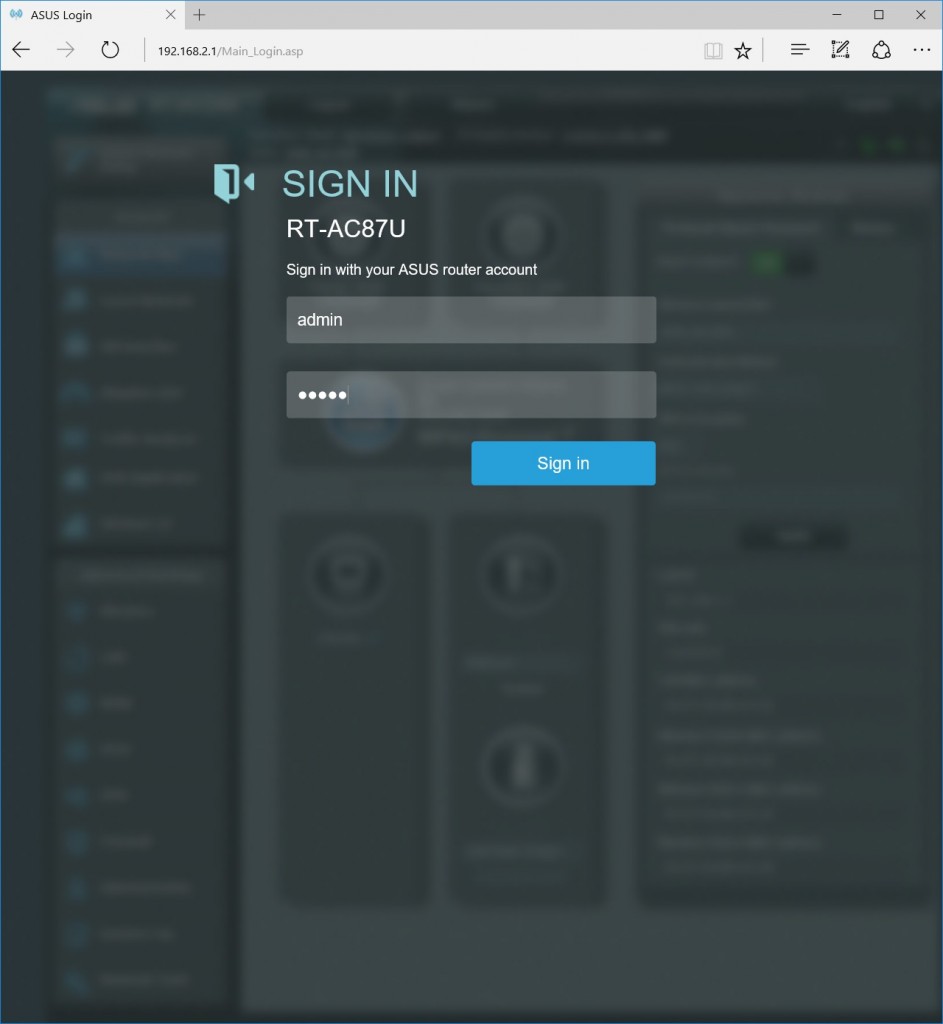
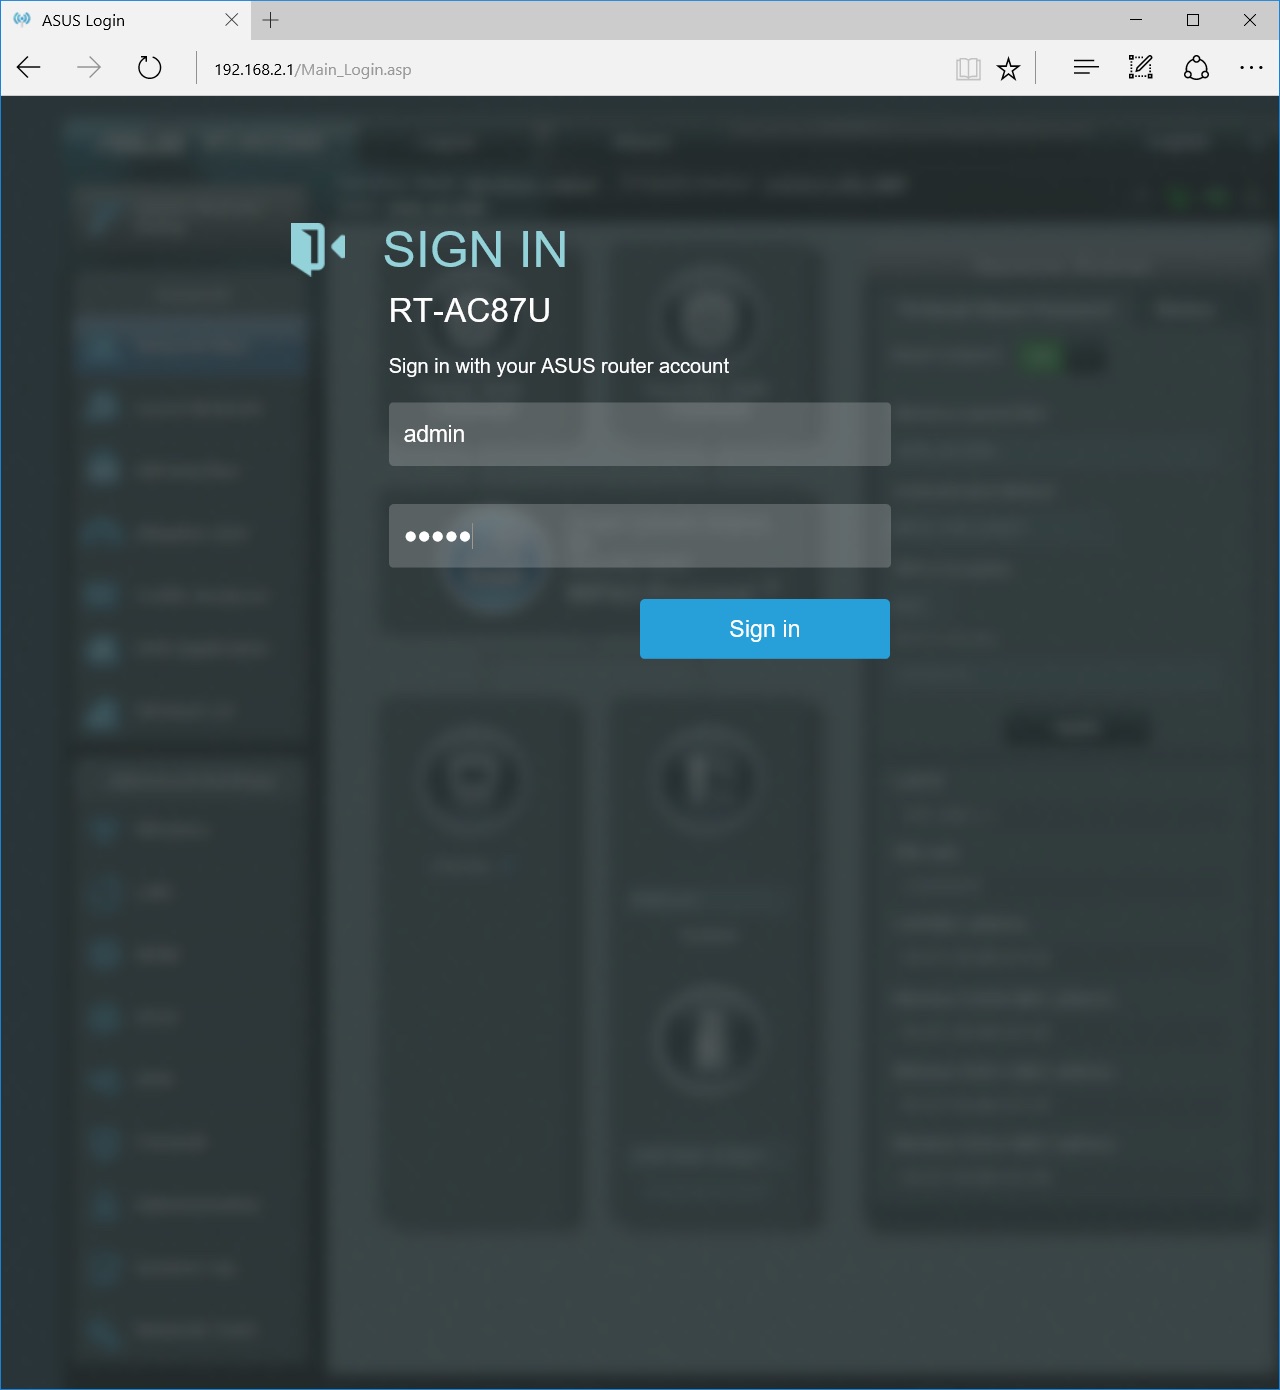
5. Sign in to the control panel of your router by visiting the 192.168.1.1 IP from your browser.
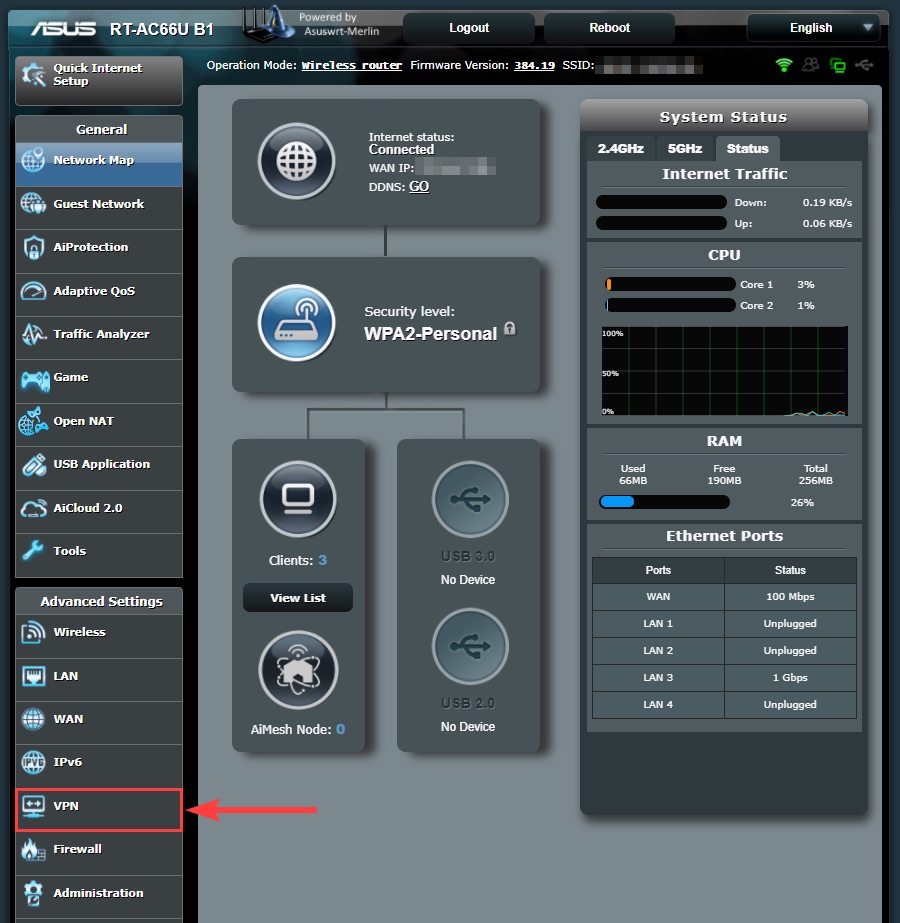
6. After you sign in, choose 'VPN' from the left pane.
7. Next, navigate to 'VPN Client' > 'OpenVPN Client Settings.'
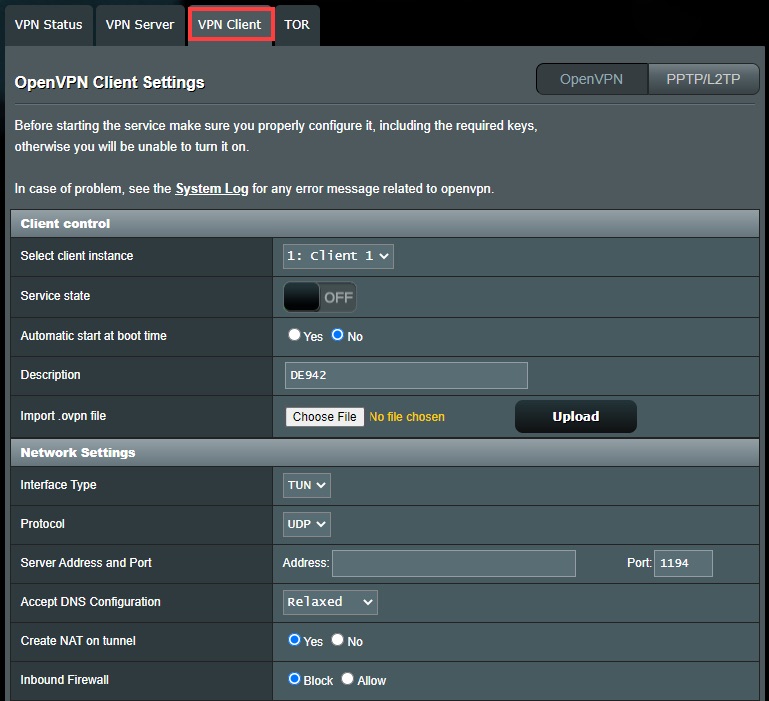
8. Click 'Choose File' to upload the .ovpn file containing the OpenVPN config downloaded earlier.
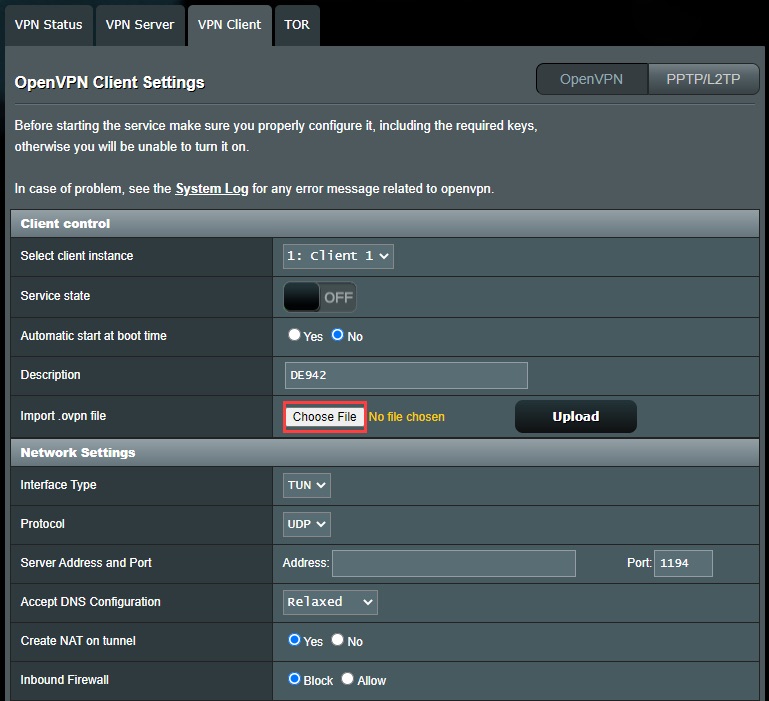
9. After that, choose the .ovpn file.

10. Next, click on the 'Upload' button.
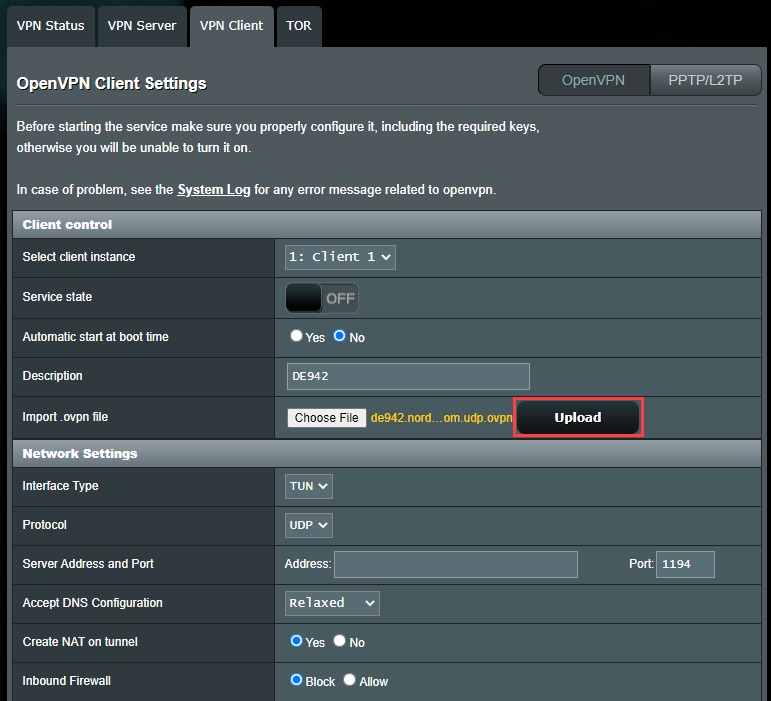
11. The page will refresh now with your OpenVPN client information.
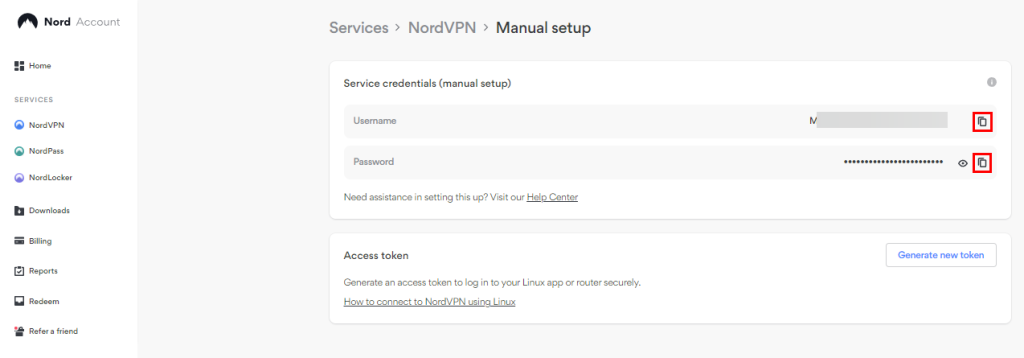
12. Open your NordVPN Account Dashboard.
13. Go to 'Set up NordVPN manually' > 'Service credentials (manual setup)'
14. Copy your NordVPN service username and password by clicking the copy buttons.

15. Paste the service Username and Password in the 'Authentication Settings' section.
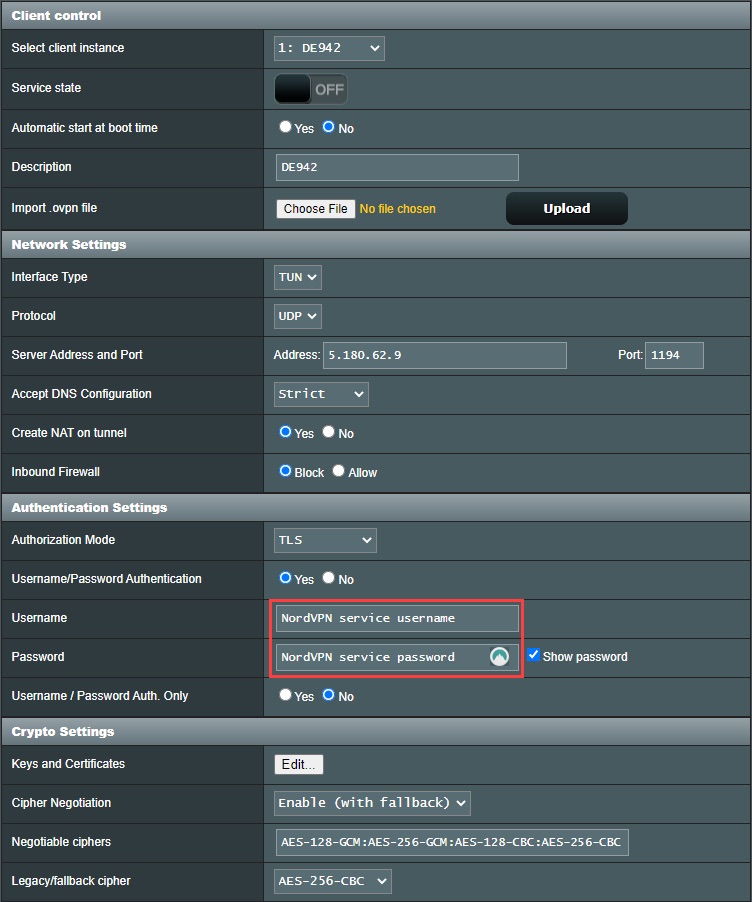
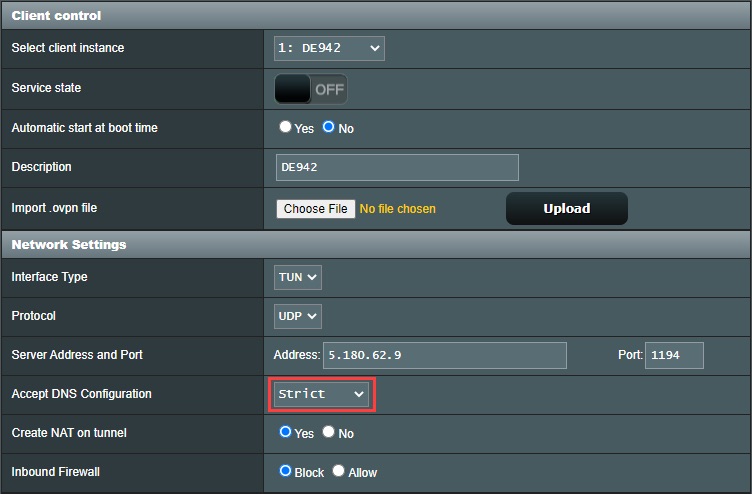
16. Then, set the Accept DNS Configuration option to strict from its dropdown menu.
17. Move on to the Custom Configuration window next and enter the below text-
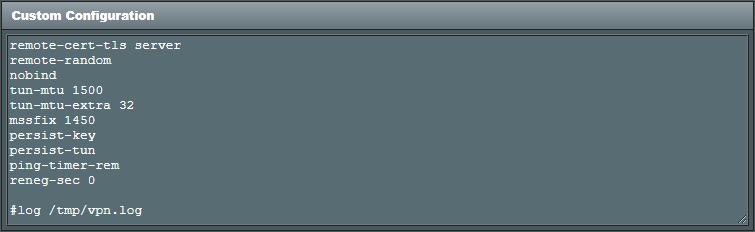
remote-cert-tls server
remote-random
nobind
tun-mtu 1500
tun-mtu-extra 32
mssfix 1450
persist-key
persist-tun
ping-timer-rem
reneg-sec 0
#log /tmp/vpn.log
18. Now configure NordVPN's DNS settings by clicking 'WAN' from the left pane first.
19. Then, navigate to the 'Connect to DNS Server automatically' section and select 'No.'
20. Next, fill the 'DNS server' fields with NordVPN's DNS addresses as mentioned below:
- DNS Server1: 103.86.96.100
- DNS Server2: 103.86.99.100
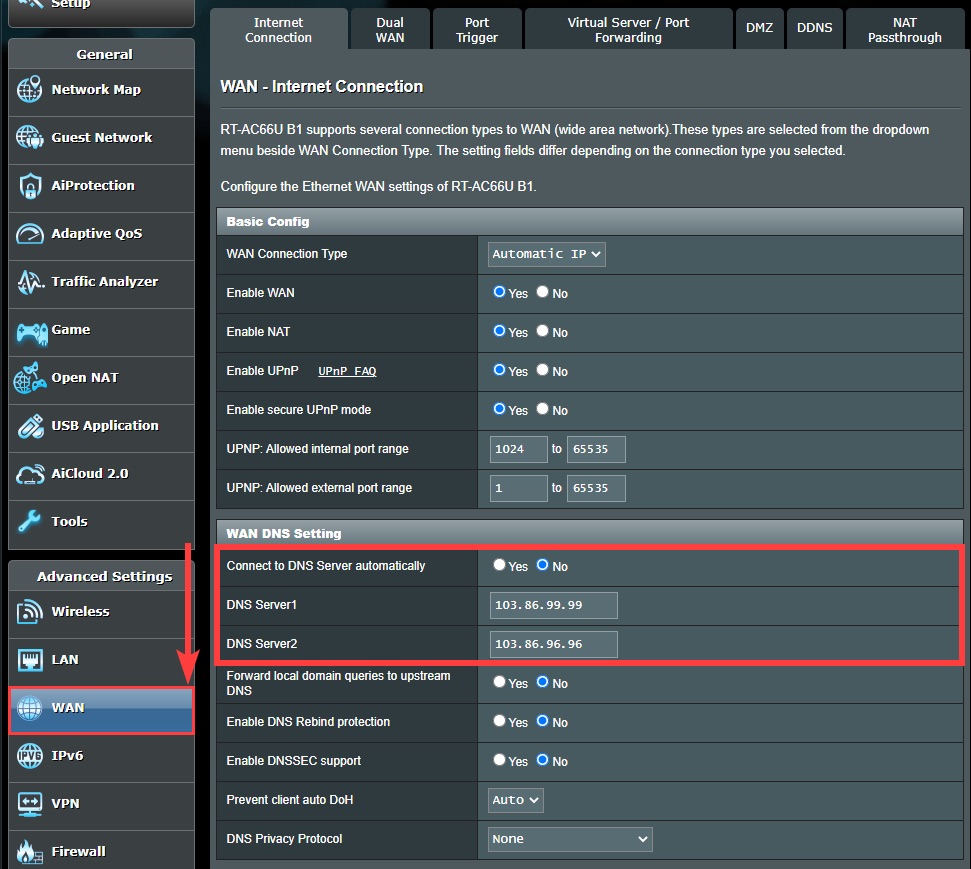
21. Click 'Apply' from the bottom of that page next and wait for a few seconds to apply the changes.
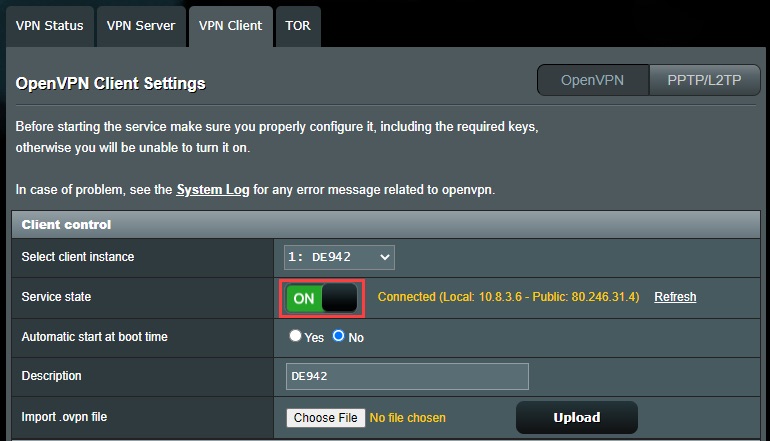
22. Your status will turn connected as indicated by the green ON button next to 'Service state.'
Final Thoughts
At first, setting up NordVPN on your AsusWRT-Merlin router may seem complex compared to using it natively on your device. But it is a one-time process that lets you protect all devices connected to the router. This removes the need to use the native app and lets you use the VPN even on devices that don't support native apps.
However, in certain situations, you may want to install and use NordVPN natively on your devices when they're not connected to the router. Then, you can utilize its 10 simultaneous connections to protect a wider range of devices.
That's all! Now you know how to set up and use NordVPN on AsusWRT-Merlin firmware-based routers. If you have further queries, feel free to comment below. Thanks for reading!
Related