When you purchase through links on our site, we may earn an affiliate commission. Here’s how it works.
How to Download, Install, & Use CyberGhost VPN on macOS
Last updated June 17, 2024


MacOS users may not face huge security vulnerabilities while browsing the Web as macOS has already incorporated strong security measures. But that doesn't mean your data is entirely safe from hackers and prying eyes while streaming, gaming, or torrenting on Mac.
CyberGhost's strong encryption protocols, like AES-256 bit, encrypt your Web traffic to prevent anybody from tracking your activities. And since CyberGhost offers a native app for Mac, it is very easy to install with just a few clicks. However, you need at least Mac OS X 10.13 (High Sierra) or newer.
In this article, we'll teach you how to install and use CyberGhost VPN on macOS with comprehensive instructions.
How to Download and Install CyberGhost VPN on macOS
To download CyberGhost VPN on macOS, all you must do is download its native installer on your device and install it. It will automatically be set up after you log in and follow the on-screen instructions to provide specific permissions. Here are the detailed setup instructions.
1. First, get a CyberGhost VPN subscription using your favorite Web browser.
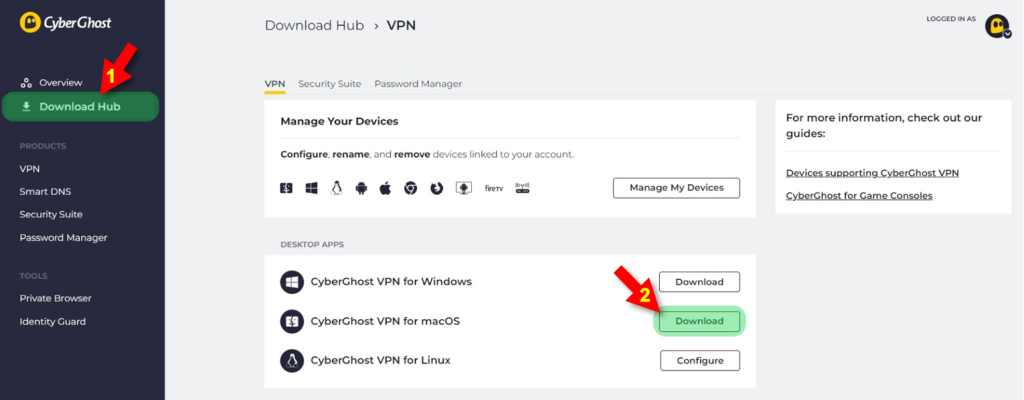
2. Access the CyberGhost VPN dashboard and navigate to 'Download Hub.'
3. Click on the 'Download' button next to 'CyberGhost VPN for macOS.'

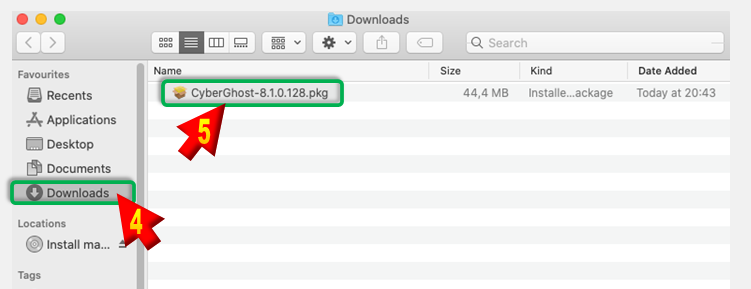
4. After that, click on 'Allow' to start the download.

5. When the download process ends, double-click on the CyberGhost VPN Installer.
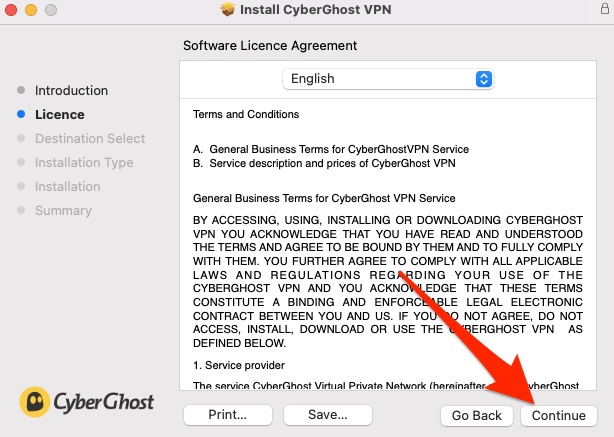
6. Next, click the Continue button in the installation window.
7. The Software Licence Agreement will come up next; go through it and click Continue again.
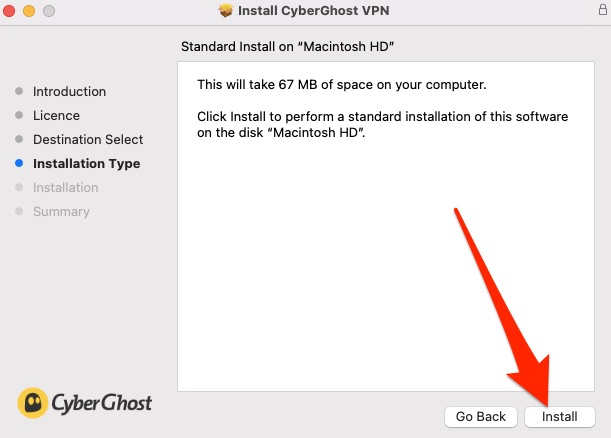
8. Now, a pop-up window will appear asking for confirmation; click the Agree button.

9. On the next screen, hit the Install button to start the installation process.
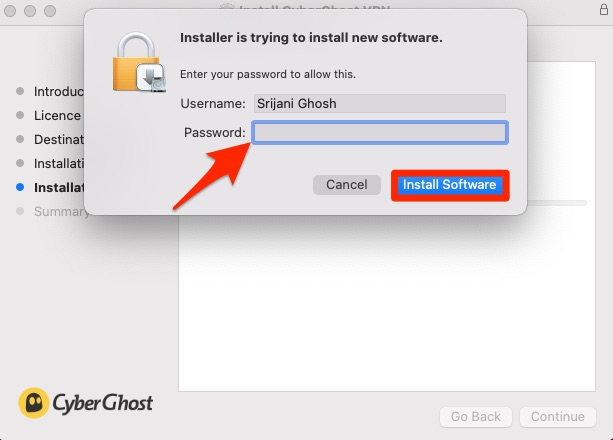
10. You’ll be asked to input your system password. Fill in the password box and click 'Install Software.'
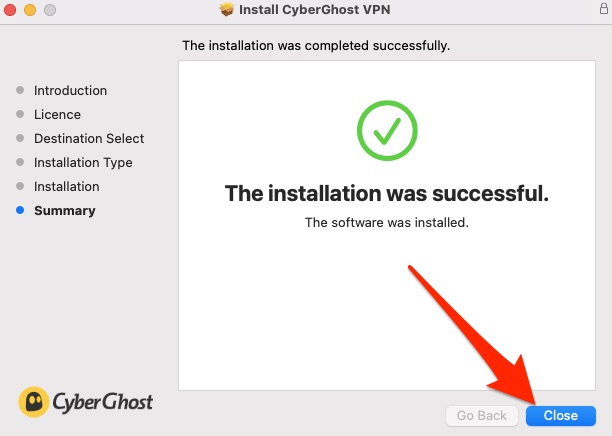
11. Once the installation process ends, hit the 'Close' button.
12. Now, you can launch CyberGhost VPN from the dock and menu bar.
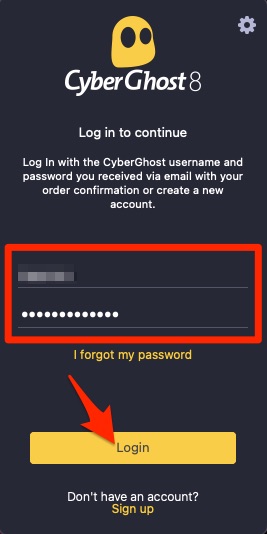
13. Next, enter your CyberGhost VPN username and password and click on 'Login.'
14. Click on the 'Connection' button in CyberGhost VPN's interface.

15. On the next screen, click on 'Install VPN profile.'
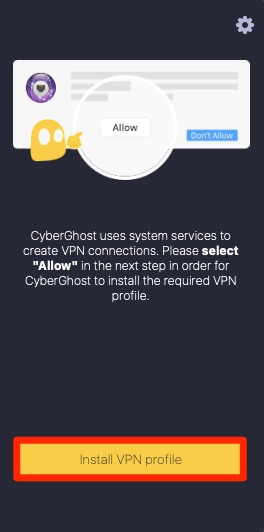
16. A pop-up will now appear asking for your confirmation to add the VPN configuration; click on 'Allow.'

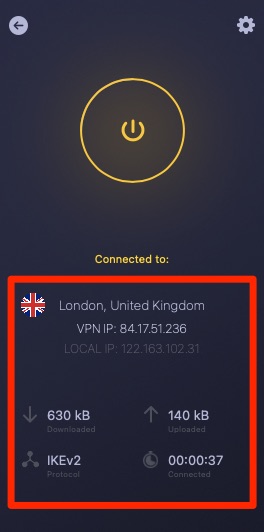
17. The connection button will turn yellow, and you’ll be automatically connected to a VPN server.
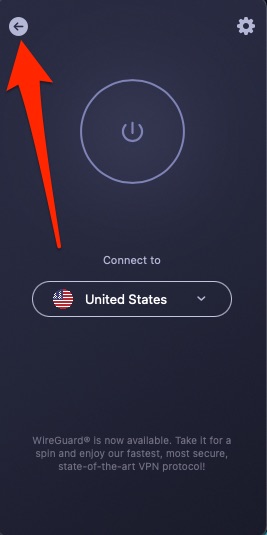
18. To pick a different server, click on the 'arrow' in the top left of the app to expand the CyberGhost UI.
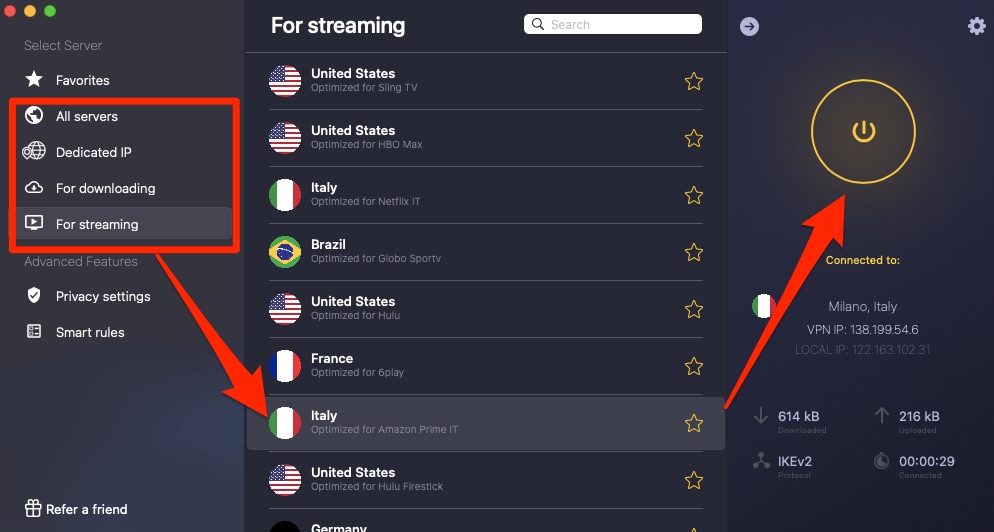
19. Then, choose a dedicated server from the list at the left pane.
20. Hit the ON/OFF button from the control screen to connect.
Final Thoughts
Overall, it should take you less than 2-3 minutes to install CyberGhost VPN on macOS, regardless of the device you're using. That's because this VPN offers a native app, which you can directly download from the app store. Once installed, it automatically gets set up without additional configuration.
If you own other devices running on platforms like Android, Windows, and Linux, why not take benefit of CyberGhost VPN's 7 simultaneous connections? To do so, you may take a look at our complete guide on how to set up CyberGhost VPN on a wide range of devices.
Thats it! You now know how to install CyberGhost VPN on macOS devices. If you have any questions, feel free to add them in the comments below.
Related