
How to Install Kodi on Raspberry Pi in 2026
Last updated April 7, 2022

Raspberry Pi can form powerful little computers capable of running all kinds of software. In fact, assembling your own computer and breathing life into it will most certainly upgrade your tech skills, which makes this a very fun project. The same applies to installing Kodi on your Raspberry Pi, turning your device into the ultimate media streamer.
We've recently updated this guide and included everything you need to know about installing Kodi on Raspberry Pi. However, before you jump into this process, we have some important information for you - so check just below.
How to Install Kodi on Any Raspberry Pi Device
We'll guide you through the procedure of setting up Kodi in three simple steps. Depending on what you're here for, here are the quick jump links that will lead you to different steps of installing Kodi on your Raspberry Pi.
- Step 1: Gather the Required Components
- Step 2: Assemble Your Raspberry Pi Device
- Step 3: Install Kodi on Your Raspberry Pi
Step 1: Gather the Required Components
Assembling your Raspberry Pi computer doesn't require a lot of components. However, you'll want to be 100% sure that you have everything you need. So, here are the required components for building a Kodi-powered Raspberry Pi device.
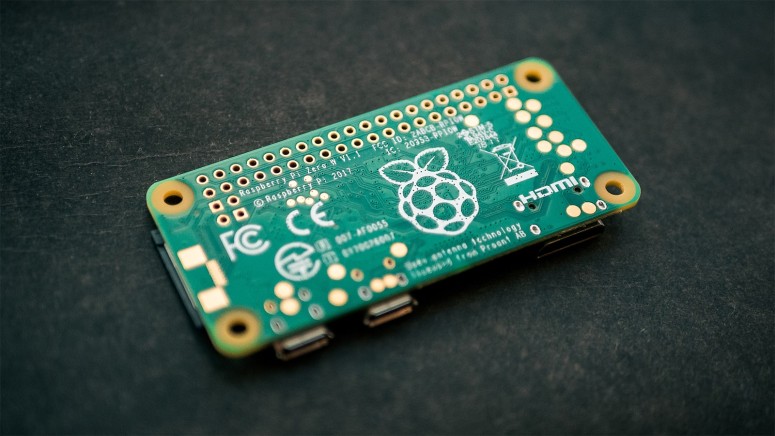
- A Raspberry Pi board;
- A case for your Raspberry Pi;
- Ethernet cable;
- HDMI cable;
- MicroSD memory card;
- Micro USB power adapter.
Raspberry Pi Board: This process starts with picking a suitable Raspberry Pi board. There are many options out there, but if you need our recommendation - we suggest checking out the Raspberry Pi 4 Model B board. There are several variants available, letting you pick between 1GB, 2GB, or 4GB of RAM. If you need something more affordable, the Raspberry Pi 3 Model B+ board should get the job done easily.
Housing (Case): You will also need a case for your computer board. There are many choices out there that vary in design and functionality. However, know that there are Kodi-branded cases out there (priced at only $15.95). You can choose from this Kodi-branded Raspberry Pi 4 case or use this Kodi-branded Raspberry Pi 3 case.
MicroSD Memory Card: Your Raspberry Pi needs a memory card to store your movies, TV shows, and other types of media. However, make sure you’re buying the right kind of microSD card. Raspberry Pi isn’t compatible with every card out there, which will why you’ll need to make sure you’re buying a compatible one.
Power Adapter: Finally, we’ll also need a micro-USB power adapter. Make sure you’re buying a quality-made adapter, which can cost around $10. Here’s another tip: Raspberry Pi doesn’t have an ON/OFF switch – which means it’s powered ON at all times. However, you can find ON/OFF switches built into micro-USB cables.
With Raspberry Pi, you always need to be creative and find your own solution. This is why this project is very educational and quite fun as well.
Step 2: Assemble Your Raspberry Pi Device
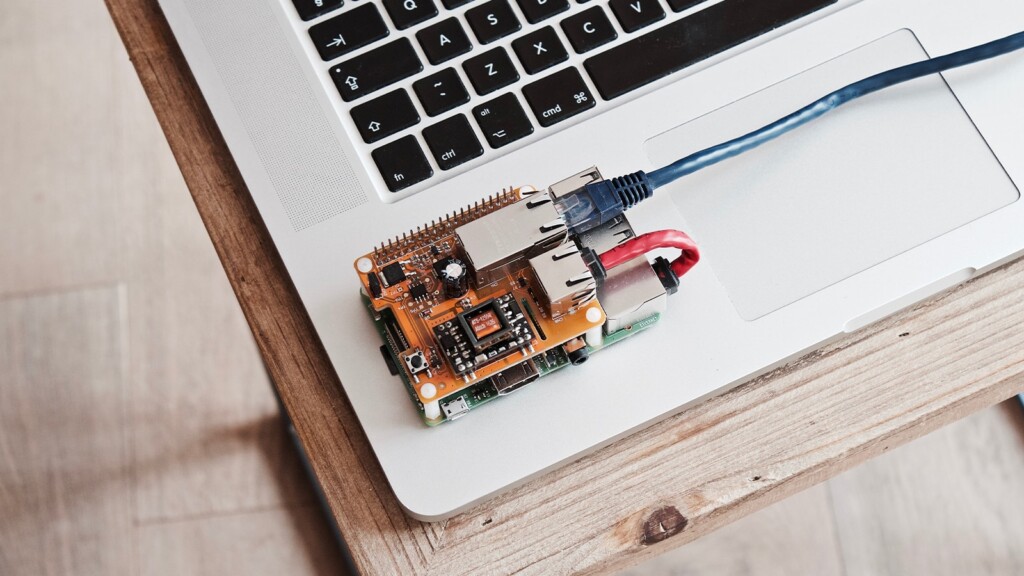

Even though there are different methods to assemble your Raspberry Pi, we'll provide a general guide, which you can find just below.
- You will need to open the case and apply the thermal paste to the heatsink (if your case comes with this feature, that is). Carefully position the board until it clicks into its place inside the case.
- Then, you’ll need to make sure that you’ve carefully aligned the board with available ports and make sure everything is in its place.
- Finally, insert all of the required cables, and connect any peripherals you might be using. And don't forget to supply power to your Raspberry Pi device. That's it!
We gave you our general description of how to assemble a Raspberry Pi computer. However, keep in mind that there are many ways to assemble a computer, depending on the components you've decided to use. This is why you’ll receive an installation manual that you’ll need to follow closely.
Once you’ve made sure that everything is in its place, it’s time to install Kodi on Raspberry Pi. So, let's proceed with the third and final step.
Step 3: Install Kodi on Your Raspberry Pi
There are different ways to get Kodi to run on a Raspberry Pi. We'll show you the easiest method available, using OpenELEC. Take a look just below.
- It’s recommended to format your microSD card first. Use SD Formatter 5.0 for this purpose. Download it to your computer (Windows or macOS), install, and launch SD Formatter. Insert your microSD card, pick 'Quick Format' and finalize the process by clicking the 'Format' button.
- Next, we need to install LibreELEC using a tool called USB-SD Creator. Download and launch this tool on your computer. It comes available for Windows, macOS, and Linux.
- Double-click on USB-SD Creator. You will see a simple interface with four different areas marked by numbers. So, let's go over all of those areas and tell you what they mean.
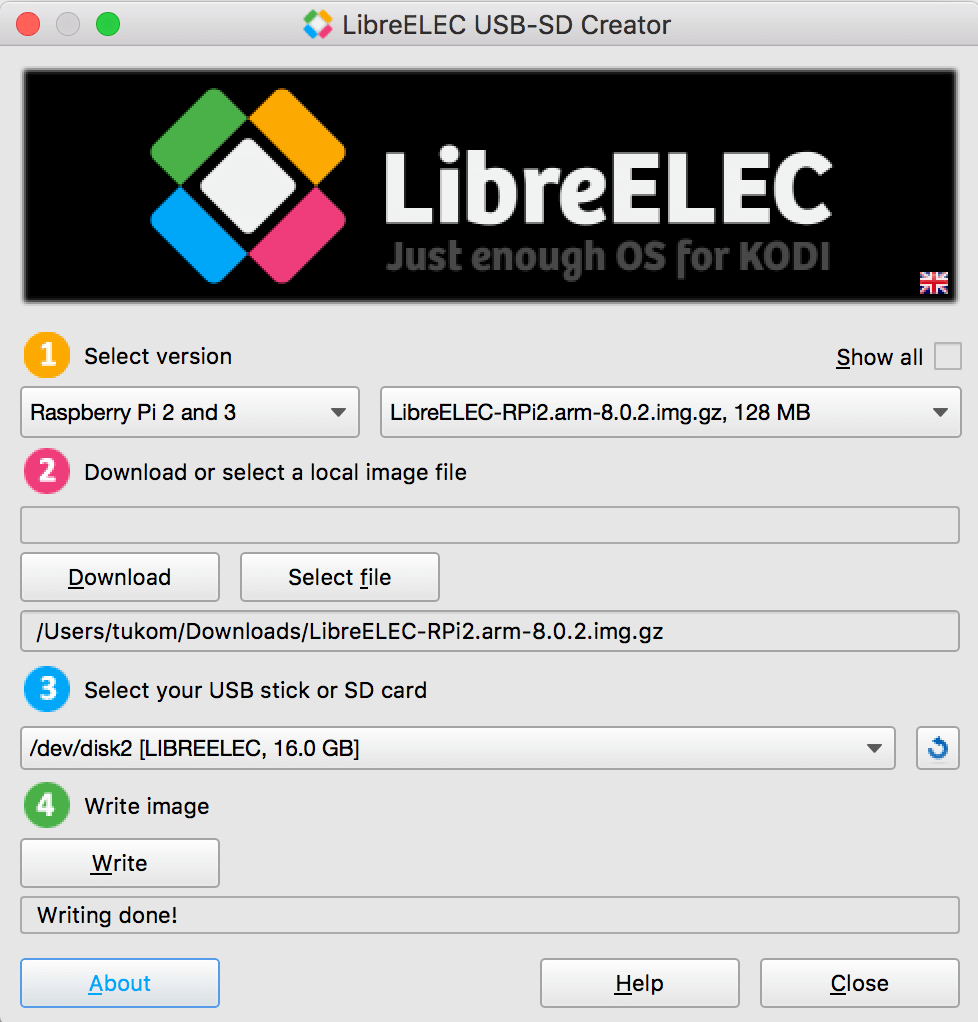
- First, select a Raspberry Pi version, marked by '1.' Next, proceed to the second section. This is where you can download this OS or load it if you have it locally stored. You can click on 'Download' and choose where you’d like the file to be placed. Next, select your microSD card.
- Finally, click on the button that says 'Write.' You have now LibreELEC installed on your microSD card.
- Remove the memory card and place it into your Raspberry Pi setup. During the initial startup, you’ll have to wait a couple of minutes for the OS to be fully installed. Once that happens, you will be greeted by Kodi and an installation wizard of LibreELEC.
- During this process, you will have to connect to Wi-Fi, set up a hostname, and share services. In case you are not sure which option to pick when it comes to sharing, you can always use the default values (which we highly recommend picking).
Once you’re done with the installation wizard, you will be greeted by Kodi’s default interface. Feel free to look around to check out its features.
Want to Learn More About Kodi's Features?
With Kodi running on your Raspberry Pi, you might be wondering what's next? Well, you can import your media library, install add-ons, and even change Kodi's appearance. So, check out the following guides.
- Enable Unknown Sources on Kodi
- Get the Best Kodi Addons
- Get the Best Kodi Skins
- Change Skins on Kodi
- Create a Library in Kodi
- Import Videos to Kodi
- Add Music to Kodi
- Add Photos to Kodi
- Set Up Kodi Profiles
- Add Subtitles to Kodi
That’s all when it comes to how to install Kodi on Raspberry Pi. In case you have any questions, don't hesitate to contact us using the comments section below. And finally, we hope you'll have plenty of fun assembling your Raspberry Pi.
Related


Get expert insights on threats, breaches, scams, and security trends — delivered every Monday.
Most Popular


Get expert insights on threats, breaches, scams, and security trends — delivered every Monday.
Most Popular