
When you purchase through links on our site, we may earn an affiliate commission. Here’s how it works.
How to Set Up and Use ExpressVPN on Raspberry Pi
Last updated June 4, 2024


You can set up ExpressVPN on most of the Raspberry Pi-powered computers thanks to the VPN's Linux-based software. So, once you assemble your device, it will take just a couple of minutes to put ExpressVPN on Raspberry Pi OS and start using this VPN through its command-line interface.
Keep in mind that ExpressVPN supports Raspberry Pi devices powered by ARMv7 CPUs, at the least. In other words, you can install ExpressVPN on Raspberry Pi 2 - Model B devices, as well as newer models, such as Raspberry Pi 3 (ARMv8) and Raspberry Pi 4 (ARMv8).
In this article, we'll teach you how to use ExpressVPN on Raspberry Pi devices with screenshots and detailed setup instructions.
How to Set Up and Use ExpressVPN on Raspberry Pi
To set up and run ExpressVPN on Raspberry Pi devices, you need to download its Linux app and install it on your machine. These are the steps you need to take:
1. Get your ExpressVPN subscription using your Raspberry Pi device and a Web browser.
2. Once you subscribe, click 'My Account' using the top-placed main menu on ExpressVPN's site.
3. Provide your credentials and access your ExpressVPN account dashboard.

4. Navigate to Set Up Other Devices > Linux.
5. On the right, pick 'Raspberry Pi OS' and download the latest installation file to your Raspberry Pi.


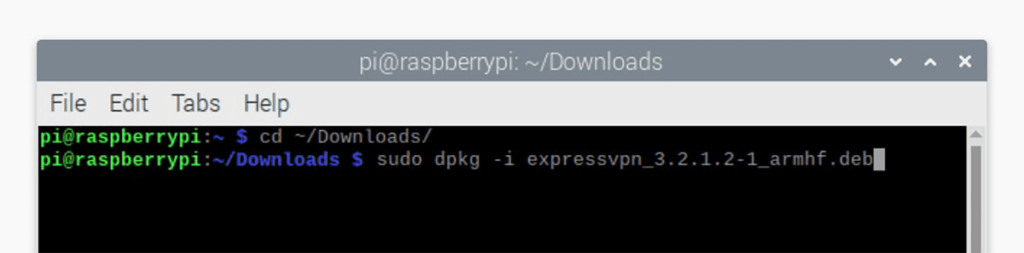
6. Launch the Terminal app and use the following command: cd ~/Downloads/.
7. Install the app using this command: sudo dpkg -i [installer filename].

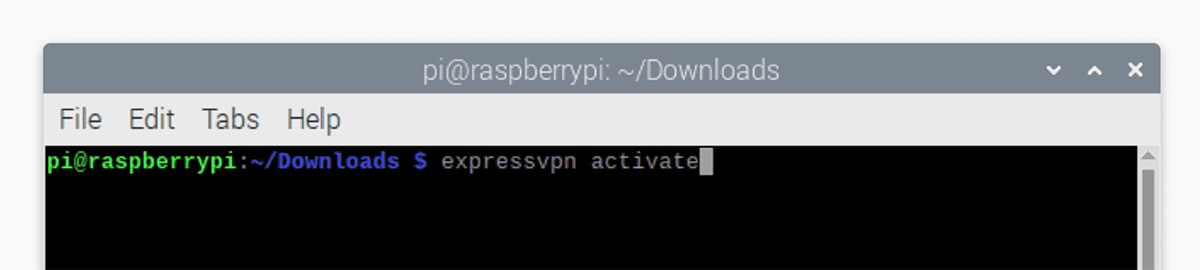
8. Then, activate the VPN using the 'expressvpn activate' command.
9. Provide your ExpressVPN activation code (from your online dashboard).
10. Answer with Y or N when asked about sending anonymous data back to ExpressVPN.

11. Starting at this moment, you can begin to interact with ExpressVPN’s servers.
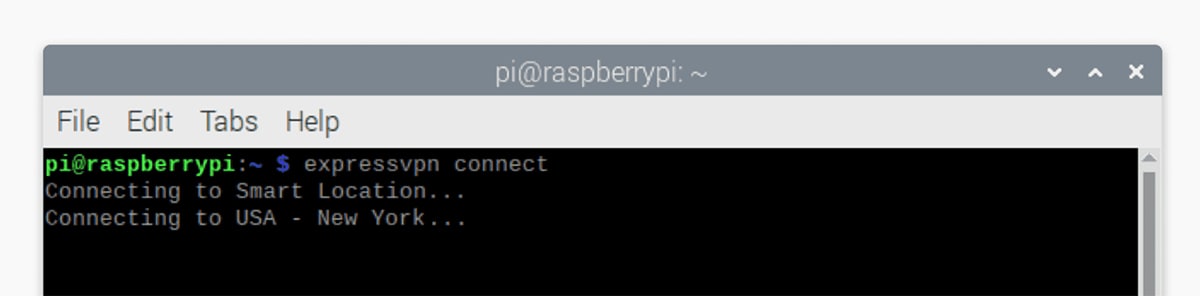
12. To connect to the nearest server, use the following command: "expressvpn connect."

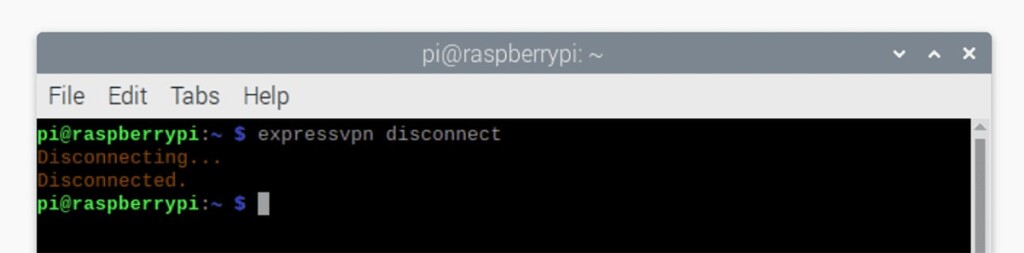
13. To disconnect at any moment, go with "expressvpn disconnect."

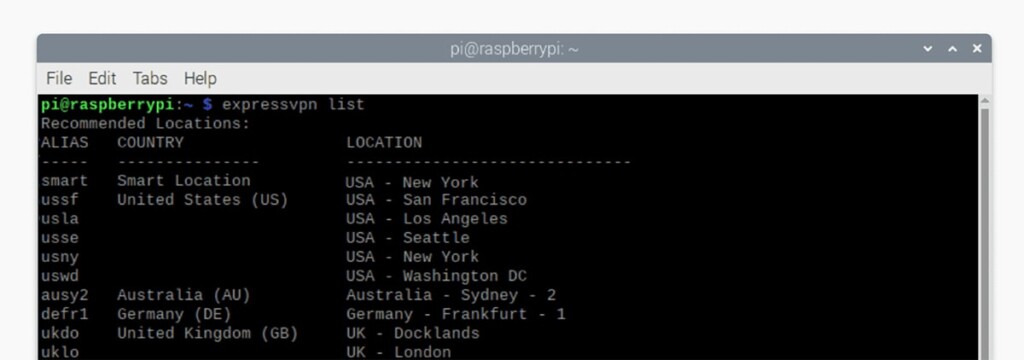
14. If you want to access a specific server, first, use the "expressvpn list" command.
15. You will see a table with three columns, and you can either use its alias, country, or location marker.
16. To change to a different VPN protocol in ExpressVPN, use the "expressvpn protocol" command:
expressvpn protocol lightway_tcp
expressvpn protocol lightway_udp
expressVPN protocol tcp
expressvpn protocol udp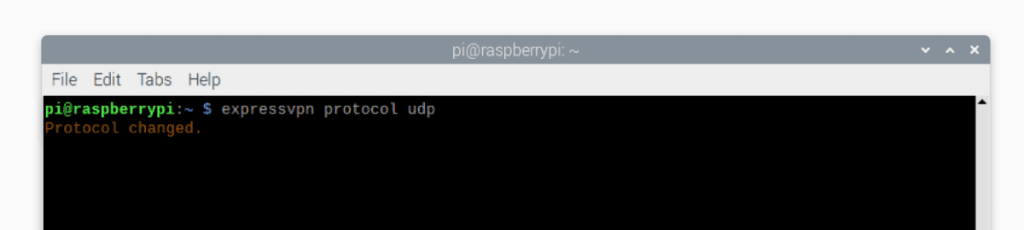
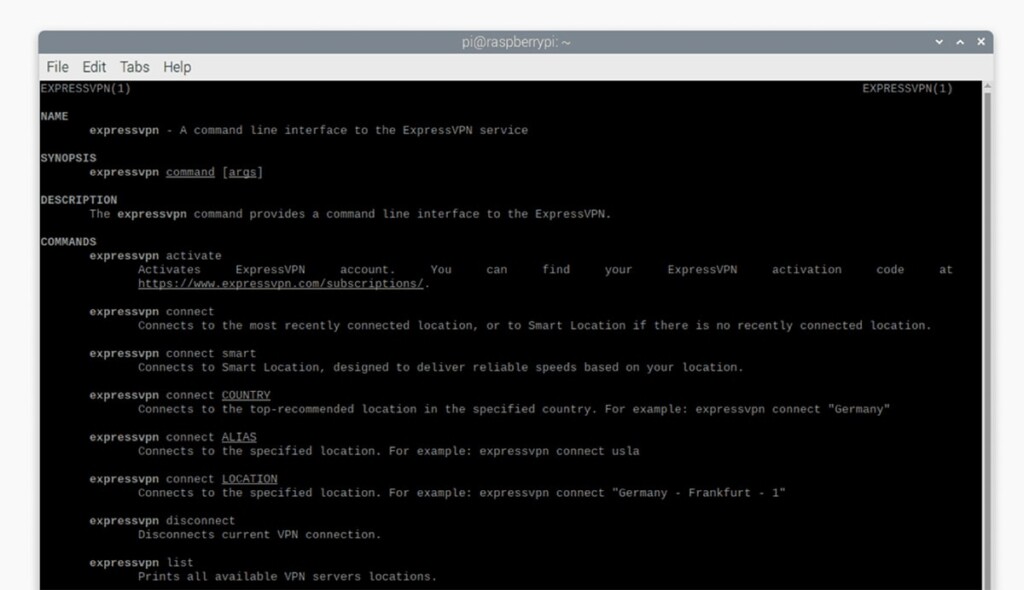
10. To learn more about ExpressVPN, use the "man expressvpn" command. That's it!

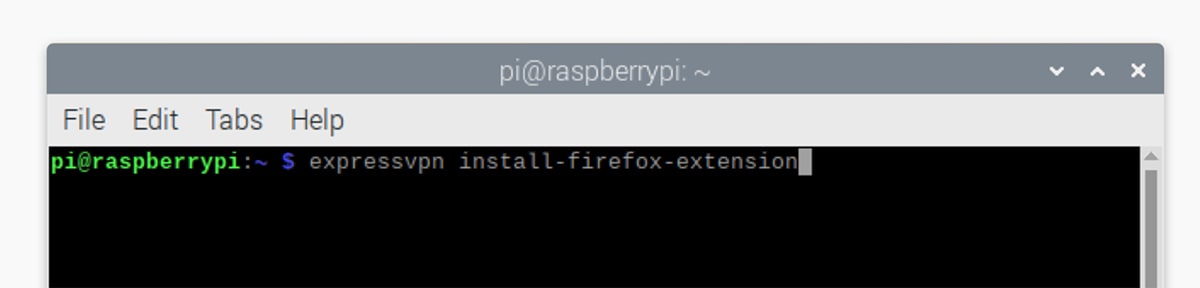
Lastly, we have an extra tip for you. If you'd like to use ExpressVPN via a graphical user interface (GUI), you can install its extension for Chrome or Firefox, done once you install ExpressVPN on Raspberry Pi OS. Use "expressvpn install-firefox-extension" or "expressvpn install-chrome-extension" and finalize the process by clicking on "Get Extension."

Final Thoughts
In terms of setting up ExpressVPN on Raspberry Pi, this VPN features a very streamlined setup process overall. As you can see above, you just need to download ExpressVPN's installation file, open the file, and install the VPN. Then, you'll get to initialize your VPN session.
That said, check our guide on how to set up ExpressVPN on Linux if you opt for something else besides Raspberry Pi OS. Also, here's our central guide on how to set up ExpressVPN across all its 60+ supported devices and platforms.
That would be all on how to get ExpressVPN on Raspberry Pi OS. In case you have any questions or doubts, make sure to post your comment just below. And finally – thank you for reading!
Related