When you purchase through links on our site, we may earn an affiliate commission. Here’s how it works.
How to Set Up a VPN on a Router in 2025
Last updated May 11, 2024

Even though it requires a little effort, anyone can learn how to set up a VPN on a router. However, there are some things to keep in mind before going into this process, especially if you want to do it the right way. So, don't worry - we're here to guide you all the way through.
Before we dive into this article, we have a few valuable pointers. As you can imagine, there are two equally important parts to setting up a VPN on a router. First, you need a router that supports VPNs, as not just any home router will do the job.
Then, you need a VPN service compatible with routers, and once again - not just any VPN will do the job. You need one that supports a range of routers, brings robust protocols, and provides support in case of technical difficulties.
If you already feel overwhelmed, don't worry; we'll make setting up a VPN on your router as simple as possible. With that said, it's time to jump right in!
How to Set Up a VPN on a Router
Setting up a VPN on your router is a 6-step process (if you're starting from scratch, that is). Here's what exactly it entails:
- Step #1: Find a VPN-Compatible Router
- Step #2: Subscribe to a Router-Compatible VPN Service
- Step #3: Flash Your Router (Using DD-WRT Firmware)
- Step #4: Access Your Newly Flashed Router
- Step #5: Obtain OVPN Files From Your VPN Service
- Step #6: Install a VPN on Your Router (via OpenVPN)
If you've already started this process, use the quick-jump links above. However, if you're starting from scratch, this is where your journey begins. Let's dive into it!
Step #1: Find a VPN-Compatible Router
In general, your average Wi-Fi router won't do the job, as it needs a dedicated CPU and enough storage to run custom firmware. With this said, chances are you'll need to buy a new router - so, let's talk about that for a minute.
What Types of VPN-Compatible Routers Are There?
There are two possible routes to take. Depending on your chosen route, this will alter the rest of this process. So, let's explore those two options.
OPTION #1: Routers With Stock Firmware. First, we have routers that support VPN services out-of-the-box. Those usually come with stock firmware that you can access via your Internet browser. Then, you'll get to tweak all kinds of settings and install a VPN service.
VPN-ready routers are made by well-known manufacturers such as Netgear, ASUS, Linksys, TP-Link, and more - so they're suitable even for first-time VPN users. However, they don't usually give you the same level of customization as the group of routers described just below.
Feel free to check the best VPN-ready routers available right now.
OPTION #2: Routers Compatible With Open Source Firmware. Some routers allow you to replace their custom firmware. It means that you can install custom firmware (like DD-WRT, for example) and, therefore, greatly expand their set of features.
DD-WRT is known for adding many useful features, so this could be an excellent way to buy a relatively cheap router and unleash its full power via custom firmware.
There are other types of custom firmware, such as Open-WRT, Tomato, and more - but those are compatible with a limited range of routers only.
Should You Buy a Router With Stock Firmware or a Flash-Ready Router?
So, which route should you take? Well, since you're already considering installing a VPN on a router, we bet you'll want to get everything your router offers.
With that said, buying a flash-ready router seems like the best option - and you have many models at your disposal, available in different price ranges.
To find the best router aligned with your needs, you can check our guide on how to choose a VPN router. Of course, we have some on-point recommendations as well.
Here are the best cheap DD-WRT routers, best routers under $50, best routers under $100, and if you want a high-end unit - check out the overall best DD-WRT routers.
Remember that before buying any router, you should check its compatibility with DD-WRT by using the firmware's official database. Some manufacturers, like D-Link routers, only have a couple models that support DD-WRT. You can search by manufacturer or model, so do your research to avoid any problems later on.
You can also check the official list of supported devices by DD-WRT.
Step #2: Subscribe to a Router-Compatible VPN Service
Once you get a router that supports running VPN connections, you need to find and subscribe to a suitable VPN. Luckily for you, there are plenty of options out there - and we're here to help you pick the best one.
How to Find a Good VPN for Your Router?
As you can imagine, you need to be very picky when choosing a VPN. However, your search can easily get overwhelming since there are hundreds of VPNs out there. So, we'll tell you about the most important aspects of a reliable VPN service.
- OpenVPN (Router) Compatibility: Remember to take a look at what kinds of protocols are on offer. You should find OpenVPN among those, as this is the safest VPN protocol right now, as well as the most suitable VPN protocol for routers.
- Strategically Placed Servers: You'll get the best possible speed if you connect to a server that isn't overly far from your physical location. Therefore, VPNs with plenty of servers should be prioritized as they typically bring the fastest possible performance.
- Stable & Reliable Performance: In general, VPNs will slow down the speed of your Internet connection. However, every VPN performs differently, so you can check our guide to the fastest VPNs to get an idea of what to expect.
- Extra Features & Functionalities: Do you want to unblock media streaming platforms? Or maybe download torrents? That's not something every VPN allows, so make a list of "extra" features you need and inquire about those features.
- Money-Back Guarantees: Lastly, keep in mind that VPNs have money-back guarantees of up to 45 days. In case anything goes wrong, or in case you're not happy with the chosen VPN, you can always have your money returned.
What's the Best Router-Compatible VPN in 2025?
So far, we've tested more than 60 VPN services, so you'll find plenty of hands-on reviews on our website. However, based on our experience, the best VPN right now is ExpressVPN.
ExpressVPN comes with other 3,000 servers, unblocks just about any website (including media streaming platforms), and brings high-end protection for your data. You can use up to five simultaneous connections, and there's no data logging involved.
To learn more, check our hands-on ExpressVPN review.
Step #3: Flash Your Router (Using DD-WRT Firmware)
Flashing your router, in this specific case, means installing third-party firmware. Once installed, you can access DD-WRT by accessing your router (via your Web browser). That's how you can configure its settings, set up a VPN, and plenty more.
It would be pointless to give you all the required steps here, as you should turn to DD-WRT's official website. That's where you'll find an up-to-date guide on installing DD-WRT, available in several languages (English, Spanish, French, German, Chinese, and more).
So, go ahead and check out how to install DD-WRT on your router. Alternatively, if you decide to listen to our advice and sign up for ExpressVPN, here's how to download and install ExpressVPN on a DD-WRT router.
We also have another useful piece of information. When installing DD-WRT, make sure to stick to the official instructions closely. Don't interrupt the process in any way, as that could lead to "bricking" your device - which could permanently damage your router.
However, even if something unexpected happens, there's no need to worry, as there are various methods to recover from a bad flash.
Step #4: Access Your Newly Flashed Router
Installing a VPN on your router is done by accessing your router as an administrator. So, before you initialize this process, you need to know your router's IP address, as well as the admin's username and password.
How to Find a Router's IP Address?
In general, router manufacturers use a group of default IP addresses for their routers. You can try the following IPs: 192.168.0.1, 192.168.1.1, 192.168.2.1, or 192.168.1.100.
If the abovementioned IP addresses don't work, do a Google search based on your router's model. And also, you can find your router's IP via your computer, and here's how.
Find Your Router's IP Address on Windows
There are different methods of revealing your default gateway IP on Windows. However, the simplest one is by using the Command Prompt in the following way:
1. Run the "Command Prompt" on your Windows PC.
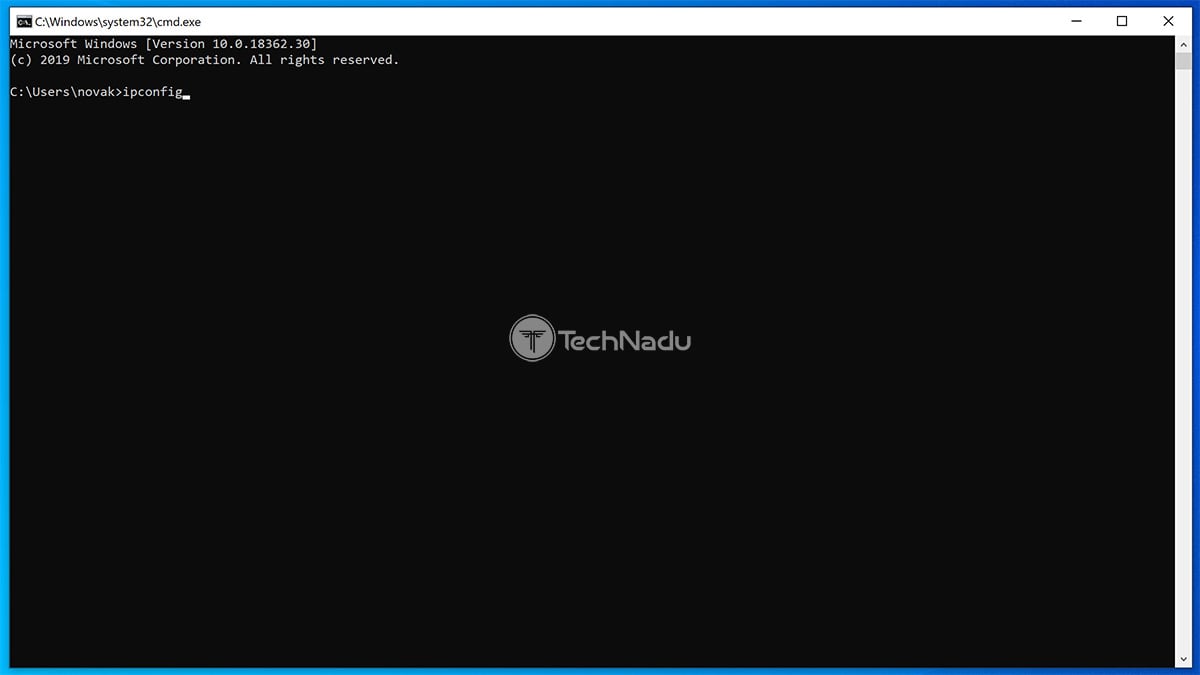
2. Type in "ipconfig" and press Enter.
3. You should now see a list of network adapters.
4. Find your router and check its IP address (next to "Default Gateway").
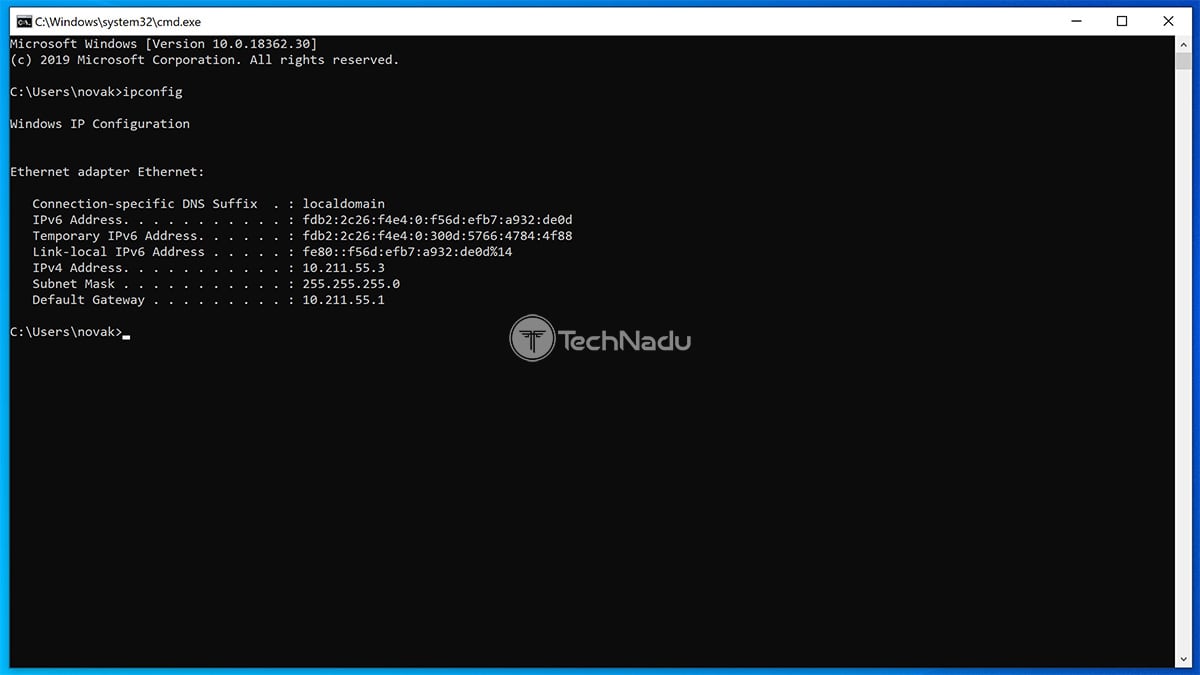
5. Alternatively, you can go with this command: "ipconfig | findstr "Default Gateway."
Find Your Router's IP Address on macOS
Don't worry - we didn't forget our readers who use macOS. This operating system allows you to easily check your router's gateway IP, so follow these steps:
1. Navigate to Apple > System Preferences > Network.
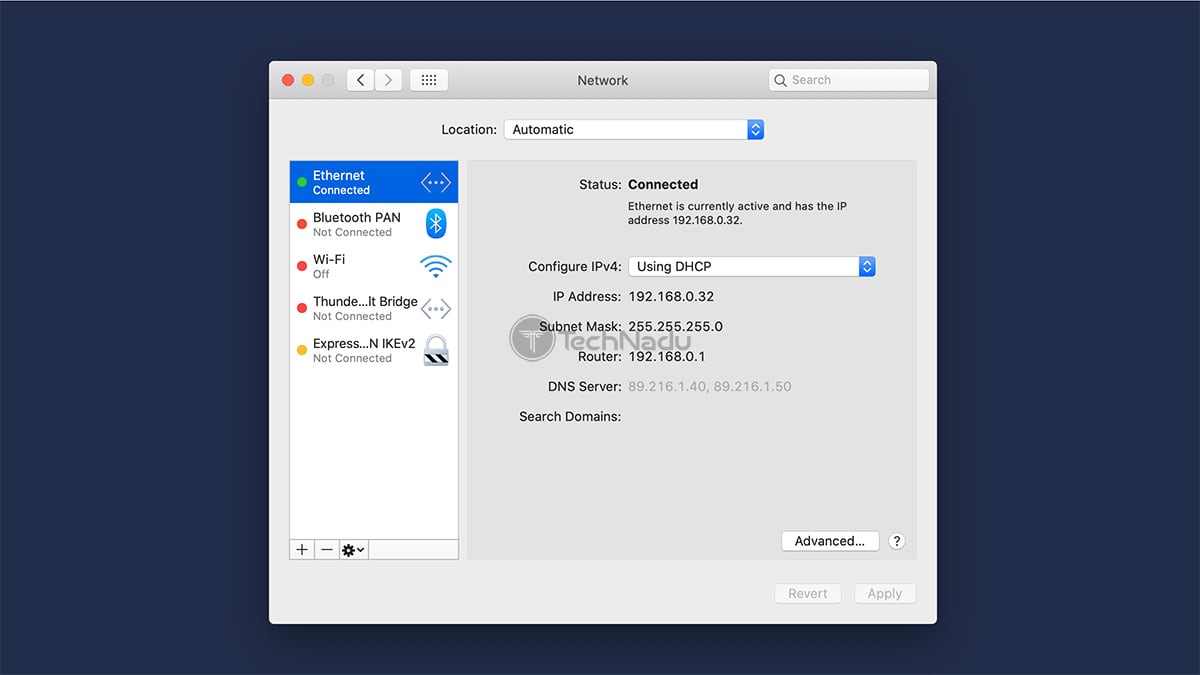
2. Choose the network you use (via the left-placed sidebar).
3. Click "Advanced" in the bottom-right corner.
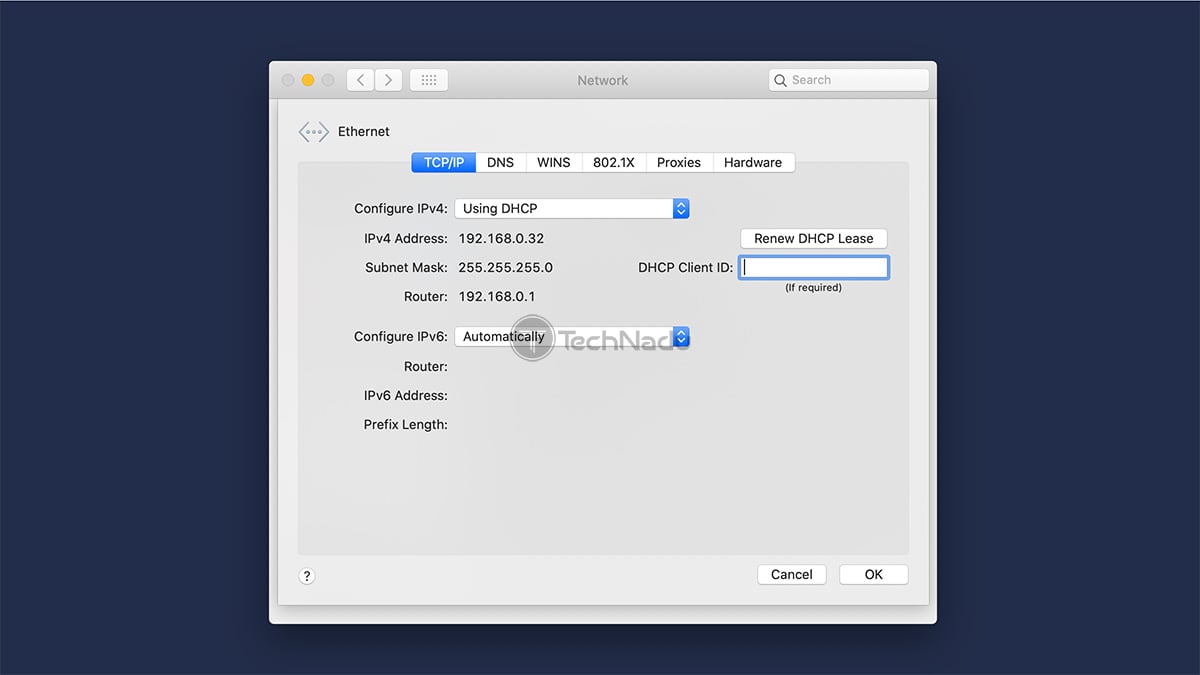
4. Select the "TCP/IP" tab
5. You'll now see your router's IP address, displayed as "Router: (a string of numbers)."
How to Find a Router's Username and Password?
Once you find the correct IP, input it in your Web browser (just like when you're browsing the Web), and you should be asked for your username and password.
Once again, this information depends on your router's model, so here are the most common combinations of usernames and passwords:
If none of the above-mentioned suggestions work, you should turn to Google. Search for your router's default username and password while using your router's exact model name.
Step #5: Obtain OVPN Files From Your VPN Service
You have one more step before you start to install a VPN on your router. You need to gather certain information from your VPN, along with OVPN files of the servers you plan on using.
Once again, we'll use ExpressVPN to show you how this is done, especially since this VPN has perhaps the most polished user account dashboard.
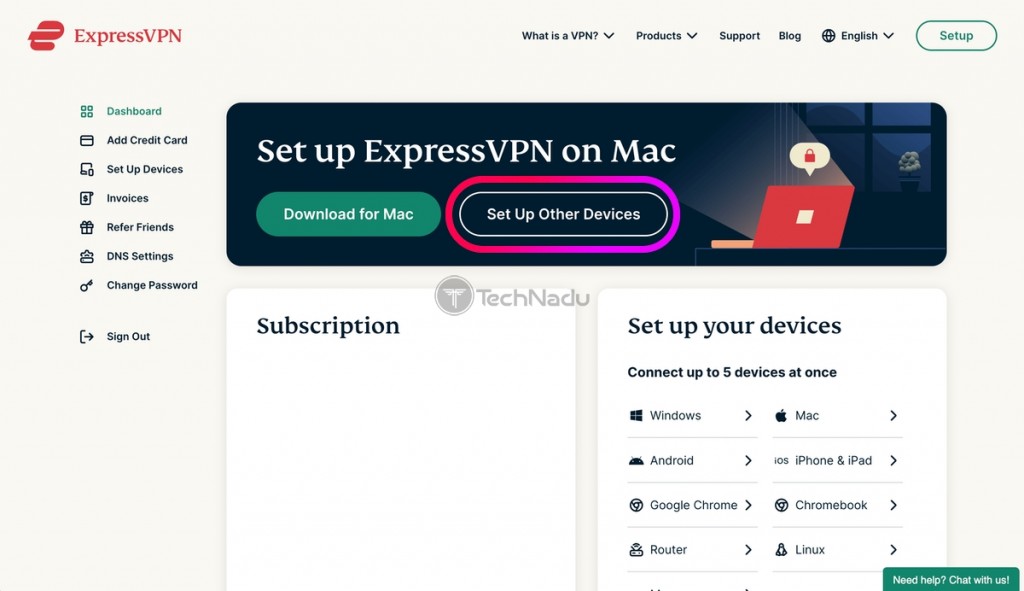
1. Visit ExpressVPN's website and click "My Account."
2. Provide your credentials and access your ExpressVPN account dashboard.
3. Click "Set Up Other Devices."

4. Pick "Manual Configuration" on the left and "OpenVPN" on the right.
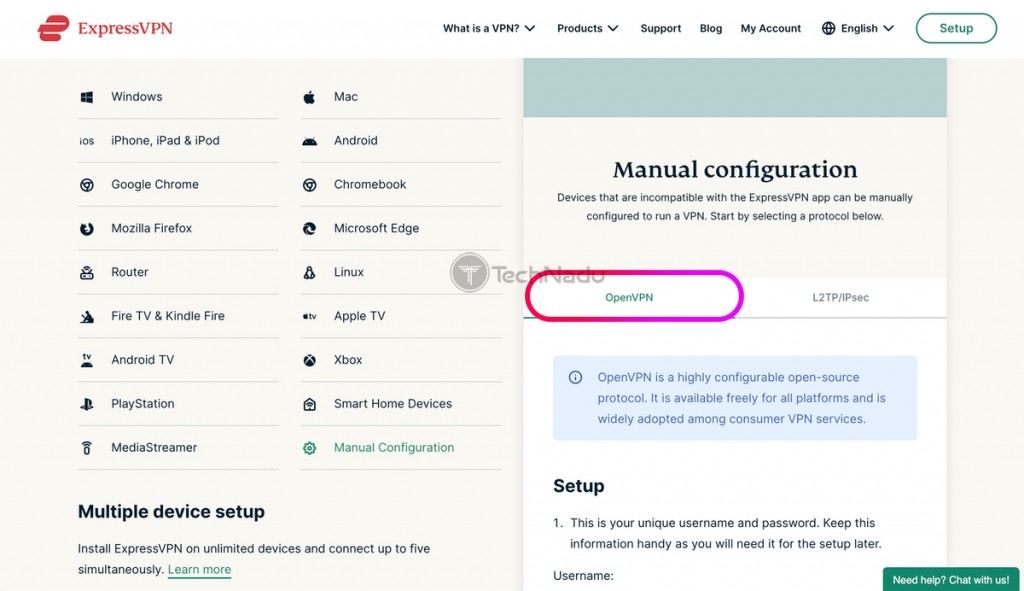
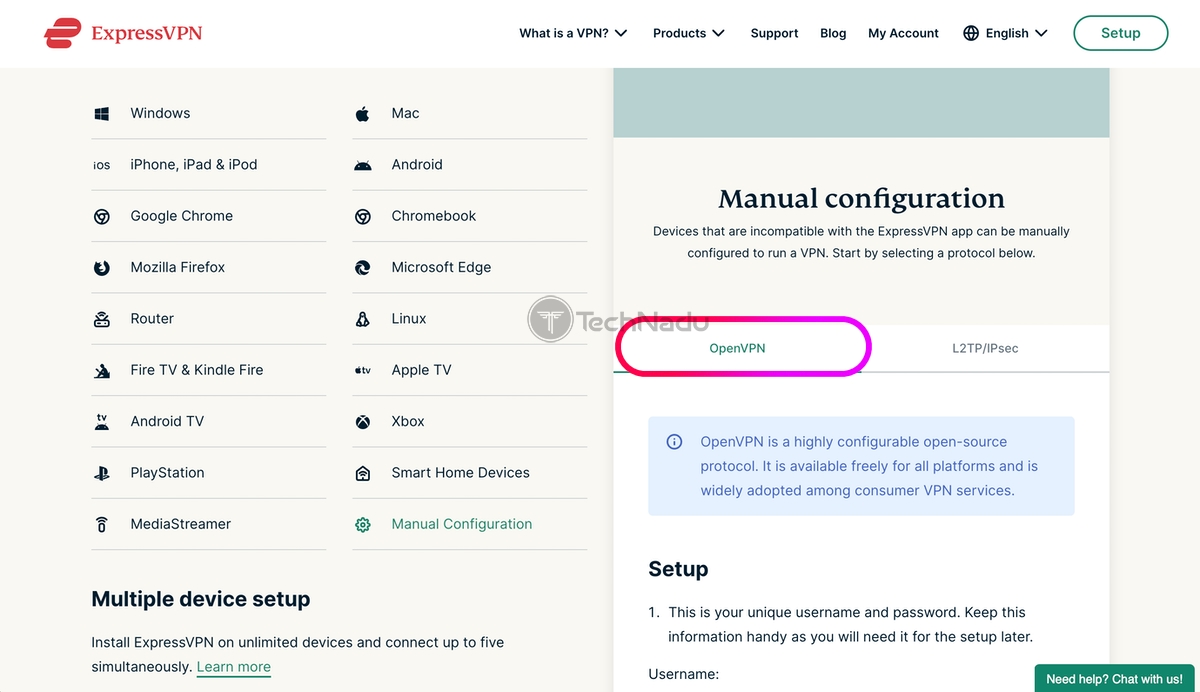
5. Make a note of your OpenVPN username and password.
6. Scroll down, pick a VPN server, and then download its OVPN files to your computer.


So, you’ve downloaded the required OVPN files, and you can now see your OpenVPN username and password. Make sure to either copy your credentials somewhere or simply leave this Web page open – as you’ll need this information soon enough.
Step #6: Install a VPN on Your Router (via OpenVPN)
As mentioned above, many of you are going to use DD-WRT - the most powerful type of custom firmware for a large number of routers.
So, what follows is our guide to installing a VPN on a DD-WRT router:
- Log in to your router (using its IP, username, and password) to reveal its settings.
- Select "Services" from the main menu and click on the "VPN" sub-tab.
- Scroll down until you see the "OpenVPN Client" segment.
- Enable your router's OpenVPN client by clicking the "Enable" box.
You should be looking at a long list of options and fields. Since there are two types of DD-WRT (with and without UPA - User Pass Authentication), we need to split this guide into two routes.
Install VPN on DD-WRT Versions With User Pass Authentication
Newer DD-WRT versions come with user pass authentication, so we'll explain what to expect from this interface. Here's how to set up the options you'll see on your screen.
- Server IP/Name: This depends on the server you've chosen previously. Right-click on the OVPN file you've downloaded and open it in a text editor. Look at the top and copy the text you'll see next to "remote."

- Port: Again, look for the port number in the OVPN file you've downloaded. This is a string of numbers on the right side of the server address.
- Tunnel Device: Select "TUN."
- Tunnel Protocol: Select "UDP."
- Encryption Cipher: Needs to be set to "AES-256 CBC."
- Hash Algorithm: Set to "SHA512."
- User Pass Authentication: Enable this option.
- Username: Retrieve Your OpenVPN username from your ExpressVPN dashboard.
- Password: Retrieve Your OpenVPN password from your ExpressVPN dashboard.
- Advanced Options: Select "Enable."
- TLS Cipher: Set to "None."
- L2O Compression: Select "Adaptive."
- NAT: Feel free to enable this option.
- Tunnel UDP Fragment: Type in "1450."
- Tunnel UDP MSS-Fix: Enable this option.
- nsCertType Verification: Make sure this box is checked.
You can now proceed to configure your ExpressVPN keys and certificates.
Install VPN on DD-WRT Versions Without User Pass Authentication
Older versions of DD-WRT come with a slightly different set of options. So, if you can't update your DD-WRT to a more recent version, make sure that everything is set as described below.
- Search for the "Additional Config" text box. You need to enter the following command there: "auth-user-pass /tmp/auth.txt"
- Server IP/Name: Open the OVPN file you've downloaded (in a text editor). You'll find the server name next to "remote."
- Port: Once again, you'll find this information in the OVPN file you've downloaded, on the right side of your server address (this is a string of numbers, by the way).
- Tunnel Device: Set to "TUN."
- Tunnel Protocol: Set to "UDP."
- Encryption Cipher: Select "AES-256 CBC."
- Hash Algorithm: Set to "SHA512."
- User Pass Authentication: Enable this option.
- Username: Retrieve your OpenVPN username from your ExpressVPN dashboard.
- Password: Retrieve your OpenVPN password from your ExpressVPN dashboard.
- Advanced Options: Feel free to enable this option.
- TLS Cipher: Set to "None."
- L2O Compression: You can go with "Adaptive."
- NAT: Enable this option.
- Tunnel UDP Fragment: Needs to be set to "1450."
- Tunnel UDP MSS-Fix: Set to "Enable."
- nsCertType Verification: Make sure to check this box.
Once done, proceed to configure your keys and certificates.
Configure the Required Keys and Certificates
Don't worry, we're nearly done. The final step requires some copying and pasting - but ensure you're paying attention to what needs to be done.
First, look for the "Additional Config" field, where you'll need to enter a set of commands. We'll show them as bullet points, but feel free to enter them one by one, simply by adding a new row.
- persist-key
- persist-tun
- fragment 1300
- msfix 1450
- keysize 256
Then, you'll be asked for a "TLS Auth" key. Open the OVPN file you've downloaded from ExpressVPN's website, and you can use any text editor for this purpose.
You need to copy the text found between the <tls-auth> and </tls-auth> tags. Check out the following screenshot, and you'll see what exactly needs to be copied.
For the "CA Cert" field, the process is similar to the previous step. However, this time around, you need to copy the text found between the <ca> and </ca> tags.
For the "Public Client Cert" key, copy the text between the <cert> and </cert>. And for the "Private Client Key," copy everything between the <key> and </key> tags.
You're now free to click "Save" and then click "Apply Settings." This will instruct your DD-WRT router to apply the newly added VPN settings, and this connection should be active the next time you restart your router.
If you use DD-WRT without User Pass Authentication, go to Administration > Commands and enter the following commands. Remember that you need to use your OpenVPN username and password here.
- echo USERNAMEHERE > /tmp/auth.txt
- echo PASSWORDHERE >> /tmp/auth.txt
Finally, you can now go to Administration > Management, and this is where you can reboot your router. Wait until your router boots up and then connect to the newly added VPN server.
Lastly, you can go to Status > OpenVPN to check if the VPN connection is active. That's it!
Final Thoughts
As you can see, installing a VPN on a router isn't the simplest process. That said, make sure to pick a reliable and trustworthy VPN that offers full support for manual connections on routers, such as ExpressVPN (which supports many alternative installation methods as well).
If you decide to go with ExpressVPN, we recommend checking our central guide on how to install ExpressVPN on a router, as you might be able to use its custom firmware as well. That article will also make it easier for you to understand the requirements from the get-go.
Lastly, don't forget that you can also use VPN clients across your devices. That can help you avoid installing a VPN on a router. To learn more, here's how to set up a VPN (we've covered more than 60 devices in that guide).
You've reached the end of our guide explaining how to install a VPN on a router. If you have any questions, know that we're always happy to help. Feel free to post a comment below, and we'll respond as soon as possible!
Related