When you purchase through links on our site, we may earn an affiliate commission. Here’s how it works.
How to Set Up and Use ExpressVPN on DD-WRT Router
Last updated June 4, 2024

To set up ExpressVPN on a DD-WRT router, you need to download the VPN's OpenVPN files from your ExpressVPN account dashboard. Then, you'll use those files to create a connection from your router to a specific VPN server location.
Note that ExpressVPN should work on any DD-WRT router as long as it has 8MB of flash. It's also recommended that you use the latest DD-WRT firmware version available, which will allow you to create more secure and stable VPN connections.
In this article, we'll teach you how to set up ExpressVPN on your DD-WRT router with screenshots and detailed steps.
How to Set Up ExpressVPN on DD-WRT Router
The process is quite simple and straightforward to set up ExpressVPN on your DD-WRT by uploading your chosen server's OpenVPN file to the router's OpenVPN settings. Let's look at the steps involved.
1. Sign up for ExpressVPN on its official website using any Web browser.
2. Then, click 'My Account' in the main menu of ExpressVPN's site.
3. Access your dashboard using your email and password and provide a verification code if needed.

4. Select 'Set Up Other Devices' when you access your ExpressVPN dashboard.
5. Navigate to 'Manual Configuration' on the left using the list of support devices.
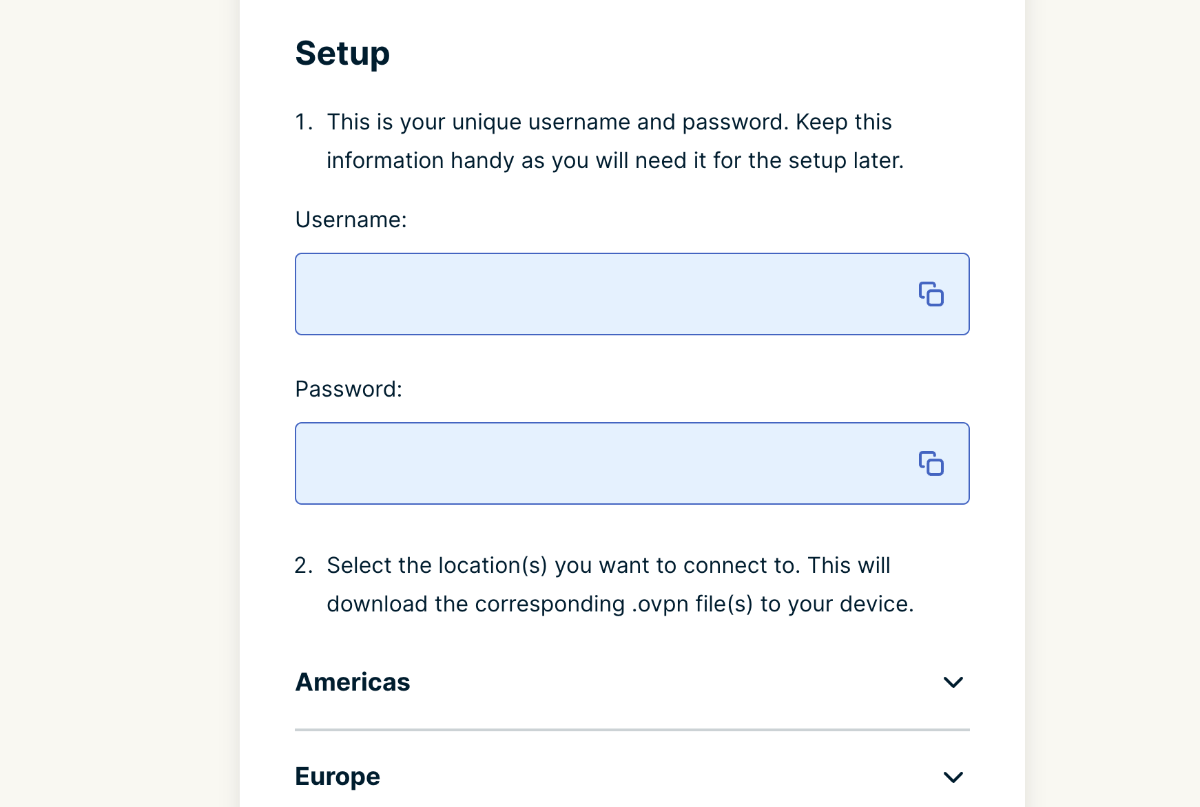
6. Make a note of your OpenVPN username and password.
7. Also, pick a VPN server location just beneath and download its OVPN file to your computer.

8. Access your DD-WRT router's admin panel by entering the '192.168.0.1' in the browser's address bar.
9. You will be asked for your router’s username and password (both should be 'admin').
10. Select the 'Services' tab once you open your router's admin, and then select 'VPN.'
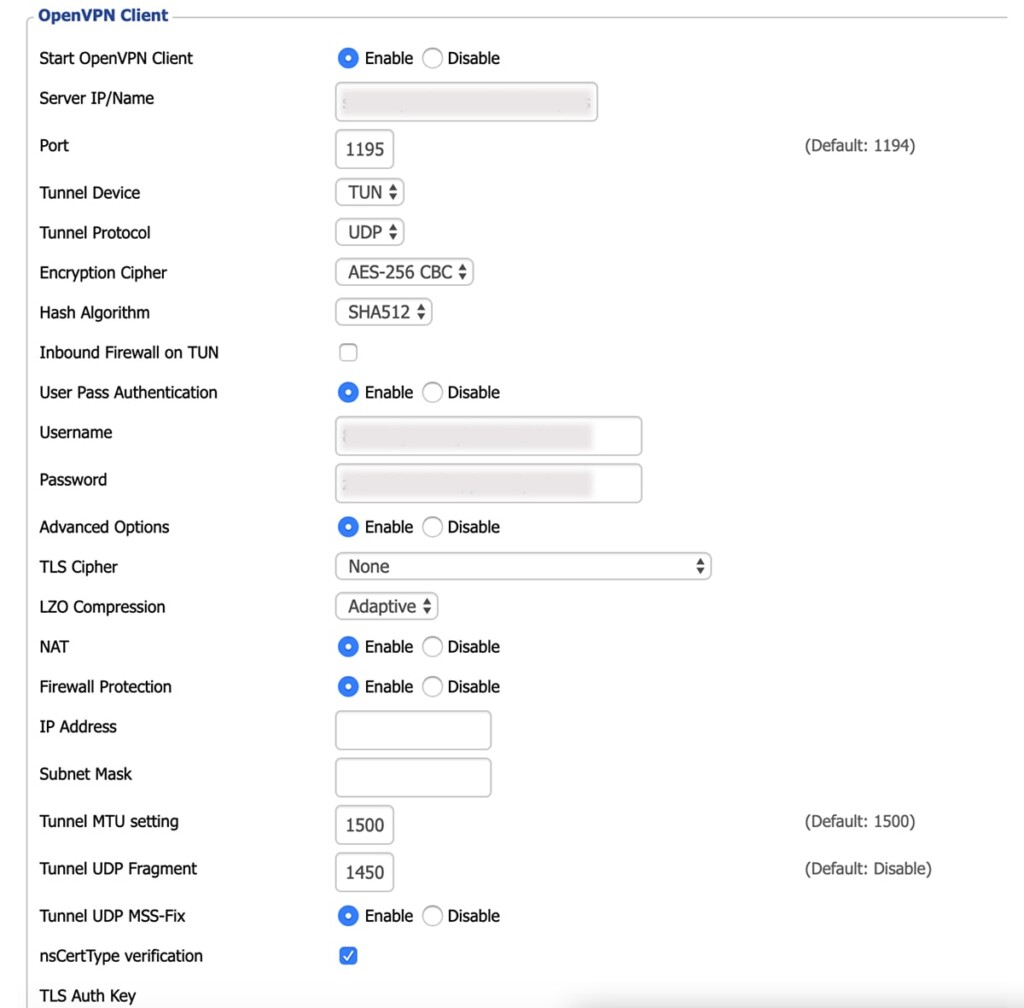
11. Under 'OpenVPN Client,' enable the 'Start OpenVPN Client' option.
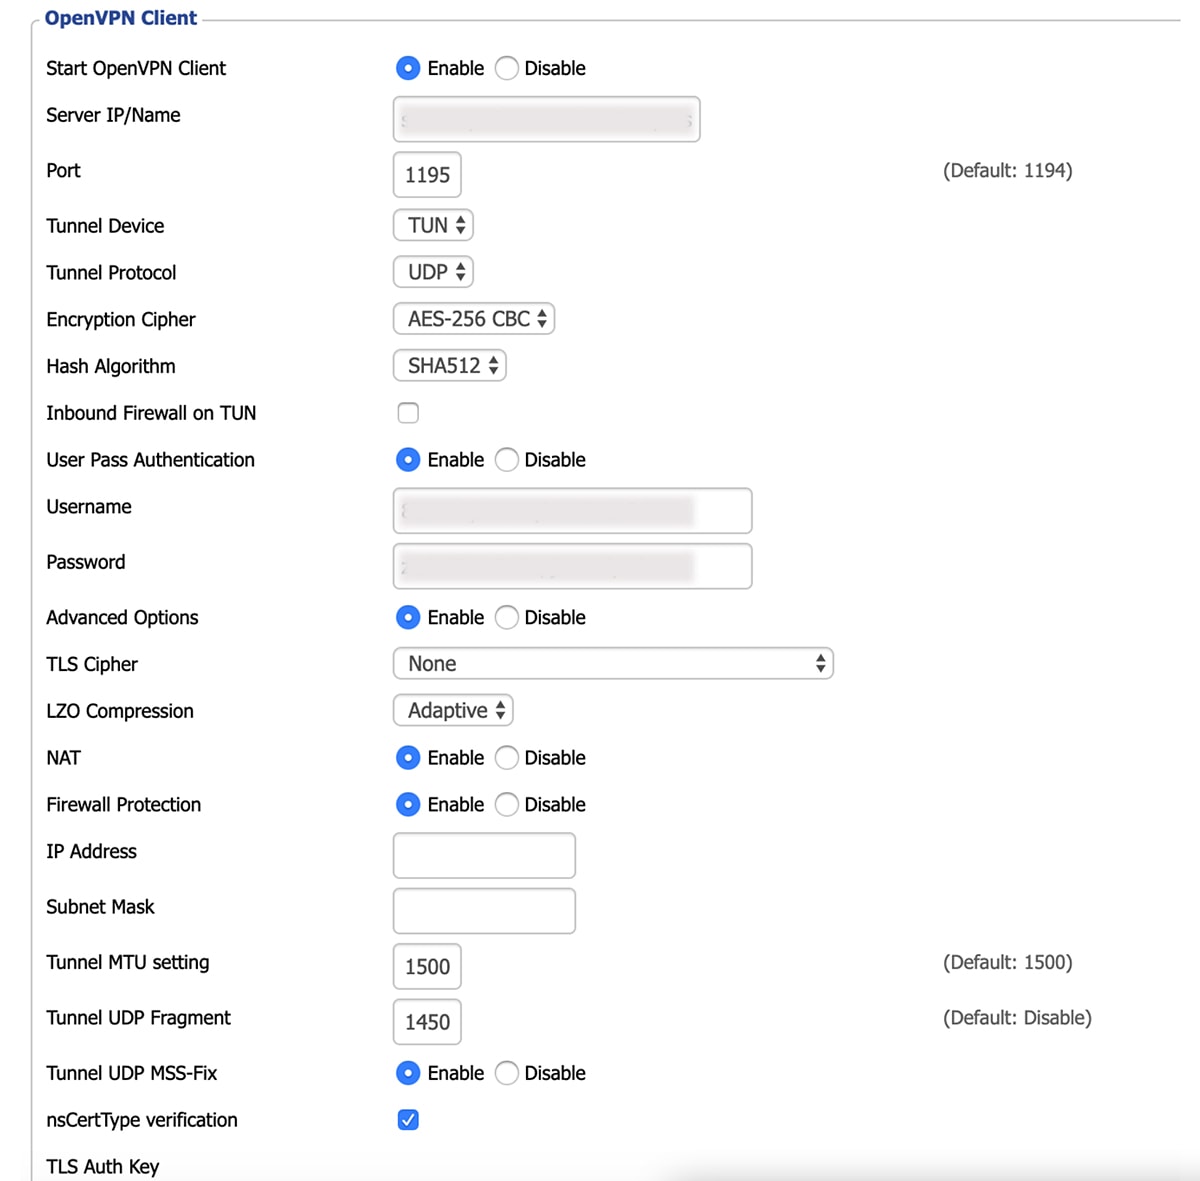
12. Open the OpenVPN configuration panel and fill out the configuration fields:
- Server IP/Name: Open the OVPN file you’ve downloaded to your computer via a text editor (such as Notepad on Windows or TextEdit on Mac). You’ll find your server name right next to the word 'remote.' It should look like this – 'usa-newyork-serveraddress.com.'
- Port: You’ll find your server’s port number right next to the server's IP address.
- Tunnel Device: Select 'TUN.'
- Tunnel Protocol: Select 'UDP.'
- Encryption Cipher: Make sure to select 'AES-256 CBC.'
- Hash Algorithm: Make sure to select 'SHA512.'
- User Pass Authentication: Feel free to enable this option.
- Username: Copy your OpenVPN username from ExpressVPN’s online dashboard.
- Password: Copy your password from your online dashboard.
- Advanced Options: Enable this option.
- TLS Cipher: Select 'None.'
- L2O Compression: Pick 'Adaptive.'
- NAT: Enable this option.
- Tunnel UDP Fragment: Type in '1450' here.
- Tunnel USD MSS-Fix: Enable this option.
- nsCertType Verification: Enable this option.
13. Open the OpenVPN configuration panel, look for the 'Additional Config' field, and type in – auth-user-pass /tmp/auth.txt.
14. Fill out all the fields in front of you based on the following.
- Server IP/Name: Open the OVPN file in a text editor (right-click on its name and open it in Notepad for Windows or TextEdit for Mac). Your chosen server's address will be right after the word 'remote.' It should have the following form: usa-newyork-serveraddress.com.
- Port: This should be a 4-digit code that you find right next to the server’s address (as talked about just above, in the OVPN file – once you open it in a text editor).
- Tunnel Device: Go with 'TUN.'
- Tunnel Protocol: Go with 'UDP.'
- Encryption Cipher: Make sure to select 'AES-256 CBC' here.
- Hash Algorithm: Go with 'SHA512.'
- User Pass Authentication: Select 'Enable.'
- Username: Copy your OpenVPN username from your online dashboard.
- Password: Copy your OpenVPN password from your online dashboard.
- Advanced Options: Enable this setting to reveal more options below.
- TLS Cipher: Pick 'None.'
- L2O Compression: Pick 'Adaptive.'
- NAT: Enable this option.
- Tunnel UDP Fragment: Go with '1450.'
- Tunnel UDP MSS- Fix: Enable this option.
- nCertType Verification: Enable this option by checking the box.
15. Look for the 'Additional Config' field, and type in what you see in the image below.


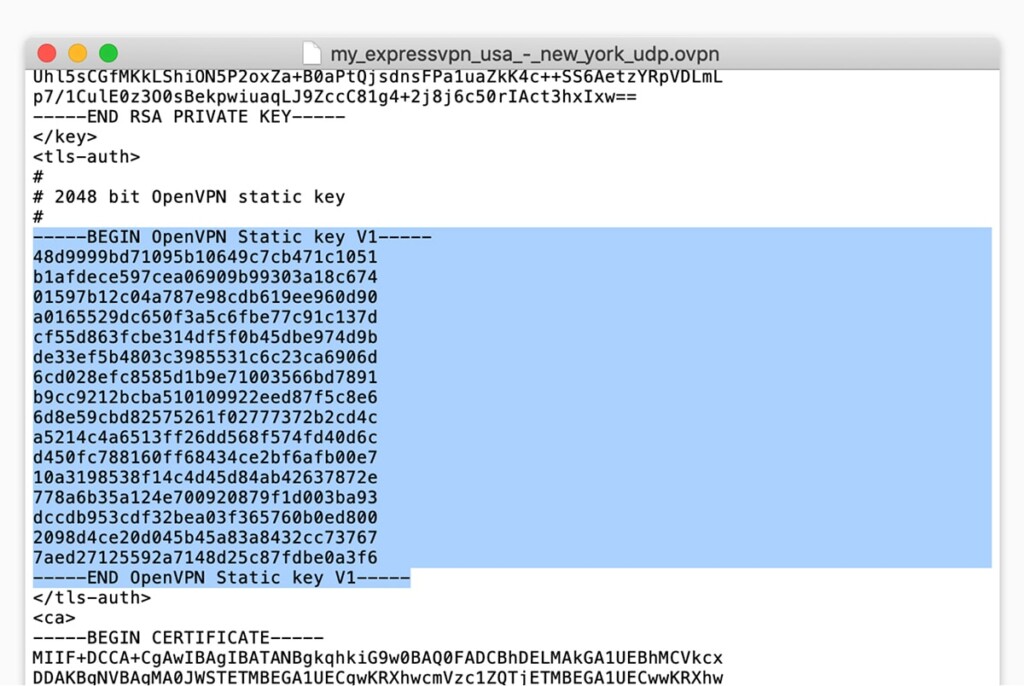
16. Make sure to have the OVPN file opened in the background in a text editor.
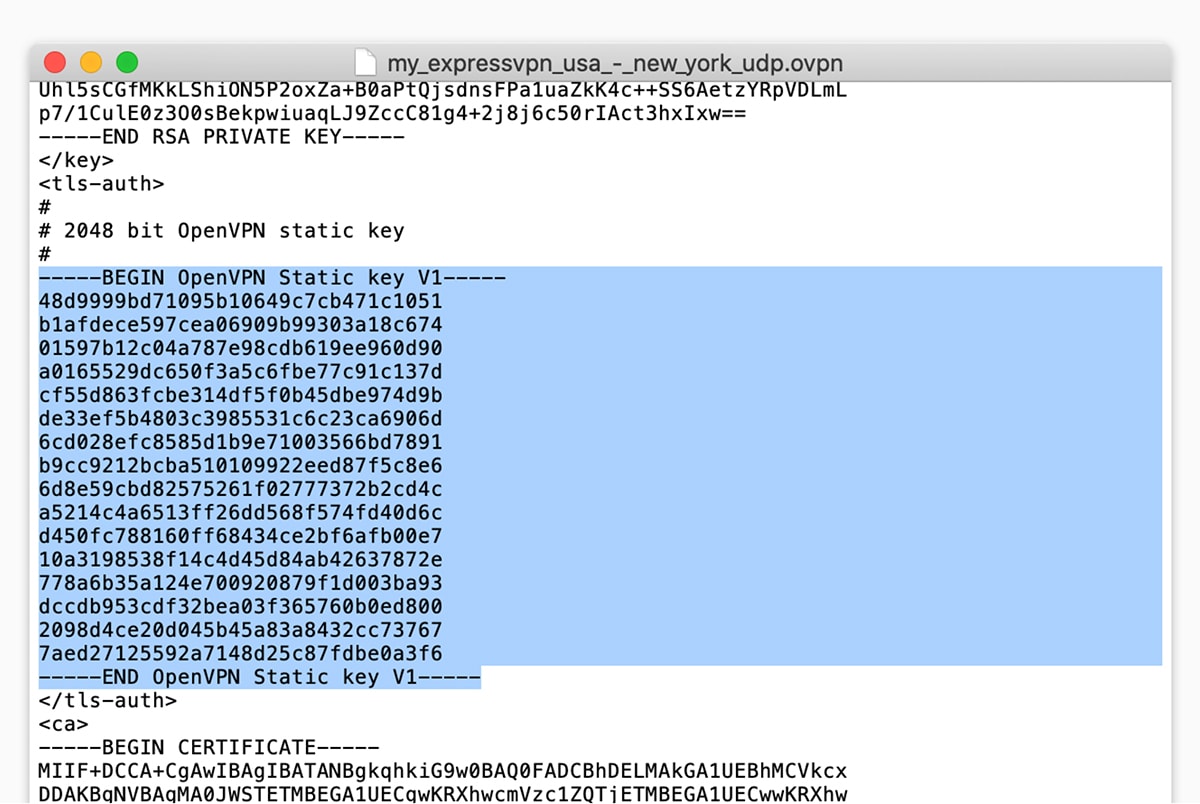
17. Then, in the 'TLS Auth Key' field, copy everything between <tls-auth> and </tls-auth>.
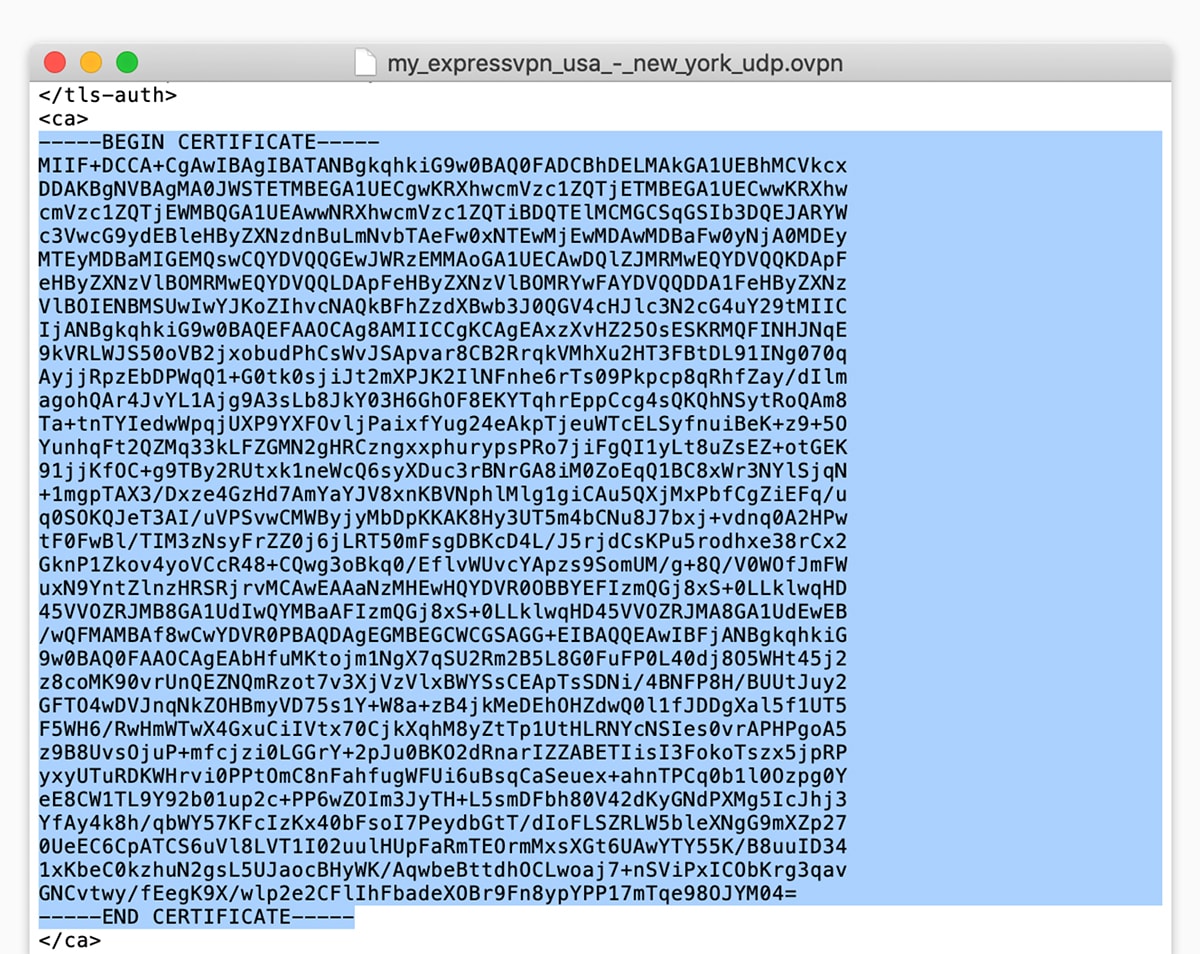
18. For the 'CA Cert' field, copy everything between <ca> and </ca>.

19. For the 'Public Client Cert,' copy everything between <cert> and </cert>.
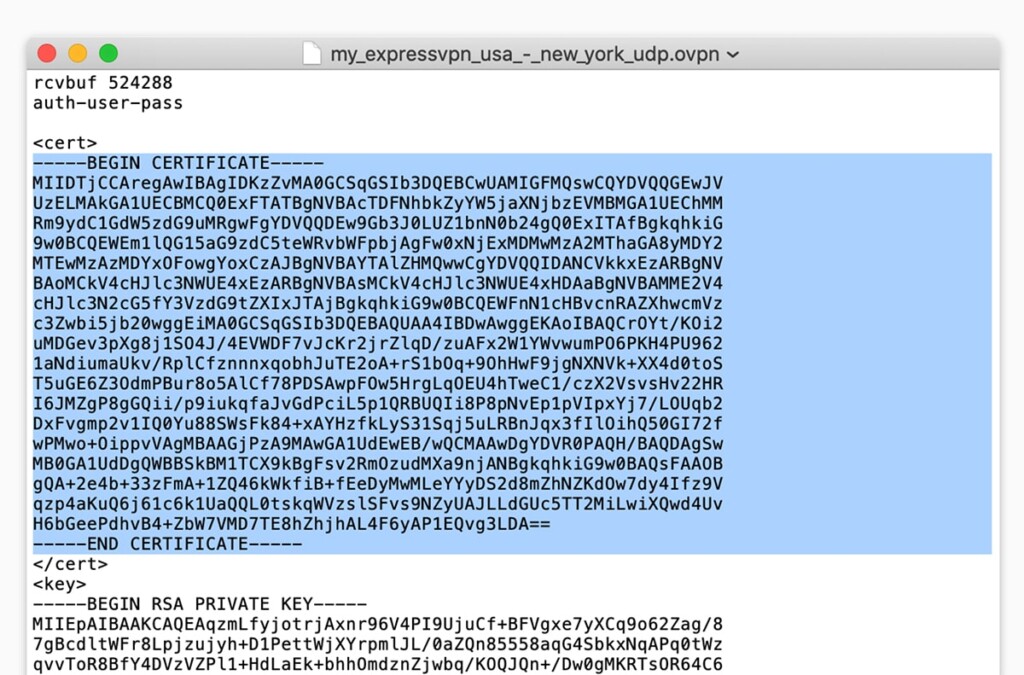

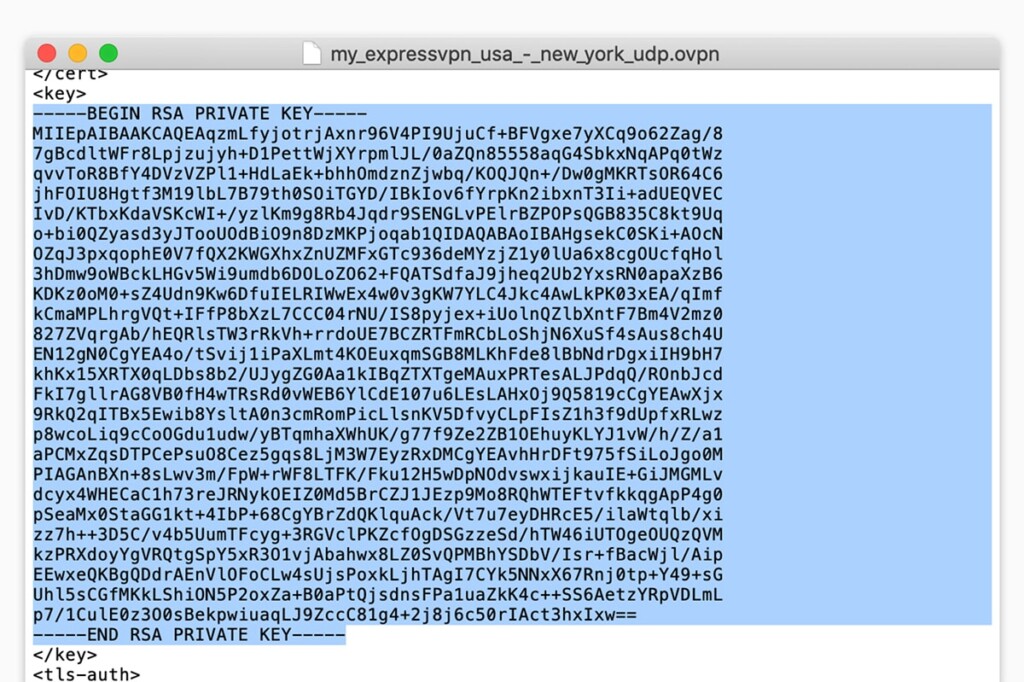
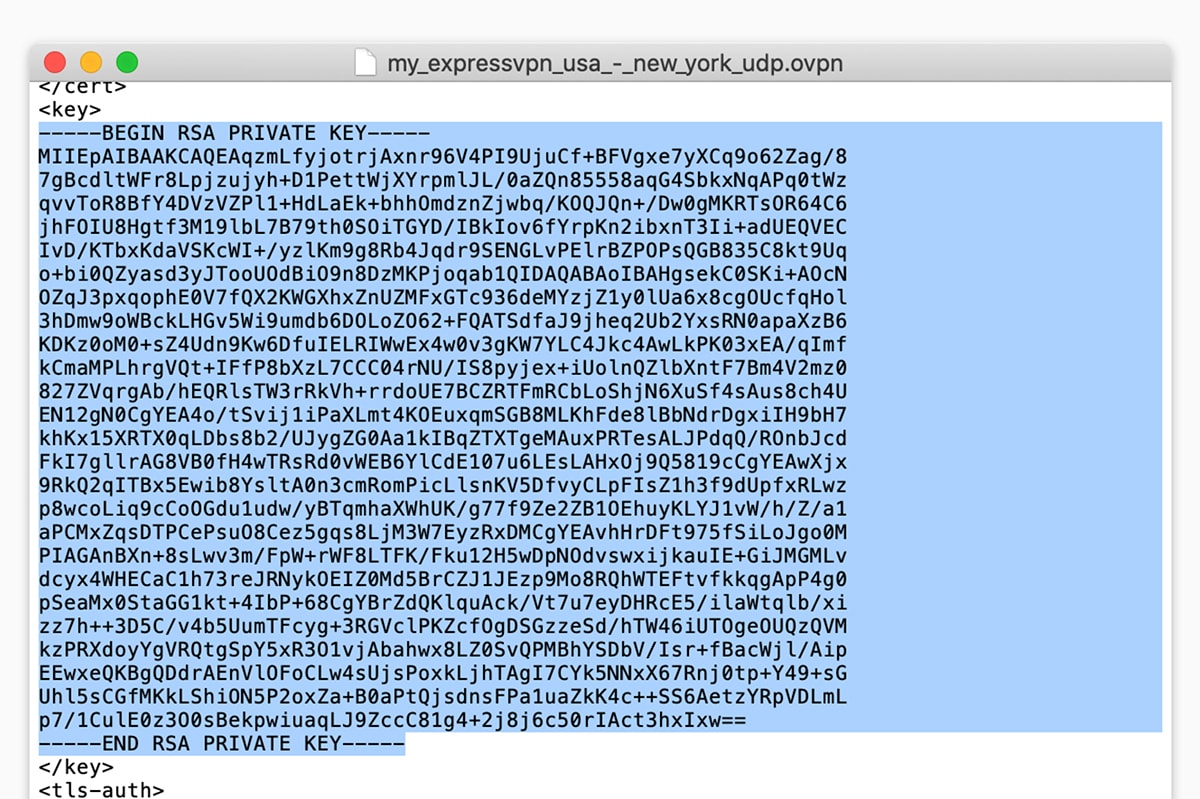
20. And for 'Private Client Key,' copy everything between <key> and </key>.
21. Click 'Save' and then make sure to click 'Apply Settings.'
22. Click on 'Save Startup' and go to Administration > Management > Reboot Router.
23. Wait for your DD-WRT router to reboot and establish the newly created VPN connection.
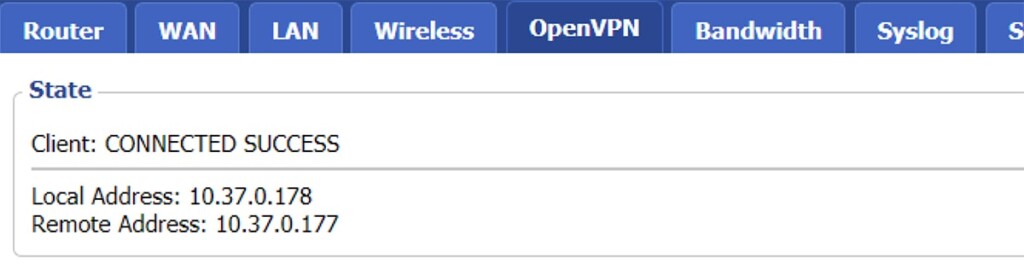
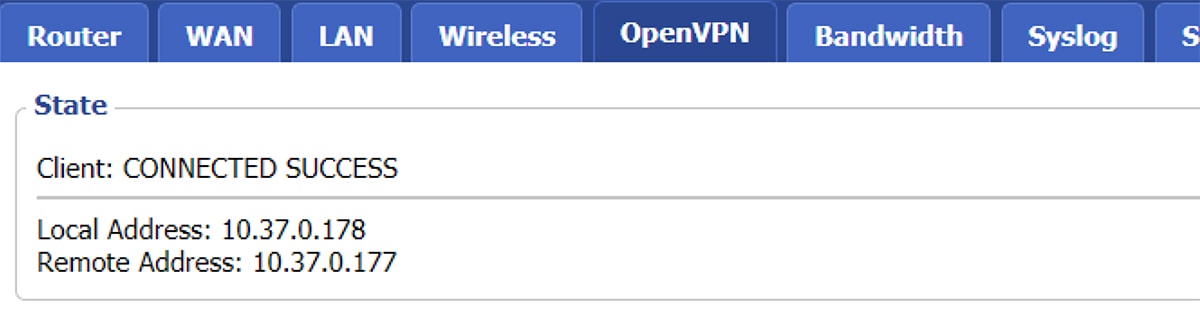
To check if everything works correctly, make sure to navigate to Status > OpenVPN. In the 'State' field, there should be a note that reads 'Connected Success' – which means your Web connection is now encrypted, and your data runs through your chosen ExpressVPN server.
Final Thoughts
That's it - you've now installed ExpressVPN on your DD-WRT router, which will encrypt and protect all your incoming and outgoing traffic. If you ever wish to use a different server, you'll have to reconfigure it by repeating the steps in this guide but using a different server's OpenVPN configuration file.
Of course, keep in mind that you may want to use ExpressVPN on the go when you're away from your home router. In such cases, you can rely on its native app for your device. To learn more, here's our guide on how to set up and install ExpressVPN - covering over 60 different devices and platforms.
That would be all on how to set up and use ExpressVPN on DD-WRT. If you have any questions, make sure to post a comment just below. Finally – thank you for reading!
Related