When you purchase through links on our site, we may earn an affiliate commission. Here’s how it works.
How to Set Up a VPN on a Netgear Router in 2025
To set up a VPN on a Netgear router, you need a router that supports the OpenVPN protocol. However, you'll have a challenging time setting up a commercial VPN even in that case, due to the way Netgear handles the OpenVPN protocol. That's why most VPN services require you to flash your Netgear router with DD-WRT.
DD-WRT is a custom type of firmware for routers that gives you unlimited customization options. It also supports OpenVPN in accordance with the requirements of most commercial VPN services. So, before you begin, check if your Netgear router is compatible with DD-WRT.
In this guide, we'll show you how to set up a VPN on a Netgear router using DD-WRT. We'll also give you a VPN recommendation along the way, as well as answer some FAQs.
How to Set Up a VPN on a Netgear Router
Before you can set up a VPN connection on your router, you need to flash it with DD-WRT. Then, you'll use your VPN's OpenVPN files to create a new connection. Use the following steps:
1. Subscribe to a VPN with full DD-WRT support (we recommend NordVPN).
2. Launch your favorite Web browser, and then access your DD-WRT dashboard.
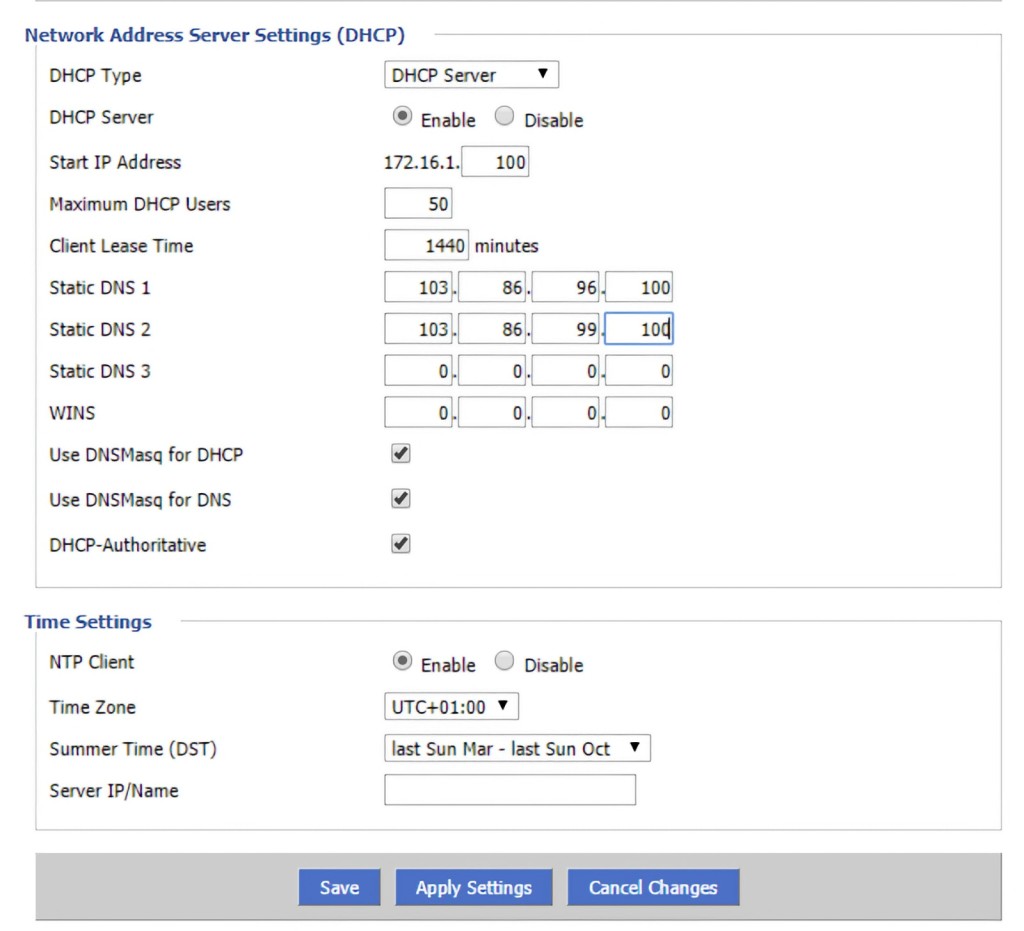
3. Go to Setup > Basic Setup > Network Address Server Settings (DHCP), copy the information found below, and click Save > Apply Settings.
- Static DNS 1: 103.86.96.100
- Static DNS 2: 103.86.99.100
- Static DNS 3: 0.0.0.0
- Use DNSMasq for DHCP: Checked
- Use DNSMasq for DNS: Checked
- DHCP-Authoritative: Checked
4. Go to Setup > IPv6 and use the button next to 'Disable,' followed by Save > Apply Settings.
5. Go to Service > VPN > OpenVPN Client > Start OpenVPN Client > Enable. Then, use the following information to fill out the corresponding fields.
- Server IP/Name: Use this page on NordVPN's site, pick a VPN server, and copy the server's address (in the following form: us936.nordvpn.com). Also, click 'Show Available Protocol' and download the server's OpenVPN files.
- Port: 1194 for UDP / 443 for TCP
- Tunnel Device: TUN
- Tunnel Protocol: UDP (or TCP)
- Encryption Cipher: AES-256-CBC
- Hash Algorithm: SHA-512
- User Pass Authentication: Enable
- Username / Password: You can find these on NordVPN's site. Pick 'Log In' on NordVPN's home page and go to NordVPN > Set Up NordVPN Manually.
- First Data Cipher: Not set
- Second Data Cipher: Not set
- Third Data Cipher: Not set
6. Next to 'Advanced Options,' click on 'Enable' and use the following information:
- TLS Cipher: None
- LZO Compression: Disable
- NAT: Enable
7. Copy the following code into the 'Additional Config' field:
remote-cert-tls server
remote-random
nobind
tun-mtu 1500
tun-mtu-extra 32
mssfix 1450
persist-key
persist-tun
ping-timer-rem
reneg-sec 0
#log /tmp/vpn.log
#Delete `#` in the line below if your router does not have credentials fields
#auth-user-pass /tmp/openvpncl/user.conf
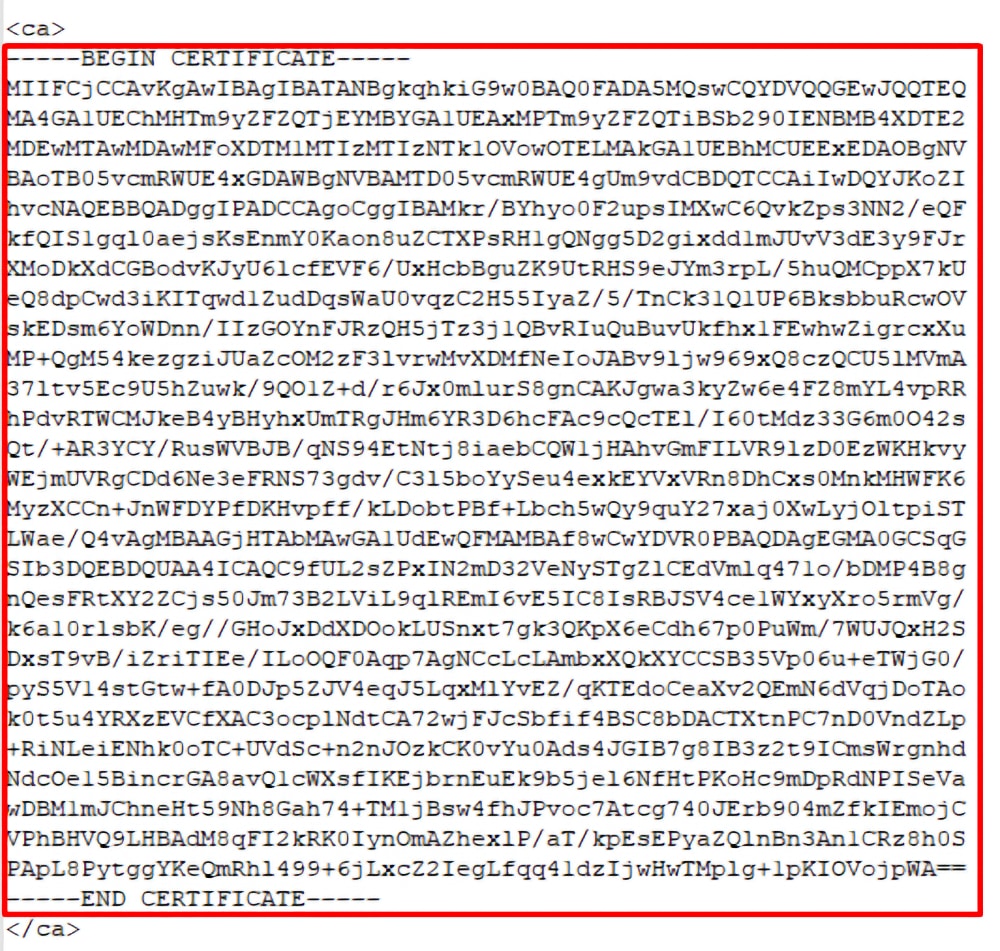
8. Locate the OpenVPN files you downloaded moments ago. Open the OVPN config file using any text editor and copy the <ca> part to the 'CA Cert' field.
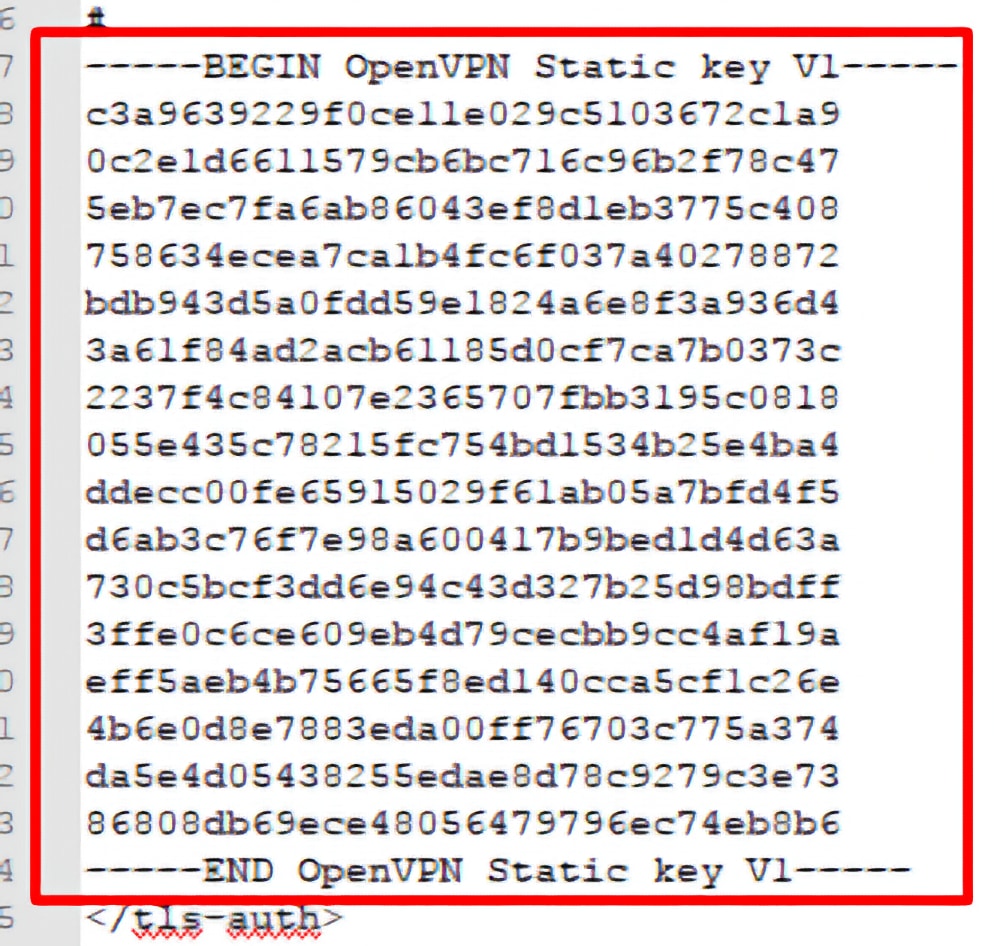
9. Scroll down and copy the <ts-auth> part into the 'TLS Auth Key' field and save.
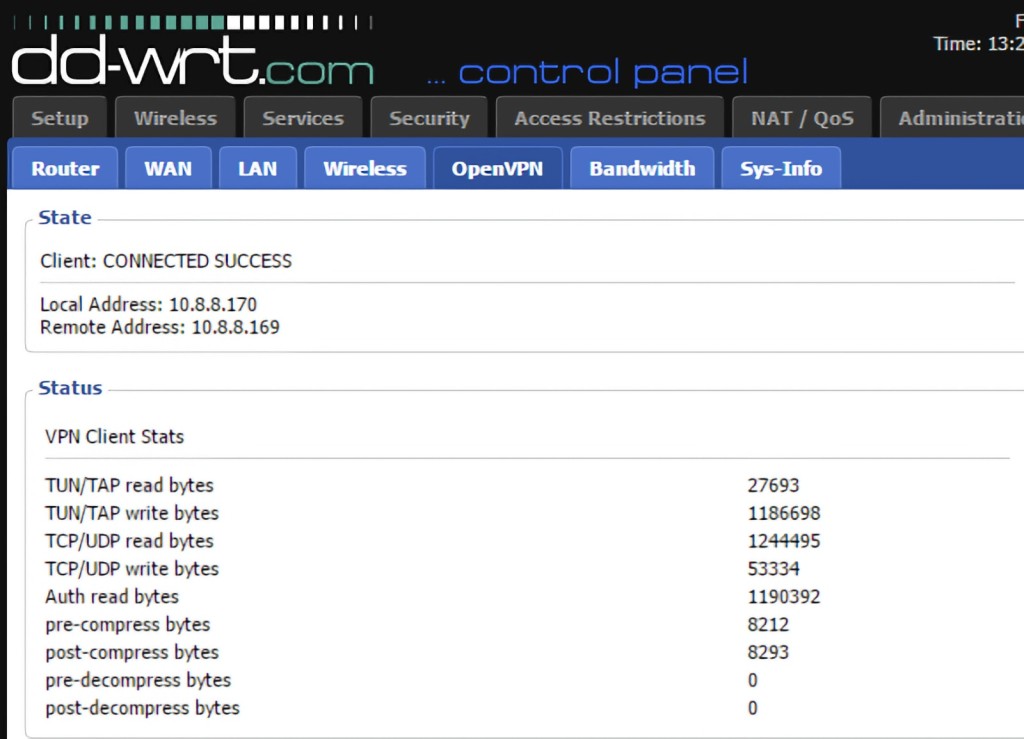
10. Go back to Status > OpenVPN. In the 'State' field, you should see a note saying 'Client: Connected Success,' which means your VPN connection is now online.
11. You can also create a kill switch by going to Administration > Commands. Copy the code from below, save it, and then go to Administration > Management > Reboot Router.
WAN_IF=`nvram get wan_iface`
iptables -I FORWARD -i br0 -o $WAN_IF -j REJECT --reject-with icmp-host-prohibited
iptables -I FORWARD -i br0 -p tcp -o $WAN_IF -j REJECT --reject-with tcp-reset
iptables -I FORWARD -i br0 -p udp -o $WAN_IF -j REJECT --reject-with udp-reset
Final Thoughts
The only bulletproof way to set up a VPN on a Netgear router is by relying on DD-WRT. That said, the main prerequisite is to find a VPN that supports manual OpenVPN connections. You'll then receive the needed OpenVPN files, whose data you can easily use through DD-WRT.
Not every VPN service is the same in that regard, so we'll remind you that our recommendation is NordVPN, which pairs well with Netgear routers. Also, if you'd like to extend your VPN protection to other devices, check our central guide on how to set up a VPN.
You now know how to set up a VPN on your Netgear router. If you have any questions, let us know via the comments section below. Thank you for reading!

