When you purchase through links on our site, we may earn an affiliate commission. Here’s how it works.
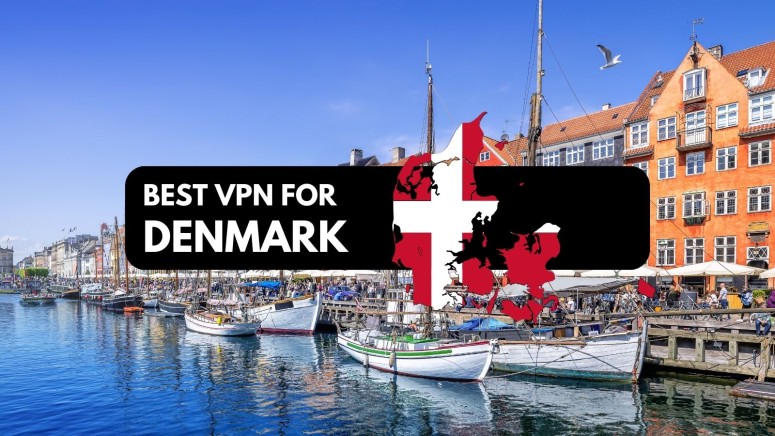
3 Best VPNs for Denmark in 2025
Our experts have reviewed 53 VPN providers, which were put through extensive rounds of testing. To learn more about that process, here’s how we review VPNs, where we explain our criteria and our policy of being fully transparent.
While Danish citizens enjoy great Internet freedom, they still face issues accessing global content. This is because some websites and streaming services are unavailable due to geo-restrictions. People often also want to watch streaming libraries from different countries, which requires different IP addresses.
Moreover, people in Denmark want to improve their privacy and security to safeguard their online activities and personal data. With the help of the best VPN for Denmark, you can solve all these problems. A VPN will allow you to access geo-blocked content, enhance your security, and unlock titles from international libraries of your favorite streamers.
In this post, we’ll rank the 3 best Denmark VPNs and help you get a Denmark IP address. Furthermore, we’ll explain why it is important to use a VPN and answer a few important questions.
Best Denmark VPNs - Our Shortlist
- ExpressVPN – Our #1-Rated Best VPN for Denmark in 2025
- NordVPN – Best Denmark VPN for Strong Security Protocols
- CyberGhost VPN – Top VPN with Streaming-Optimized Servers
How to Get a Danish IP Address
To get a Danish IP address, you must first get a subscription for a VPN provider that has servers in Denmark. The following steps will make things easy for you:
- Subscribe to a VPN that works in Denmark (we recommend ExpressVPN).
- Download and install the VPN app on your device.
- Open the VPN app and log in using your account credentials.
- Connect to a VPN server in Denmark.
- That’s it! Now, you can stream and browse protected by your Denmark IP address.
The Best VPNs for Denmark in 2025
To find the best VPN for Denmark, consider the factors in our detailed guide for the best VPNs with a large number of servers. First, ensure that the VPN has a wide global server network with servers in Denmark. It should also help unblock websites inside and outside the country to stream your favorite content, including Netflix, Disney+, DRTV, and TV 2.
The provider you choose must offer obfuscated servers and a kill switch to improve security. Plus, look for a VPN with an iron-clad no-logs policy, advanced AES-256 bit encryption, and high-end VPN protocols like OpenVPN, WireGuard, and IKEv2. Super-fast speeds and reliable overall performance are both very important, too.
A good VPN should allow multiple simultaneous connections and support many devices including smartphones, tablets, laptops, routers, and smart TVs. Lastly, find a VPN that provides excellent customer support via 24/7 live chat and emails, along with a solid money-back guarantee.
According to the factors above, we have ranked and reviewed the 3 best Denmark VPNs:
1. ExpressVPN – Our #1-Rated Best VPN for Denmark in 2025
ExpressVPN is the best VPN for Denmark as it features 3,000+ servers in 94 countries with numerous servers in Denmark. It allows you to unblock websites inside and outside Denmark, so that you can watch your favorite streaming content on Netflix, Disney+, DRTV, and TV 2.
This provider offers high-end security features, including a kill switch, split tunneling, private DNS, and obfuscated servers. ExpressVPN also follows a strict no-logs policy and provides advanced AES 256-bit encryption. Besides that, it employs strong VPN protocols including OpenVPN, Lightway, L2TP/IPsec, and IKEv2.
ExpressVPN is the fastest VPN available and delivers consistent, well-rounded performance. It bests all the competition when it comes to software, security protocols, and top-of-the-line privacy and protection. This makes it a perfect choice for accessing geo-blocked content, streaming, gaming, and torrenting—among many other activities.
With 8 simultaneous connections allowed, you can connect ExpressVPN to several devices at a time, including smartphones, tablets, laptops, smart TVs, gaming consoles, routers, and more. Lastly, it offers 24/7 customer support via live chat and emails, and a 30-day money-back guarantee.
PROS
- Servers in Denmark
- Ideal for streaming and torrenting
- Easily unblocks geo-restricted content
- 8 simultaneous connections
- 30-day money-back guarantee
CONS
- Can be expensive for some
2. NordVPN – Best Denmark VPN for Strong Security Protocols
NordVPN is an advanced VPN with 5,800+ servers in 60 countries. This includes 70+ servers in Copenhagen, Denmark. Therefore, you’ll be able to unblock local and international content including popular services like Netflix, Disney+, DRTV, and TV 2.
The VPN follows a stringent no-logs policy and offers advanced security features like a kill switch, split tunneling, private DNS, and more. NordVPN also uses high-end AES 256-bit encryption and obfuscated servers to improve security. Furthermore, it features top-notch VPN protocols including NordLynx, OpenVPN, and IKEv2/IPsec.
NordVPN delivers medium-high speeds but is not as fast as ExpressVPN. However, it still provides reliable performance, especially when it comes to media streaming capabilities. In short, there is good value for your money here.
This Denmark VPN permits 6 simultaneous connections. Plus, you’ll have the ability to use multiple different devices, including smartphones, tablets, laptops, and smart TVs. Lastly, NordVPN offers friendly customer support through live chat, email, and tutorials. Its 30-day money-back guarantee will let you test it risk free.
PROS
- 70+ servers in Denmark
- Allows access to blocked websites
- Effectively prevents DNS leaks
- Double VPN for enhanced security
- 30-day refund policy
CONS
- High monthly subscription cost
3. CyberGhost VPN – Top VPN with Streaming-Optimized Servers
CyberGhost has a huge global network of 9,100+ servers in 100 countries with 44 servers in Copenhagen, Denmark. Thanks to this huge network, you’ll gain access to local and international content, so you can watch titles from popular platforms like Netflix, Disney+, DRTV, and TV 2.
The VPN provides advanced VPN protocols, which include OpenVPN, IKEv2/IPsec, and WireGuard. Plus, CyberGhost features high-end security features like a kill switch, NoSpy servers, ID guard, dedicated IPs, and more. It doesn’t offer obfuscated servers, but there is a strict no-logs policy and top-notch AES 256-bit encryption.
CyberGhost delivers medium-fast speeds and is quick to connect. However, if we compare it to ExpressVPN and NordVPN, it is a bit slower. Besides that, it delivers stable overall performance, and it’s very affordable.
This provider allows 7 simultaneous connections, and you can connect multiple devices, including smartphones, tablets, laptops, and smart TVs. Lastly, it provides customer support via 24/7 live chat and emails, and a 45-day money-back guarantee.
PROS
- 44 servers in Denmark
- Advanced protocols and encryption
- Optimized servers for streaming
- Affordable long-term plans
- 45-day money-back guarantee
CONS
- No obfuscated servers
Why Do You Need a VPN for Denmark?
You need a VPN for Denmark to easily access geo-restricted websites and services, as well as protect your privacy. Here is a comprehensive list of other reasons why you need a Denmark VPN:
- Conceal Your Browsing Activity – A good VPN offers advanced encryption, which is important for preventing monitoring by the government and ISPs. It will also keep you safe from hackers.
- Hide Your IP Address – With a VPN, you can mask your IP address so that no one can see your location. This way you can access blocked content without the fear of getting caught.
- Bypass Bandwidth Throttling – If you have high data consumption, your ISP will often slow down your Internet speed. Using the best EU VPN can help you avoid bandwidth throttling.
- Get Better Prices – When shopping online, people often come across different prices due to their location. A VPN will unlock access to the best deals.
- Avoid Local Censorship – Danish ISPs have blocked a few file-sharing platforms, including The Pirate Bay. Besides that, illegal music services like y2mate.com and music-bazaar.com, as well as gambling sites like stake.com and nordicasino.com, are also restricted. You can use a VPN to access them in Denmark.
- Access Global Content – With a VPN, you can unblock geo-restricted content from anywhere in the world. For example, you can access streaming libraries only available in specific countries.
- Connect Safely to Public Wi-Fi – Public Wi-Fi is not safe, but if you need to use it urgently, having a VPN provides a layer of security and protection.
- Improve Gaming Experience – A VPN enhances your gaming experience by reducing ping and lag and protecting you from DDoS attacks and doxxing. Plus, you can also play restricted games.
- Shop Safely Online – Online shopping comes with risks, particularly because there are cybercriminals and hackers always ready to attack insecure transactions. A good VPN will help keep your transactions secure.
- Browse Locally While Traveling – If you are traveling from Denmark to another country, a VPN will help you access your local content from back home.
- Secure Your Torrent Downloads – If you often indulge in torrenting, we recommend using a VPN as it will improve your privacy and security so your IP address and download activities can’t be traced.
Final Thoughts
Though the laws in Denmark prohibit censorship, a few websites and services are blocked. Geo-restrictions also prevent access to a lot of content. Plus, it’s important to secure your online activities and keep your sensitive information private. This is where a Denmark VPN is needed.
We recommend ExpressVPN as the best VPN for Denmark as it features high-end security and advanced VPN protocols. Plus, it has many servers in Denmark which give you a Danish IP address. With ExpressVPN at your side, you’ll be able to unblock any geo-restricted content and enjoy the Internet with full freedom and privacy.
That’s all for our guide on the best VPN for Denmark. If you have any questions, please leave a comment below. Thank you for reading!