When you purchase through links on our site, we may earn an affiliate commission. Here’s how it works.
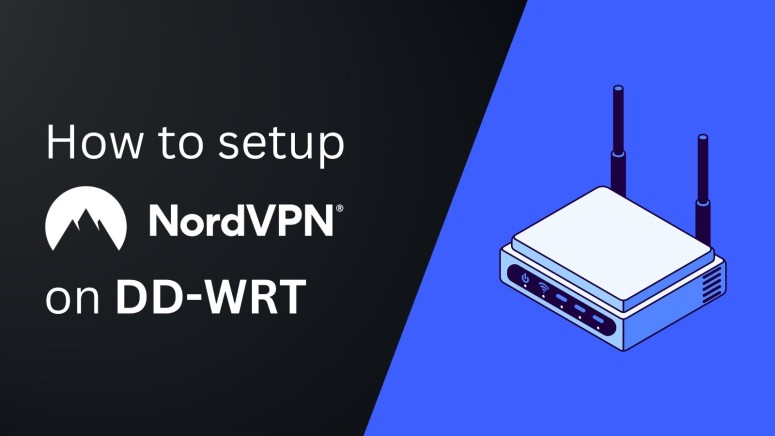
How to Set Up and Use NordVPN on DD-WRT
Last updated January 26, 2025

If you're using DD-WRT firmware on your router, there are two ways to use NordVPN with it. You can either use the VPN through the FlashRouter (FR) privacy app or configure an OpenVPN connection on your router. This will let you secure every device connected to Wi-Fi regardless of whether it natively supports VPNs.
However, the FR privacy app only supports a select number of routers. These include Asus RT-AC5300, Asus RT-AC56U, Asus RT-AC66U, Asus RT-AC68U, Netgear R6300v2, Netgear R6400v2, Netgear R7000, Netgear R7800, Netgear R8000, Netgear R8500, Netgear R9000, Linksys WRT1200AC, Linksys WRT1900AC, Linksys WRT1900ACv2, Linksys WRT1900ACS, Linksys WRT3200ACM, and Linksys WRT32X.
In this article, we'll teach you how to configure NordVPN on your router running DD-WRT firmware using the two methods described above.
How to Set Up NordVPN on DD-WRT
If your router supports the FlashRouters app, we recommend taking that route, as it's the easiest way to run NordVPN on your DD-WRT router. That said, you can always configure a NordVPN connection to a specific server, but you'll need to go through a lengthy and somewhat technically complex procedure. Let's take you through all of the steps you need to take:
Method #1: Configure NordVPN on DD-WRT through FlashRouters Privacy App
Before starting this process, note that the oldest version of DD-WRT firmware you can use is 02-10-2020-r42335. If your router's firmware is older than this, update it to the latest version. Here's a step-by-step guide:
1. Get a NordVPN subscription using your computer and any Web browser.
2. Open your NordVPN account dashboard and click 'NordVPN.'
3. Choose 'Set up NordVPN manually.'
4. Enter the security code received in your inbox.
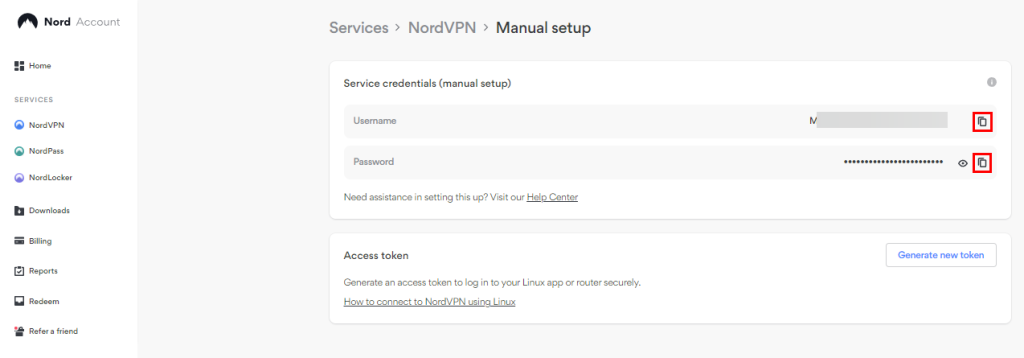
5. Copy your Service credentials (we'll use them later).

6. Connect your router to the Internet and go to 'Administration.'
7. Next, choose 'Commands' and enter the following line.
curl --silent --retry 3 https://api.flashroutersapp.com/api/v1.0/ddwrt/group/privacy/provider/NordVPN/install | sh8. Click on the 'Run Commands' option after that.
9. You'll get an 'Installation successful' message now.
10. Visit flashroutersapp.com now.
11. Now, go to 'DD-WRT settings' and find 'Status.'
12. Choose 'MyPage' after that.
13. Go to the Connect page on your FlashRouters App and enter your NordVPN service credentials.
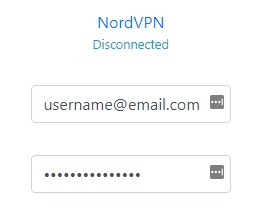
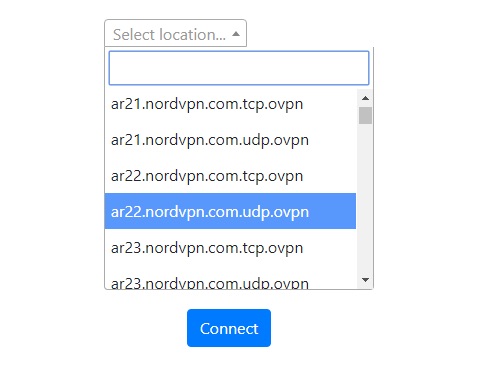
14. Then, select your preferred NordVPN server and click Connect. That's it!
Method #2: Set Up the OpenVPN Client for NordVPN on Your DD-WRT Router
This process will help you get an OpenVPN connection on your DD-WRT firmware-based router through the OpenVPN client UI. Follow these steps:
1. Subscribe to NordVPN using any Web-connected device (computer, phone, tablet).
2. Access your NordVPN account dashboard and choose 'NordVPN.'
3. Click on 'Set up NordVPN manually,' enter your security code, and copy the Service credentials.
4. Open the NordVPN server tool and pick your preferred server location.
5. Note your preferred server's hostname.
6. Click on 'Show available protocols' and click on 'Download config' next to OpenVPN (TCP or UDP).


7. Visit the DD-WRT Administrative Interface and log in with your admin credentials.
8. Then, navigate to Setup> Basic Setup.
9. Now, go to Network Address Server Settings and set the NordVPN DNS addresses as follows:
- Static DNS 1: 103.86.96.100
- Static DNS 2: 103.86.99.100
- Static DNS 3: 0.0.0.0 (default)
10. Check the boxes beside Use DNSMasq for DHCP, Use DNSMasq for DNS, and DHCP-Authoritative.
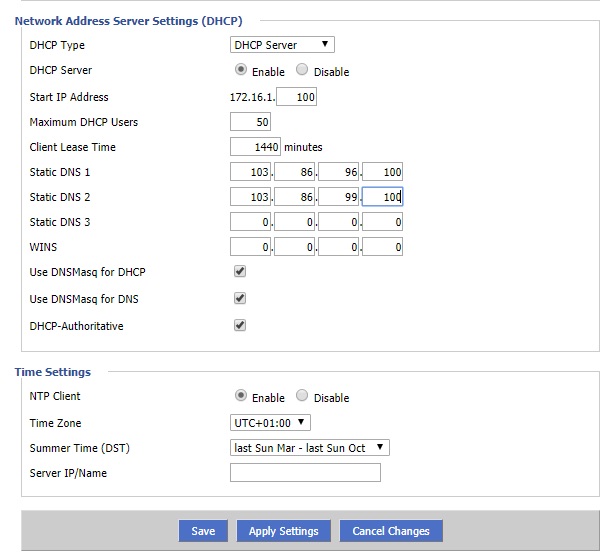
11. Then, click the Save button and Apply Settings next.
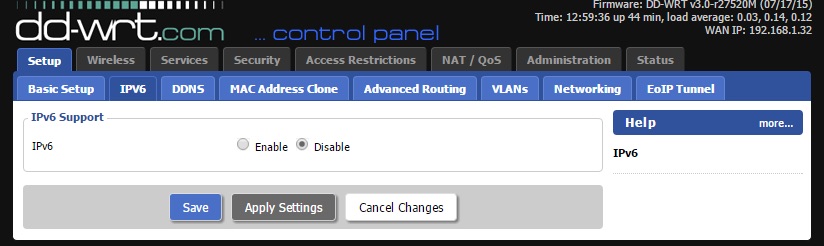
12. Now, navigate to Setup, and choose IPv6.
13. Next, Disable IPv6 and click Save, then Apply Settings.
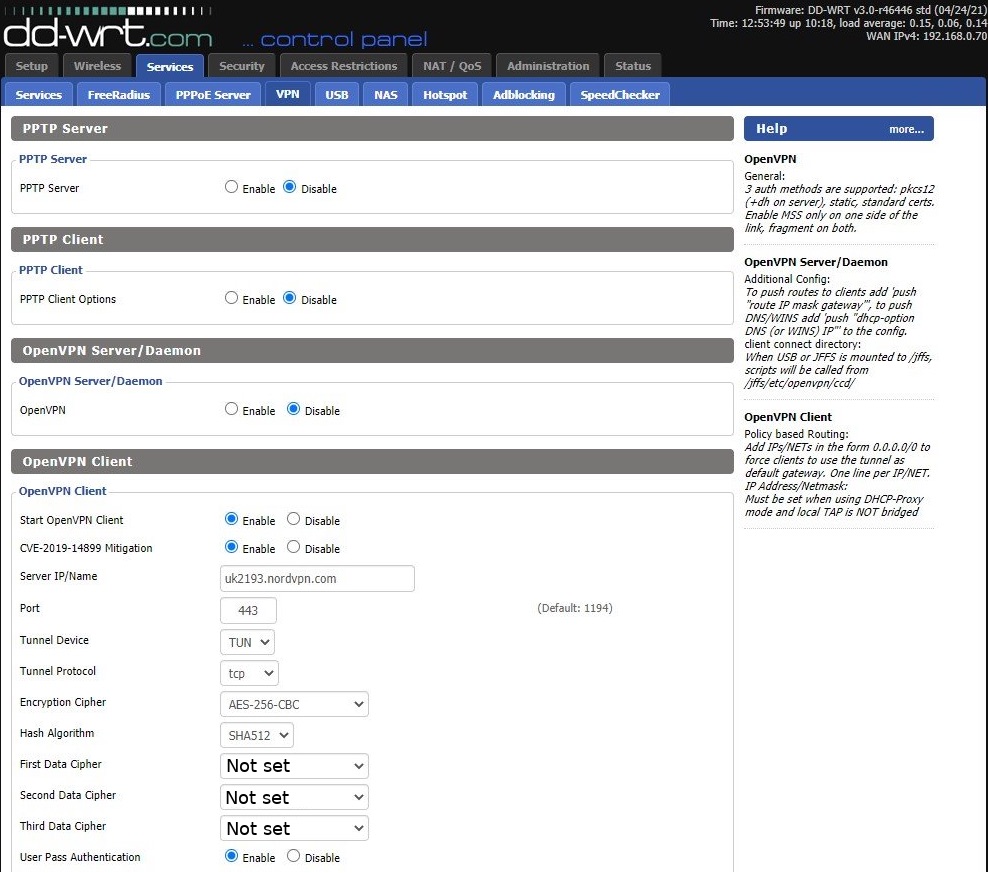
14. Navigate to Service and choose VPN.
15. Now, under OpenVPN Client, Enable the Start OpenVPN Client option.
16. Enter the following details:
- Port: 1194 (or choose 443 for the TCP protocol)
- Server IP: Enter the hostname that you copied earlier.
- Tunnel Device: TUN
- Tunnel Protocol: UDP (or TCP)
- Encryption Cipher: AES-256-CBC
- Hash Algorithm: SHA-512
- User Pass Authentication: Enable
- Username, Password: Enter the NordVPN service credentials you copied earlier
- First Data Cipher: Not set
- Second Data Cipher: Not set
- Third Data Cipher: Not set
- Advanced Options: Enable
- TLS Cipher: None
- LZO Compression: Disable
- NAT: Enable
17. Leave the other options at their default values.
18. Now, navigate to the Additional Config box and enter the below command.
remote-cert-tls server
remote-random
nobind
tun-mtu 1500
tun-mtu-extra 32
mssfix 1450
persist-key
persist-tun
ping-timer-rem
reneg-sec 0
#log /tmp/vpn.log
#Delete
#auth-user-pass /tmp/openvpncl/user.conf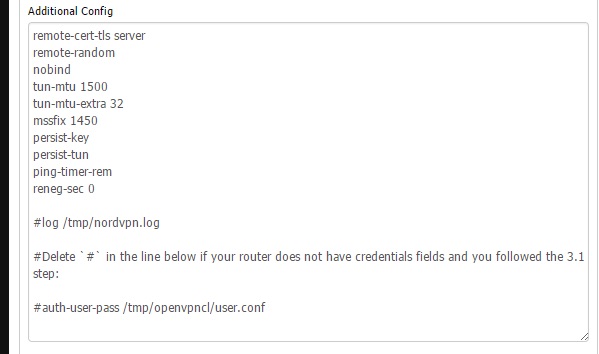
19. Next, open the .ovpn file with a text editor you downloaded earlier.
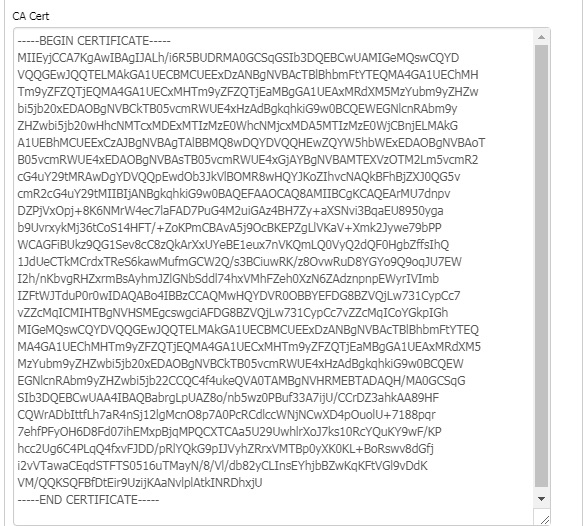
20. Copy the section from BEGIN CERTIFICATE to END CERTIFICATE.
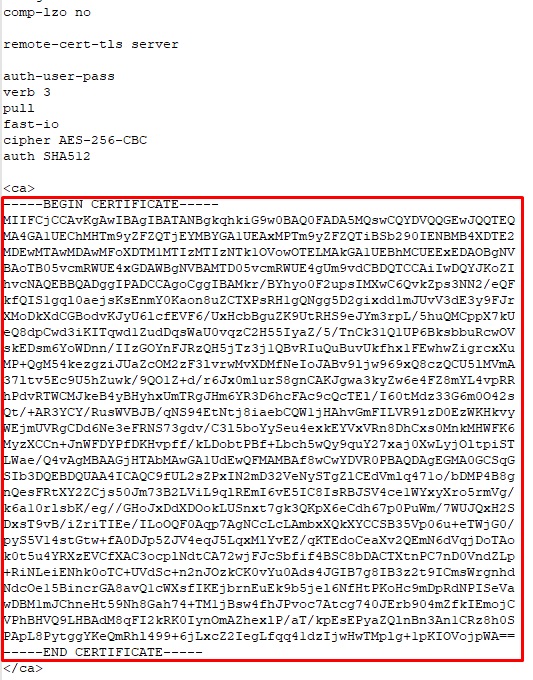
21. Paste this entire content to the CA Cert file after that.
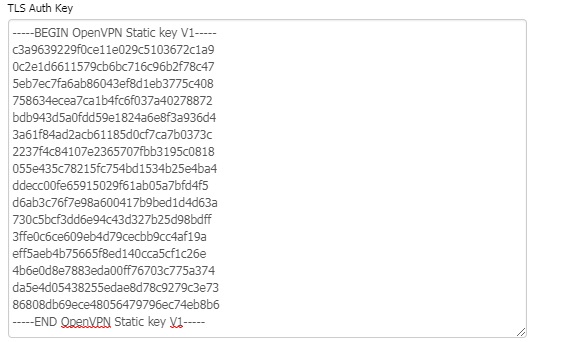
22. Once done, move to the configuration file and copy the TLS key section under <tls-auth>.
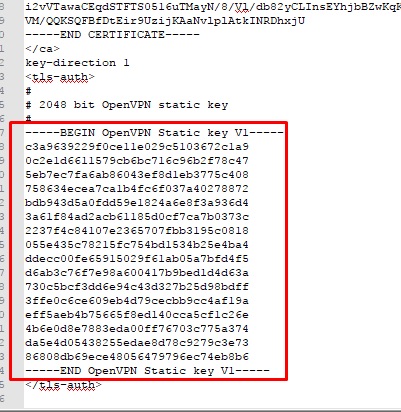
23. Next, 'paste' the entire content into the TLS Auth Key.
24. Make sure the entire text gets pasted from BEGIN OpenVPN Static key V1 to END OpenVPN Static key V1.
25. Then, click 'Save' and choose 'Apply Settings.'

26. As soon as you do that, you will get the message ‘Client: CONNECTED SUCCESS’ under the State tab.
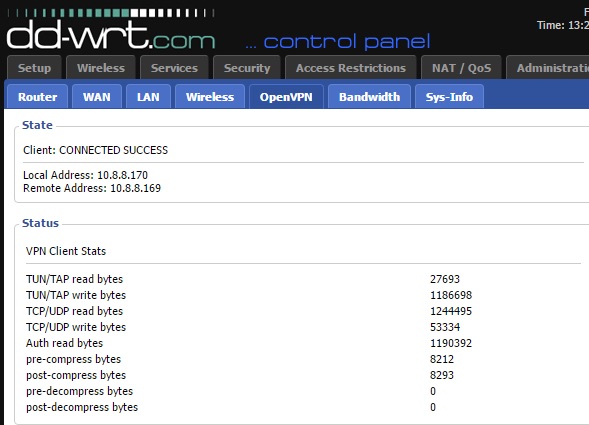
27. Finally, you can use your DD-WRT router with the OpenVPN client of NordVPN.
Final Thoughts
If your router runs on another firmware, you can always install DD-WRT on your router and proceed with NordVPN's setup using either of the two methods we've discussed. Using NordVPN with the FlashRouters Privacy App is a relatively faster method but isn't supported by all routers. Overall, we recommend setting up NordVPN's OpenVPN client on your router.
If it turns out that your router cannot run DD-WRT, there are alternative ways to set up NordVPN on a router, depending on your device's brand and model. That said, you'll still want to protect your devices on the Web when you're away from your router and can't connect to it.
In such a scenario, you can benefit from NordVPN's 10 simultaneous connections. Read our detailed guide to downloading and installing NordVPN on a wide range of devices. And if you'd like to check some trustworthy alternatives, here's our complete guide to the best VPNs for DD-WRT.
This is where we conclude this installation guide. If you have further queries, drop us a comment below. Lastly, thank you for reading!
Related