How to Find a VPN Server Address & Uncover the True Location of Your VPN’s Servers
Published on August 16, 2021


It’s no secret that VPNs often use virtual locations, which is a legitimate way for them to offer connectivity through countries where using physical (bare metal) servers could be a problem. However, not all VPN providers are equally honest when it comes to their virtual locations, and the quickest way to check that is by finding a VPN server address and testing it.
With that said, this guide will show you how to find a VPN server address, and we’ll expand that knowledge by showing you how to test your VPN’s servers. Let’s jump right in!
Step #1: Find Your VPN’s IP or Server Address
There are several ways to get to your VPN’s server addresses. However, keep in mind that not all VPNs are willing to provide that information publicly. In general, there should be no reason for a VPN to hide their server addresses, especially those marketing themselves as no-logs VPNs.
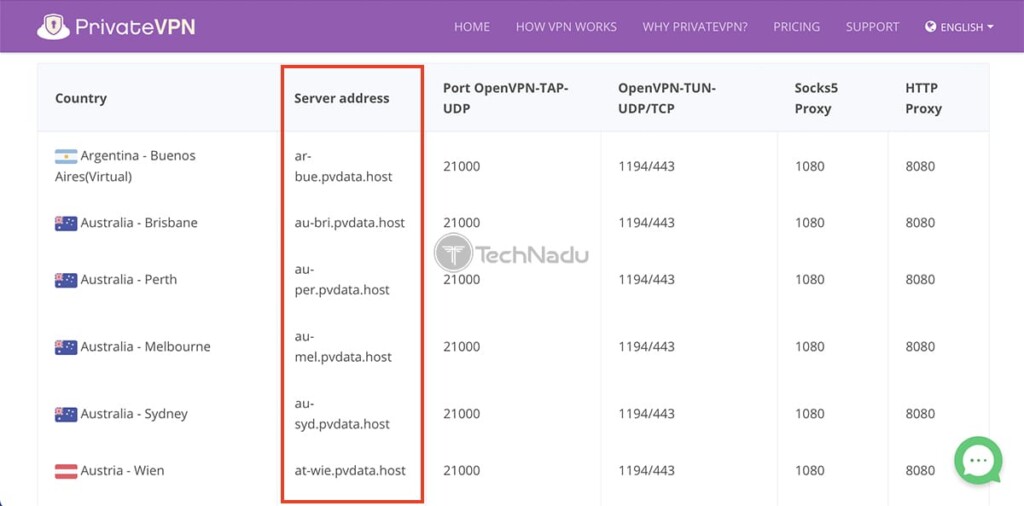
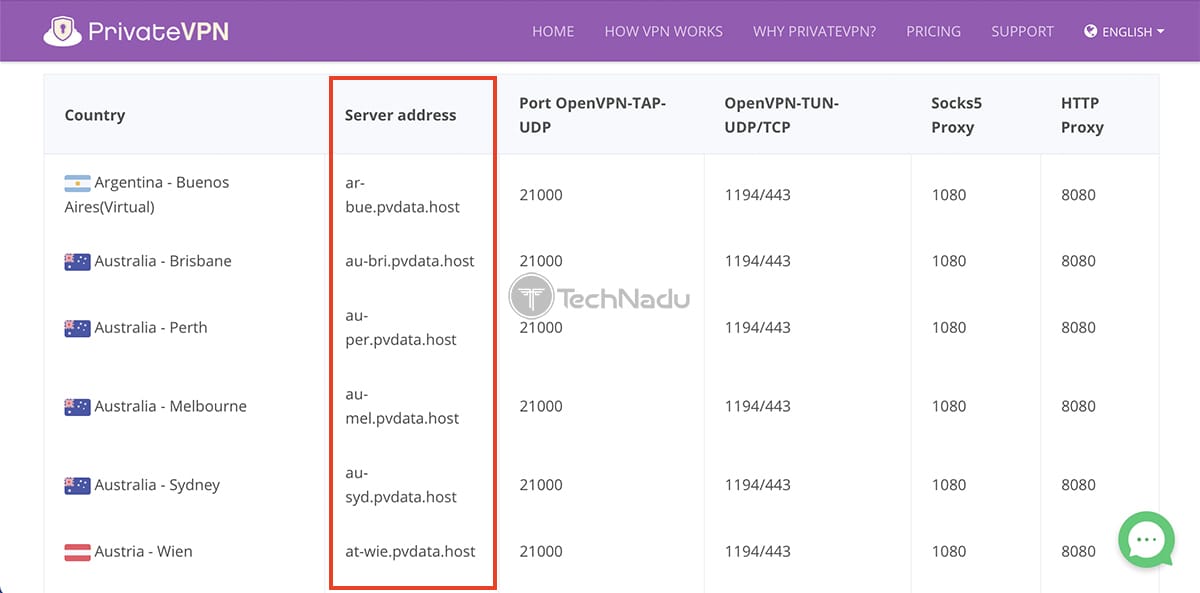
With that said, know that there are two ways to proceed. The easiest way is offered by VPNs that list their servers publicly. For example, some of those VPNs are NordVPN, PrivateVPN, TorGuard, and PureVPN. Use the provided link to get to their VPN server addresses.
Other VPNs don't list their VPN server addresses publicly, but they're willing to provide such information upon request. In general, any VPN that allows you to set up connections manually (or on a VPN-compatible router) will be happy to provide server addresses (as that's required to set up a VPN connection manually).
Step #2 (Optional): Test Your VPN Connection
Now, you can begin testing your VPN's servers. However, since we want to be thorough, we'll ask you to access your VPN. If you don't have it (if you have a server address instead), you can proceed to the next step. So, do the following:
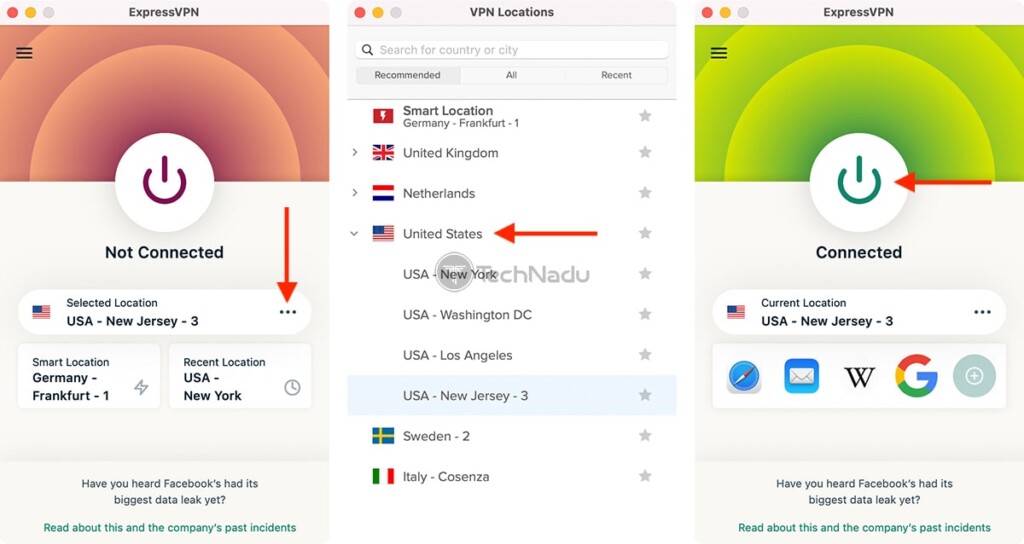
1. Launch your VPN client and connect to a server. That is done using your VPN client’s interface, but you can also set up manual connections for the same purpose.

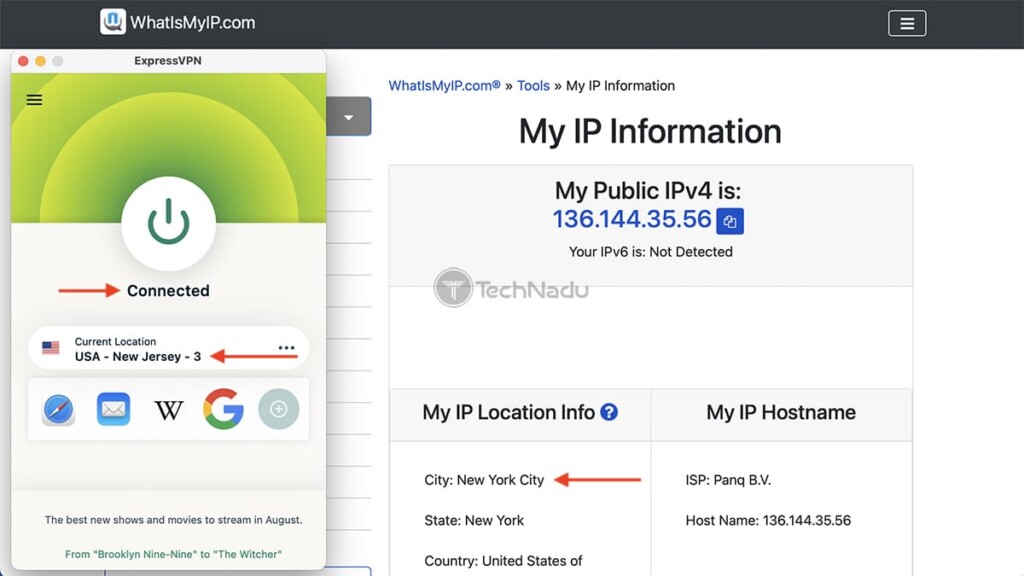
2. Then, visit WhatIsMyIP.com to test your Web connection’s data. You should see your IPv4, IPv6, local IPs, your city and country, and even your ISP. Of course, all of that data will come from your VPN connection. In other words, none of your "real" or "true" data should pop up on any IP address-checking websites.

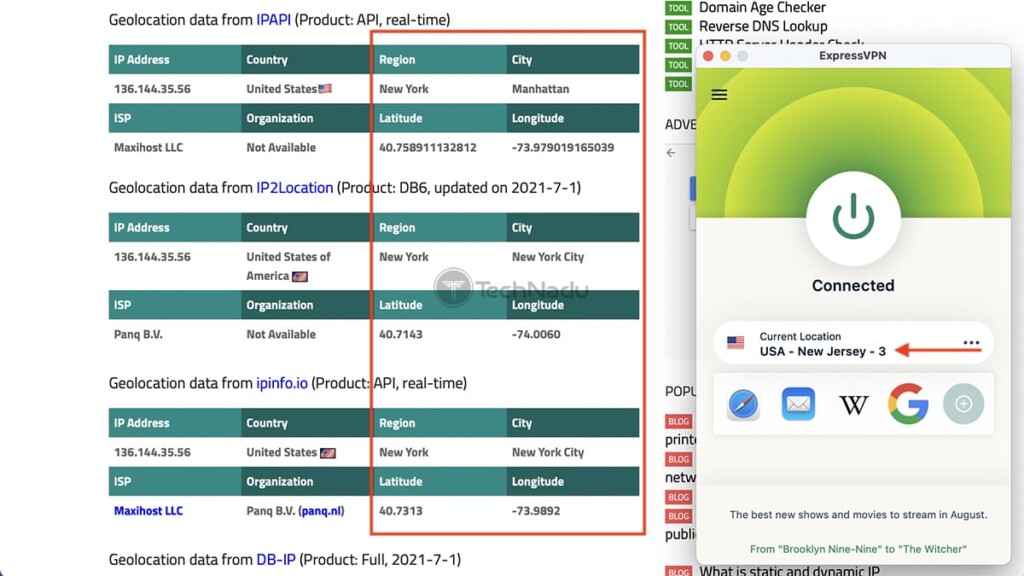
3. Now, go one step further and visit IPLocation.net. We recommend using that website because it relies on several geolocation providers. Therefore, you’ll test your VPN server more thoroughly, checking for any data leaks. Also, pay attention to the location of your VPN server listed there, as you shouldn’t see any inconsistencies.

Step #3: Test Your VPN’s IP or Server Address
Now, it’s time to check whether your VPN’s server is a physical or virtual unit. We’ll do that by testing the server’s ping, uncovering its true location. Do the following.
1. First, make sure to connect to your VPN using any server available. However, make a note of the server you've chosen (remember its country or its city). Still, if you don't have access to a VPN and wish only to check its server address, you can proceed with that information only.
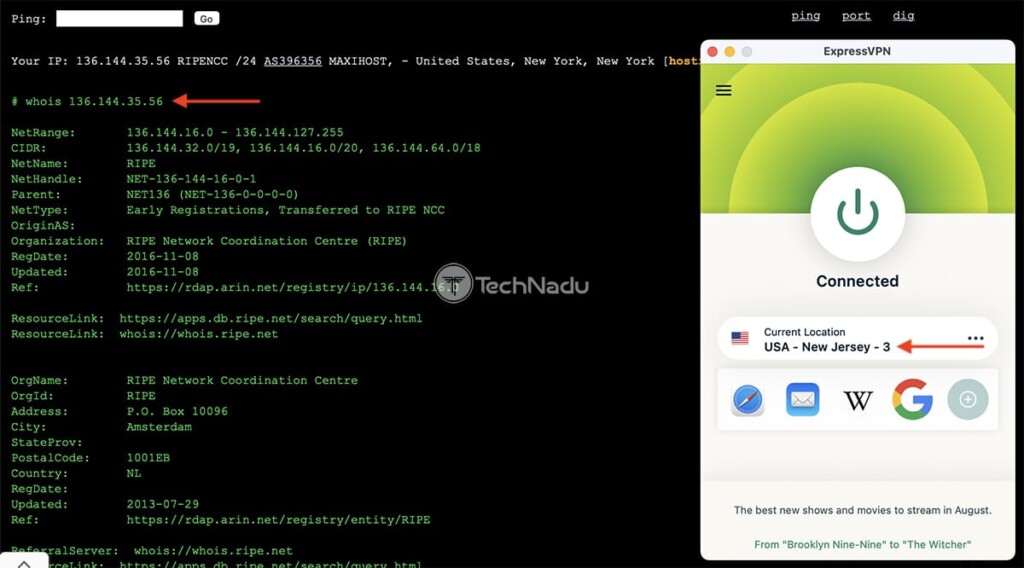
2. Use any Web browser to visit Ping.pe. After a couple of moments, the website will read your IP address while also providing a whole wealth of information. Next, you need to note your IP address, visible at the top of the website. Alternatively, you can proceed only with a VPN server address (taken from your VPN's website, for example).

3. Input the IP or server address in the "Ping" field, located at the very top of Ping.pe. Then, hit the 'Go' button and wait a couple of minutes until the test is done.
4. The website will contact the chosen IP/server address from 30+ locations around the world. Keep your eye on the 'Best' column and identify the lowest ping value. That would indicate the true location of the chosen VPN server, based on its IP address or server address.
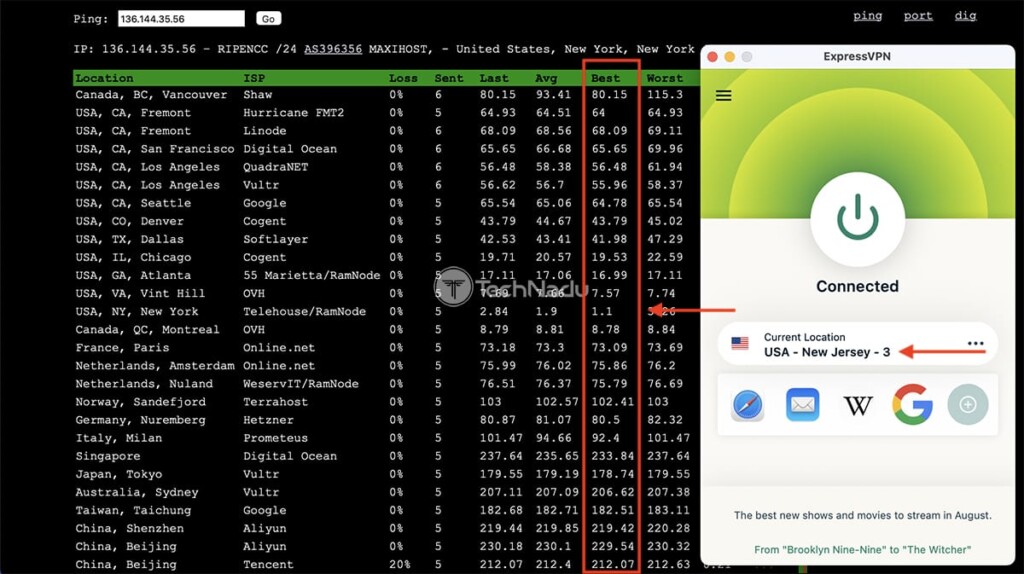
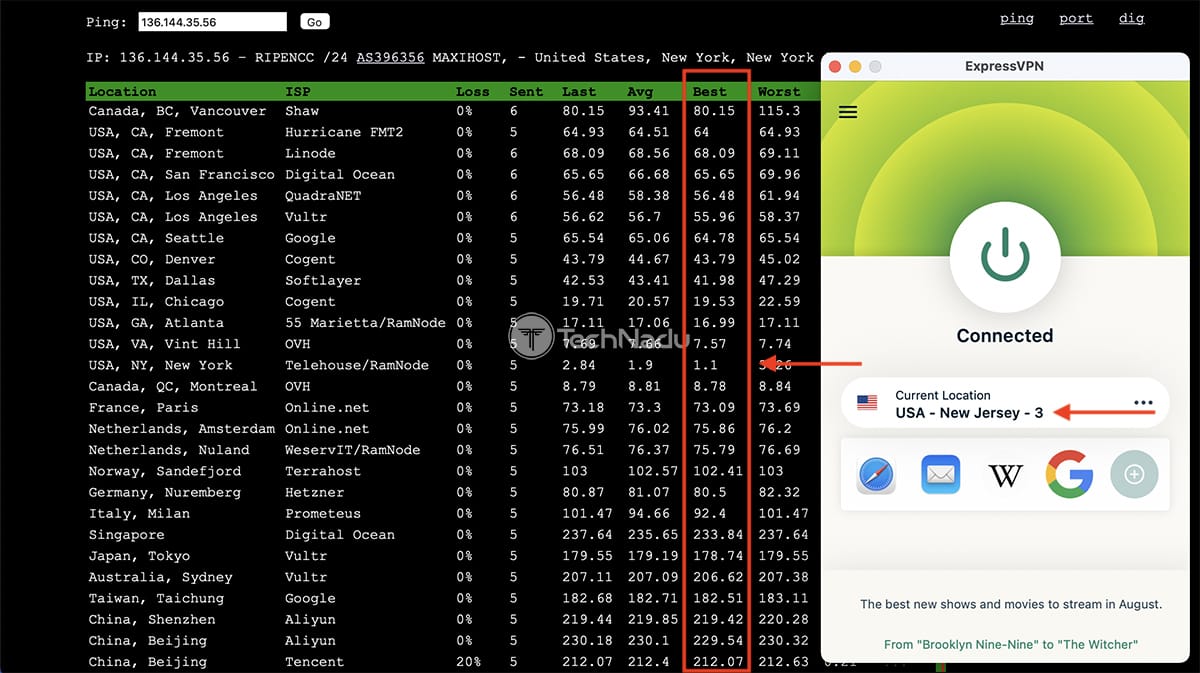
5. In the end, the location of the lowest ping value should correspond to the location of your chosen VPN server. If you see a discrepancy there, that would indicate that you’re using a VPN virtual location instead.
That would be all on how to find a VPN server address and test its location. In case of any questions, share them via the comments section below. And lastly, thank you for reading!
Related