When you purchase through links on our site, we may earn an affiliate commission. Here’s how it works.
How to Set Up ExpressVPN Aircove
Last updated July 6, 2023

You can set up ExpressVPN Aircove in a matter of minutes using your phone or computer. More precisely, you’ll need to activate Aircove, connect your existing modem to the router, and complete the initial setup using a Web browser. From there on, it’s all smooth sailing.
Once you get access to your ExpressVPN Aircove, you can optimize your VPN connection, create groups of devices and connect them to specific VPN locations, and more. That said, let's show you how to get started with your ExpressVPN Aircove from scratch.
How to Set Up ExpressVPN Aircove
Hopefully, you’ve purchased your Aircove already (if you didn’t, order it via Amazon). Once you get your device, here’s how to set up your ExpressVPN Aircove.
1. Subscribe to ExpressVPN using your computer and any Web browser. You need an active subscription to gain access to every feature this router offers.
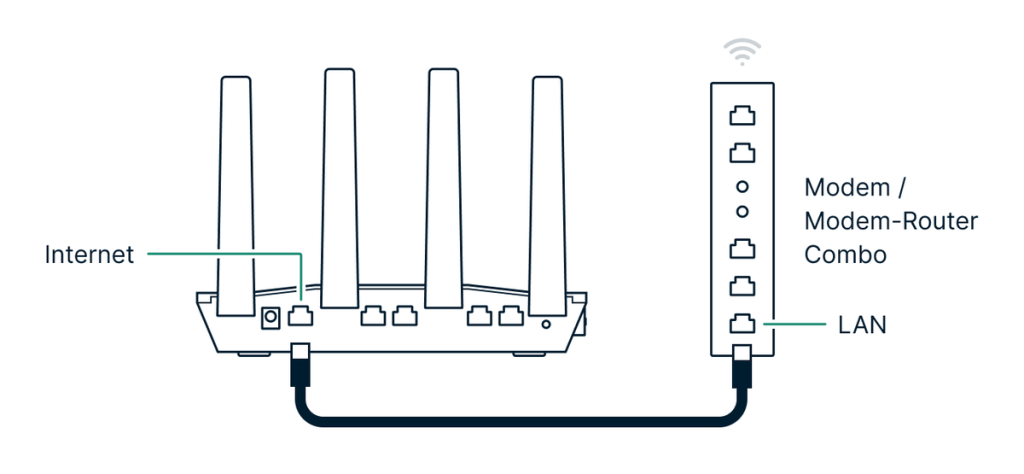
2. Now, turn to your Aircove. Assemble its power adapter and connect your Aircove to a wall outlet. Use an Ethernet cable to connect Aircove to your modem or existing router’s LAN port. Power on Aircove and wait for it to boot up (around one minute).

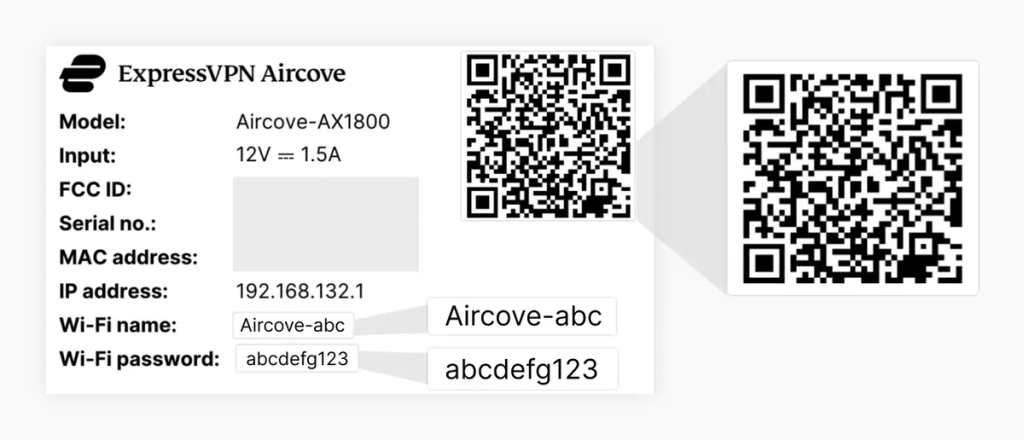
3. If you have a smartphone, scan the QR code on the bottom of your Aircove to connect to its Wi-Fi automatically. Alternatively (if you have a computer), search for the network name that should appear as “Aircove-XXX.” You’ll find your password on the bottom side of your router.

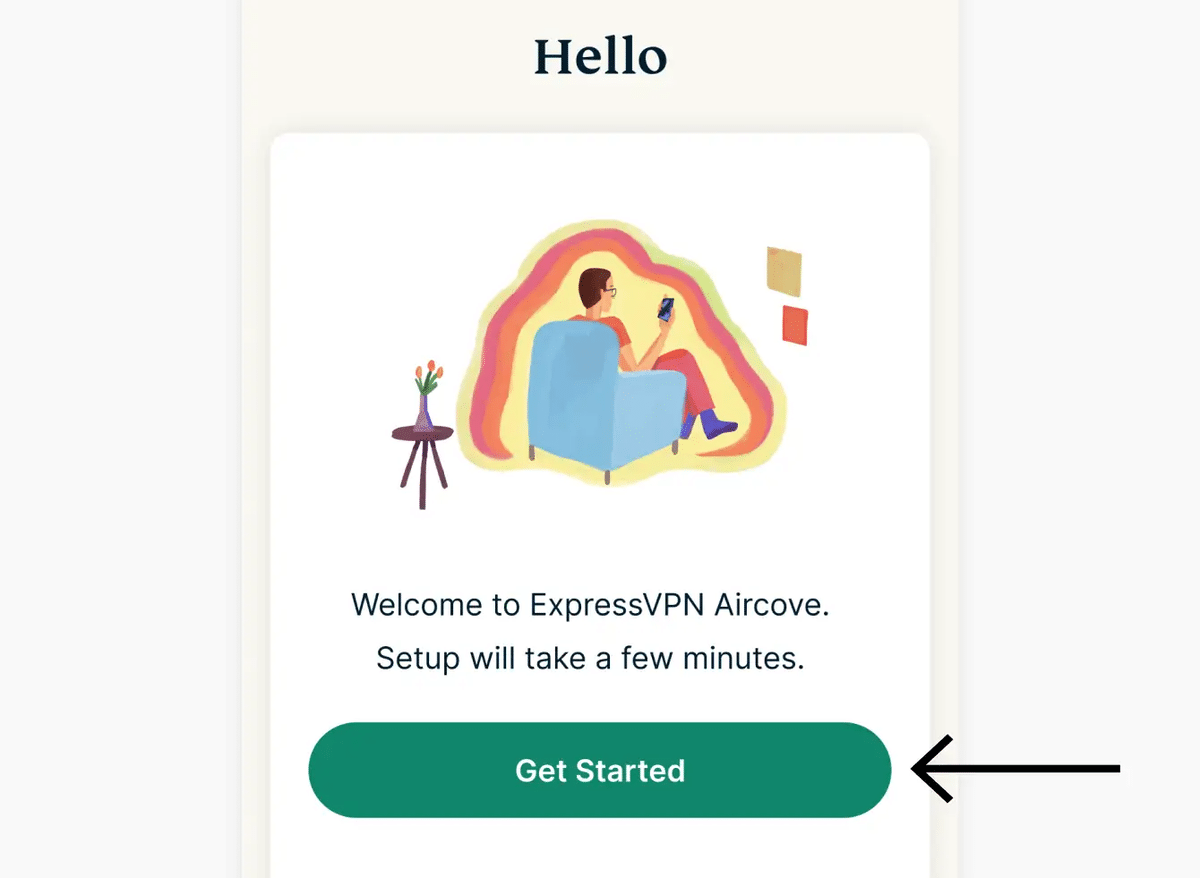
4. Launch any Web browser and visit expressvpnrouter.com. Click “Get Started” and wait until Aircove detects your Internet connection. You might be asked to enter the username and password that your ISP gave you. Then, click “Connect.”

5. Provide your ExpressVPN activation code and click “Sign in to ExpressVPN.” Then, decide whether you’d like to share anonymous analytics with ExpressVPN.


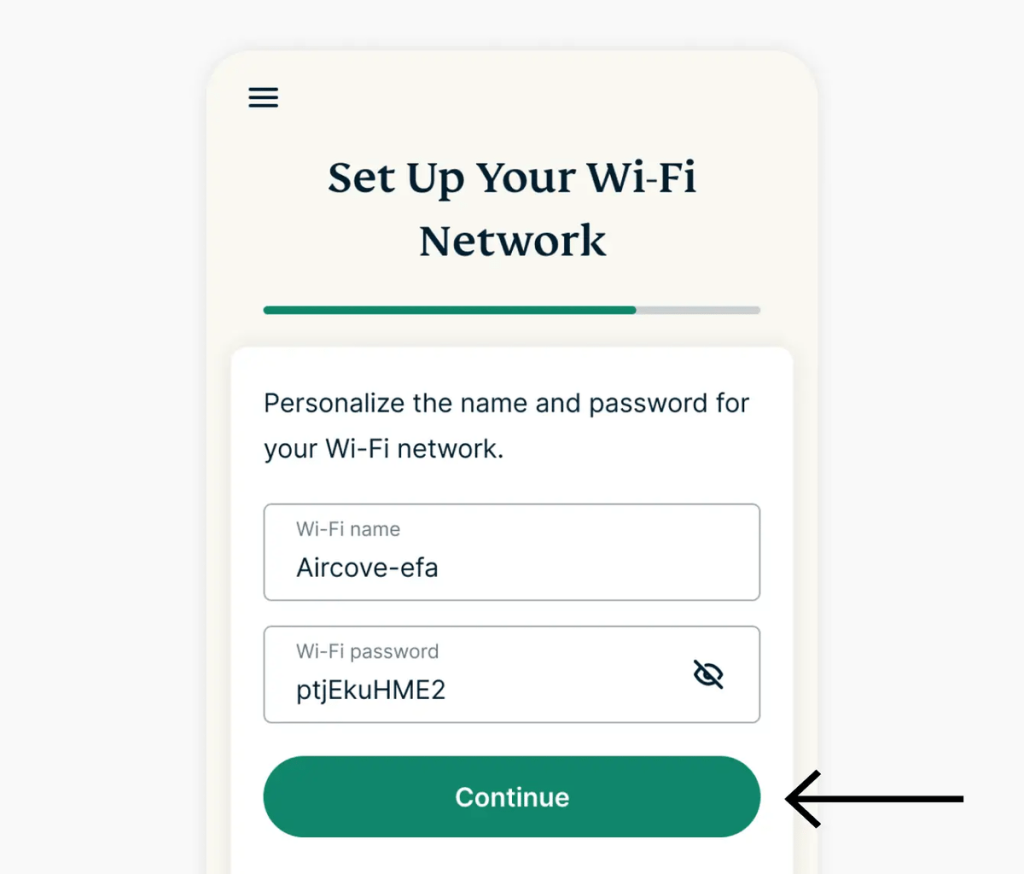
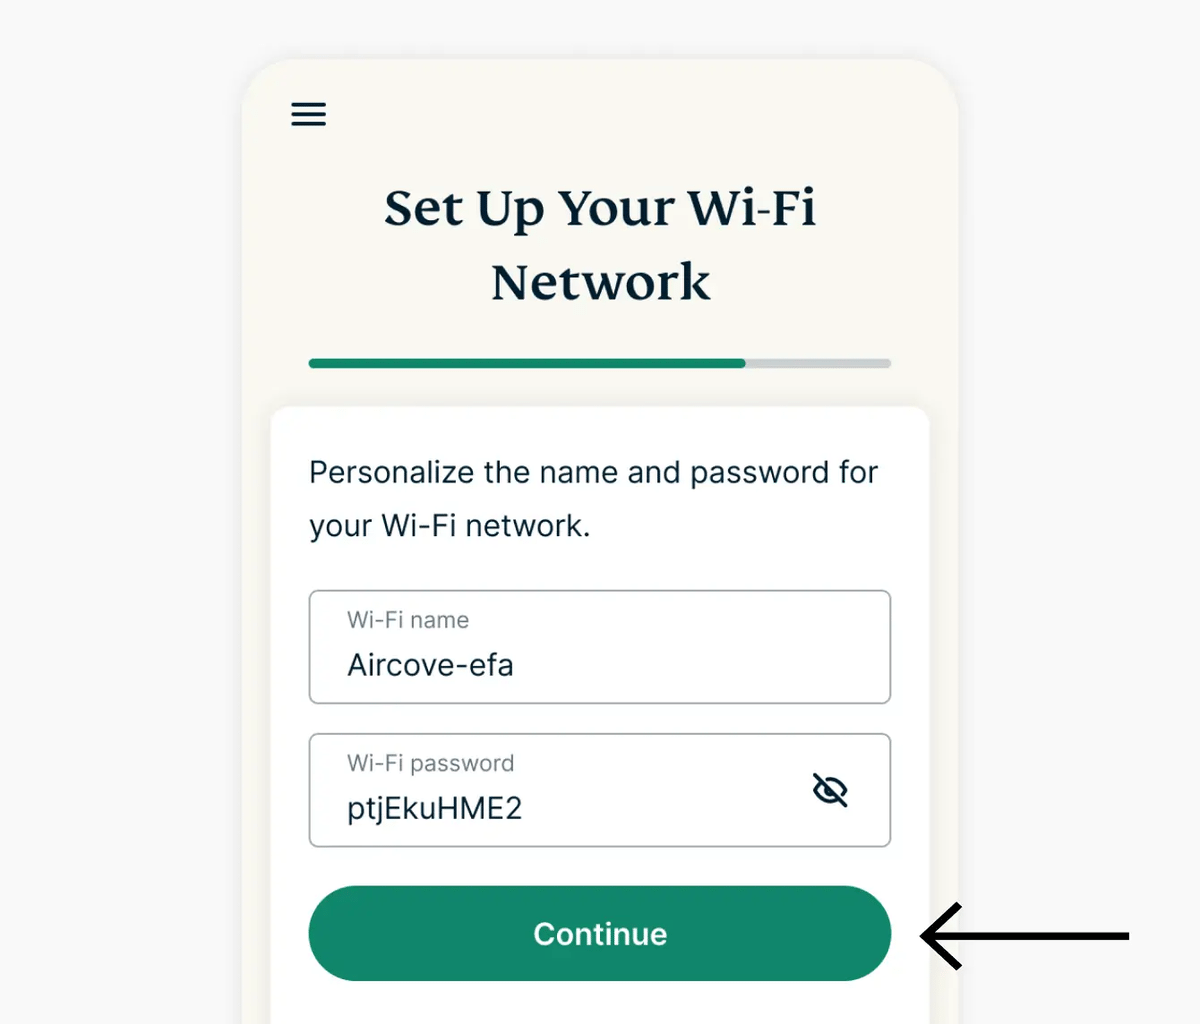
6. Provide a name for your new Wi-Fi connection and pick a password. Make sure to remember that information, as you’ll need your Wi-Fi password when connecting other devices. Click “Continue” once done.
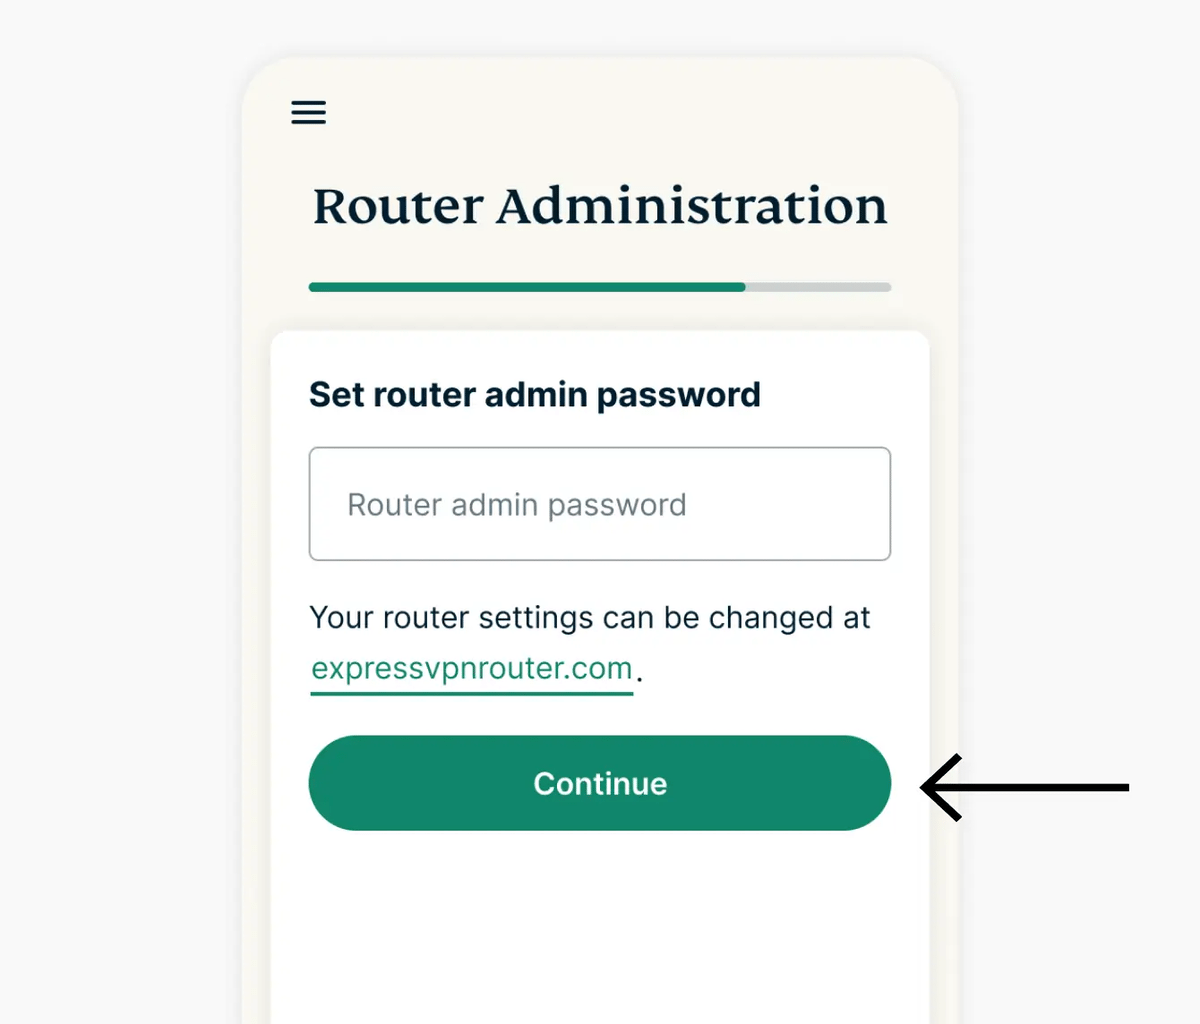
7. Create a password for your Aircove dashboard. You’ll use that password every time you wish to access your router and edit its VPN settings. Click “Continue” once done.

8. Aircove will now check for updates. Then, you’ll be instructed to use your device to connect to your newly created Wi-Fi connection.

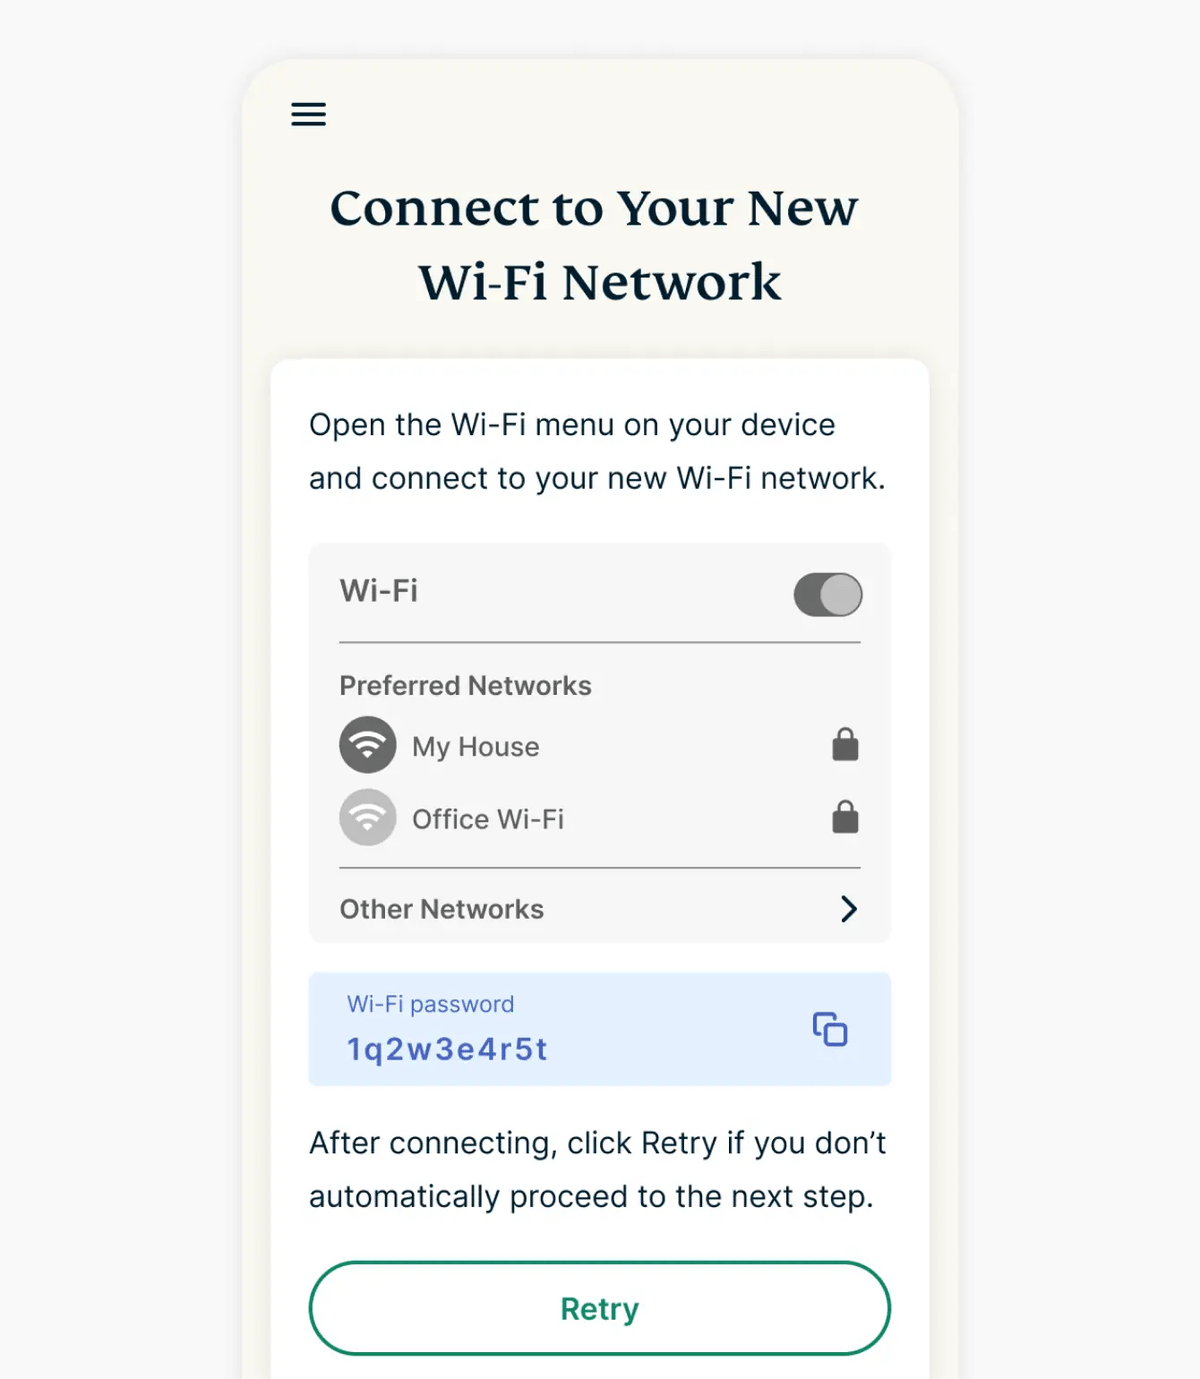
9. At this moment, you’ll have access to your ExpressVPN Aircove dashboard. We recommend that you now connect your other devices to your new Wi-Fi connection. Find it in your other devices’ settings, provide your password, and connect.
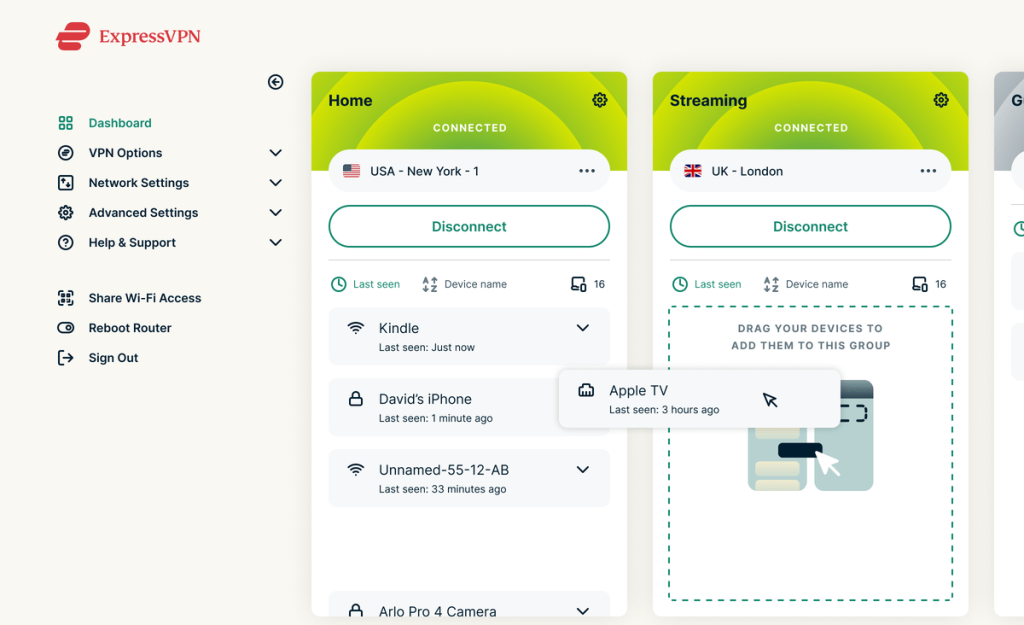
10. Finally, use your Aircove dashboard to fine-tune the router. You can create Device Groups based on your connected devices, assign a specific VPN location to each group, and more. Take your time and inspect the options your Aircove provides.

Final Thoughts
Setting up ExpressVPN on Aircove is a really simple procedure, easy enough even for first-time VPN users. And more importantly, it'll leave you with a VPN-protected Wi-Fi network, so you can cover your entire household at once.
Of course, you'll want to make sure you're protected on the go as well, done by installing this VPN on individual devices. To learn how that's done, head over to our central guide that explains how to set up ExpressVPN.
That would be all on how to set up ExpressVPN Aircove. If you have any questions for us, let us know via the comments section below. Thank you for reading!
Related