When you purchase through links on our site, we may earn an affiliate commission. Here’s how it works.
How to Set Up and Use CyberGhost VPN on DD-WRT Router
Last updated July 25, 2024

DD-WRT routers support VPN connections by default, and the only requirement is to use a provider that supports OpenVPN connections. That said, CyberGhost fully supports DD-WRT, and you're free to pick any of its thousands of servers in 100 countries.
We recommend having a router with at least 8MB of flash, which is the minimum requirement for any VPN connection to run without issues. We also recommend using the latest DD-WRT version available. So, update your router's firmware, especially if you haven't done that in a while.
In this guide, we'll show you how to set up CyberGhost on DD-WRT routers. Since it's a somewhat complex procedure, we'll include plenty of screenshots as well.
How to Set Up CyberGhost on DD-WRT
The following procedure requires you to sign up for CyberGhost, create an OpenVPN connection manually, and then set it up on your DD-WRT router. Let's go over everything.
1. Sign up for CyberGhost using your favorite Web browser.
2. Visit the CyberGhost official website now and click the 'My Account' button.
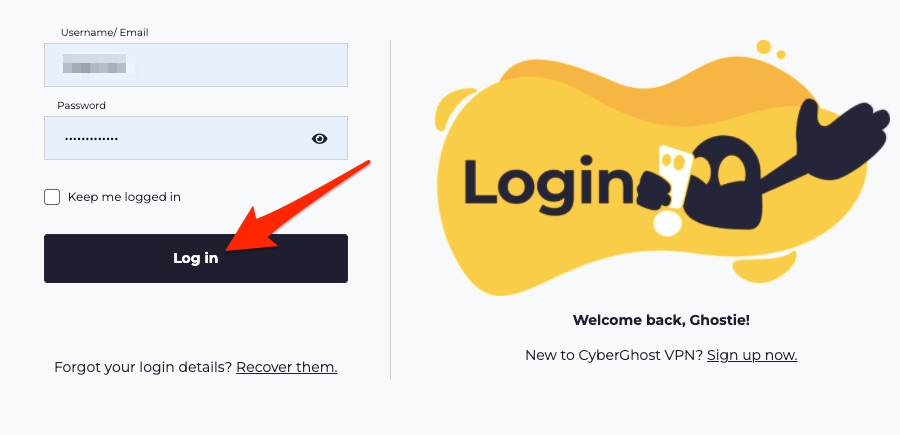
3. Now, enter your username and password to log in and access your online dashboard.
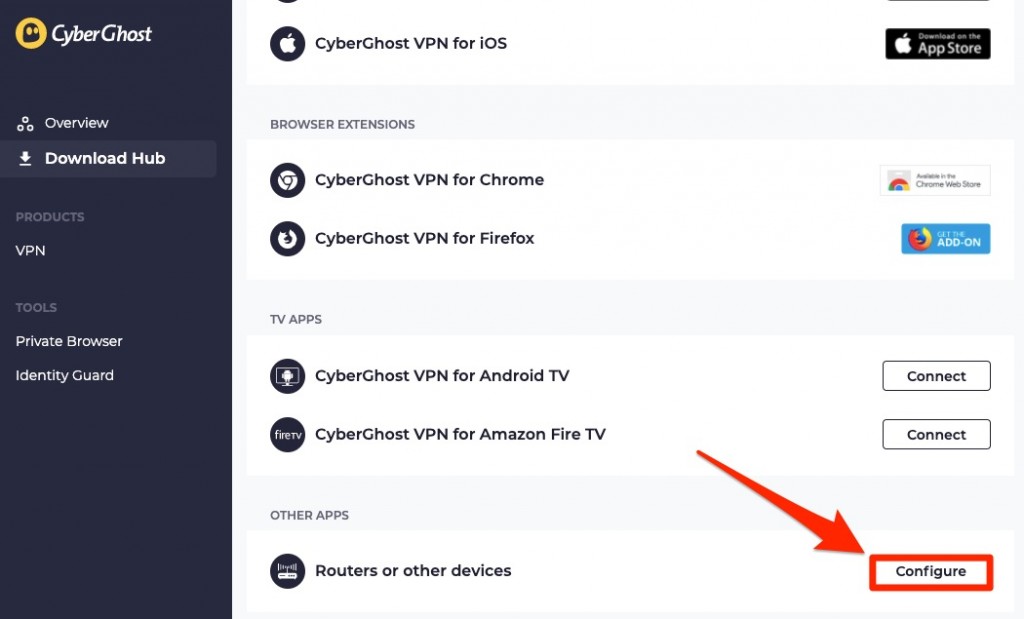
4. Navigate to 'Routers or other devices' and click the 'Configure' button.

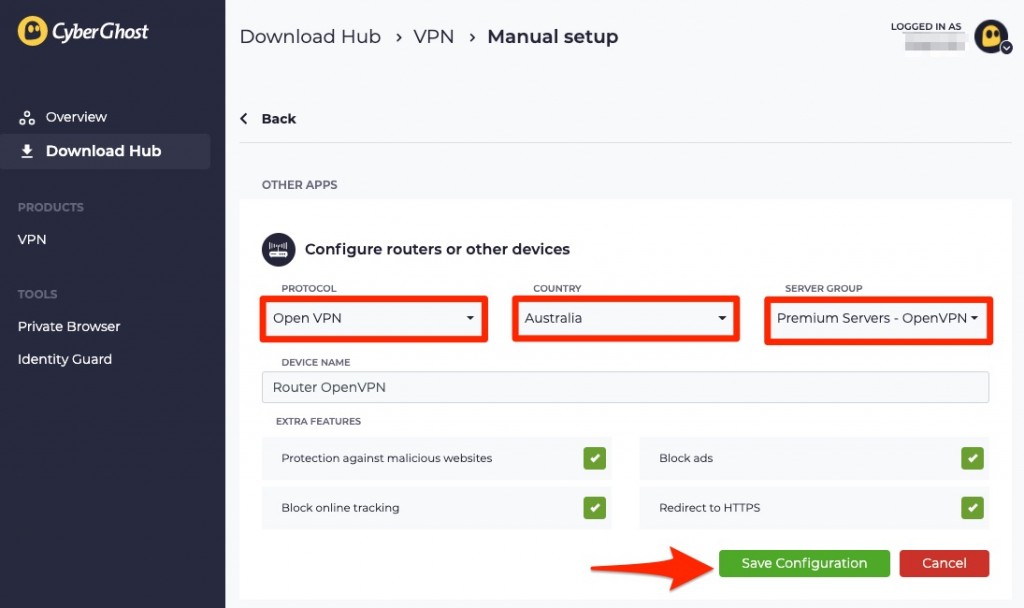
5. Now, fill in the details as mentioned below. Once done, click the 'Save Configuration' button.
- PROTOCOL: OpenVPN
- COUNTRY: Select the country where you want to connect to.
- SERVER GROUP: Choose OpenVPN via UDP or TCP.
- DEVICE NAME: Enter as per your wish.
- EXTRA FEATURES: Tick all the boxes.

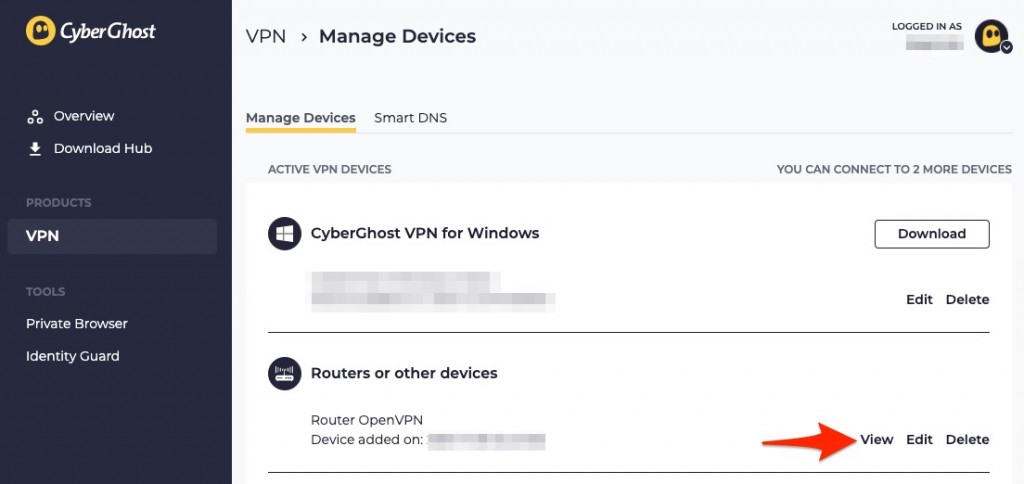
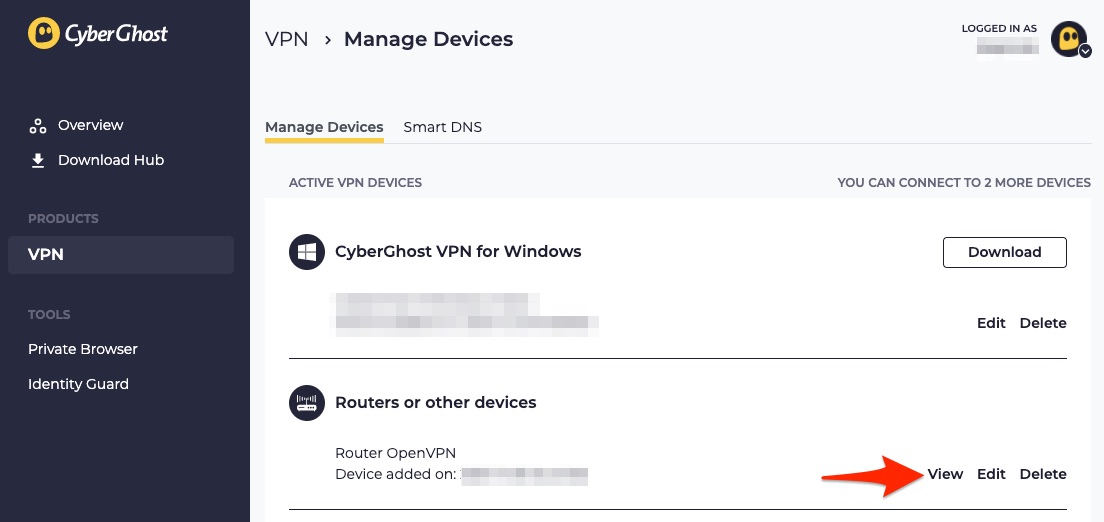
6. You'll be redirected to the 'Manage Devices' page. Here, you need to locate 'Routers or other devices' and hit the 'View' button.
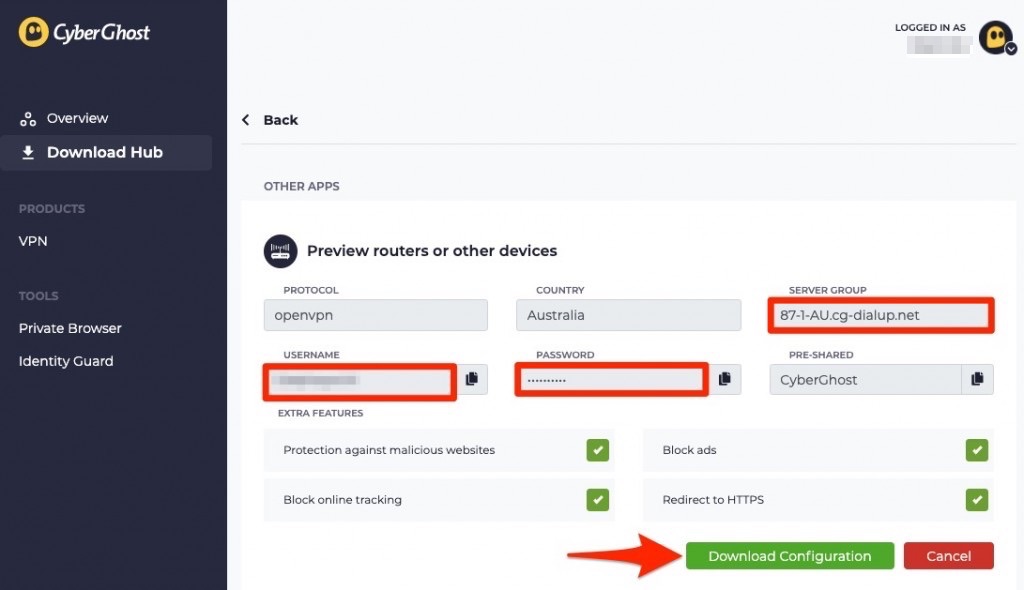
7. The complete configuration will be previewed now. Note your username, password, and server group, then click the 'Download Configuration' button.
8. Once the .zip file gets downloaded, extract it; You'll find the below-mentioned files:
- client.key: Private key file.
- ca.crt: Certificate of the certification authority.
- client.crt: User certification file.
- openvpn.ovpn: OpenVPN configuration.
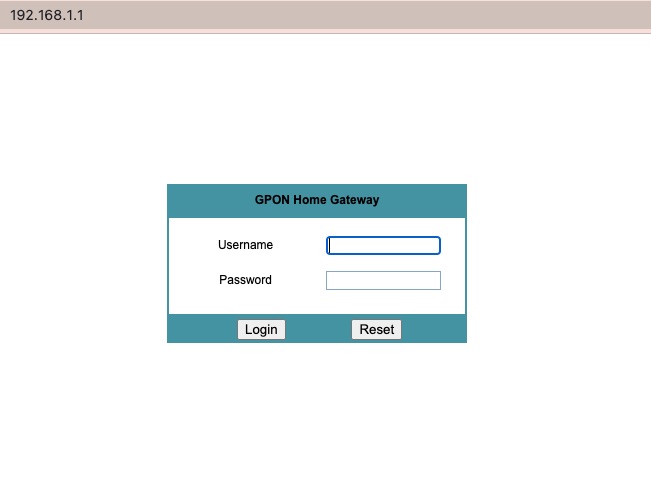
9. Now, enter the 192.168.1.1 IP address in the address bar (that's the default address, in case you haven't changed it manually).
10. Provide your username and password to log in and access your DD-WRT router.
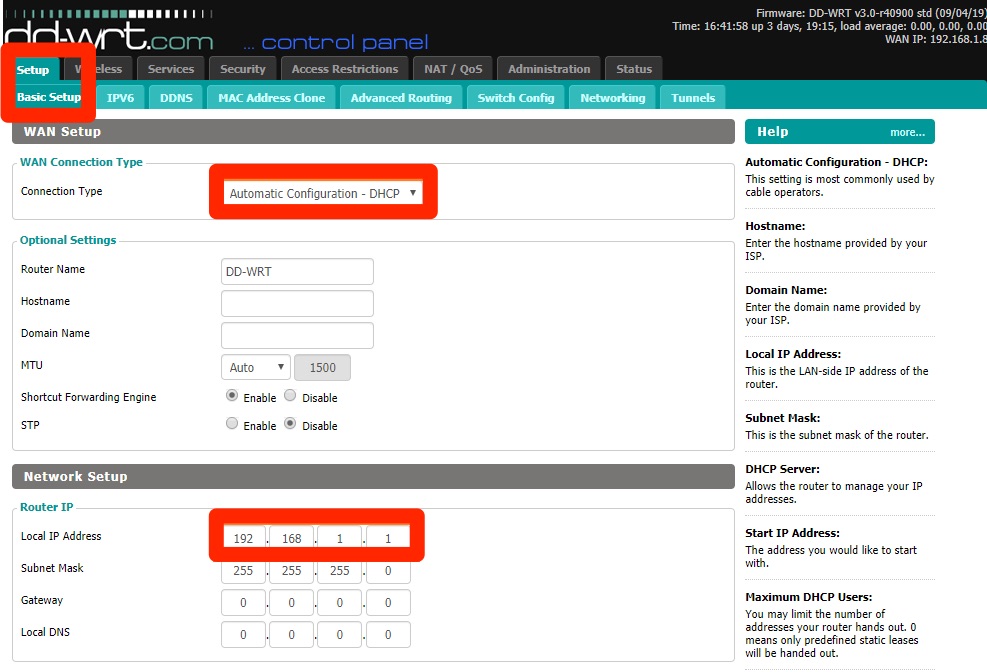
11. Navigate to Setup > Basic Setup, and set the 'Connection Type' to 'Automatic Configuration - DHCP.' Re-check your local IP address as well.
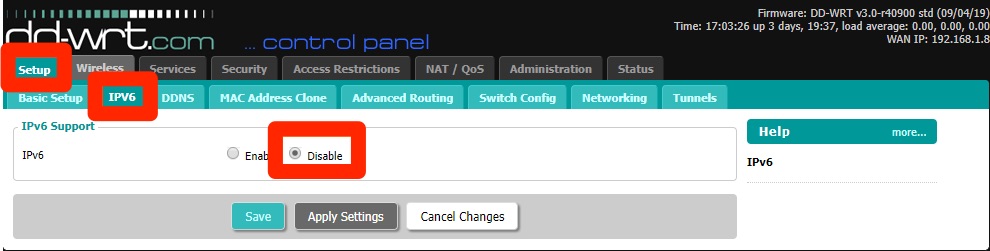
12. Now, navigate to the 'IPV6 tab' and check the circle before 'Disable' (this step is to prevent data leaks). Click 'Save' and 'Apply Settings' to save the changes.
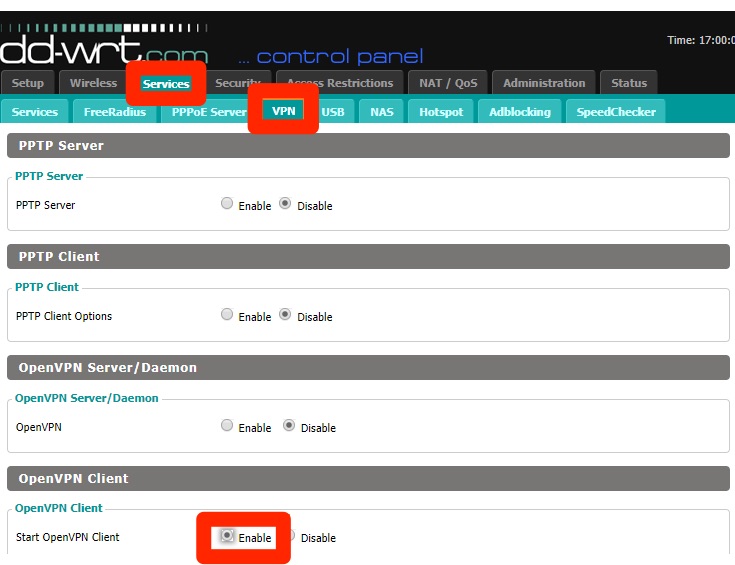
13. Next, go to the Services > VPN > OpenVPN Client.
14. Find the 'Start OpenVPN Client' option and enable it.
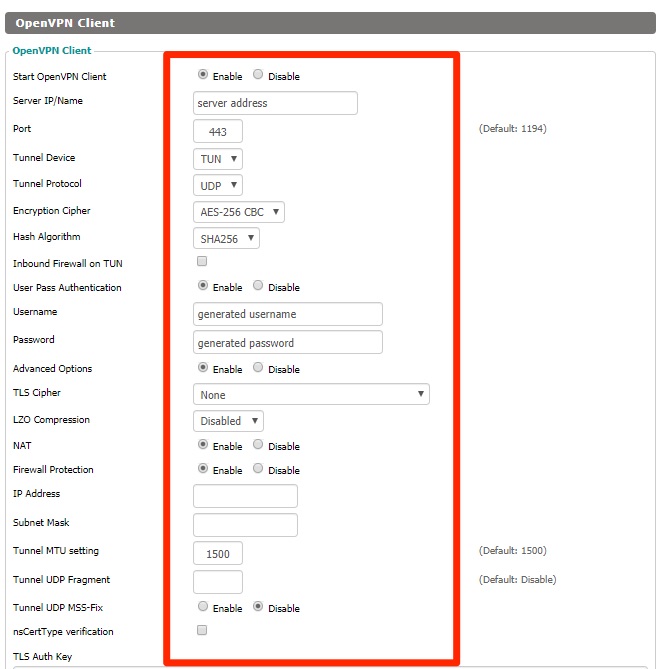
15. You have to fill in the client settings with the below details.
- Server IP / Name: Enter the server group that you picked earlier.
- Port: 443
- Tunnel Device: TUN
- Tunnel Protocol: TCP or UDP
- Encryption Cipher: AES-256-CBC
- Hash Algorithm: SHA256
- User Pass Authentication: Enable
- USERNAME: Put the username that was previewed in the router configuration.
- PASSWORD: Enter the password previewed in the router configuration.
- Advanced Options: Enabled
- TLS Cipher: None
- LZO Compression: Disabled
- NAT: Enable
- Firewall Protection: Enable
- IP Address: Blank
- Subnet Mask: Blank
- Tunnel MTU setting: 1500
- Tunnel UDP Fragment: Blank
- Tunnel UDP MSS-Fix: Disable
- nsCertType verification: Unchecked
- TLS Auth Key: Blank
16. After the 'TLS Auth Key' field, you need to enter 'Additional Config.'
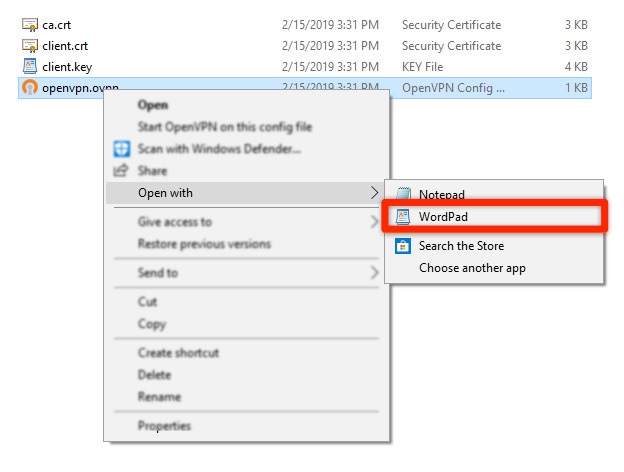
17. Move to the folder where you extracted the .zip file earlier, right-click the openvpn.ovpn file and choose 'Open with WordPad/Notepad.'
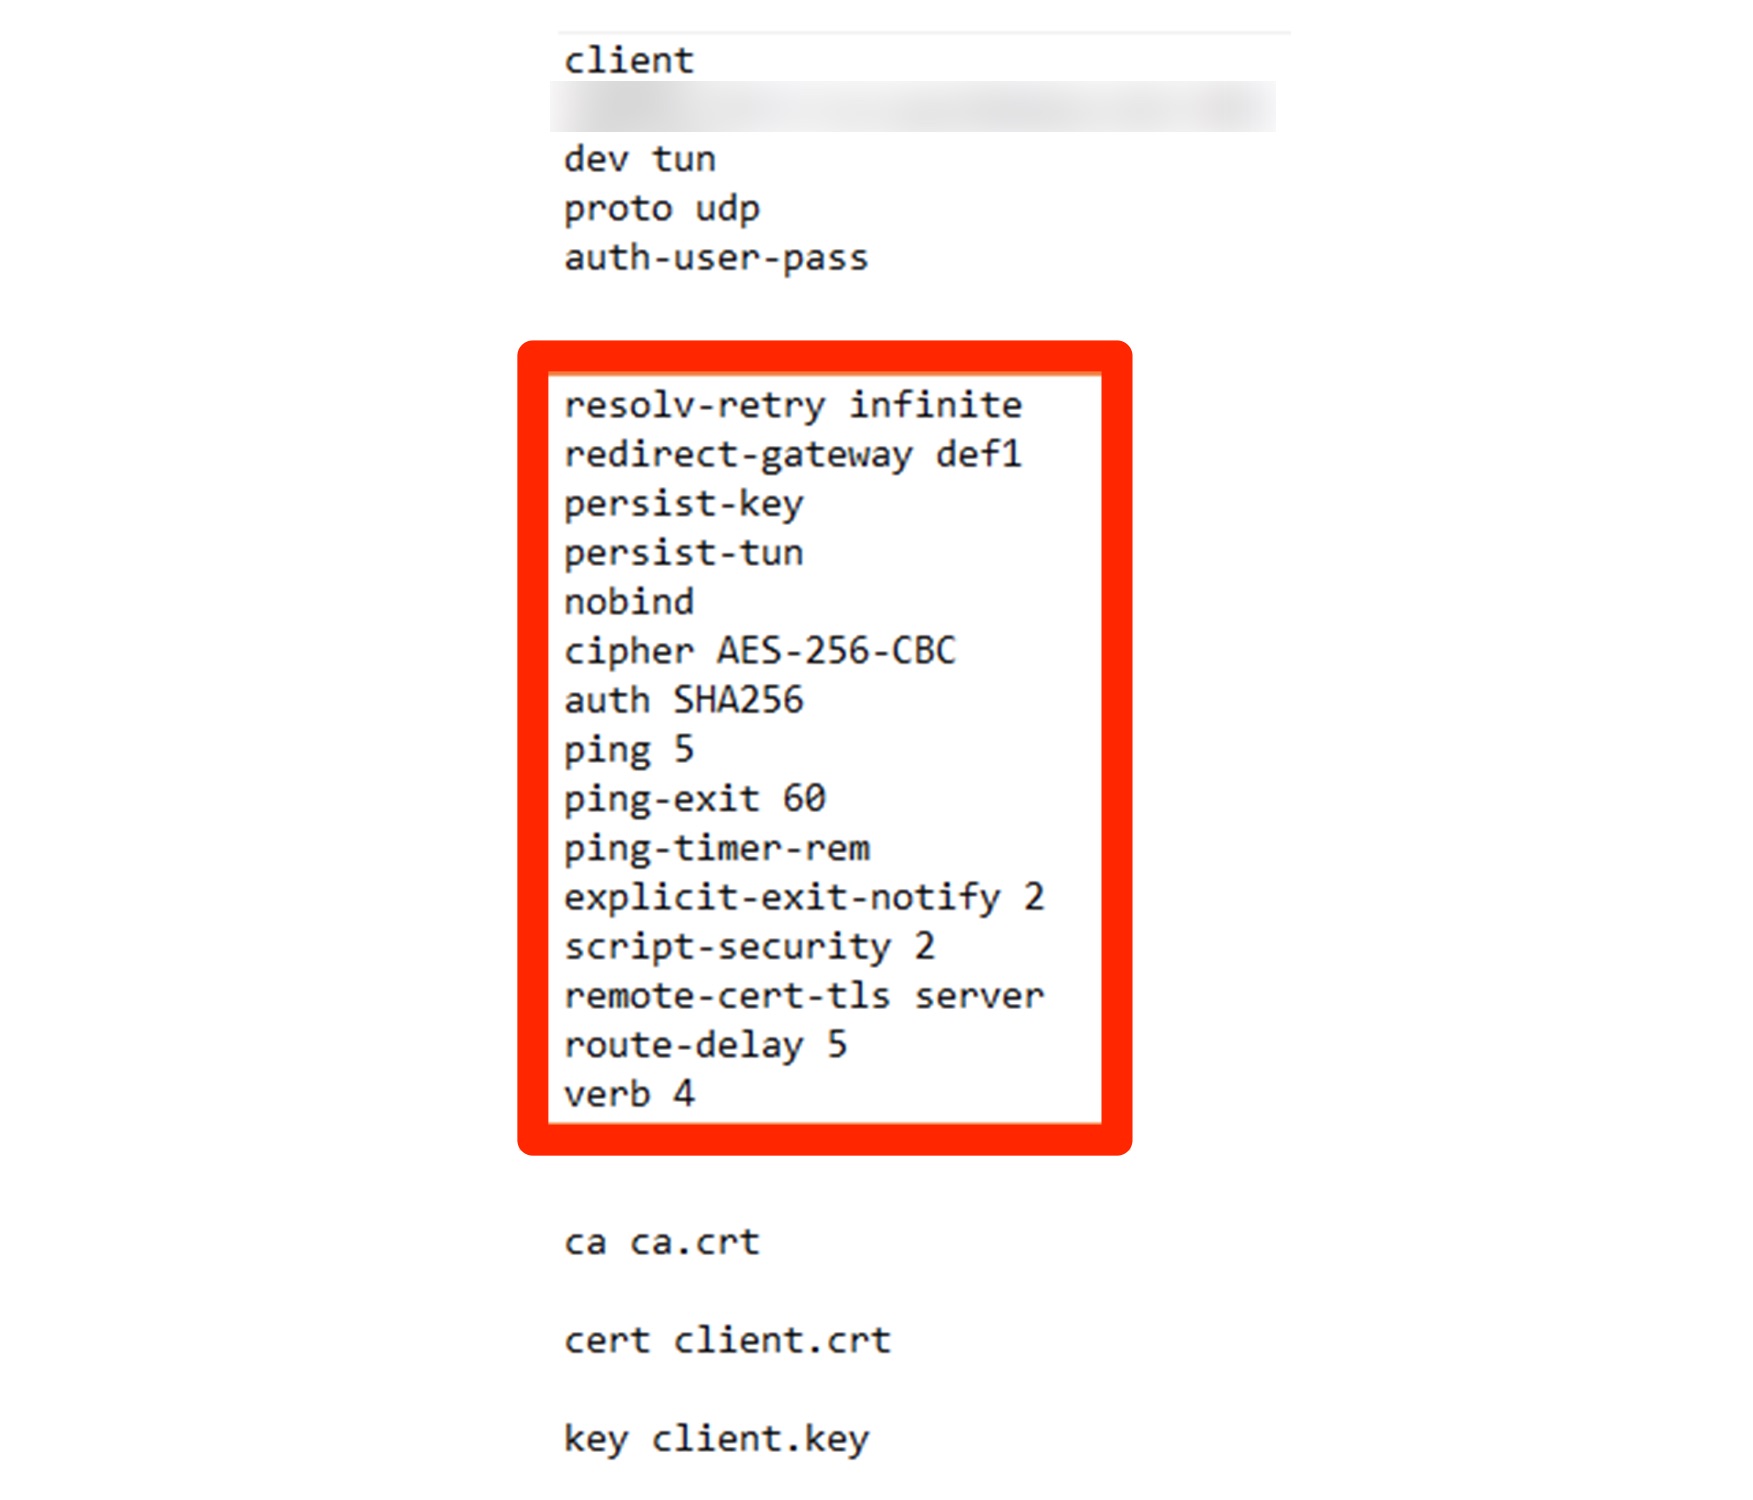
18. Once opened, copy the part from 'resolv-retry infinite' to 'verb 4'.

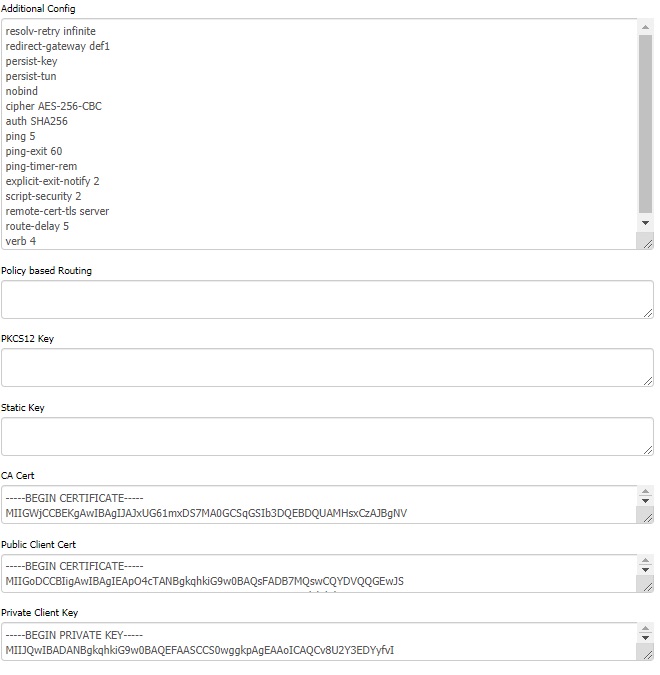
19. Next, right-click in the 'Additional Config' field and choose 'Paste.'

20. Once done, fill in the rest of the field with the below details:
- Policy-Based Routing: Blank
- PKCS12 Key: Blank
- Static Key: Blank
- CA Cert: Here, copy-paste the text found in the ca.crt file
- Public Client Cert: Here, copy-paste the text found in client.crt file
- Private Client Key: Here, copy-paste the test found in client.key file
21. Hit 'Save' and 'Apply Settings' to save the changes.
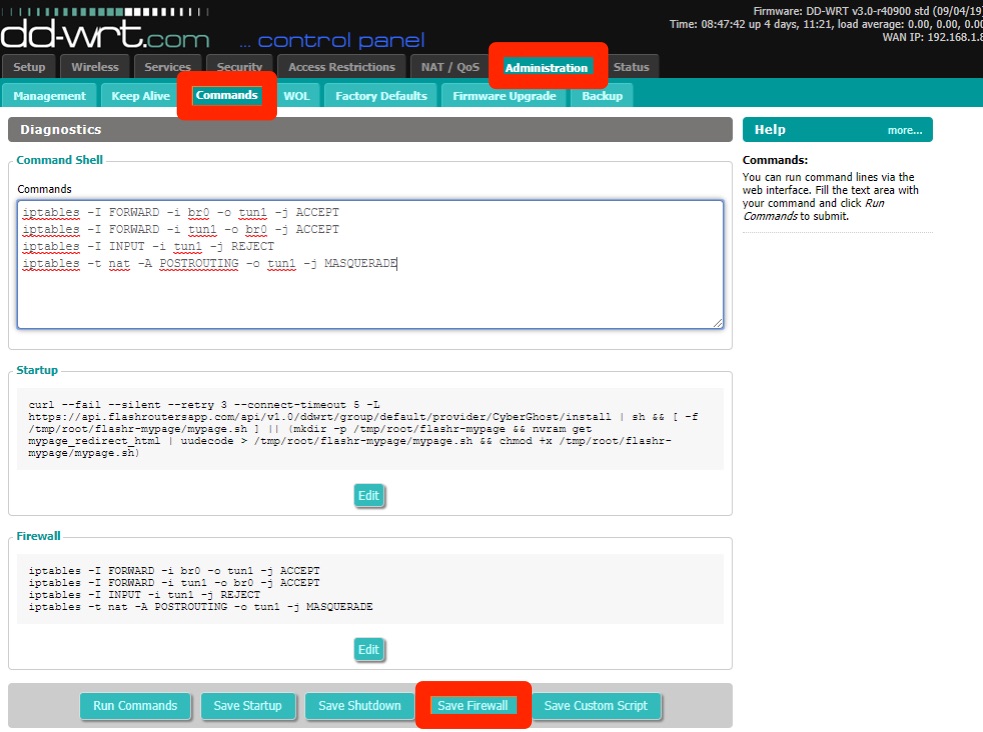
22. Now, move to the 'Administration tab' and hit 'Commands.'
23. Enter the below command in the corresponding field.
iptables -I FORWARD -i br0 -o tun1 -j ACCEPTiptables -I FORWARD -i tun1 -o br0 -j ACCEPTiptables -I INPUT -i tun1 -j REJECTiptables -t nat -A POSTROUTING -o tun1 -j MASQUERADE24. Click the 'Save Firewall' button next.
25. Once done, move on to the 'Management' tab and scroll down to 'Reboot Router.'

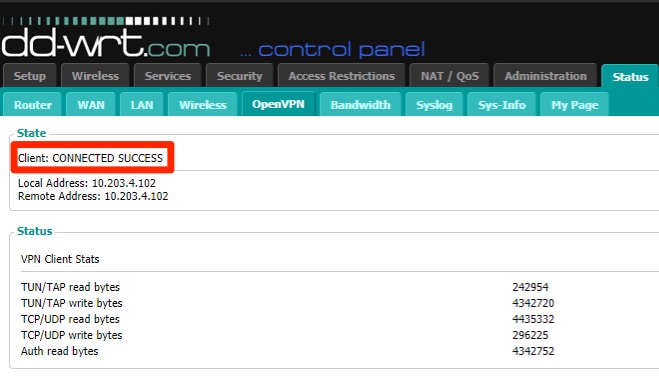
26. Finally, test your VPN connection by following this path: Status > OpenVPN, and under the State section, you must see the 'CONNECTED SUCCESS' message.
Final Thoughts
Setting up CyberGhost on a router running DD-WRT firmware isn't the simplest procedure and takes a bit of time. Still, it's worth the effort. In the end, you'll encrypt the source of your Web connection, which means that your entire household will receive VPN protection and other benefits.
Nonetheless, it's worth installing CyberGhost on your other devices as well, especially those that you plan on using away from home. That said, your next Web destination should be our guide on how to set up CyberGhost, where we've covered dozens of devices and platforms.
That's all for our guide on setting up CyberGhost on DD-WRT. Let us know through the comments section below if you have any questions. Thanks for reading!
Related