When you purchase through links on our site, we may earn an affiliate commission. Here’s how it works.
How to Configure and Use NordVPN on GL.iNet
Last updated May 16, 2024

If you're using a GL.iNet router, you can easily configure NordVPN on it. This is a manual process in which you need to access the router's control panel and adjust some of its settings. Fortunately, the overall process is quite simple and straightforward. That is because NordVPN provides everything you need via a unified dashboard, including .ovpn config files and service credentials.
Once configured, all devices connected to your GL.iNet router will be protected by NordVPN, including those that don't support native VPN apps. Examples of such devices include gaming consoles, Smart TVs, and even security cameras. Also, you can secure an unlimited number of devices with this setup (as many as your router can support).
In this article, we've put together everything that you need to configure and use NordVPN on GL.iNet.
How to Configure NordVPN on GL.iNet
To set up NordVPN on a router made by GL.iNet, you need to upload your chosen server's OpenVPN configuration file to the router along with your service credentials. Let's take a look at how this is done.
1. Sign up for NordVPN via its official website using your computer, phone, or tablet.
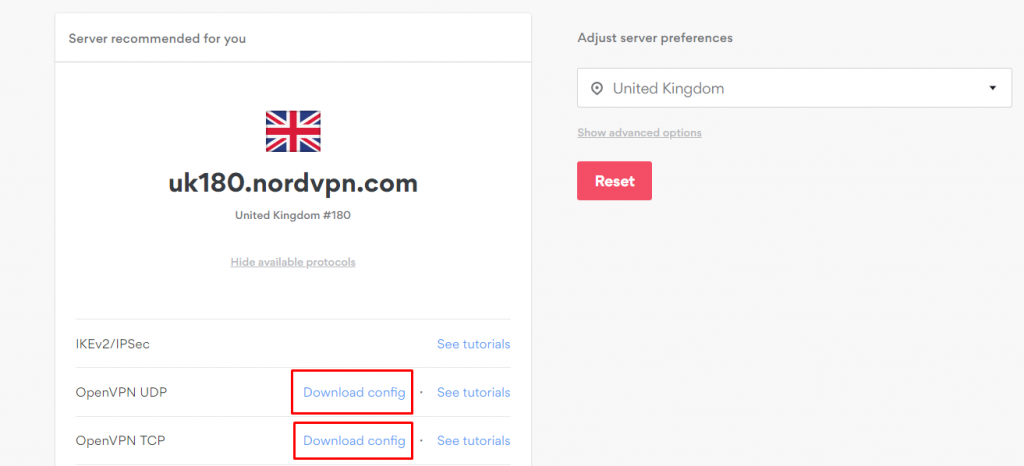
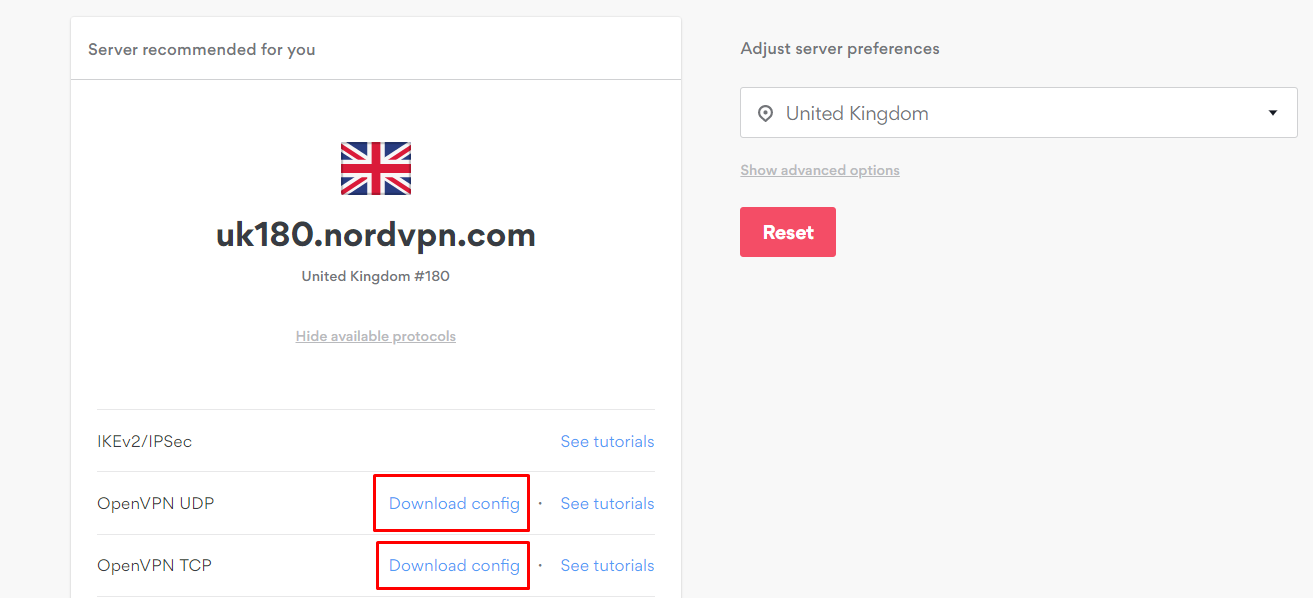
2. Visit the NordVPN server tool to pick a server in your desired location.
3. Click on 'Show available protocols' > 'Download config' (UDP or TCP based on your preference).
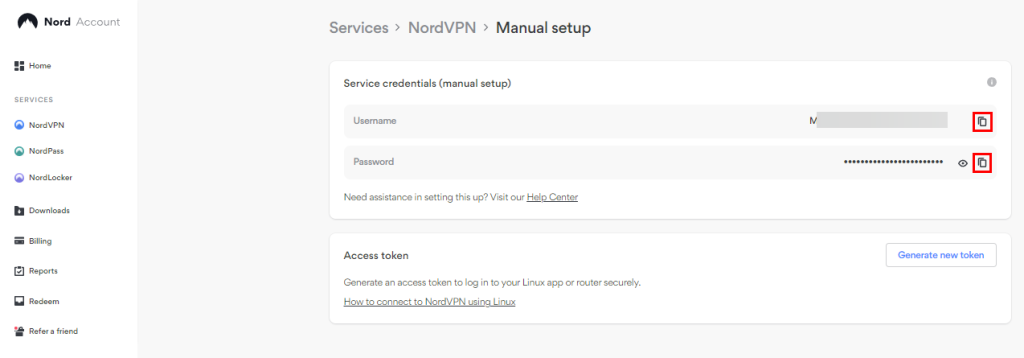
4. Go to your Nord Account Dashboard and click 'NordVPN' > 'Set up NordVPN manually.'
5. Copy the username and password from under 'Service credentials (manual setup).'

6. Visit the default IP address of your router, '192.168.8.1', and log in with your credentials.
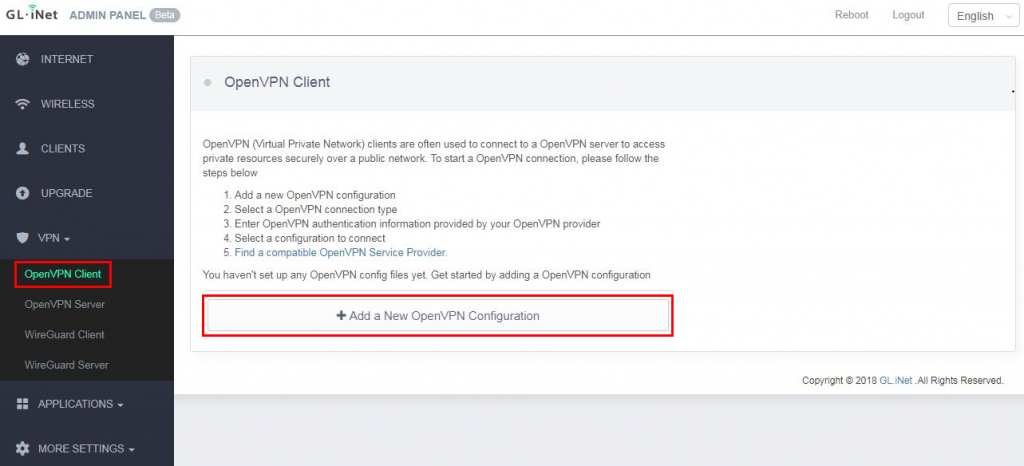
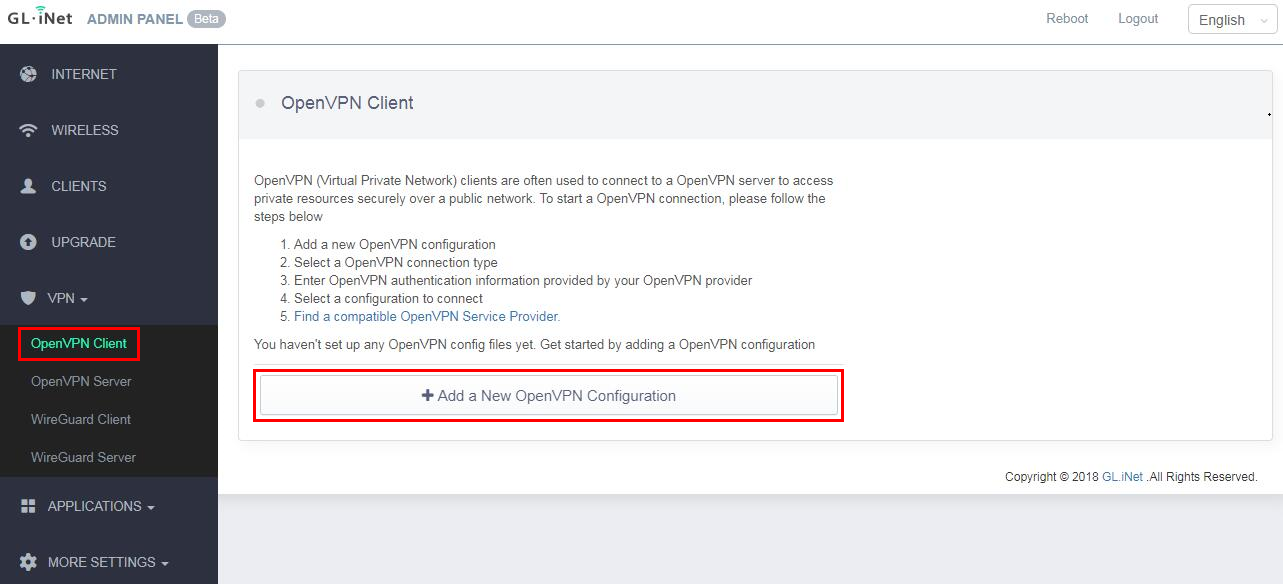
7. Navigate to 'VPN' > 'OpenVPN Client.'
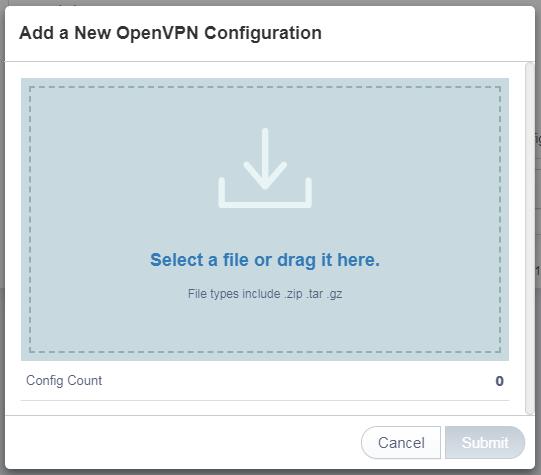
8. Select 'Add a New OpenVPN Configuration.'
9. Attach the .ovpn config file you downloaded earlier and click 'Submit.'
10. Enter your NordVPN service credentials copied earlier in the new window that appears.
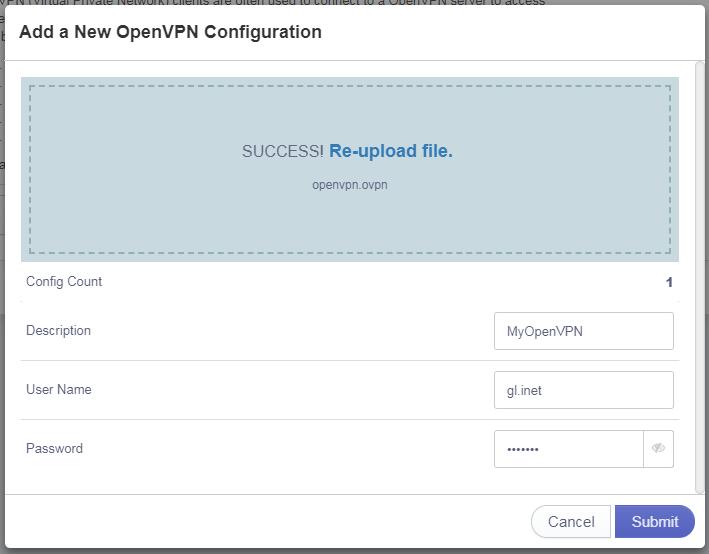
11. Once you enter the credentials, click on the 'Submit' button.
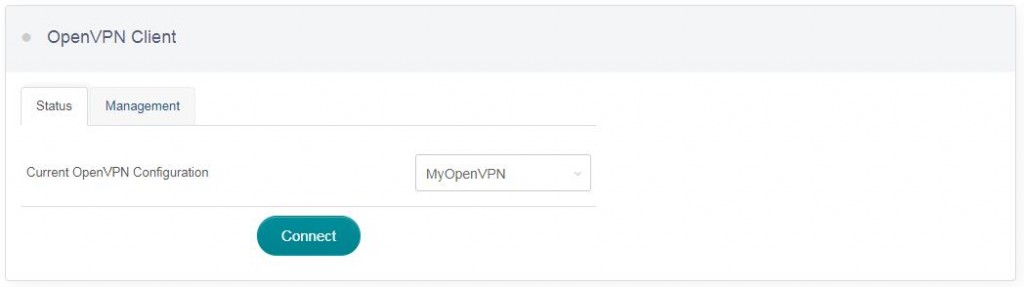
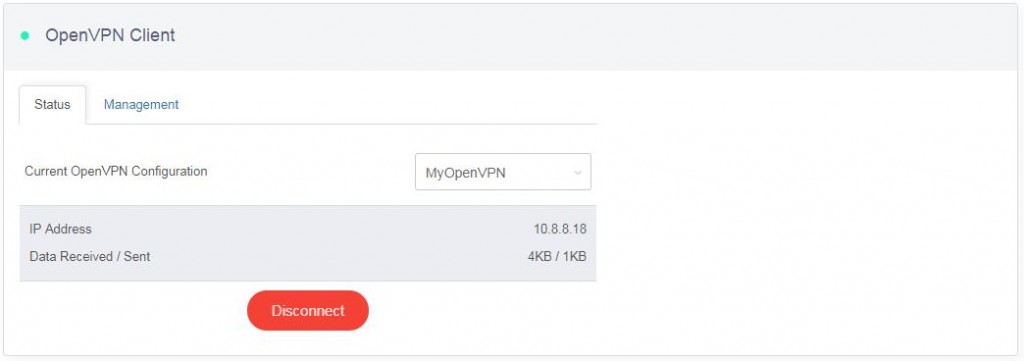
12. Hit the Connect button to enable the OpenVPN connection.
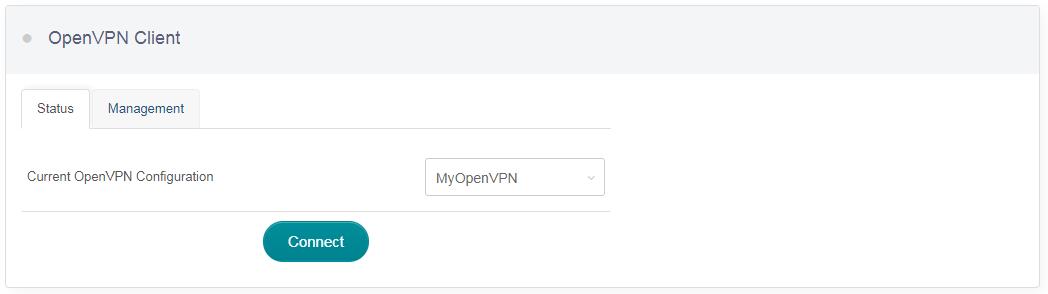
13. As soon as you get connected, your status will be previewed alongside your new virtual IP address.
Final Thoughts
When it comes to a manual configuration involving a router, users often feel overwhelmed because it looks difficult at first glance. However, to set up NordVPN on GL.iNet routers, all you need to do is follow simple setup instructions and set the right settings accordingly.
If you have additional devices that aren't connected to your GL.iNet router, you can download and install NordVPN on them by installing its native app or using its SmartDNS feature. With its native app alone, you can connect and secure up to 10 devices simultaneously.
That's all! Now you know how to configure and use NordVPN on GL.iNet. If you have further questions, drop us a comment using the button below. Thanks for reading!
Related