When you purchase through links on our site, we may earn an affiliate commission. Here’s how it works.
How to Set Up and Use a VPN on Apple TV in 2026
Last updated December 27, 2023


Apple TV streaming devices now support VPN software, starting with tvOS 17. If you visit your device's App Store, you'll see a selection of VPN apps that you can download, install, and run natively on your Apple TV. This option is available on any device running tvOS 17, which includes Apple TV HD and Apple TV 4K (1st, 2nd, and 3rd-gen) media streamers.
However, other options exist as well. You can set up a custom DNS ('SmartDNS') to unblock specific streaming apps, set up a VPN on your router, or share your VPN connection from your computer. That said, let's explain all 4 methods to setup and use a VPN on Apple TV.
How to Set Up a VPN on Apple TV
To set up a VPN on your Apple TV, you need to choose from 4 of the available methods, which include a range from native VPN apps to various workarounds. These are your options:
- Method #1: Set Up a VPN on Apple TV Using a Native tvOS App
- Method #2: Set Up a VPN on Apple TV Using Custom DNS
- Method #3: Set Up a VPN on Apple TV Using Your Router
- Method #4: Set Up a VPN on Apple TV By Sharing a VPN Connection
Method #1: Set Up a VPN on Apple TV Using a Native tvOS App
The easiest way to install a VPN on Apple TV is to use a native app. For that, you need a VPN provider that offers an app listed on the App Store. So, do the following:
1. Sign up for a VPN with a native tvOS app (we recommend NordVPN).
2. On your Apple TV, navigate to the 'App Store' app.
3. Select the magnifying glass icon and search for your VPN app.
4. Once you download the VPN, return to Apple TV's home screen and open the app.
5. Go through the setup process, asking you to log in to your account.
6. You should now see your VPN's home screen. That's it!
Method #2: Set Up a VPN on Apple TV Using Custom DNS
You can also get a VPN on Apple TV using custom DNS settings, also known as 'SmartDNS.' This option is offered by most VPNs and doesn't require you to use an app. Here's how to configure your VPN's SmartDNS and set it up on your Apple TV:
1. Get a VPN that comes with SmartDNS functionality (we recommend NordVPN).
2. Visit your VPN's home page and access your account (usually by clicking on 'Log in').
3. You should now see an option called 'SmartDNS' or 'Custom DNS.'
4. Most VPNs will now ask you to enable 'SmartDNS' or register your IP address.
5. At this point, you should see your primary and secondary DNS addresses.
6. On your Apple TV, navigate to Settings > Network.
7. Select your Web connection and pick 'Configure DNS.'
8. Choose 'Manual' and enter your DNS address.
9. Restart your Apple TV. That's it!
Method #3: Set Up a VPN on Apple TV Using Your Router
Another way to add a VPN to Apple TV is to set it up on a router, for which you need a VPN that supports routers. Keep in mind that this is a process that takes some time. It’s not an overly complicated process, but it requires your full attention and some technical knowledge.
Here's what it exactly entails:
1. Pick a VPN that supports plenty of routers (we recommend NordVPN).
2. Learn how to set up NordVPN on your router.
3. Visit your router's admin panel and ensure you have an active VPN session.
4. Go to Settings > Network > Wi-Fi on your Apple TV.
5. Connect to your Wi-Fi network and return to Apple TV's home screen.
6. You can now use your Apple TV as if you're located elsewhere.
We’ve put together a series of helpful links and articles (found below), providing highly detailed instructions on setting up a VPN on your Apple TV. So, let's go over those.
First, you need a router that supports VPNs. We recommend reading about how to choose a VPN router. Then, proceed to check our recommendations. Here are the best VPN routers, as well as the best DD-WRT routers right now.
If you’re on a tight budget, check out the best DD-WRT routers under $100. In case you didn’t know, DD-WRT is a type of custom firmware suitable for running a VPN service. For additional info, here’s our explanation of DD-WRT.
Once you obtain your VPN subscription and a VPN-compatible router, it’s time to combine these two. To learn how this is done - here’s our freshly updated guide on installing a VPN on a router.
Method #4: Set Up a VPN on Apple TV By Sharing a VPN Connection
We will show you how to share your VPN connection by turning your computer into a router. Once set up, you can connect your Apple TV to this virtual network and reap the benefits that your VPN offers. So, here's how to set up a VPN on Apple TV by sharing your VPN.
How to Share Your VPN Connection on Windows 10/11
In the past, Windows users were forced to use a command-line interface to enable this option. However, Windows 10 and 11 have an easy-to-use interface that helps you create a mobile hotspot. So, here are our step-by-step instructions.
1. Get a VPN with full Windows support (we recommend NordVPN).
2. Configure the VPN on your Windows PC (we recommend going with manual configuration).
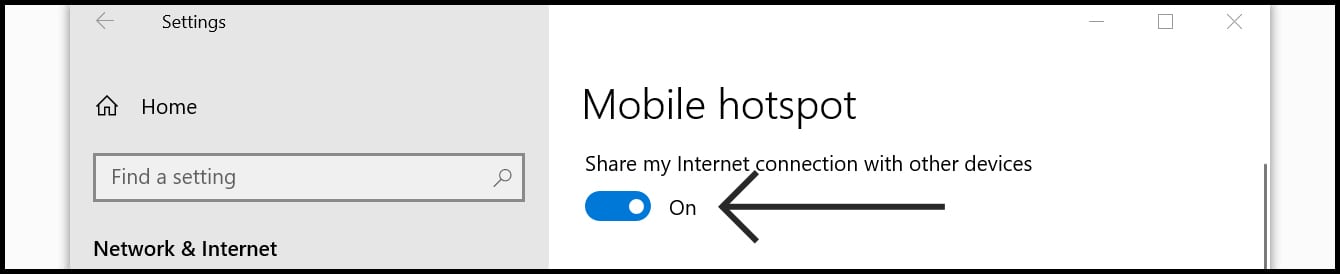
3. Then, go to Start > Settings > Network & Internet > Mobile Hotspot.
4. Flip the switch on your screen to activate your mobile hotspot.
5. Select 'Wi-Fi' next to 'Share My Internet Connection From.'
6. Click 'Edit' to set a new network name and password.

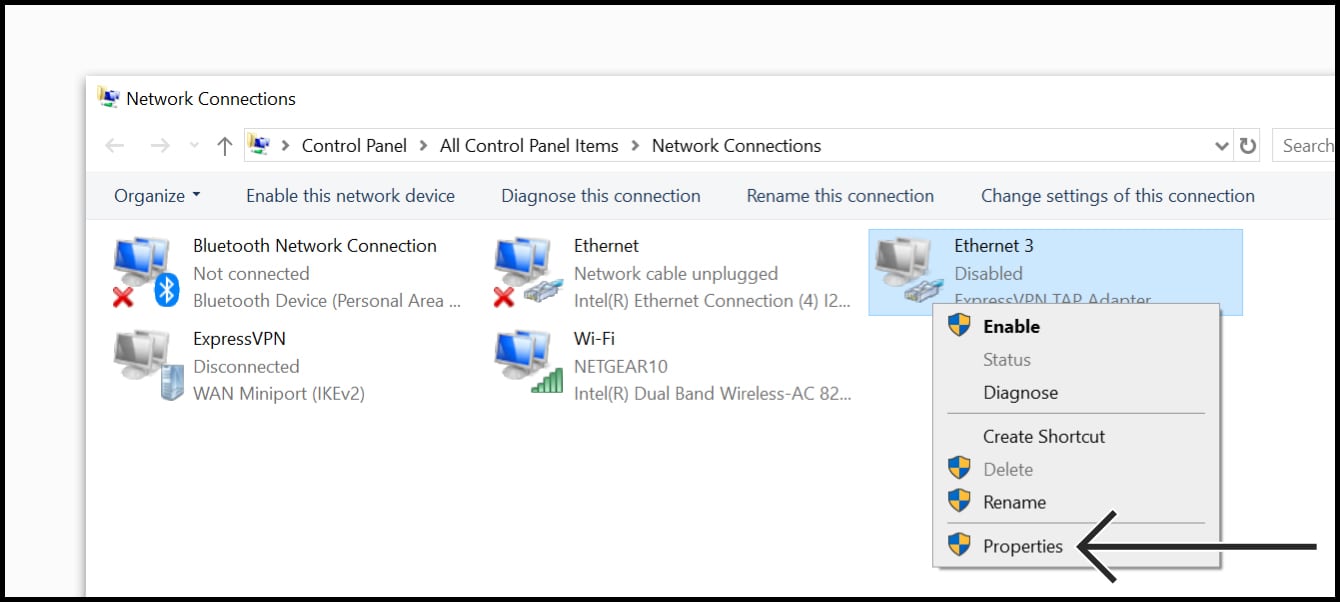
7. Select 'Change Adapter Options' below 'Related Settings.'
8. Note the name of the network you created moments ago.
9. Right-click on your VPN network adapter and pick 'Properties.'
10. Select the 'Sharing' tab and pick 'Allow Other Network Users to Connect...'
11. From the dropdown menu, pick your newly created connection.
12. Finally, click 'OK' to save your settings.
You’re free to connect to the newly created connection by going to your Apple TV settings. Once you do so, you’ll encrypt your Internet connection and access new types of streaming apps.
How to Share Your Internet Connection on macOS
If you use macOS, you can also share your Web connection – and then use Apple TV to get VPN-related benefits. However, remember that you need to have an L2TP/IPSec VPN connection on your Mac as a requirement. Then, do the following:
1. Get a VPN that fully supports macOS (we recommend NordVPN).
2. Configure the VPN on your Mac (it's best to use manual configuration).
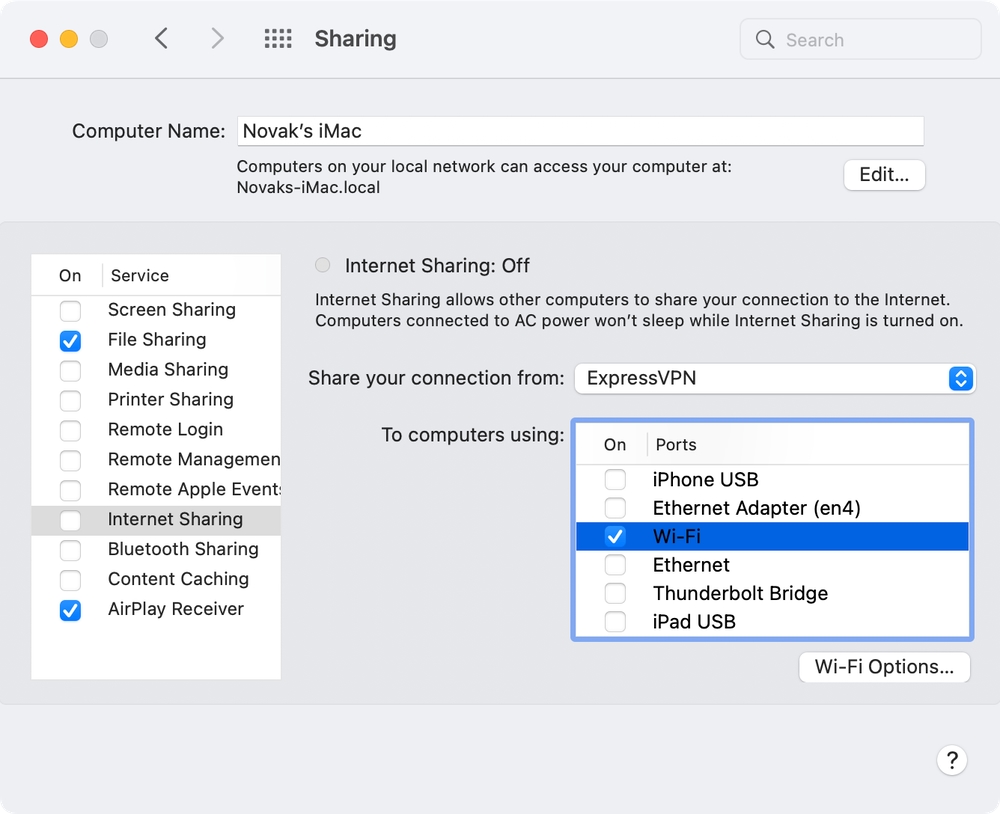
3. Next, go to System Preferences > Sharing.
4. On the left, select 'Internet Sharing.'
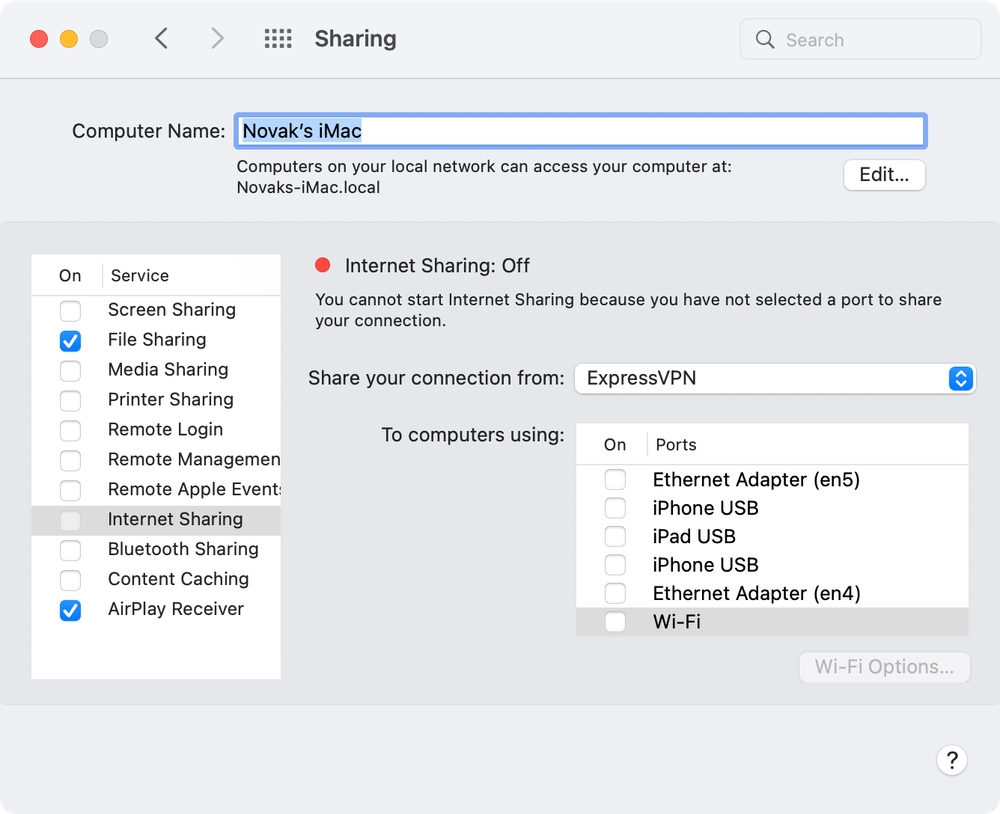
5. Pick your VPN connection next to 'Share Your Connection From.'
6. Select 'Wi-Fi' in the field that says 'To Computers Using.'
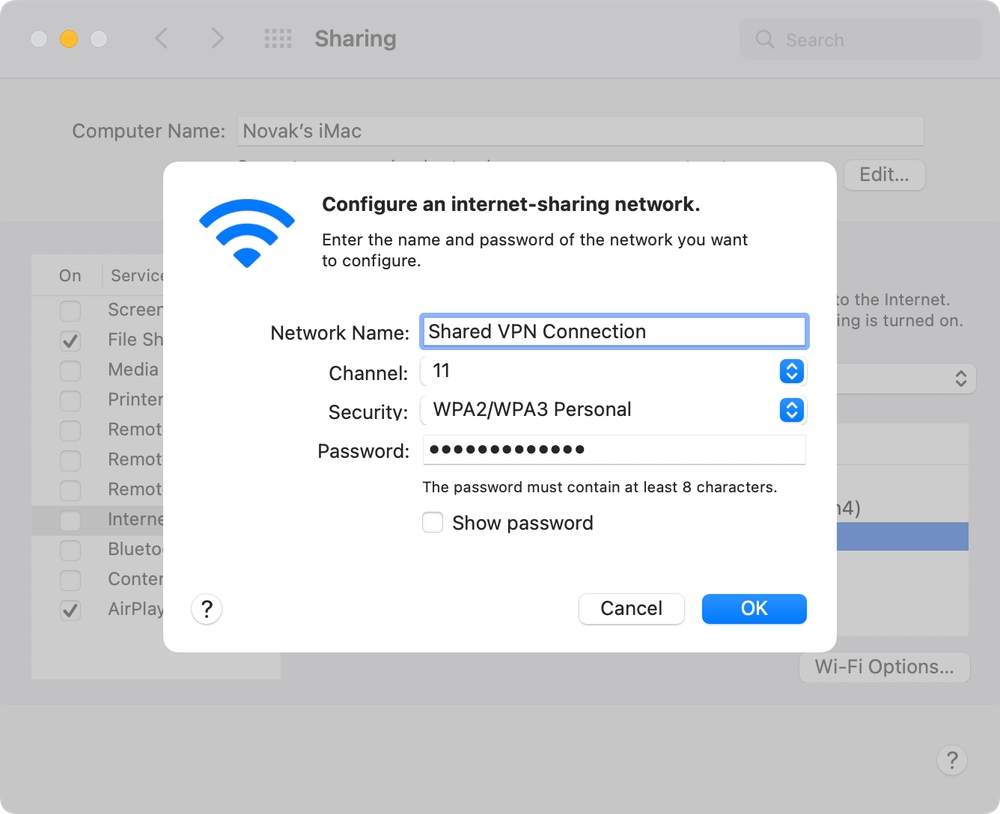
7. Use the 'Wi-Fi Options' button in the bottom right corner.
8. Give a name to your connection and create a password. Then, click 'OK.'
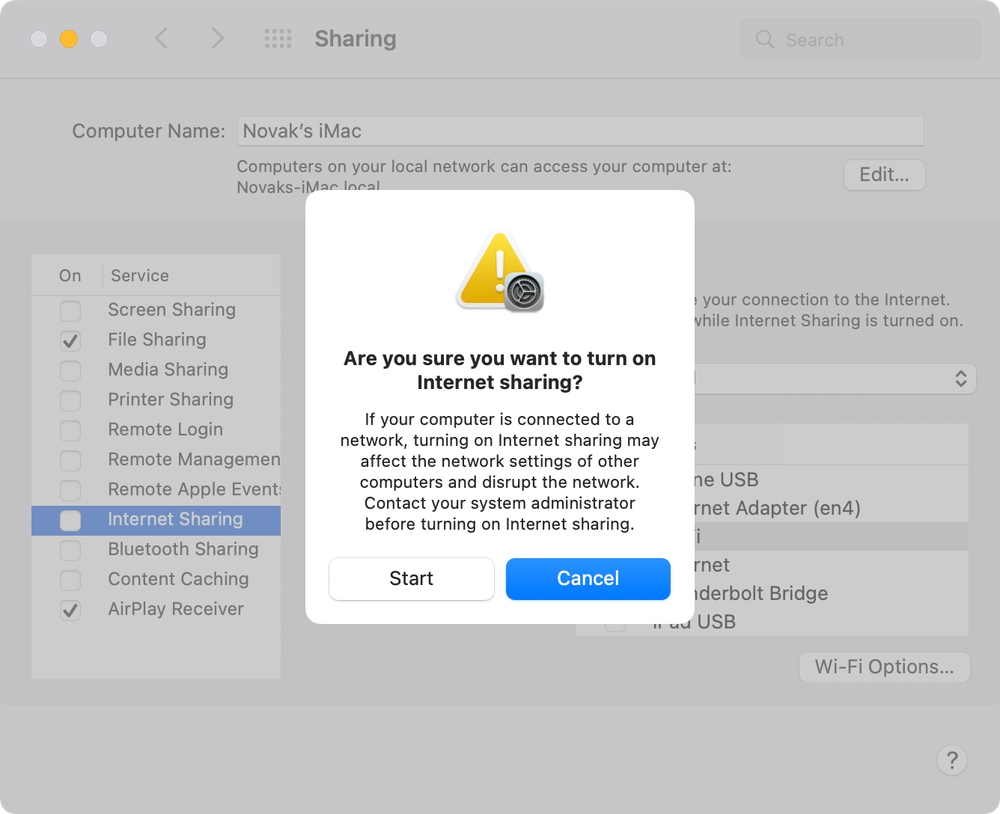
9. Tick the box next to 'Internet Sharing' to start sharing your VPN connection.
10. Return to your Apple TV and go to Settings > Network > Wi-Fi.
11. Connect to your newly created Wi-Fi network (you'll recognize it by its name).
12. Feel free to return to your Apple TV's home screen. That's it!
Final Thoughts
The easiest way to set up and use a VPN on Apple TV is to use a native app, but remember that your device needs tvOS 17, as you won't have access to VPN apps otherwise. Workarounds like installing a VPN on a router, adding a custom DNS, or sharing your VPN is also viable - but they're also more complex and take more time to complete.
We'll remind you that we highly recommend NordVPN for any Apple TV device (both old and new), as it supports every single installation method mentioned above. As such, it's the best VPN for Apple TV. We'll also recommend you visit our central guide on how to set up a VPN if you wish to extend its protection to other devices as well.
You’ve reached the end of our guide on how to set up and use a VPN on Apple TV. In case of any problems, feel free to let us know by posting your comment below.
Related