When you purchase through links on our site, we may earn an affiliate commission. Here’s how it works.
How to Set Up & Use NordVPN on Apple TV
Last updated May 17, 2024

Starting with tvOS 17, NordVPN offers full support for Apple TV. That means you can now install the NordVPN app on your Apple TV, which includes Apple TV HD and Apple TV 4K (1st, 2nd, and 3rd generation). Using the app, you gain access to everything this VPN offers, including its entire server network and high-end encryption.
However, you can set up and use NordVPN on Apple TV in several different ways. Aside from using its tvOS app, you can install it on your router (cover all your devices at once), set up NordVPN's SmartDNS (to unblock streaming apps), or share your VPN connection from another device (Windows, macOS, Linux). We'll explain each of those methods.
How to Set Up NordVPN on Apple TV
There are 4 ways to set up NordVPN on your Apple TV, depending on the version of tvOS you have installed and the Apple TV model you use. These are the options available.
Method #1: Install NordVPN App on Apple TV
To install the NordVPN app on your Apple TV, your device needs to be on the latest version of tvOS (to update, go to Settings > System Software Updates). Use the following steps:
1. Sign up for NordVPN using a Web browser on your phone or computer.
2. On your Apple TV, open the 'App Store' app.
3. Use the search icon at the top to look up 'NordVPN,' and then download the app.
4. Return to Apple TV's home screen and open NordVPN.
5. Pick 'Log In' and go through the one-time setup procedure.
6. You'll now see NordVPN's home screen, ready to be used. That's it!
Method #2: Set Up NordVPN's SmartDNS
The following steps will instruct you to activate the NordVPN SmartDNS feature, giving you access to DNS addresses you'll need to add to your Apple TV. Here's what you need to do:
1. Subscribe to NordVPN using your computer and any Web browser.
2. Make sure that your Apple TV and your computer are using the same Wi-Fi network.
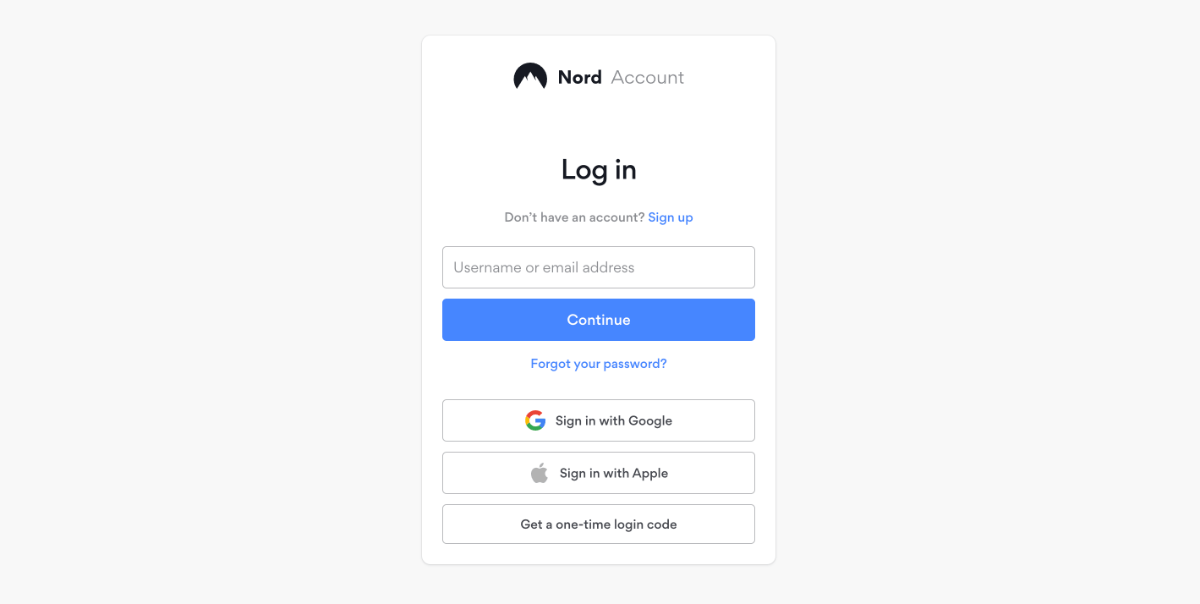
3. Go back to NordVPN's home page. Click 'Log In' using the main menu, and then provide your credentials. You will reach your Nord Account dashboard.

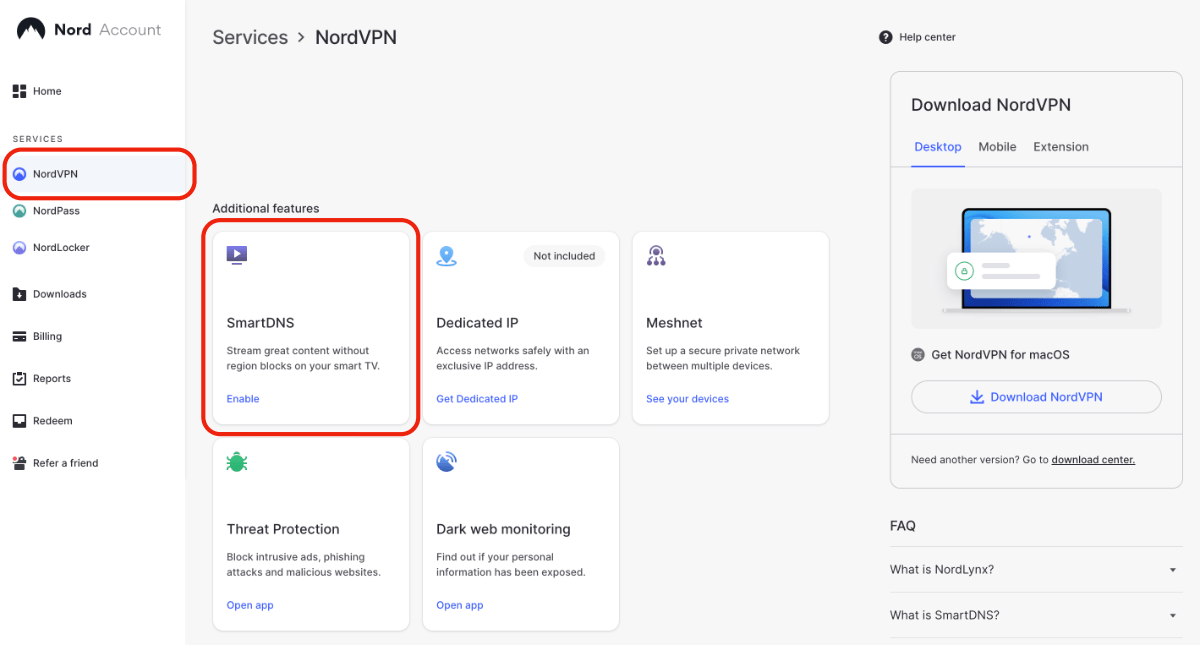
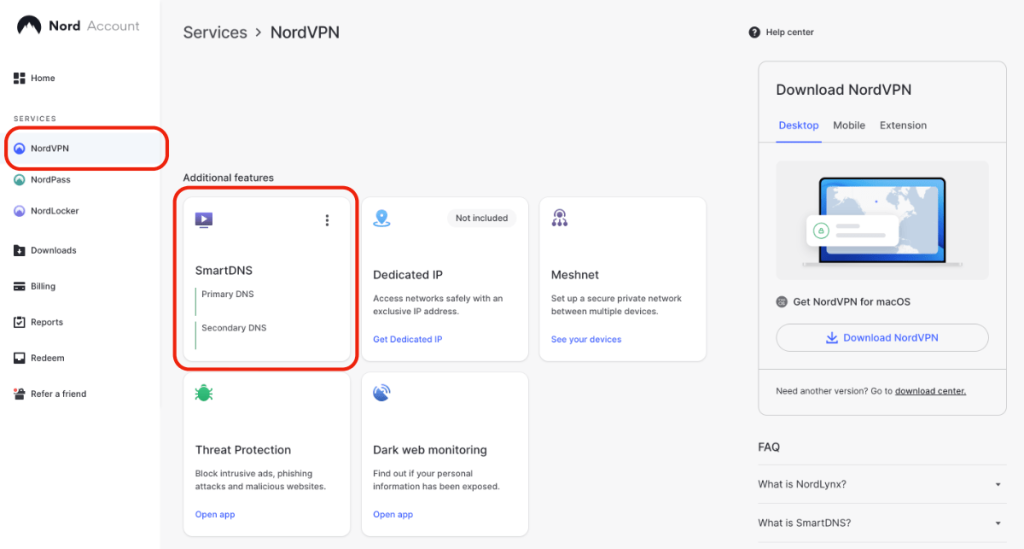
4. Select 'NordVPN' using the left-placed sidebar. On the right, click 'Enable' in the 'SmartDNS' box and follow the steps you'll see on your screen.

5. After a few minutes, you should receive an email from NordVPN. That's when you'll see your primary and secondary DNS address on your Nord Account dashboard.

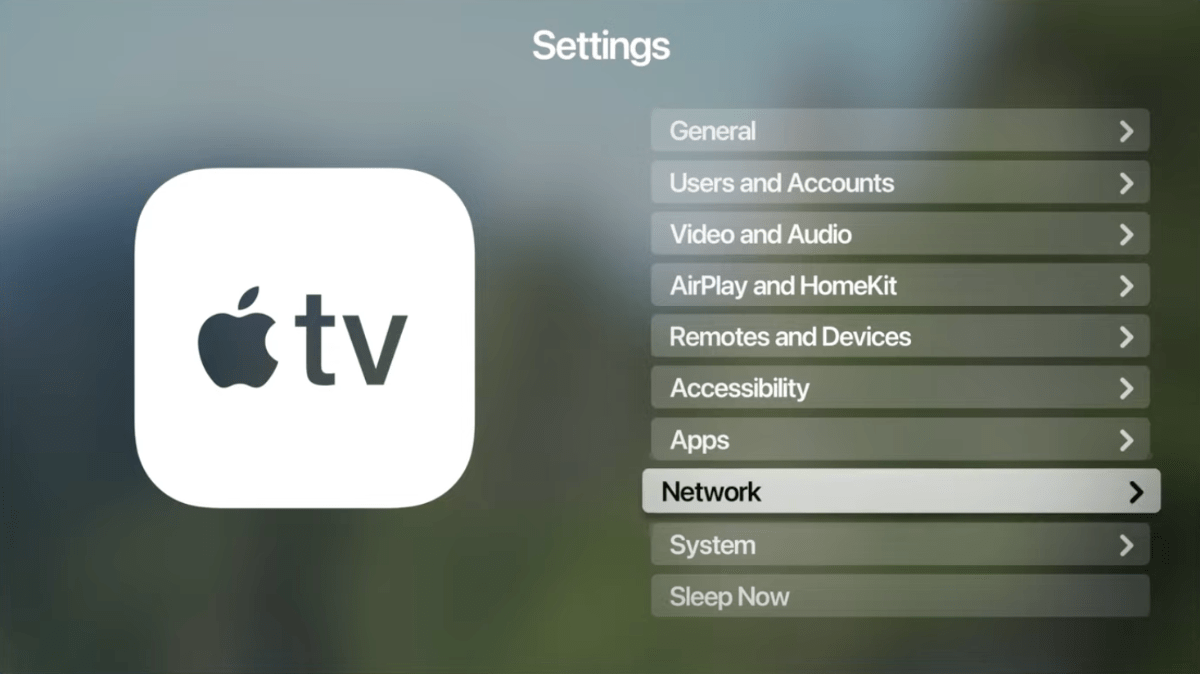
6. Turn to your Apple TV and navigate to Settings > Network > Wi-Fi.


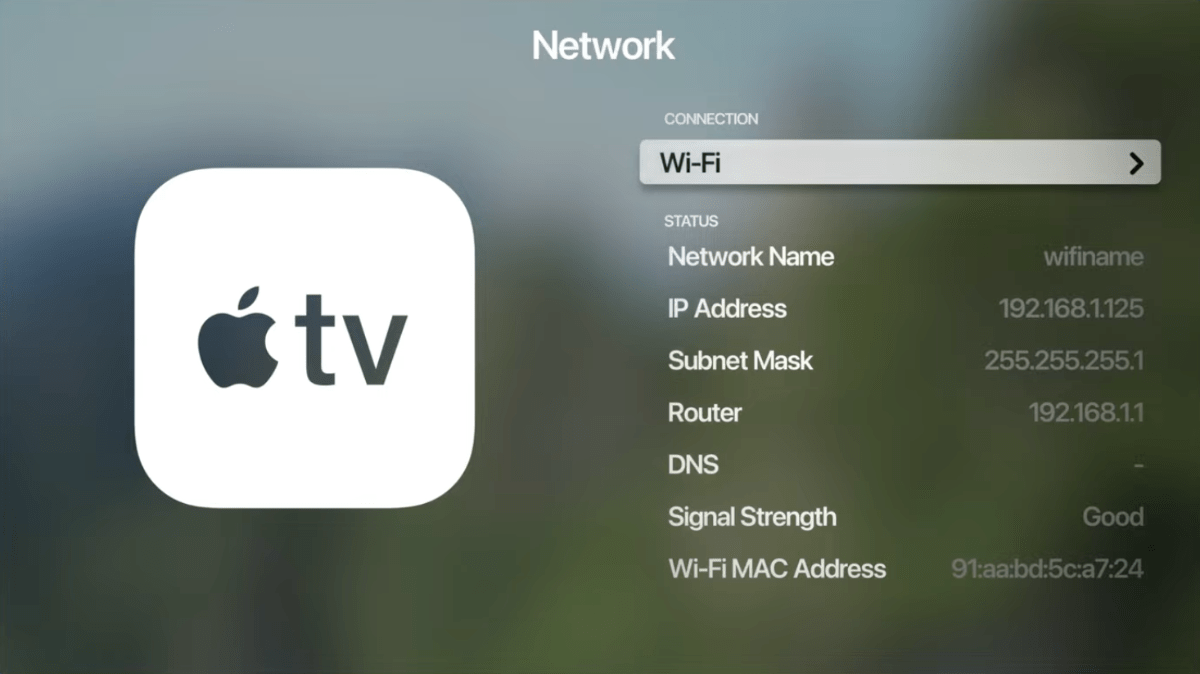
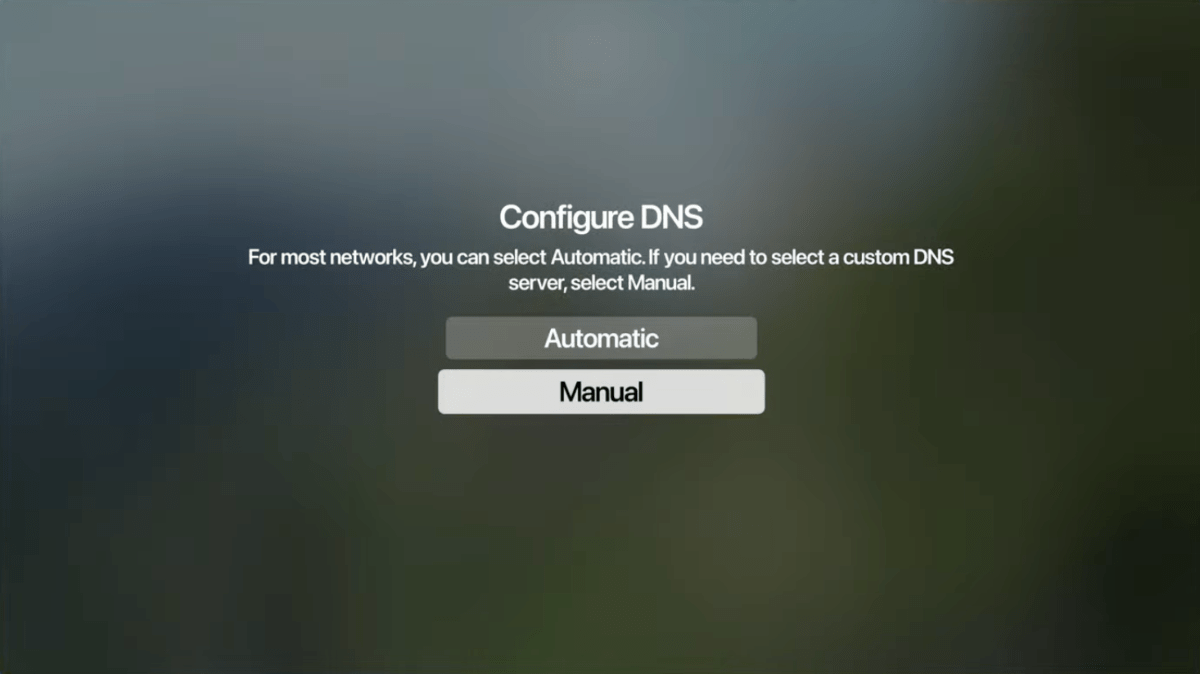
7. Make sure to pick the same Wi-Fi connection that your computer uses. Then, scroll down and select the 'Configure DNS' menu item.
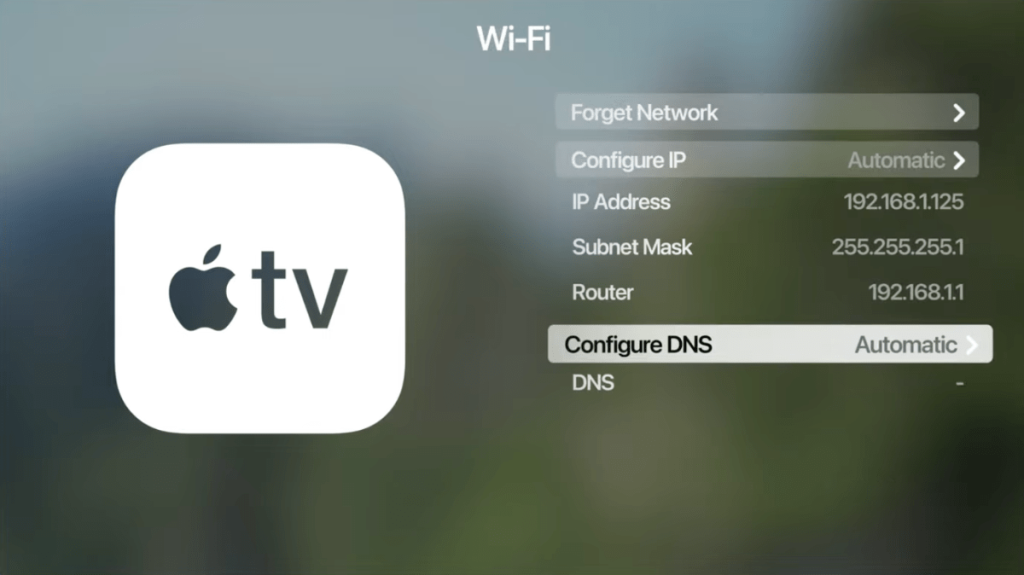

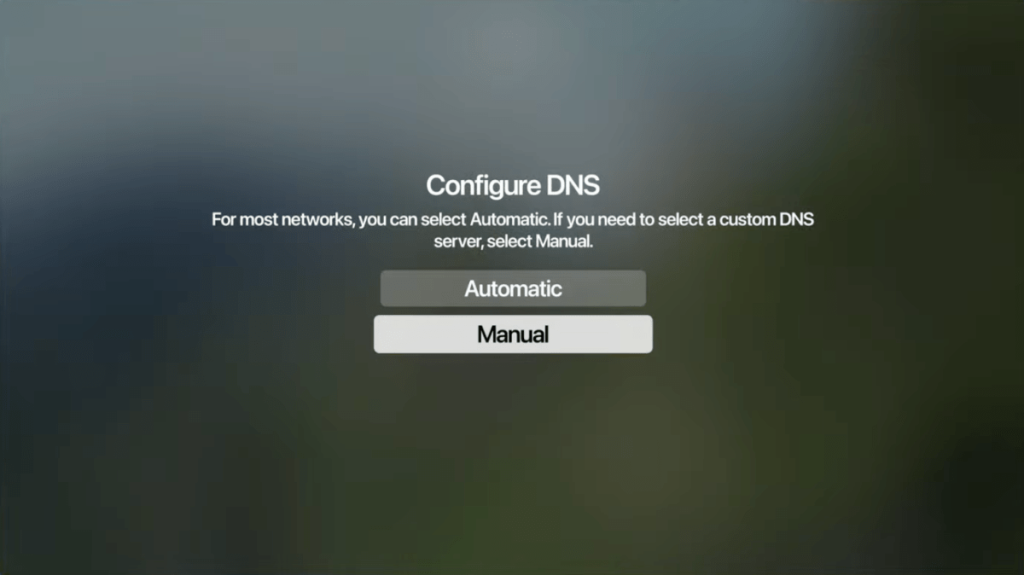
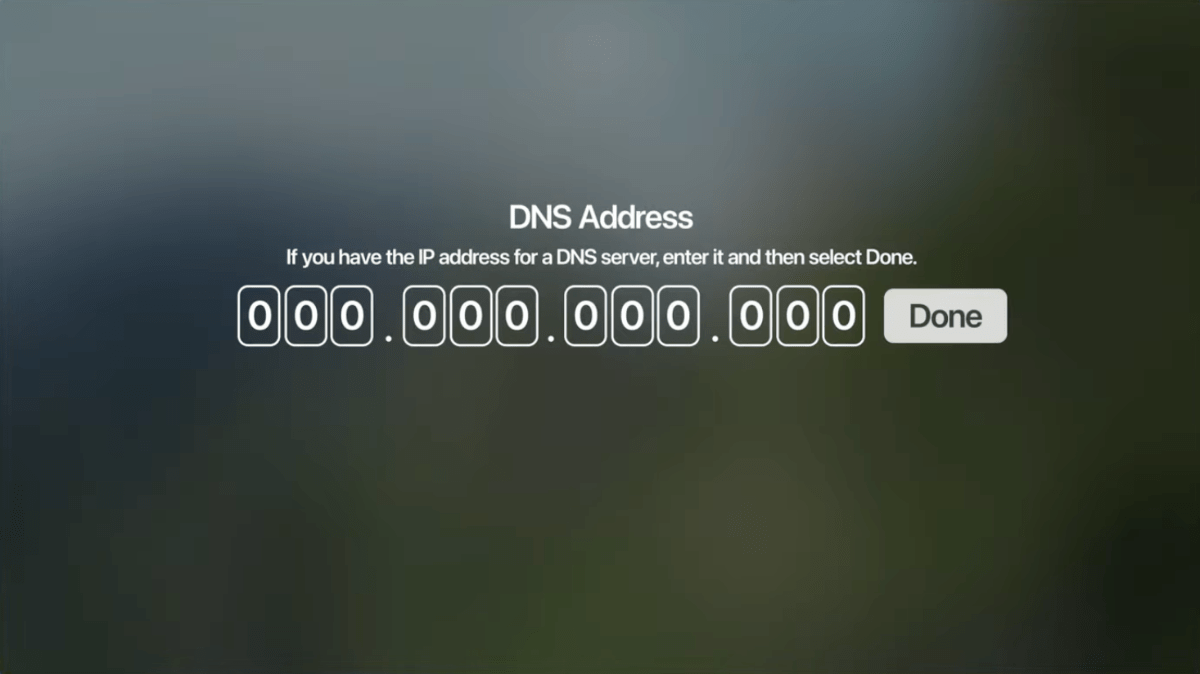
8. Pick 'Manual,' and you should see a prompt to enter a new DNS address. Use the following DNS addresses: primary - 103.86.99.103; secondary (if available) - 103.86.96.103.
9. Once you confirm the new DNS addresses, feel free to restart your Apple TV. That's it!

Method #3: Set Up NordVPN on Router
You can use NordVPN on your Apple TV by connecting to your VPN-protected Wi-Fi network. To make that possible, you need to set up the VPN on your router. That way, every device you connect to your router will receive the same VPN benefits, including your Apple TV.
That said, there's an important prerequisite here - you need a router that supports manual VPN configuration. More precisely, it must support OpenVPN, as that's the protocol that NordVPN supports on routers. Once you cover that, you'll need to follow your router manufacturer's guide to access its dashboard and set up a new VPN connection.
For a more detailed guide with individual instructions related to every popular brand of routers, visit our guide on how to set up NordVPN on a router.
Method #4: Share NordVPN from Another Device
You can share any VPN connection, including those by NordVPN, from another device, like a Windows PC, macOS computer, or Linux machine. That's done by setting up NordVPN and then using your computer's Internet sharing capability, which creates a virtual Wi-Fi network. You can join that network from your Apple TV, extending NordVPN's protection.
The good news is that VPN sharing works on Windows, macOS, and Linux, even on very old computers, for which there are no specific prerequisites. However, this procedure will ask you to set up NordVPN manually, which is a lengthy process but not an overly complicated one. In the end, you'll gain a virtual VPN Wi-Fi network for more than your Apple TV.
To learn how to share your VPN connection, make sure to use the provided link. You'll get to our central guide that covers Windows, Mac, Linux, Android, and iOS.
Final Thoughts
NordVPN has done a great job of supporting Apple TV. It's one of the first VPNs with a native tvOS VPN app. As such, you can set up NordVPN on Apple TV in a matter of minutes. However, depending on your needs, you have extra options available.
Setting up NordVPN on a router will protect your entire household at once, including your TV. If you share your NordVPN connection from a computer, you can create a virtual Wi-Fi network. And you can use its SmartDNS to unblock apps like Netflix and Prime Video.
To learn more, visit our central guide on how to set up NordVPN, covering dozens of different devices. Remember that you have 6 simultaneous connections available, so why not take full advantage of your NordVPN subscription?
That's all! Now you know how to set up NordVPN on Apple TV. If you have further queries, drop us a comment below. Thanks for reading!
Related