When you purchase through links on our site, we may earn an affiliate commission. Here’s how it works.
How to Configure and Use NordVPN on DrayTek Vigor
Published on April 28, 2022

If your router runs on DrayTek Vigor firmware, you can easily configure NordVPN on it. Yes, you just have to create an IKEv2 EAP VPN tunnel from your router to any NordVPN server in your preferred location. However, the installation process can be a bit difficult for first-time users. That's why we've created a step-by-step guide to help you learn how to configure and use NordVPN on DrayTek Vigor. Have a look.
1. First, visit the NordVPN website.
2. Next, hit the Grab the Deal button and choose a subscription on the next page.
3. You’ve to enter your payment details after that to complete the purchase.
4. You’ll receive a confirmation on your subscription now.
5. Next, click here to get the hostname of the server you want to connect to.
6. Then, log into your router’s management page with admin access; you can choose any browser and visit this IP, 192.168.1.1, for that.

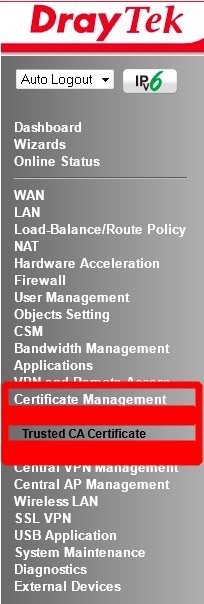
7. Once the page opens, move to the Certificate Management option and choose Trusted CA Certificate from the drop-down.
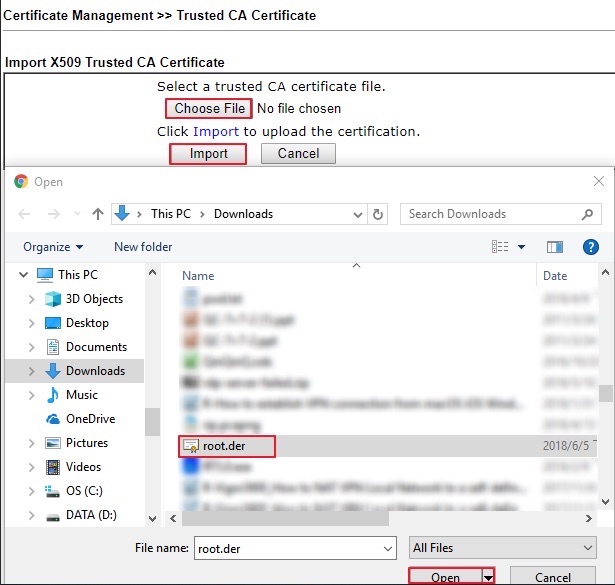
8. Next, download the NordVPN root CA certificate; you have to import it to your router’s page.
9. Now, click IMPORT under Trusted CA Certificate.
10. Click on Choose File after that and Open the .der file.
11. Next, click Import and wait for a few seconds.
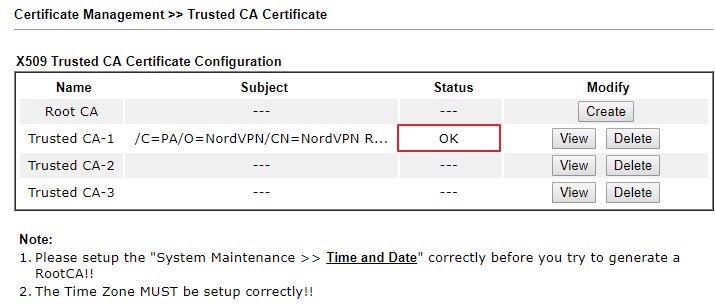
12. Your router will respond with an Import Success message, and the Certificate Status will show OK.
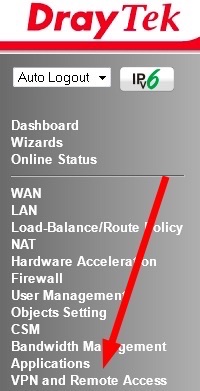
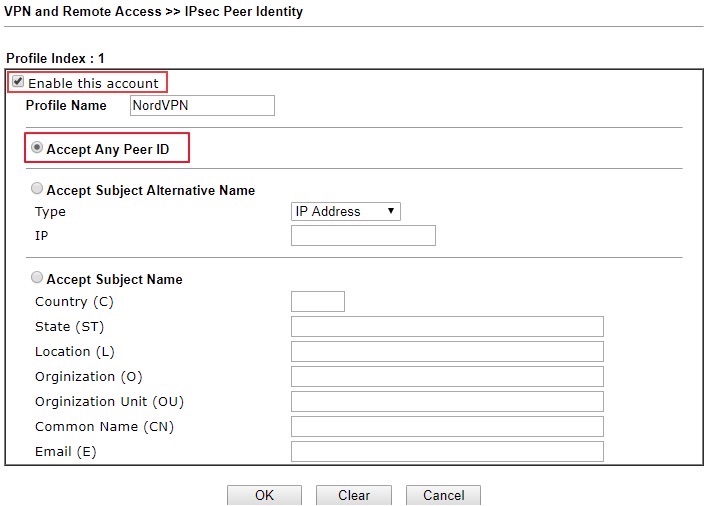
13. Now, move to VPN and Remote Access and choose IPsec Peer Identity.
14. Set the profile name to NordVPN next and check the box next to Enable this Account, and choose the option Accept Any Peer ID.
15. Then, move on to VPN and Remote Access, and pick LAN to LAN.
16. Next, click on an available index number and edit the profile with the details we’ve mentioned below.
Common Settings:
- Choose any profile name.
- Check the option Enable this profile.
- Select Dial-Out for Call Direction.
- In Dial-Out Through, choose WAN for the VPN connection.
Dial-Out Settings:
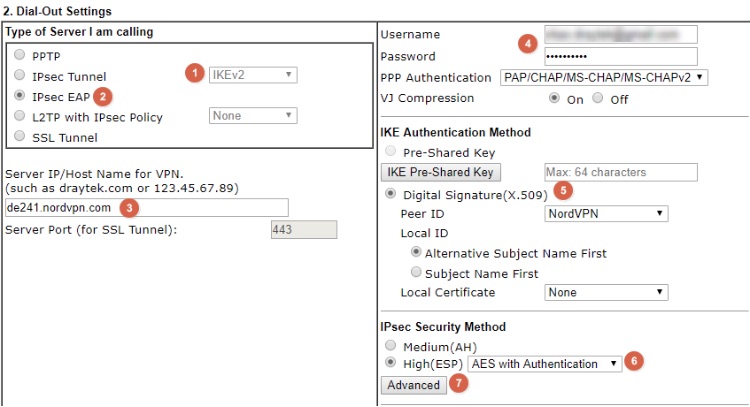
- First, select IPsec Tunnel and IKEv2.
- Under VPN server type, choose IPsec EAP.
- Enter the VPN server IP/hostname now that you’ve received in step 5.
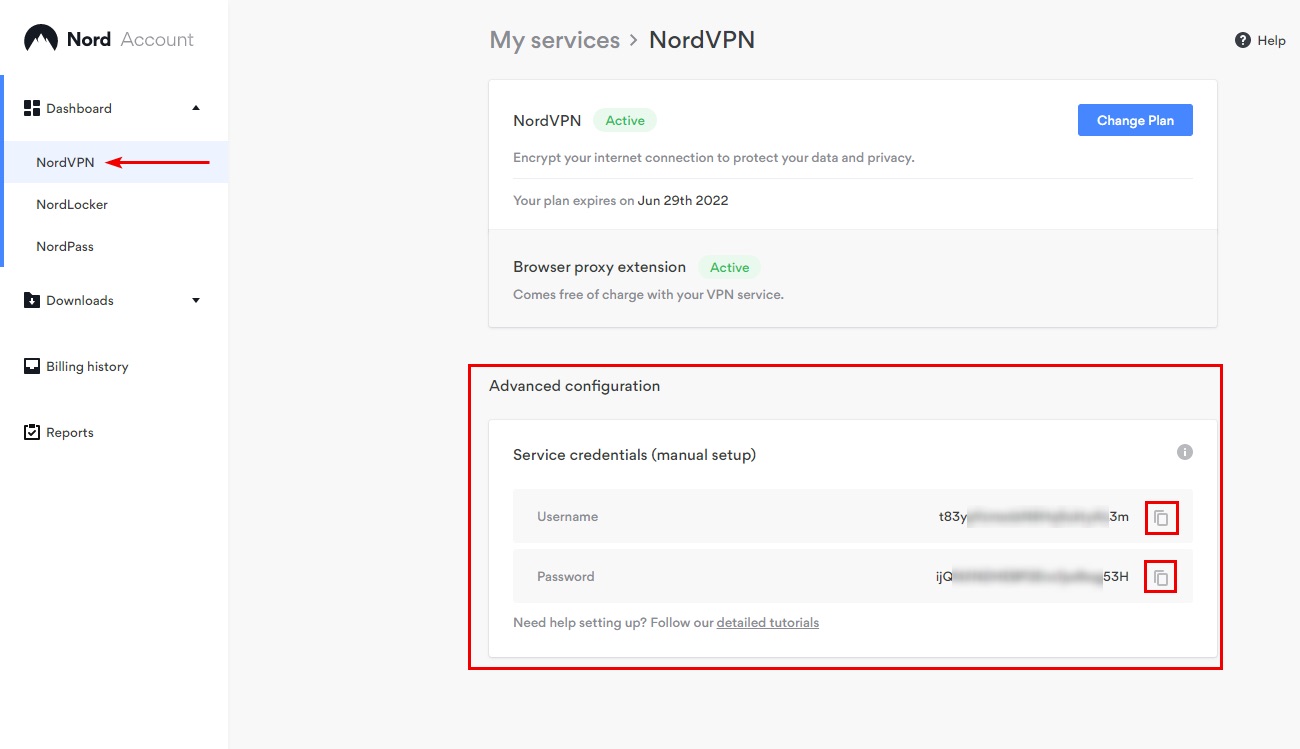
- Type in your Username and Password next that you can find these options under NordVPN service credentials in your online VPN account dashboard.

- Select Digital Signature for IKE Authentication Method, and for Peer ID, choose the IPsec Peer Identity Profile you’ve created earlier.
- For IPsec Security Method, choose AES with Authentication.
- Click Advanced next.
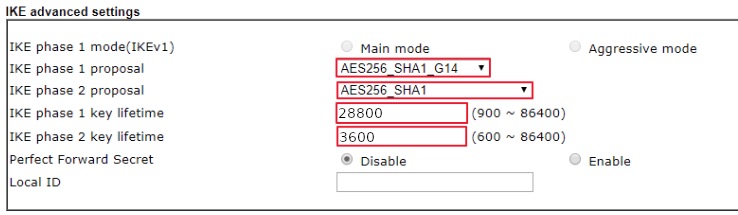
IKE advanced settings:
- IKE phase 1 proposal as AES256_SHA1_G14
- IKE phase 2 proposal as AES256_SHA1
- IKE phase 1 key lifetime as 28800
- IKE phase 2 key lifetime as 3600
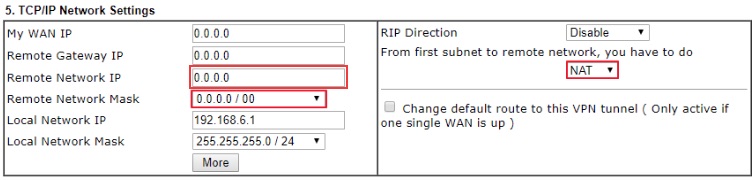
TCP/IP Network Settings:
- Remote Network IP as 0.0.0.0.
- Remote Network Mask 0.0.0.0/00.
- Change Routing to NAT.
- Enable Change Default Route to this VPN tunnel option if you want to encrypt your complete web traffic.
17. Once done, you’ll be connected, and you can check your VPN status through VPN and Remote Access >> Connection Management

That’s all! Now you know how to configure and use NordVPN on a router running DrayTek Vigor. If you’ve further queries, drop us a comment through the below button. Thanks for reading!
Related