When you purchase through links on our site, we may earn an affiliate commission. Here’s how it works.
How to Set Up ExpressVPN on Synology NAS
Last updated January 26, 2025

You can set up ExpressVPN on your Synology NAS device by configuring the VPN manually. That means you'll need to create an OpenVPN connection to a specific VPN server, which will allow your NAS device to encrypt its incoming and outgoing data traffic.
We'll also note that ExpressVPN doesn’t provide a list of supported Synology NAS devices. Still, the procedure should work on any Synology NAS that supports OpenVPN connections. We recommend checking your device’s manual before you proceed.
In this article, we'll teach you how to set up ExpressVPN on Synology NAS with comprehensive instructions.
How to Set Up ExpressVPN on Synology NAS Using OpenVPN
Setting up ExpressVPN on your Synology NAS device requires you to obtain your OpenVPN credentials, which are available on the VPN's website. After that, you need to access your Synology NAS, configure a connection to a specific server, and establish that connection. The entire procedure should not take more than a couple of minutes, and here's everything you need to do:
1. Sign up for ExpressVPN using your computer and any Web browser.
2. After subscribing, click 'My Account' using the top-placed main menu on ExpressVPN's website.
3. Provide your credentials to access your ExpressVPN dashboard.

4. Go to Set Up Other Devices > Manual Configuration.
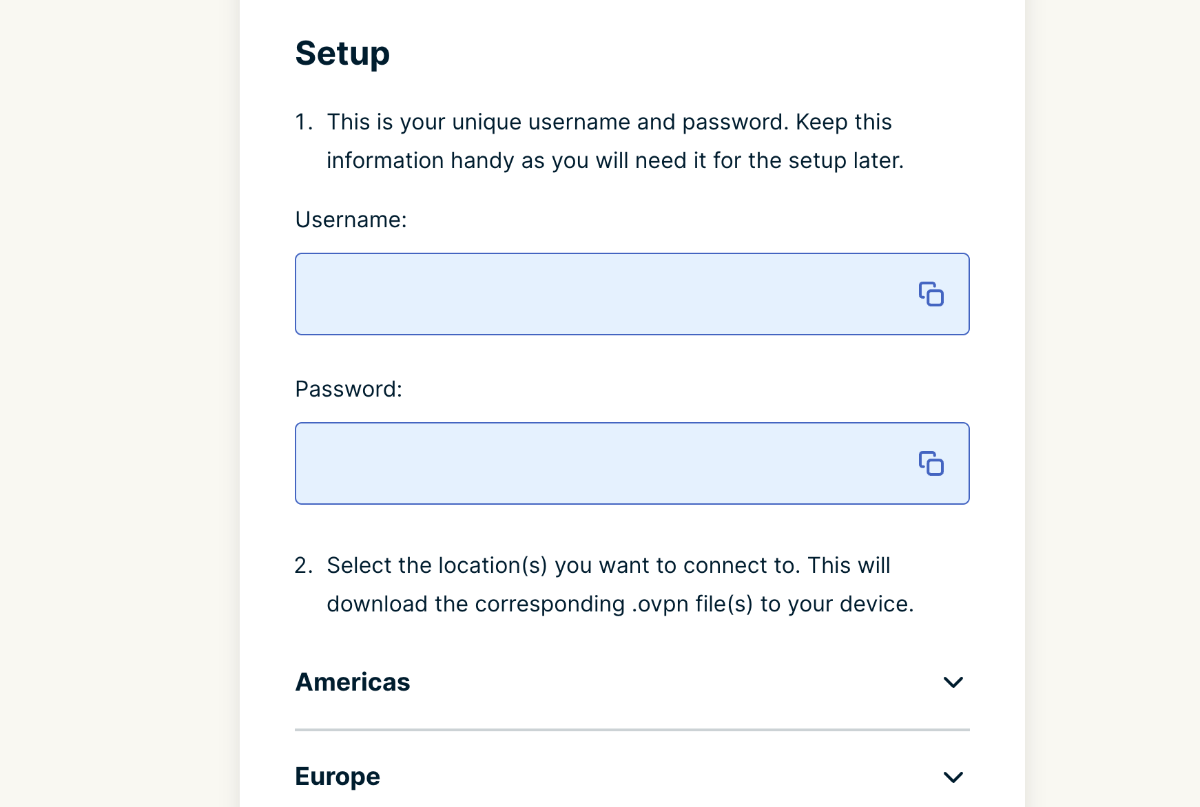
5. Check your OpenVPN username and password on the right.
6. Pick a VPN server and download its OVPN file.

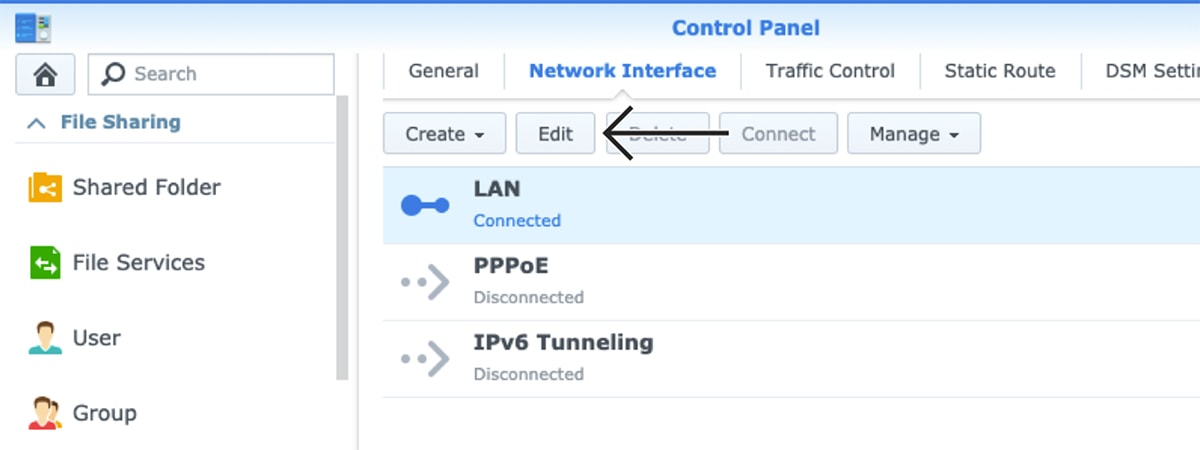
7. Access your Synology NAS device and open its Control Panel.
8. Go to Network Interface > LAN > Edit, pick 'IPv6,' and set it to 'OFF.'

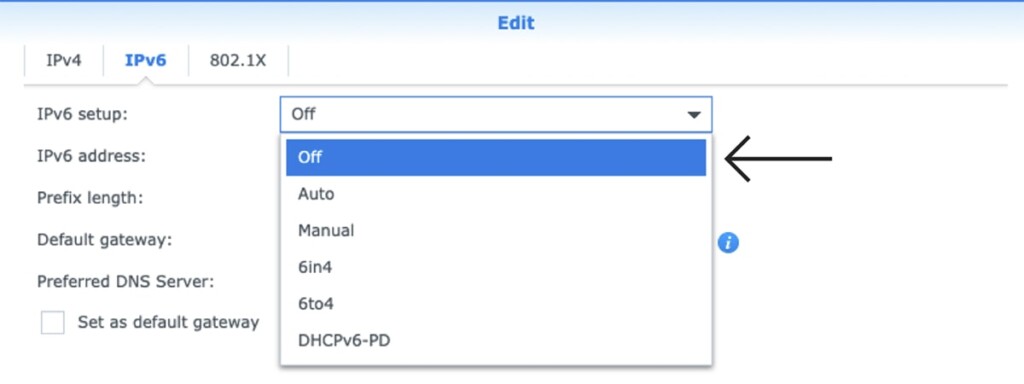
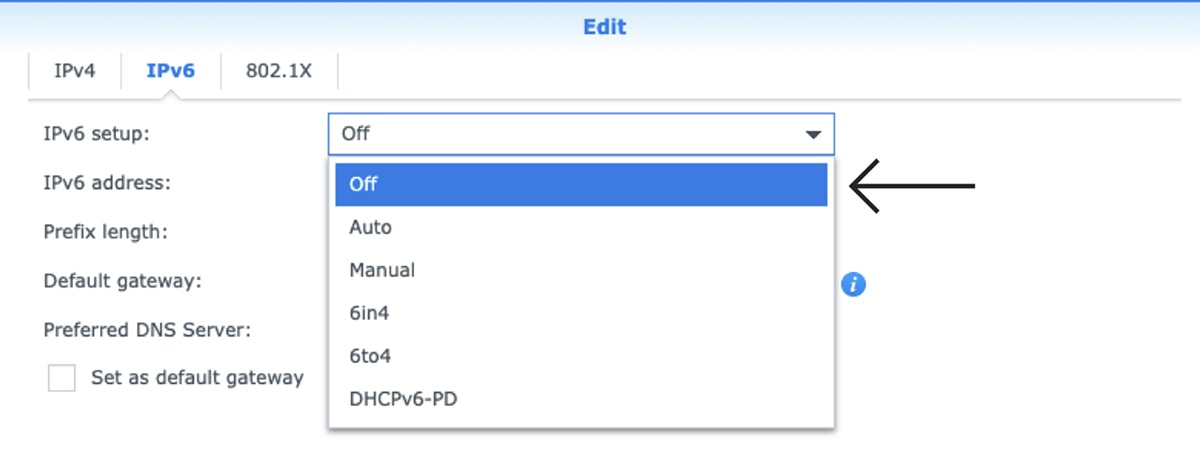
9. Click 'OK' to apply the changes, then restart your Synology.
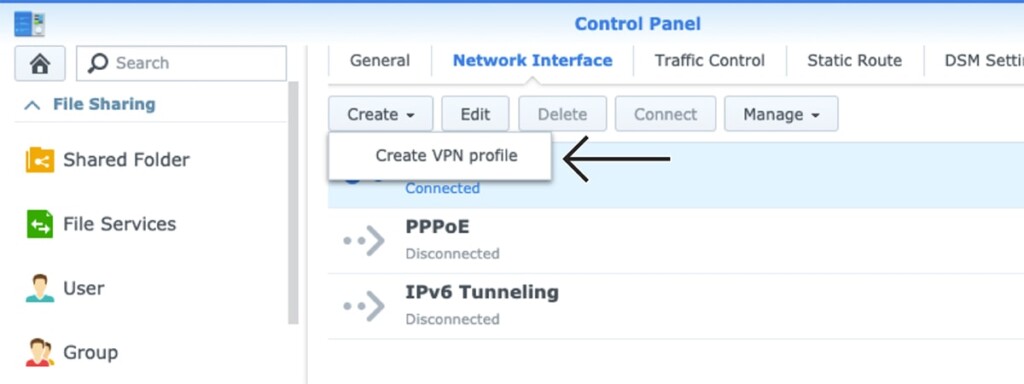
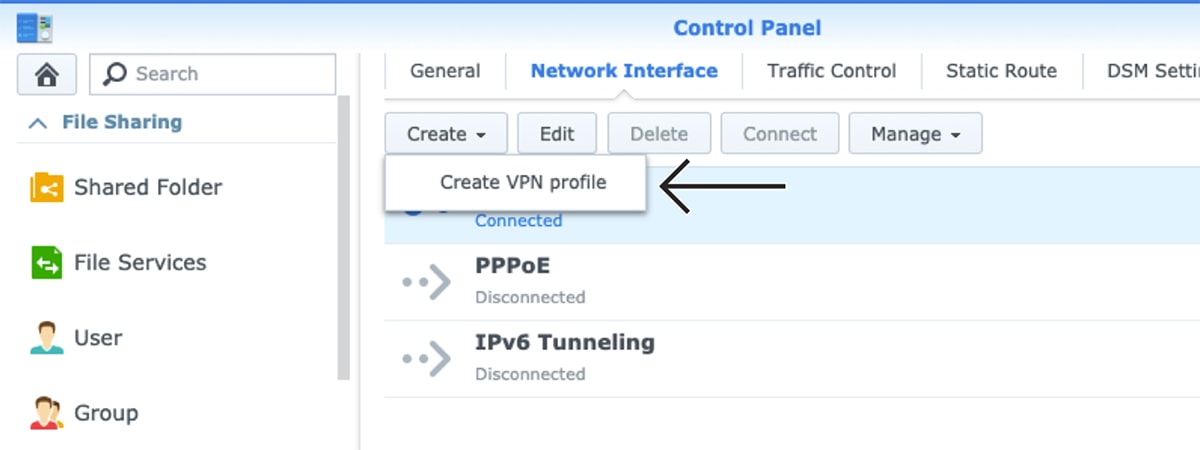
10. Now, go to Control Panel > Network > Network Interface > Create > Create VPN Profile.
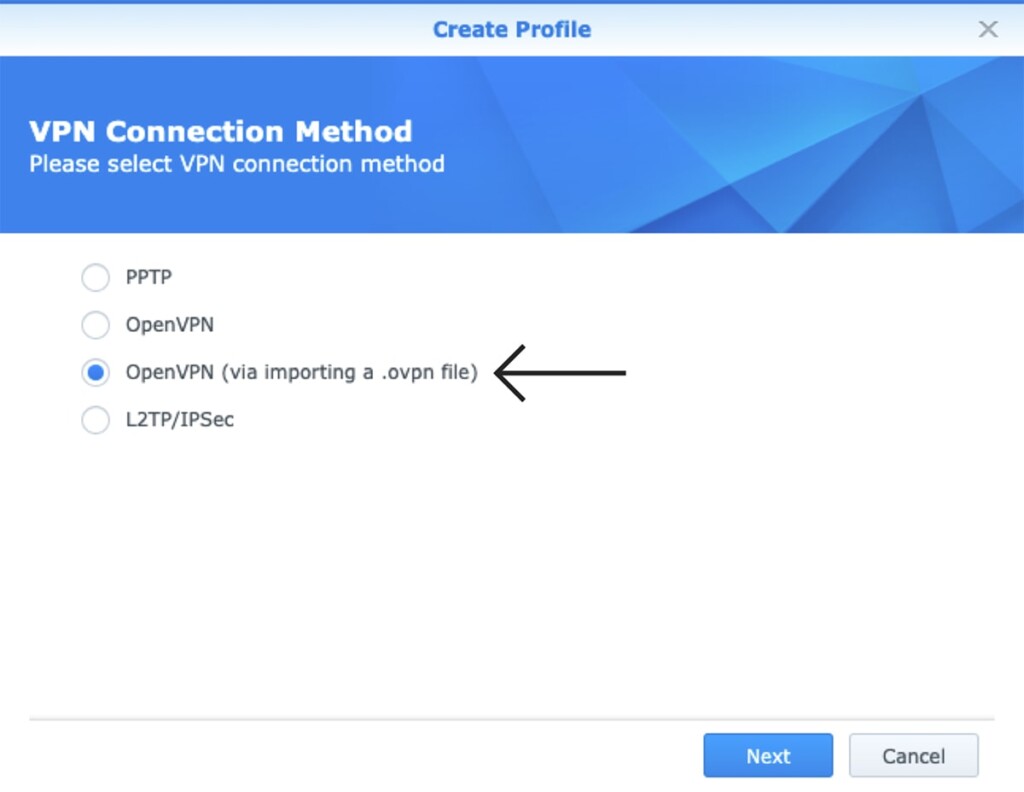
11. Pick 'OpenVPN (.ovpn file)' and click 'Next.'

12. Next, you’ll see the 'General Settings' screen, where you must enter the following info.
- Profile Name: Use any name that’ll help you recognize your VPN connection.
- User Name: Copy your OpenVPN username from your ExpressVPN dashboard.
- Password: Copy your OpenVPN password from your ExpressVPN dashboard.
- Import OVPN File: Upload the file you downloaded earlier.
- CA Certificate: Feel free to leave this field blank.

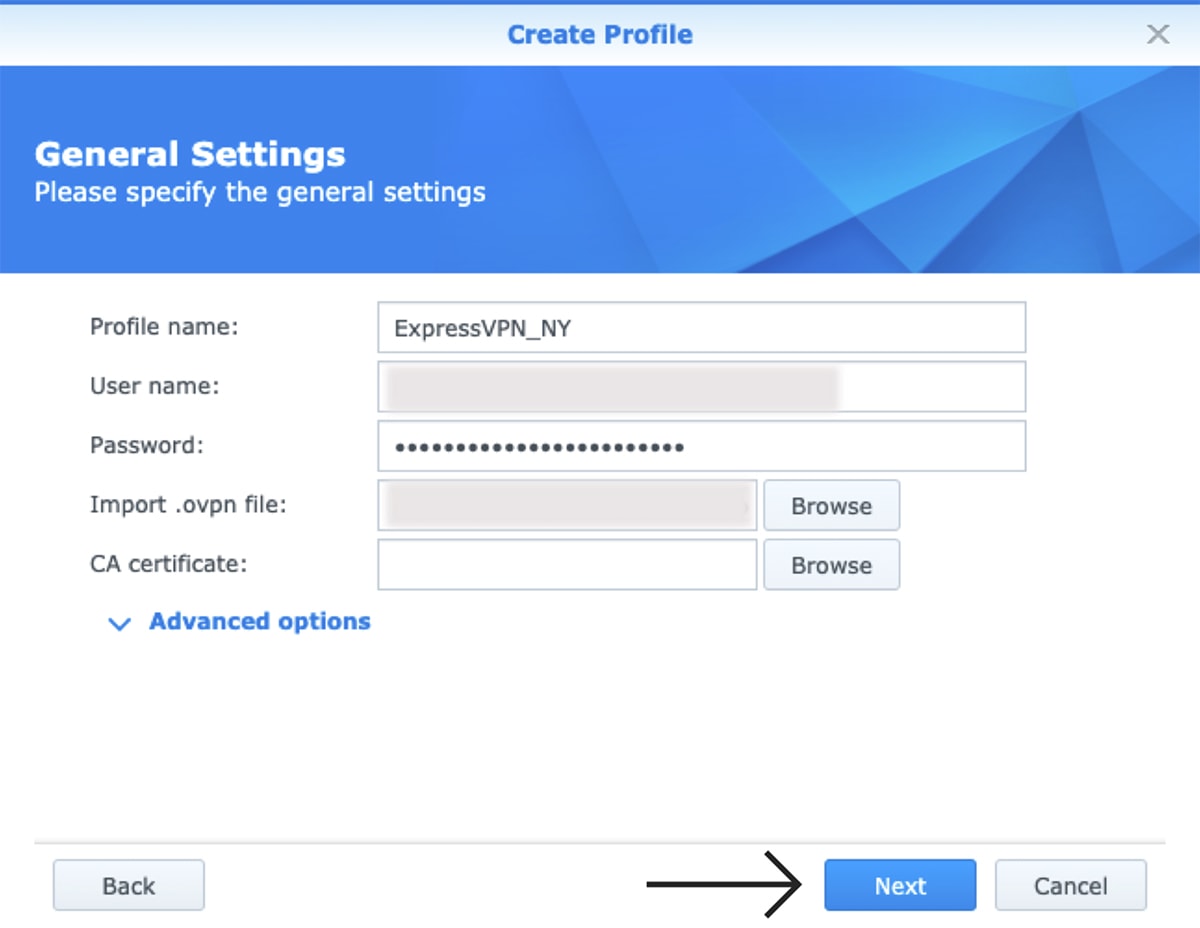
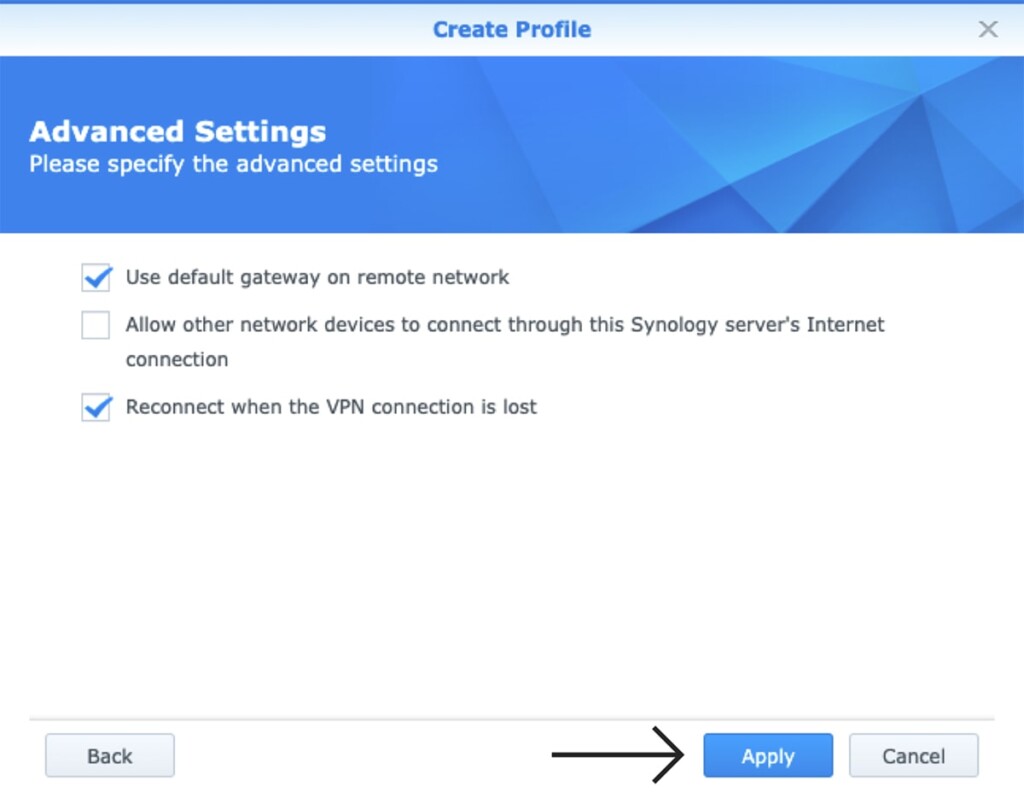
13. Click 'Next,' and the 'Advanced Settings' screen will appear.
14. Check the box next to 'Use default gateway on remote network.'
15. Do the same with the 'Reconnect when the VPN connection is lost' box.
16. Click on 'Apply' when done.

17. To connect, go to Control Panel > Network > Network Interface.
18. You should see your newly created VPN connection on the right-hand side.
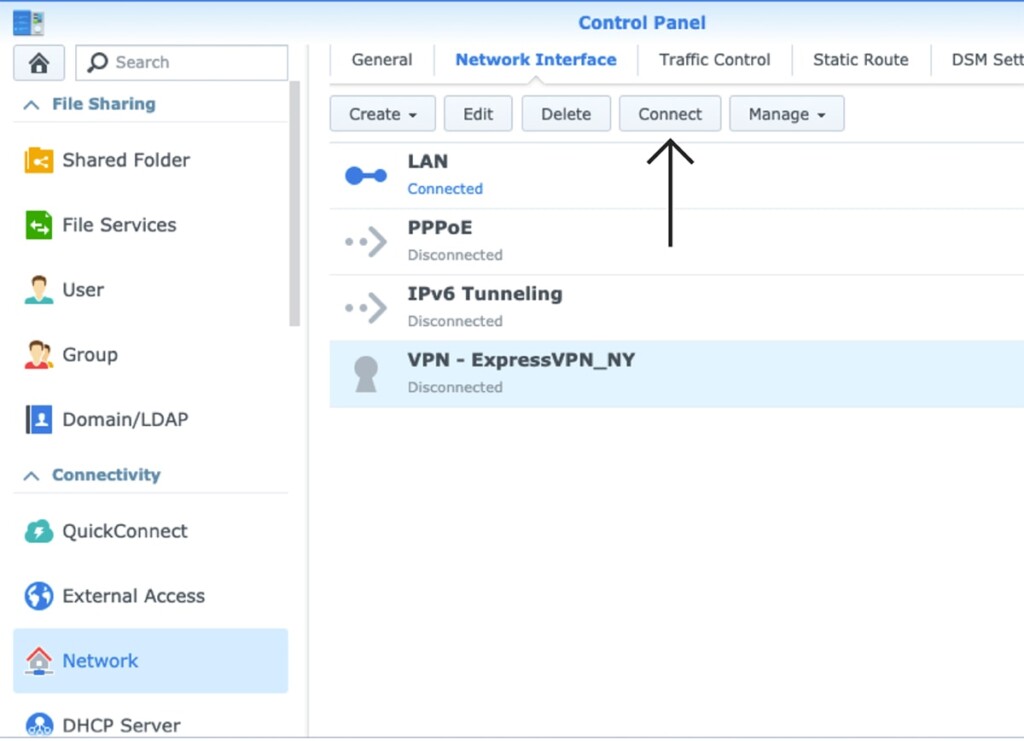
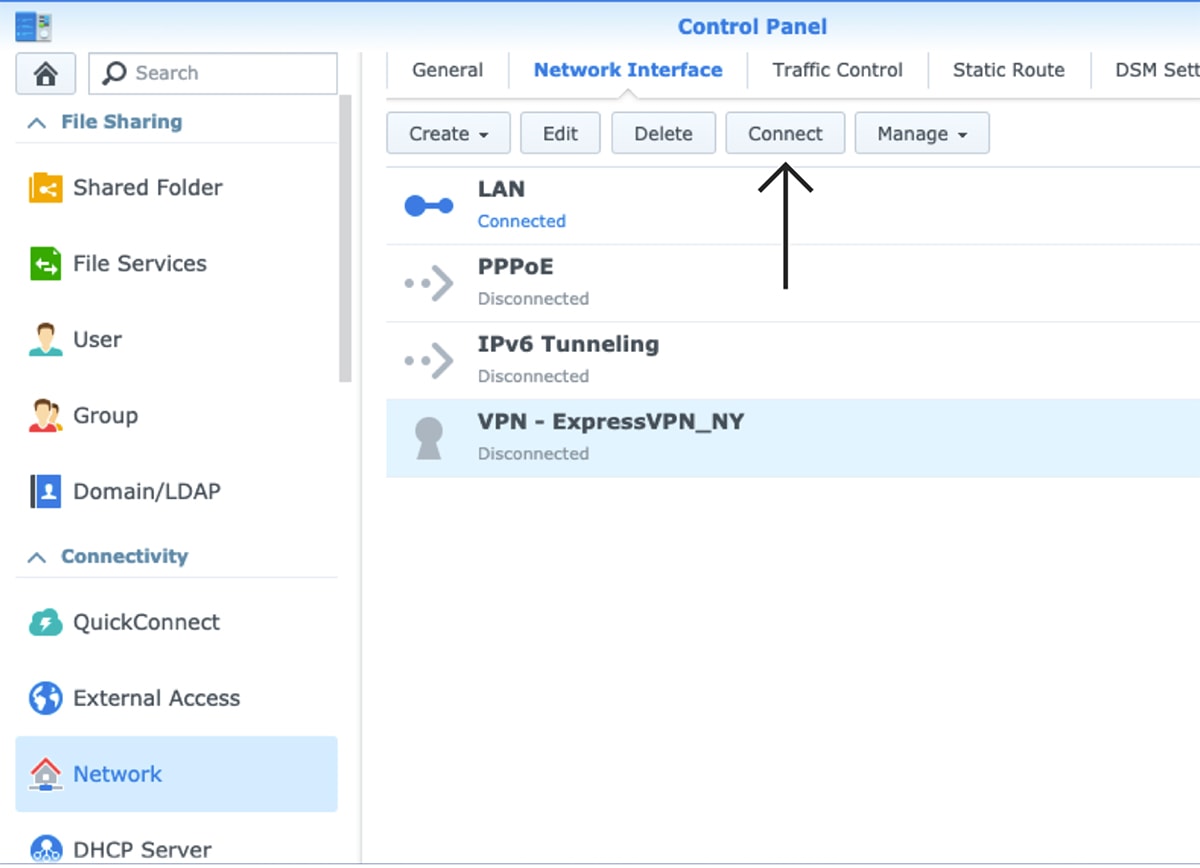
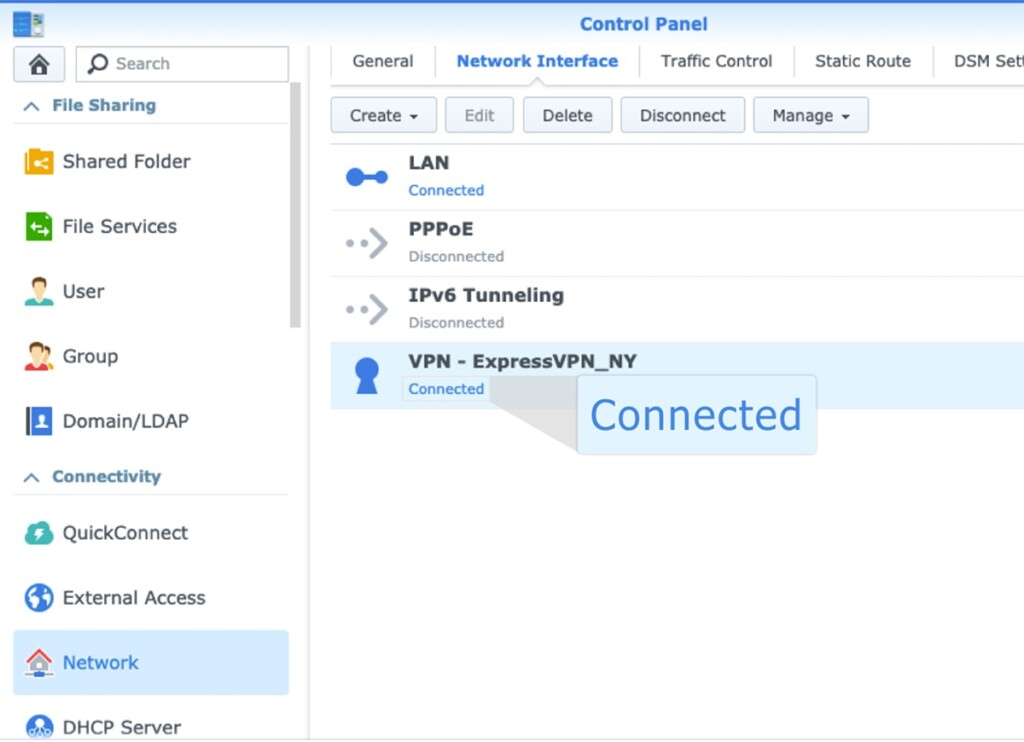
19. Select your new VPN profile and click 'Connect.'
20. Make sure to check for a 'Connected' label below the VPN’s name.

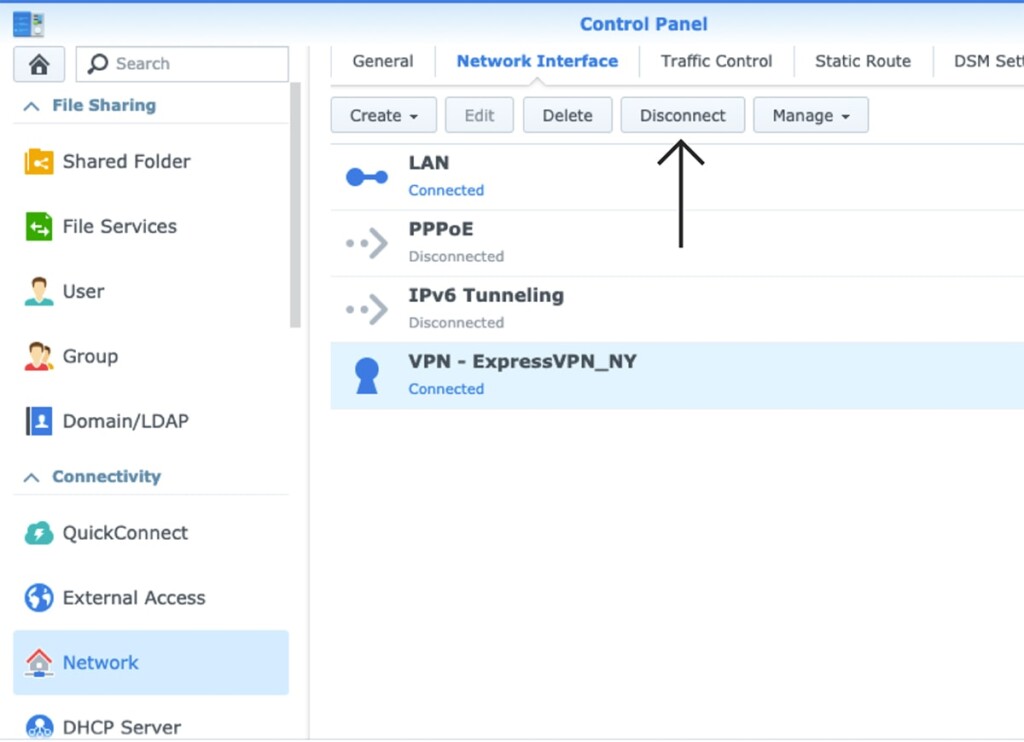
21. To disconnect at any moment, click the 'Disconnect' button.

Final Thoughts
Thanks to this VPN's brilliantly designed online dashboard, obtaining the required OVPN files and setting up ExpressVPN on a Synology NAS is a piece of cake. As you know by now, it takes only a few minutes to ensure your NAS's incoming and outgoing traffic is kept within a secure tunnel.
That said, you probably have more gadgets that could benefit from this VPN. Don't forget that ExpressVPN works on many other devices and supports 10-14 simultaneous connections, so why not take advantage of that? Check our central guide on how to set up ExpressVPN across all its supported devices.
In the end, we'll note that ExpressVPN provides all you need to secure and encrypt your Synology NAS, as it supports OpenVPN paired with AES-256 and offers ultra-fast performance. Of course, you also have many other excellent alternatives, as featured in our guide to the best VPNs for Synology NAS. So, take a look if you still have your options open.
That's all we have prepared for this installation guide. If you have any questions for us, make sure to post your comment below. Lastly, thank you for reading!
Related