When you purchase through links on our site, we may earn an affiliate commission. Here’s how it works.
How to Set Up and Use ExpressVPN on QNAP NAS
Last updated July 9, 2023

You can set up ExpressVPN on a QNAP NAS using the L2TP/IPsec protocol. That way, your NAS device will secure your incoming and outgoing file transfer protocols, as L2TP/IPsec is both secure and fast enough to support large data transfers.
That said, please note that ExpressVPN doesn't provide a list of supported QNAP NAS devices. However, as long as your device supports the QVPN client and the L2TP/IPsec protocol, you'll get to set up and run the VPN without any issues.
How to Set Up ExpressVPN on QNAP NAS
Setting up ExpressVPN on a QNAP NAS device is quite simple - as long as your device supports the L2TP/IPsec protocol. Here's what you need to do.
1. Subscribe to ExpressVPN on your computer, using any Web browser.
2. Once you subscribe, pick "My Account" using the top-placed main menu on ExpressVPN's site. Provide your credentials and access your ExpressVPN account dashboard.

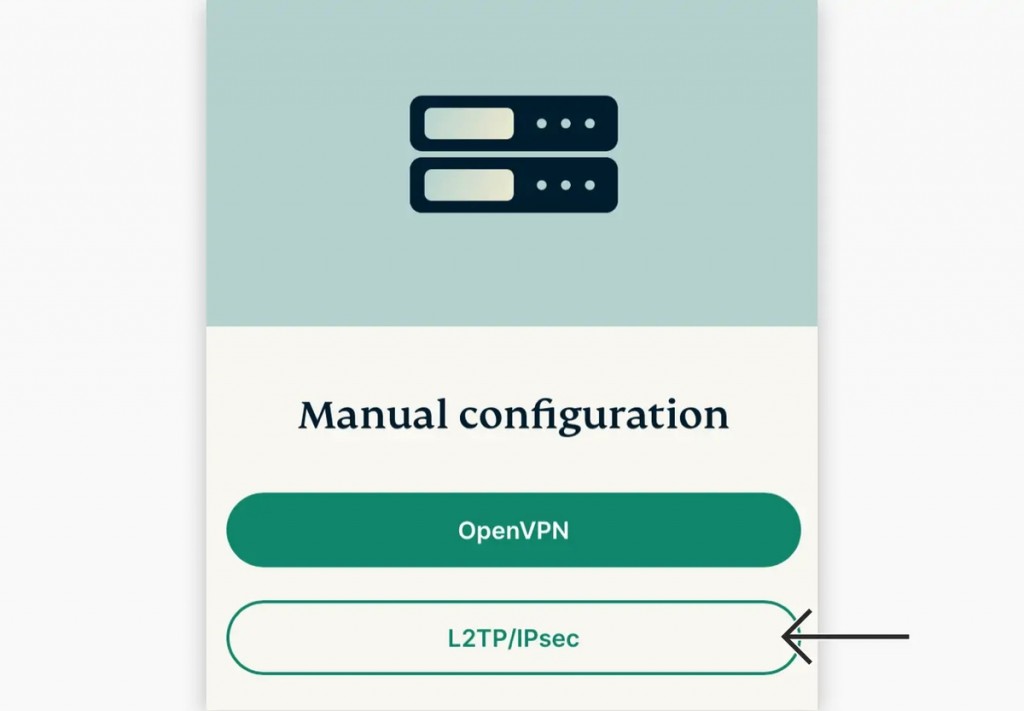
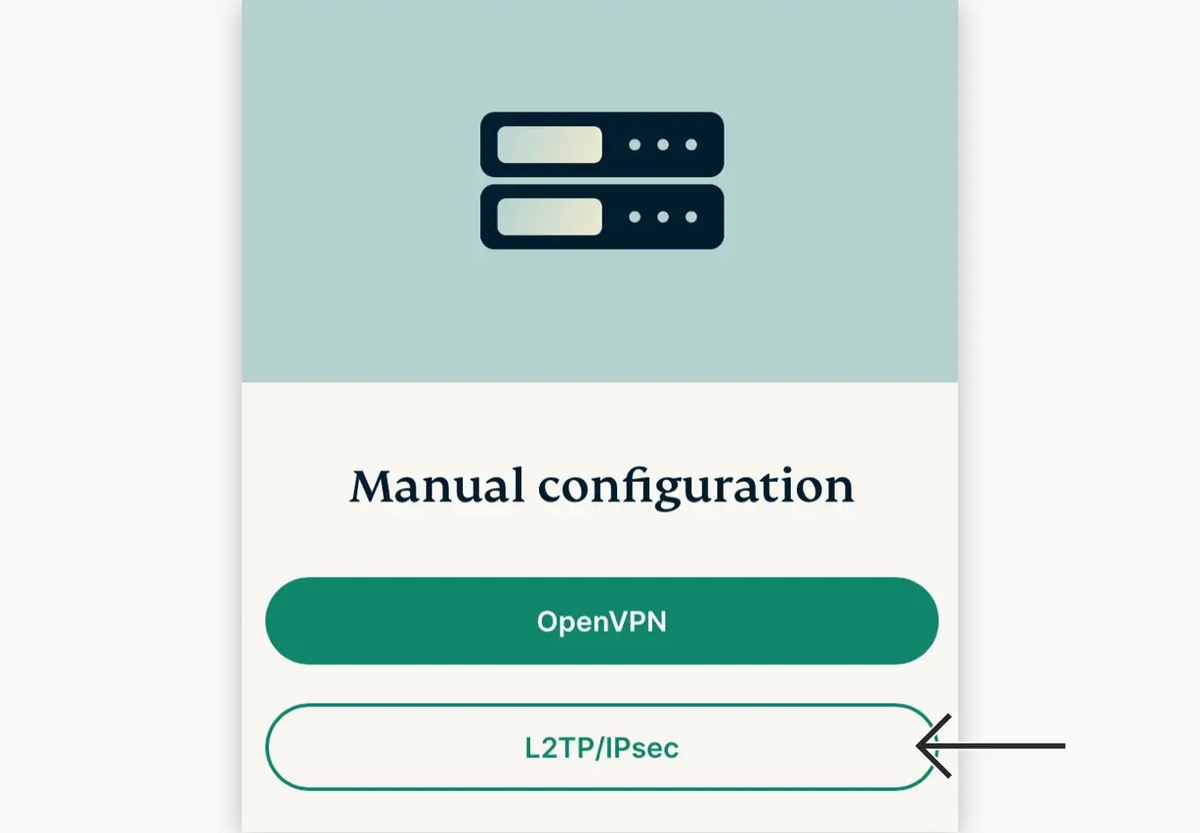
3. Navigate to Set Up Other Devices > Manual Configuration > L2TP/IPsec. Note your L2TP username and password, and then pick a VPN server. Note its L2TP/IPsec server address.
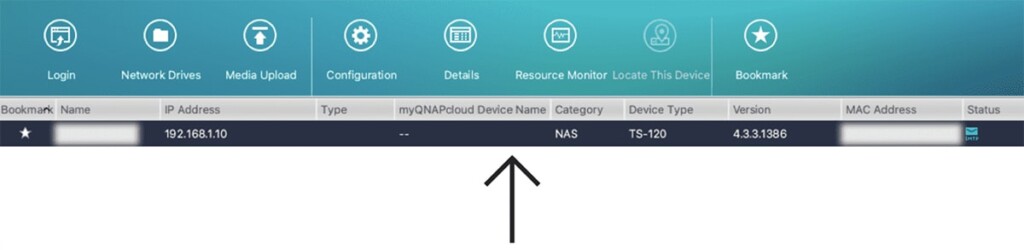
4. Proceed to access your QNAP NAS device (using any Web browser). If you don't know your QNAP NAS device's IP, we recommend using QFinder Pro. It’s available for Windows, macOS, and Ubuntu, letting you find your NAS device easily.
5. Once you launch QFinder Pro, double-click on your NAS device’s name to access it. You will be taken to the login page. Enter your credentials and click "Login."

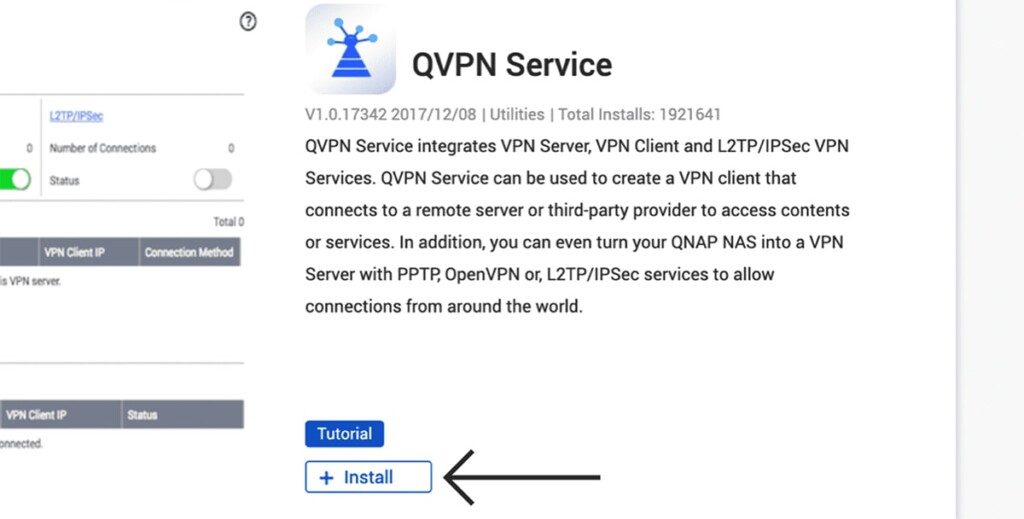
6. Access the App Center and use its built-in search functionality. Look up "QVPN Service" and open the app’s overview. Click the "Install" button to add QVPN to your QNAP NAS device.

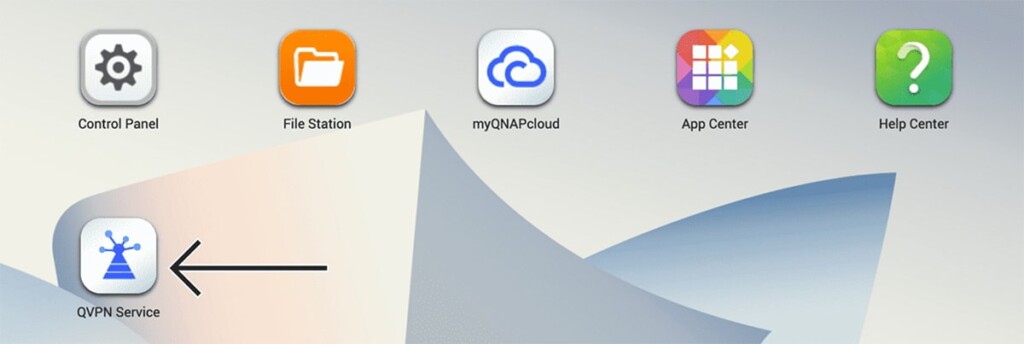
7. Return to your QNAP dashboard and launch the QVPN app from there. Using the left-placed sidebar, select "VPN Client."

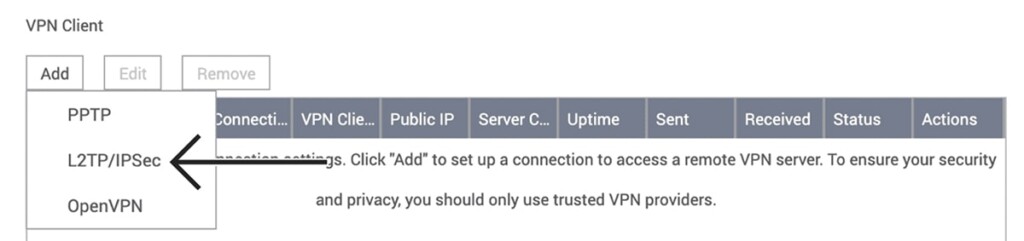
8. On the right, click "Add" and then make sure to select "L2TP/IPsec." Input the information below in the "Create VPN Connection" fields. Click "Create" once done.
- Profile Name: Add a name for your VPN connection (any name will do).
- Server Address: Copy this information from your ExpressVPN dashboard.
- Username: Copy your L2TP username from ExpressVPN’s dashboard.
- Password: Copy your L2TP password from ExpressVPN’s dashboard.
- Authentication: Pick "MS-CHAPv2" from this drop-down menu.
- Preshared Key: Enter "12345678."
- Specify the Subnet Mask: Leave these fields as they already are.
- Check the box next to "Use default gateway on remote network."
- Check the box next to "Reconnect when the VPN connection is lost."

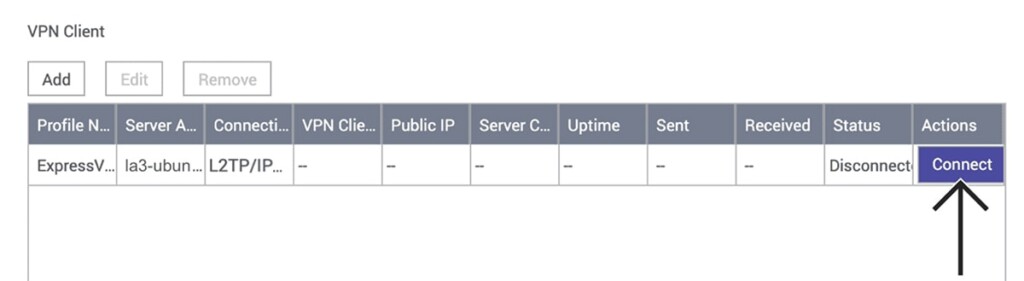
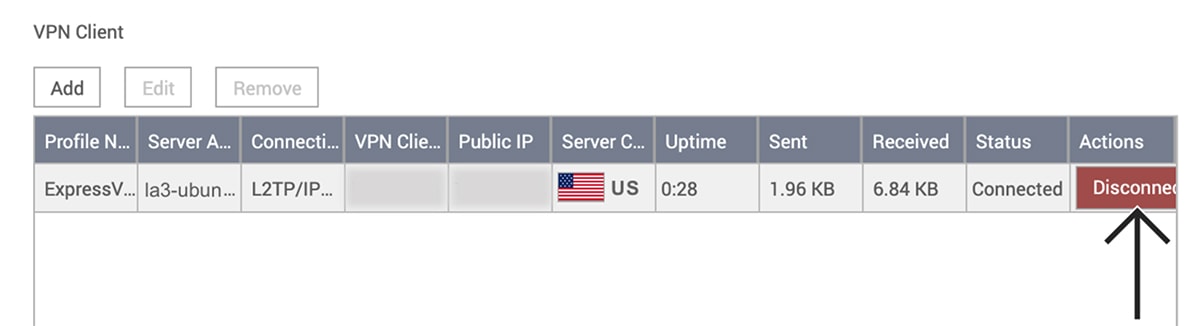
9. To test your new VPN connection, click "Connect" on the right side. After a few seconds, you should see real-time data about your VPN connection.

10. To disconnect at any point, click "Disconnect" on the right side.

You can add more than a single VPN connection to your QNAP. So, if you want to have access to multiple ExpressVPN servers, just repeat the above-explained steps. The only difference is that you need to add different server addresses in the "Server Address" field. Your username and password (and other information) always remain the same.
Final Thoughts
When it comes to your QNAP NAS, ExpressVPN will help you establish a secure connection that will protect and encrypt your incoming and outgoing data. That makes it a highly valuable tool for any QNAP NAS device, as ExpressVPN's easy-to-configure L2TP/IPsec connections will make sure your file transfers are kept within a secure tunnel.
You now know how to set up and use ExpressVPN on your QNAP NAS. If you have any questions, know that you can count on us. Just post your comment below. Thanks for reading!
Related