When you purchase through links on our site, we may earn an affiliate commission. Here’s how it works.
How to Download and Install ExpressVPN on Chromebook
Last updated January 17, 2025

There are 2 ways to set up ExpressVPN on a Chromebook - using the VPN's Android app or using the VPN's Linux app. The only requirement is to have a Chromebook made in 2019 or later, as those models come with built-in support for Android and Linux apps.
There are also some pre-2019 Chromebook models that might be compatible. So, before you proceed, check out the list of the ChromeOS versions supporting Linux apps as well as the ChromeOS versions supporting Android apps.
In this article, we'll teach you how to set up ExpressVPN on a Chromebook with detailed instructions.
How to Download and Install ExpressVPN on Chromebook
ExpressVPN can be installed on Chromebook through either its Android or Linux apps. Let's look at these methods in more detail, and we'll start with ExpressVPN's Android app, as it provides an easier way to set up and use this VPN on your computer.
Method #1: Install ExpressVPN's Chromebook (Android) App
Before you get started, make sure your Chromebook has access to the Play Store. Then, just follow these steps to set up the VPN using its Android app:
1. Sign up for ExpressVPN using your Chromebook and any Web browser.
2. Open the Play Store and click the 'App Launcher' icon to launch the Play Store.
3. Use Play Store’s search bar to look up 'ExpressVPN.'
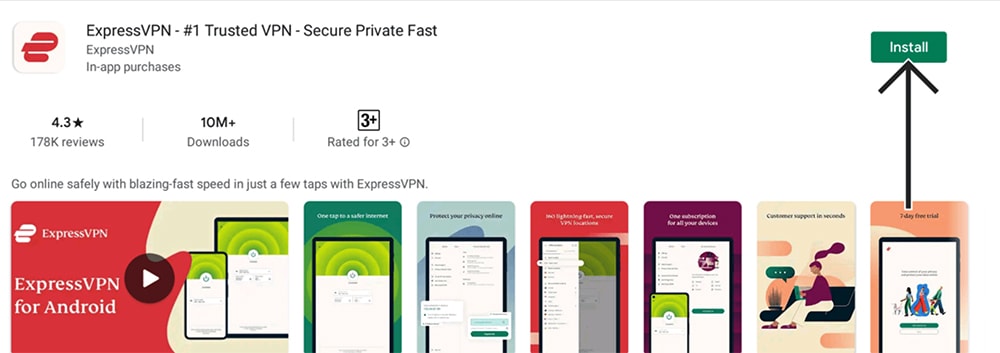
4. Click 'Install,' and the app will download and install automatically.
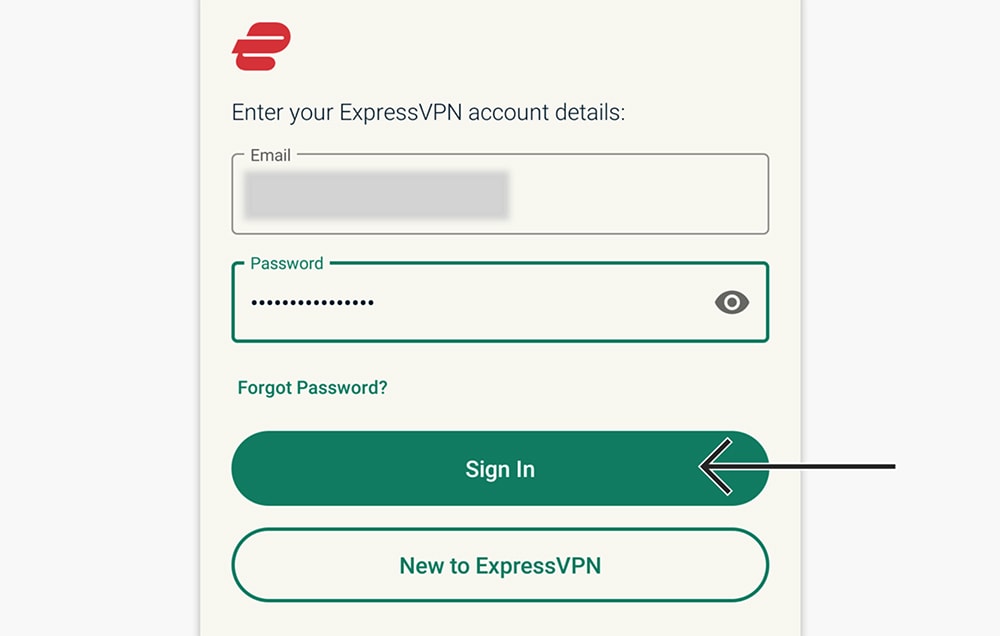
5. Click 'Open' to launch the ExpressVPN app and then click 'Sign In.'
6. Provide your credentials and go through ExpressVPN's one-time setup procedure.
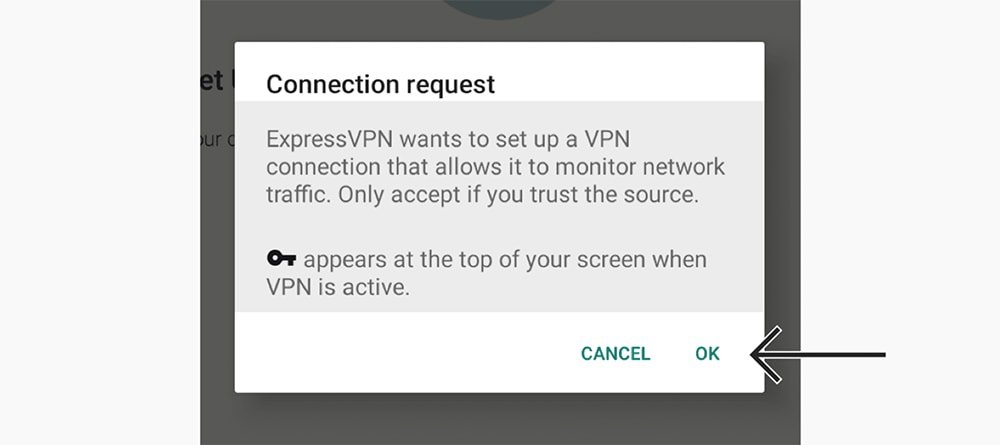
7. Click 'OK' when Chrome OS asks you to allow the installation of a VPN profile.
8. At this moment, you should see ExpressVPN’s home screen.
9. Press the ON/OFF button, and ExpressVPN will connect you to the nearest server.
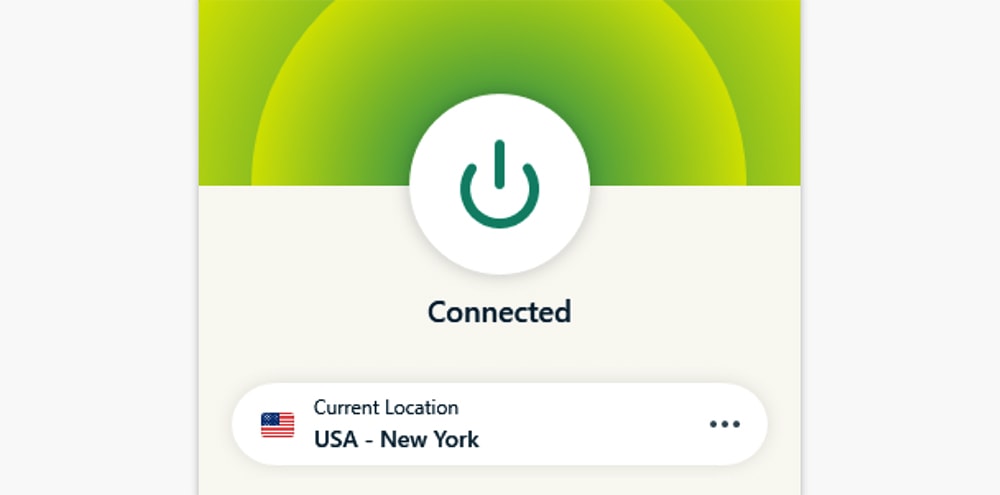
10. Press the ON/OFF button to disconnect and end your VPN session.
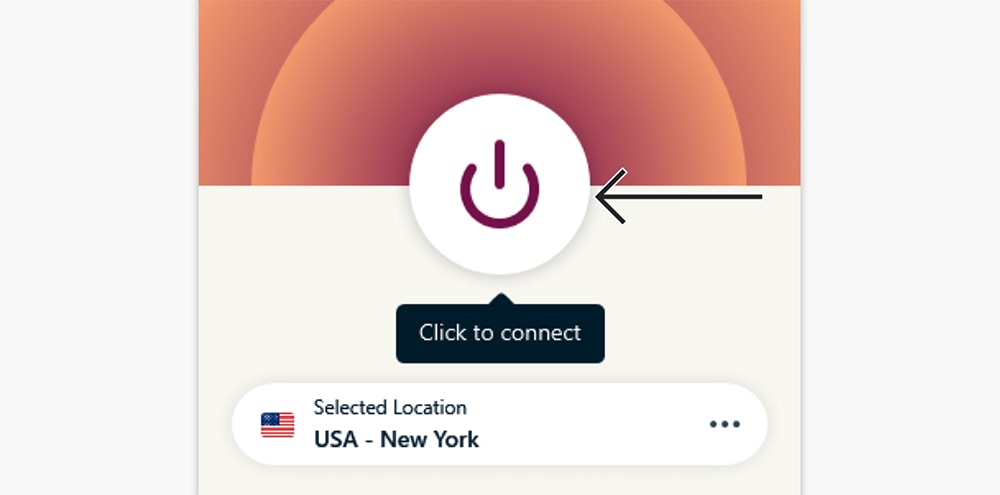
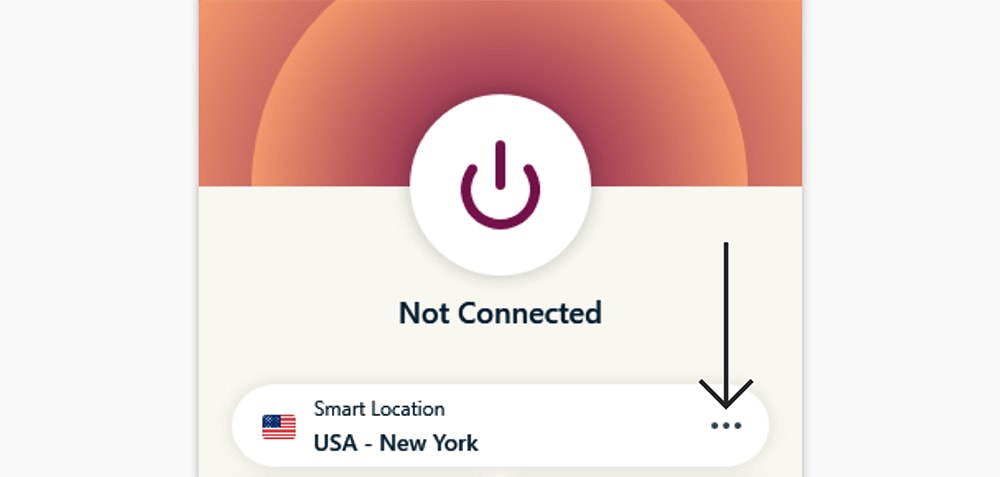
11. To pick a server manually, click on the button just below the ON/OFF switch.
12. Select any server using the top-placed tabs to preview the selection.
13. If you don’t get connected automatically, use the ON/OFF button again.
If you’d like to take a deeper dive into everything ExpressVPN offers, use the hamburger button (three horizontal lines) in the top-left corner. That’s where you can change a VPN protocol and fine-tune ExpressVPN to your liking.
Method #2: Install ExpressVPN's Linux App
Chromebooks made in 2019 and later have support for Linux applications. Even though this is another reliable method to use ExpressVPN on a Chromebook, know that you'll be dealing with a command-line application. Here's how to get started:
1. Sign up for ExpressVPN using your Chromebook and any Web browser.
2. Then, select 'My Account' on the ExpressVPN website.
3. Use your credentials to access your ExpressVPN account dashboard.

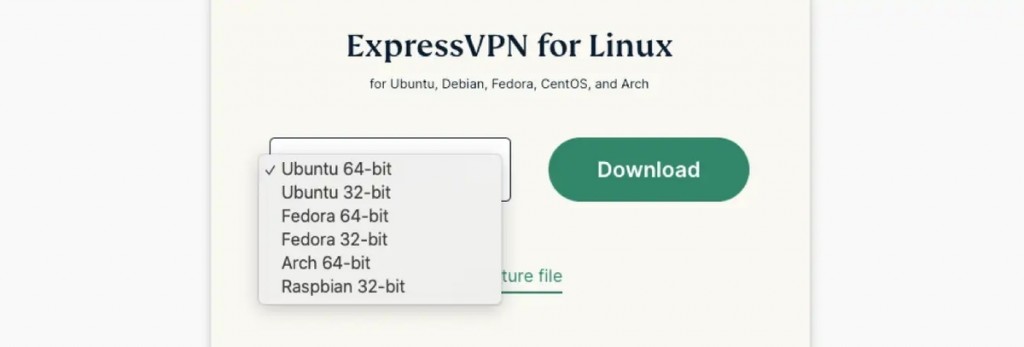
4. Go to Set Up Other Devices > Linux.
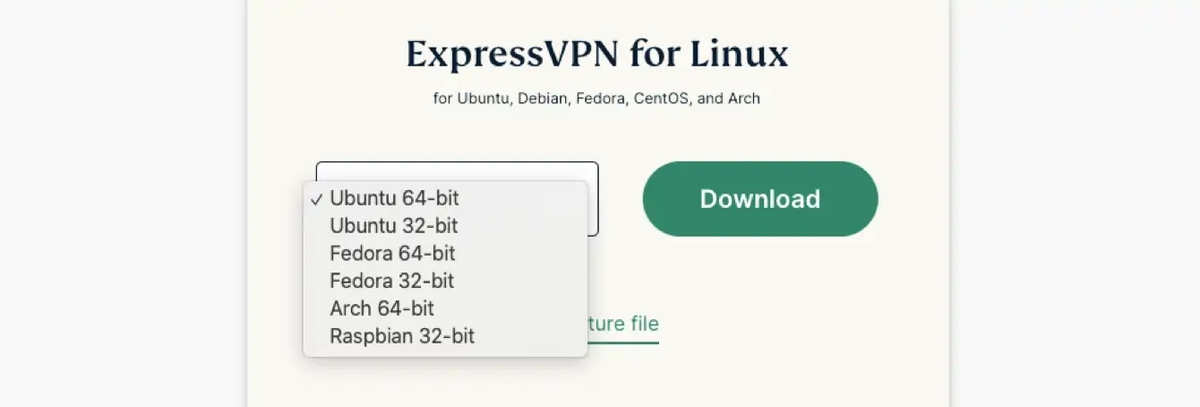
5. Pick your version of Linux on the right (Ubuntu 32- or 64-bit) and download the installation file.
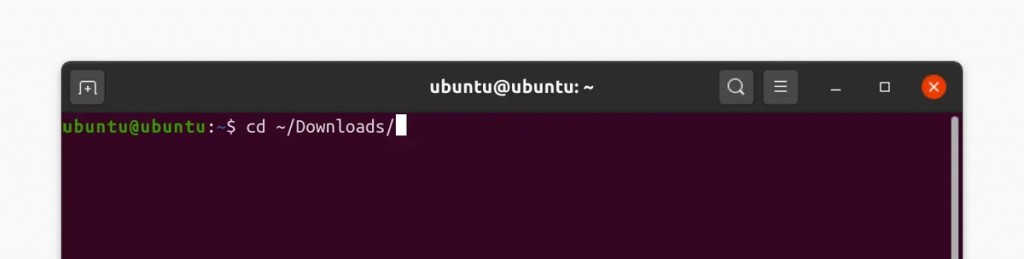
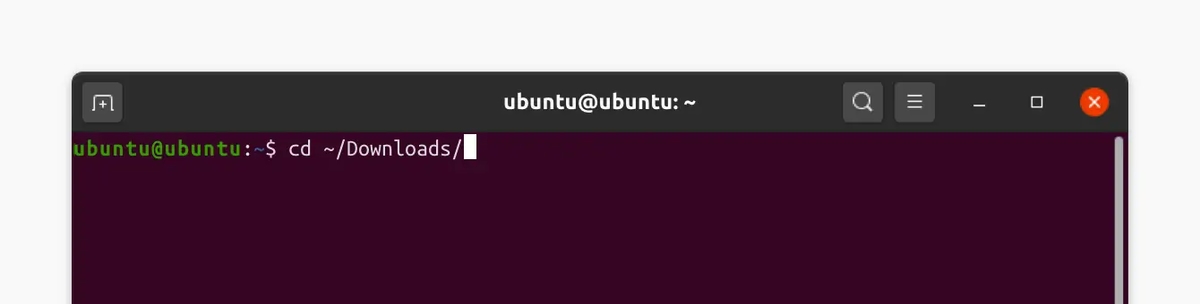
6. Launch Linux's Terminal and go to the folder with the installation file.
7. By default, you'll need to use the 'cd ~/Downloads/' command.
8. Install ExpressVPN using the 'sudo dpkg -i [INSTALLER NAME]' command.
9. Make sure to use the file's name and extension very carefully to avoid any errors.


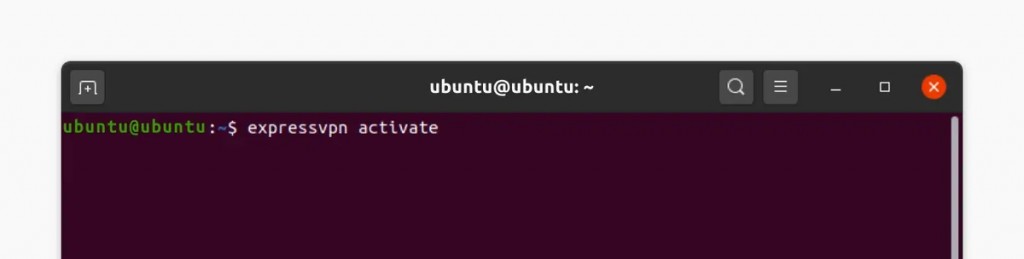
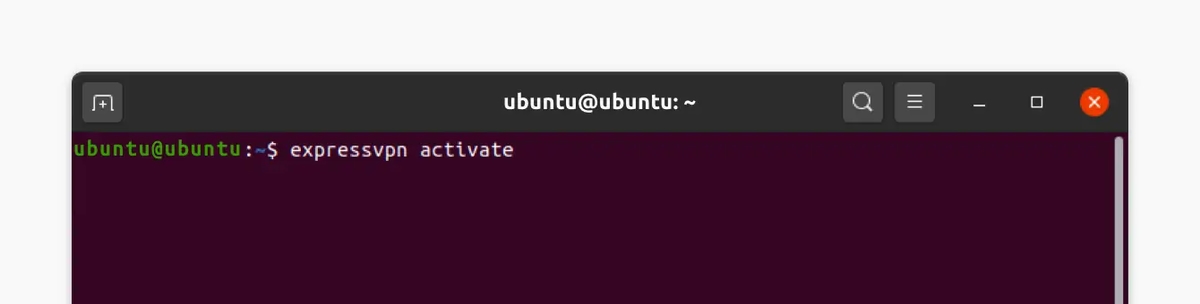
10. Activate the VPN using the 'expressvpn activate' command.
11. Paste your ExpressVPN activation code, and choose whether you want to share anonymous data.
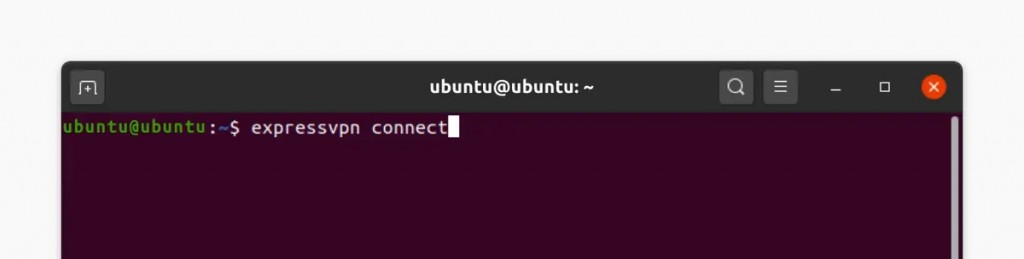
12. Input the 'expressvpn connect' command to connect to the nearest server available.

13. To connect to a specific server, enter the 'expressvpn list all' command.
14. Then, pick a server based on that list and make sure to enter its full name correctly.
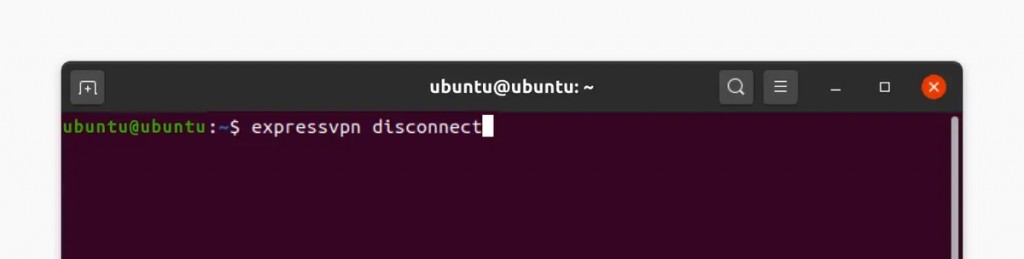
15. To disconnect, use the 'expressvpn disconnect' command.

Final Thoughts
As you know now, before you can set up ExpressVPN on a Chromebook, you need to decide whether to use the VPN's Android or Linux application. That said, downloading the Android app is preferable, as that's the easiest method available. The only requirement is access to the Play Store, which would mean that your Chromebook supports Android apps.
The Linux app doesn't have a GUI, which means it's a command-line application. As such, it's highly usable and works excellent for encrypting your device's Internet connection. However, since you'll need to rely on a series of codes, it's not the best option for beginners.
We'll also add that ExpressVPN works on countless other devices and platforms. To learn how to set up ExpressVPN on all your Web-connected gadgets, use the provided link. If you'd like to check out how other VPNs work on Chrome OS and perhaps try some alternatives, we offer a guide to the best VPNs for Chromebook, based on our in-depth testing and analysis.
That brings us to the end of our guide. If you have any questions, don't hesitate to post a comment below. Lastly, thank you for reading!
Related