When you purchase through links on our site, we may earn an affiliate commission. Here’s how it works.
How to Download and Install CyberGhost VPN on Windows PC
Last updated July 25, 2024


CyberGhost supports Windows 11 and 10 and offers a native app for those operating systems. All you need is to download CyberGhost from its official website, install the app, and log in, and you'll access its servers and a wide range of privacy-protecting features.
Also, if you don't wish to use CyberGhost's application, or if you use an older Windows version, you can also configure CyberGhost manually. That way, you'll set up OpenVPN connections to individual VPN servers, and you're free to configure as many connections as you want.
In this guide, we'll show you how to install CyberGhost on Windows using its app or setting it up manually. Of course, we'll include handy screenshots throughout.
How to Download and Install CyberGhost on Windows
We recommend going for CyberGhost's Windows application, which is the best way to experience every feature this VPN offers. However, manual configuration is always a possibility. Let's explain everything.
Method #1: Install CyberGhost's Native App for Windows
Getting started with CyberGhost's native software is easy and takes less than a couple of minutes. Plus, you'll get access to every single server from a single place, as well as every feature this provider offers on Windows PCs. Here's what you need to do:
1. Sign up for CyberGhost VPN using a Web browser on your Windows PC.
2. Go back to the CyberGhost official homepage and click 'My Account' in the top right corner.

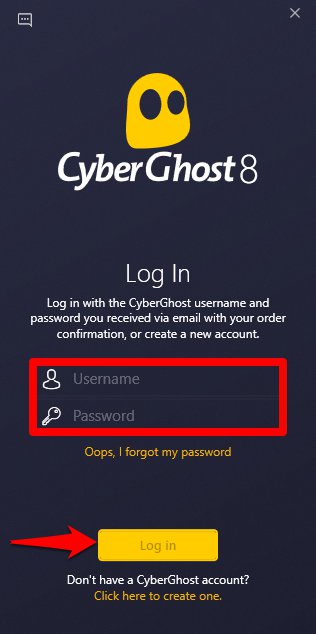
3. Provide your username or email address, as well as your password, and click 'Log in.'
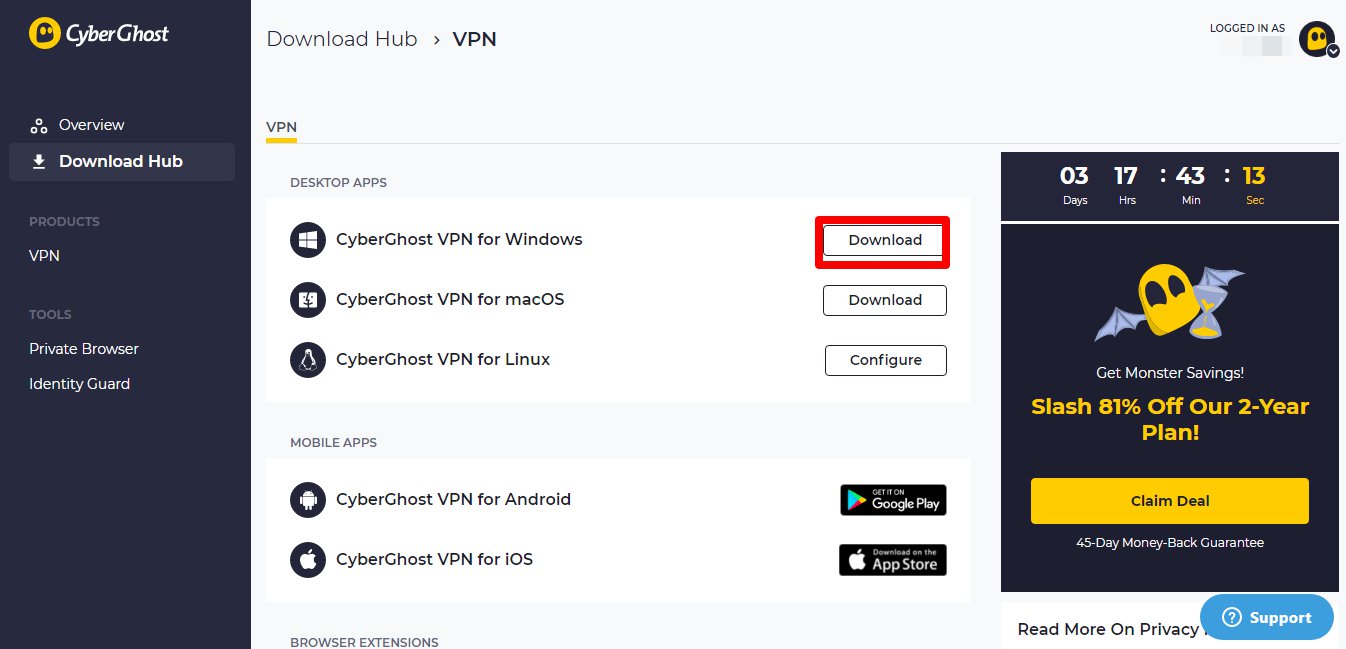
4. Select 'Download Hub,' navigate to 'CyberGhost VPN for Windows,' and use the 'Download' button.

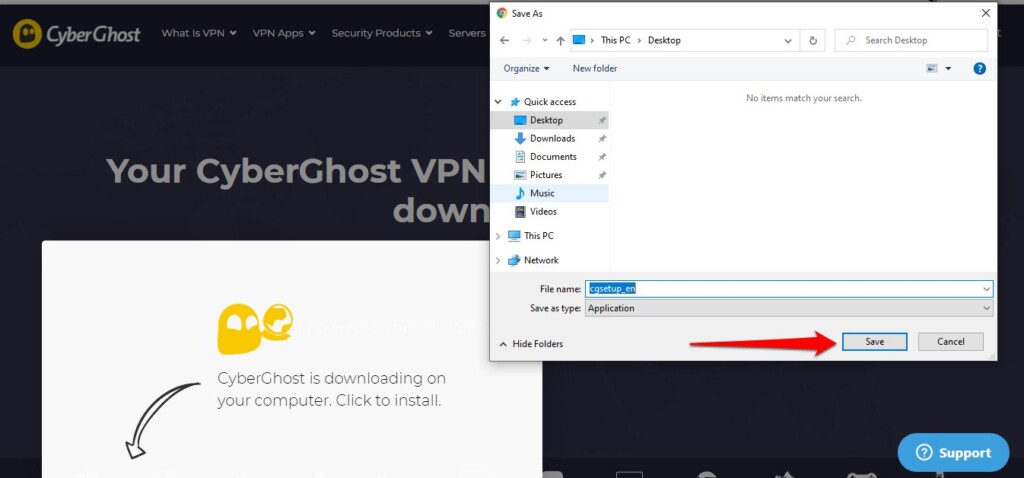
5. Now, choose your preferred location to save the setup file and give it a few moments to download.

6. When done, navigate to the location you chose and double-click on the CyberGhost installer.
7. Next, a warning will pop up - select 'Yes' to move forward with the installation.
8. Once the installation ends, click on the 'Accept' button on the TERMS AND CONDITIONS screen.

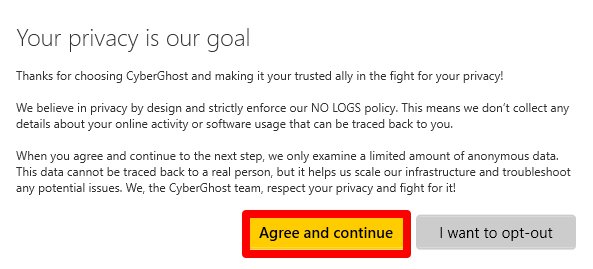
9. A window with privacy details will pop up; click the 'Agree and continue' button.
10. The CyberGhost Windows client will launch now; Log in using your credentials.
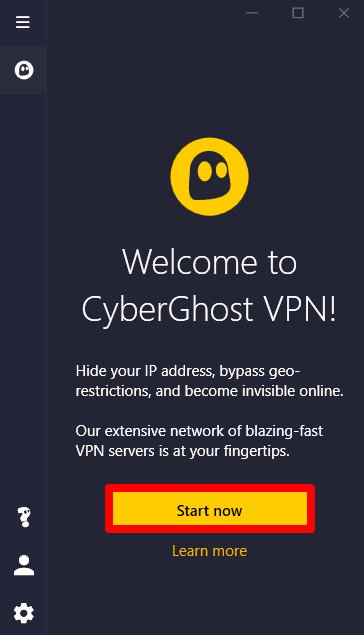
11. On the next screen, hit the 'Start Now' button.
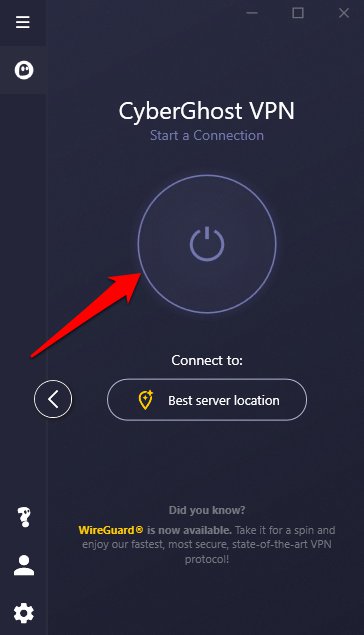
12. Hit the power button to let the VPN automatically connect to the nearest server.
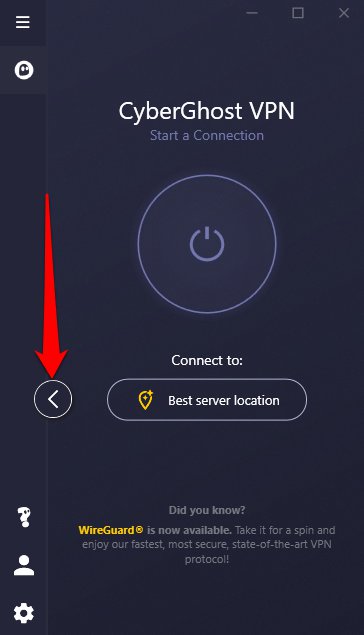
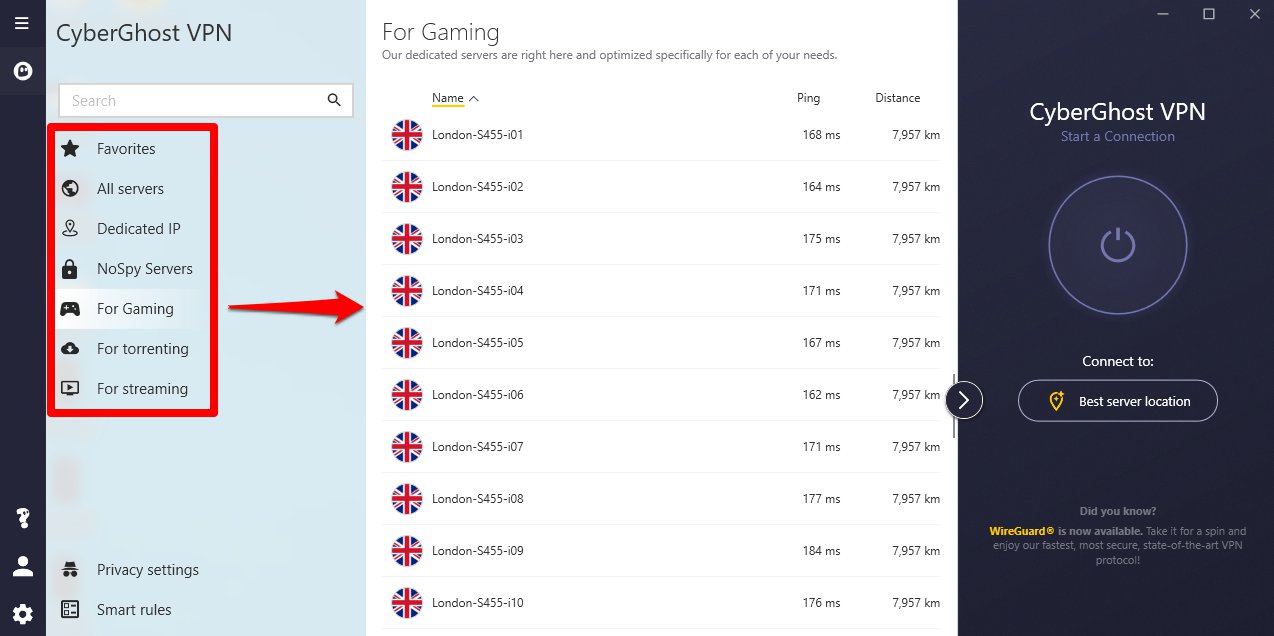
13. You can preview all of the available servers and pick a server of your preference by clicking the arrow button and expanding the control screen.
14. Then, you can choose a dedicated server from the list at the left pane and pick any location from the right-side tab.

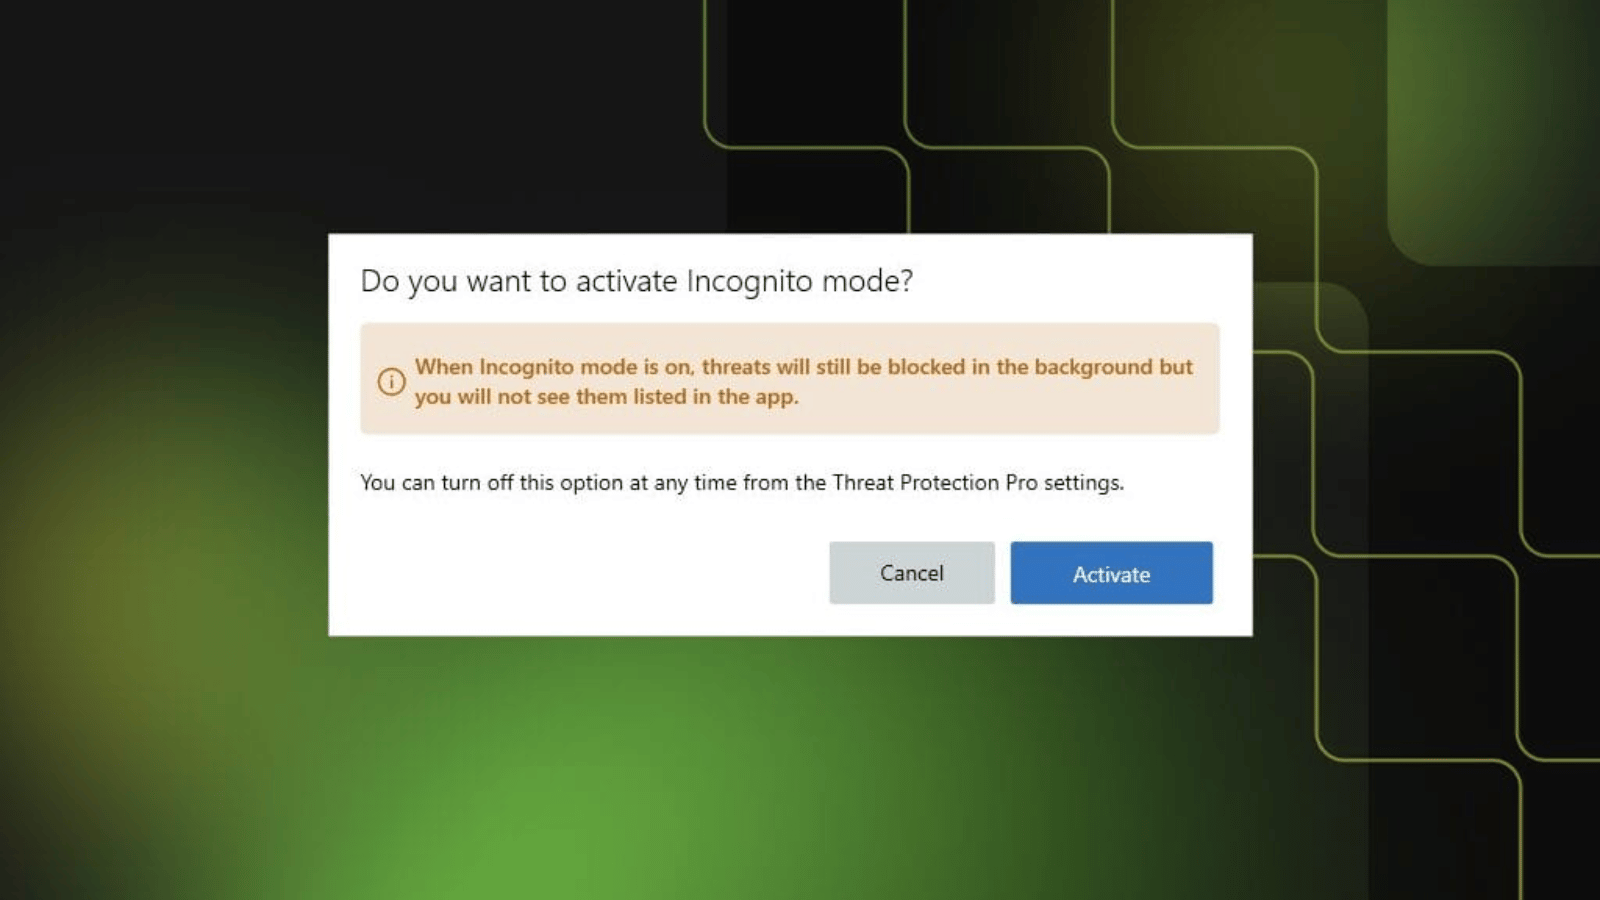
19. Finally, click on the ON/OFF button from the control screen, and when the outline of that button turns yellow, you’ll be connected.
Method #2: Configure CyberGhost Manually on Windows
If you have an older Windows version or wish to avoid using CyberGhost's application, you can set up OpenVPN connections manually via 'OpenVPN Connect.' These are the steps you need to take:
1. Subscribe to CyberGhost using any Web browser on your PC.
2. Return to CyberGhost's home page and pick 'My Account.'
3. Provide your credentials to access CyberGhost's online dashboard.
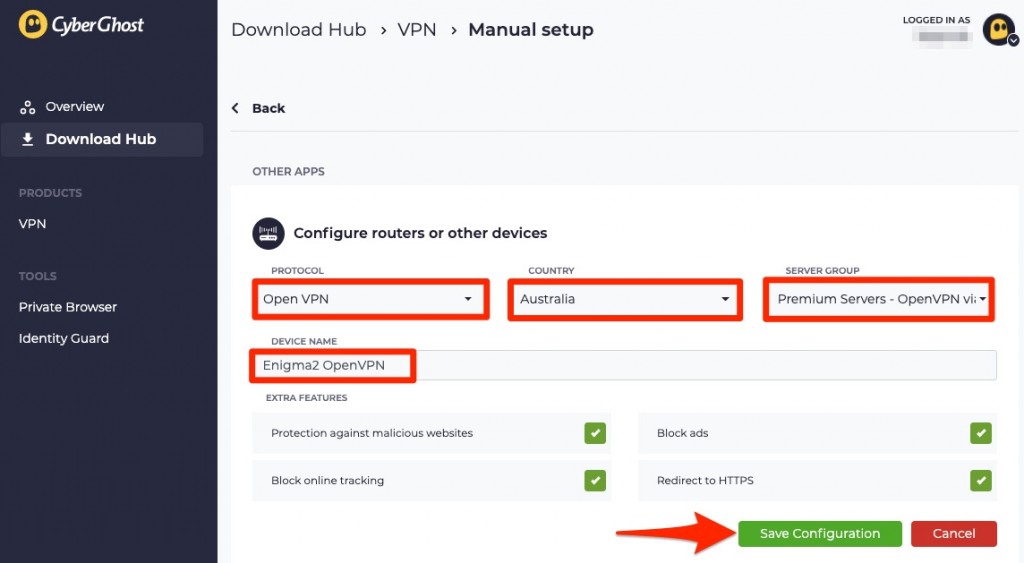
4. Navigate to VPN > Manual Setup > Configure Device.
5. Select 'OpenVPN,' pick a country and a server group. Provide a name for your connection and check if you'd like to use any of the features from the 'Extra Features' group. Click 'Save Configuration.'

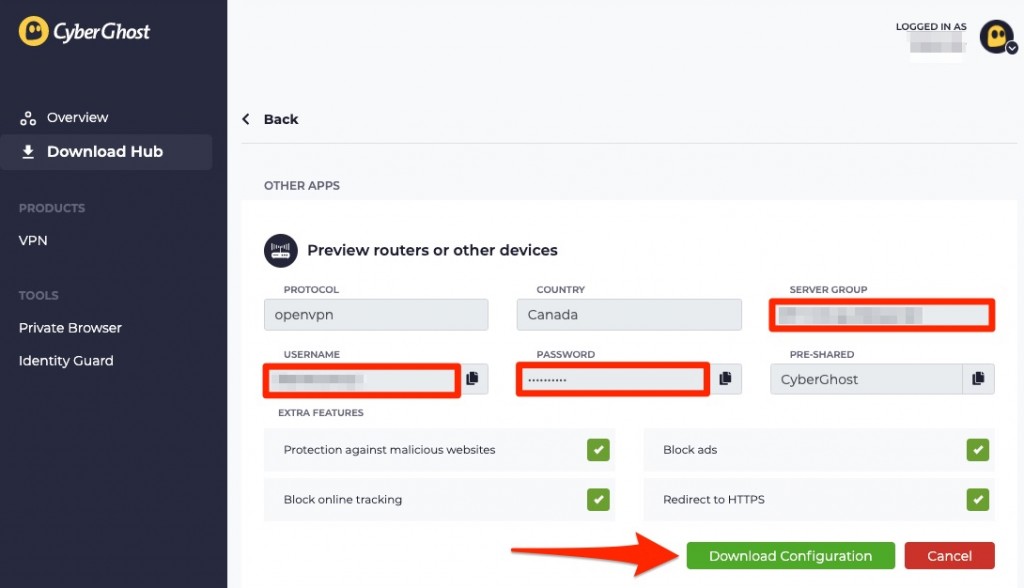
6. Select 'View Configuration' to check your username and password (these are your OpenVPN credentials). Then, press 'Download Configuration.'

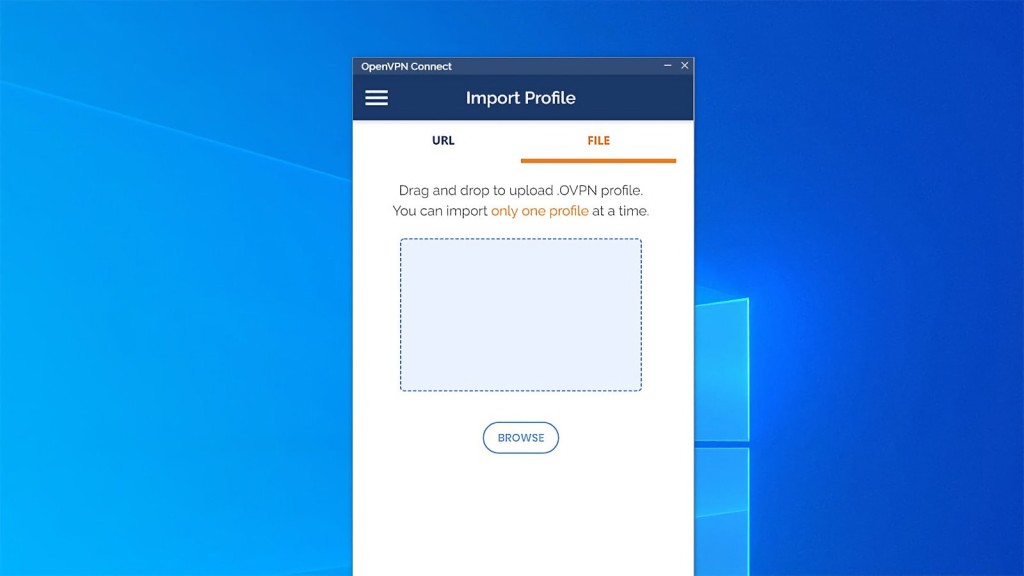
7. Download OpenVPN Connect and install it on your Windows PC.
8. Open the application and select the 'File' tab. Upload your OVPN file (you might need to unzip the file you previously downloaded from CyberGhost's website).

9. Input your username and password (your OpenVPN credentials).


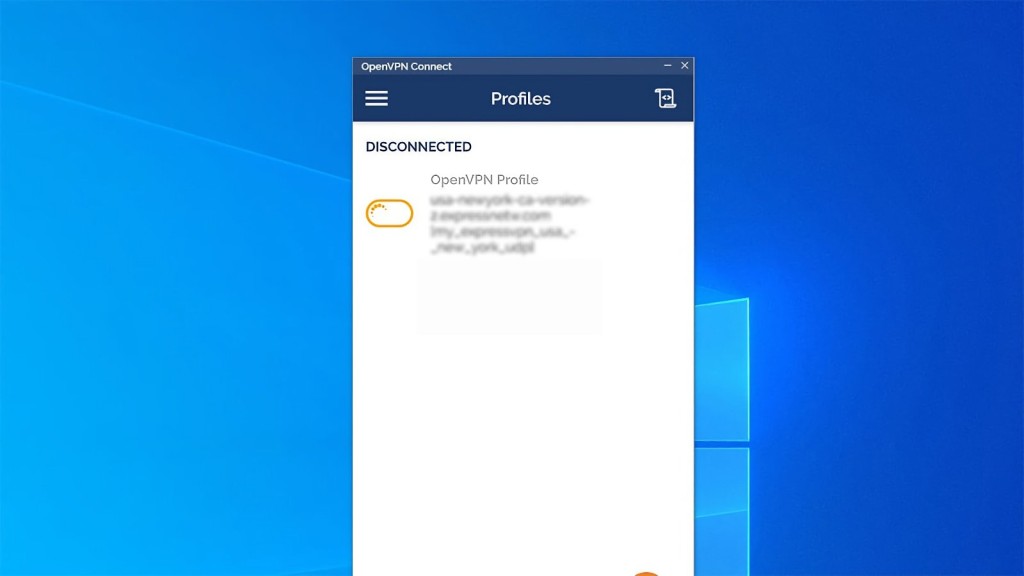
10. You can now connect using the switch on the left-hand side.

If you wish to add multiple OpenVPN connections, just repeat the procedure from above. Generate OpenVPN files for each connection and then add them to the OpenVPN Connect app.
Final Thoughts
In conclusion, we recommend going with CyberGhost's application, as it's the easiest method to get started with this VPN. However, if that's not possible, configuring this VPN manually will get the job done. In the end, you'll get a secure connection either way.
We'll remind you that CyberGhost offers 7 simultaneous connections. So, there's no reason not to set up CyberGhost on your other Web-connected devices. Use the provided link to learn how that's done on macOS, Linux, Android, iOS, streaming devices, and even routers.
That's all for our guide on installing CyberGhost VPN on Windows. If you have any questions, leave your comments just below. Thanks for reading!
Related