When you purchase through links on our site, we may earn an affiliate commission. Here’s how it works.
How to Set Up CyberGhost VPN on Nintendo Wii U
Last updated July 19, 2024

Nintendo Wii U doesn't support VPN applications natively. However, there's still a way to re-route your traffic and unblock new digital services. In terms of CyberGhost, you can use its 'SmartDNS' and pick a custom server location that will handle your Internet traffic.
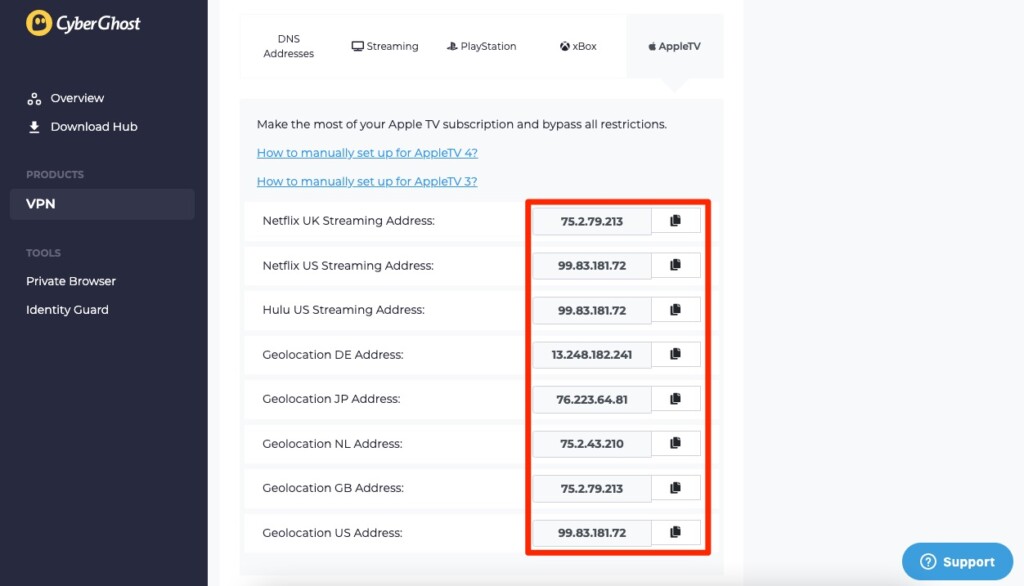
More precisely, CyberGhost's SmartDNS servers are located in five regions (the United States, the United Kingdom, Germany, Japan, and the Netherlands), giving you plenty of options for reaching new types of content online.
In this guide, we'll show you how to set up CyberGhost on your Nintendo Wii and Wii U consoles.
How to Set Up CyberGhost on Nintendo Wii U
You first need to sign up for CyberGhost, which is when you can activate its 'SmartDNS.' You'll finish this procedure on your console by altering its DNS settings. Here's what you need to do:
1. Get your CyberGhost VPN subscription using any device with a Web browser.
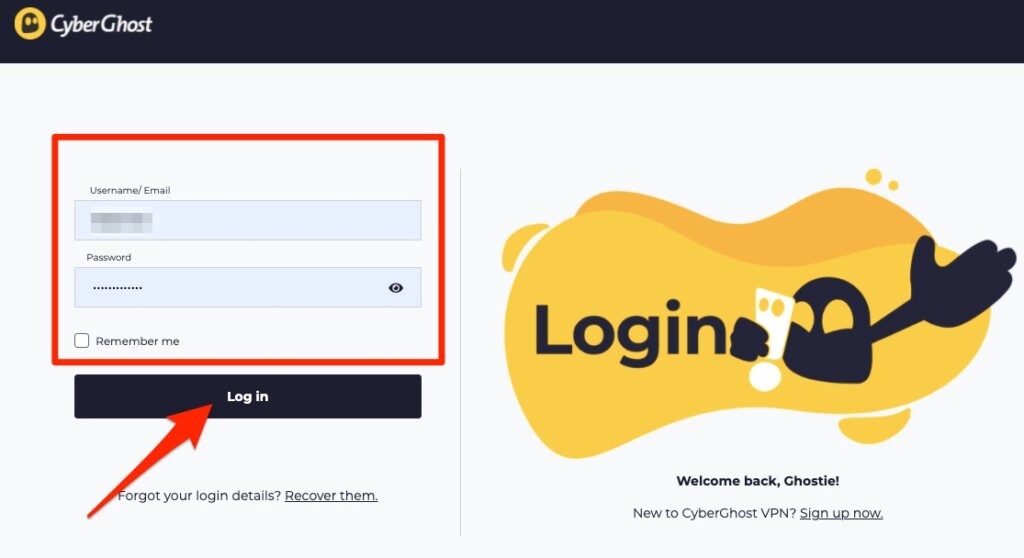
2. After that, visit the CyberGhost website and click 'My Account' in the top right corner.
3. Now, enter your username and password to log in. You'll access your online dashboard.

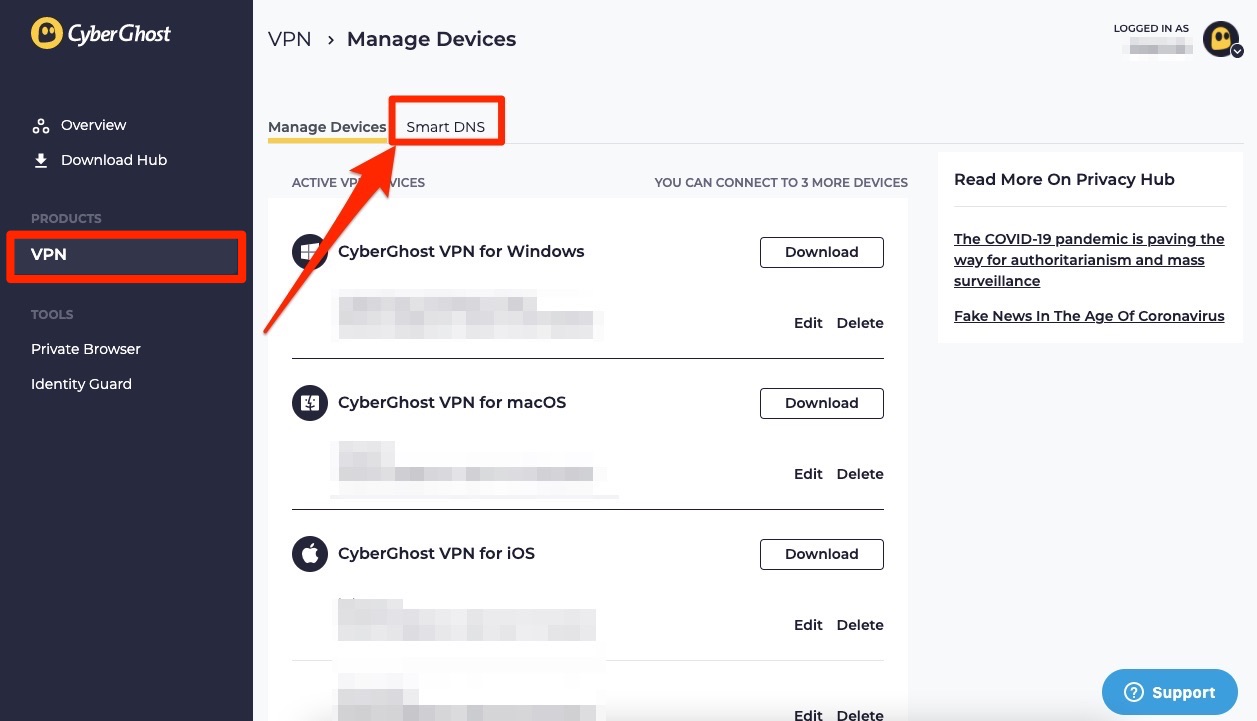
4. Pick 'VPN' on the left-side pane and navigate to the 'Smart DNS' tab.

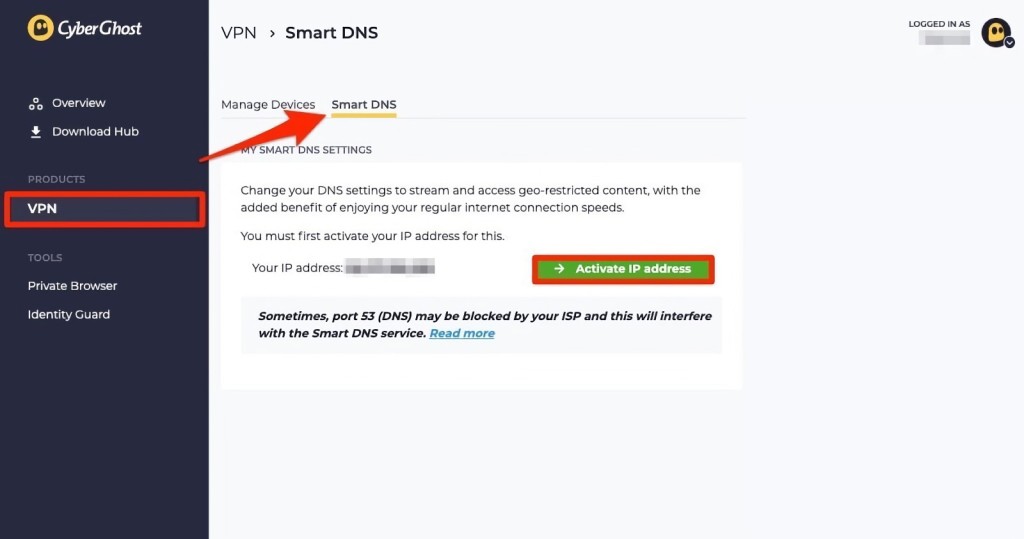
5. Next, click the 'Activate IP address' button right after your real IP.

6. Once your IP is activated, a list of DNS addresses will appear. Choose the one in your preferred location and leave this page open.

7. The rest of the process is different for Nintendo Wii and Wii U. You may perform the steps depending on the type of Nintendo controller you own.
Nintendo Wii
1. Turn on your Nintendo Wii and choose 'Wii Settings' from the main menu.
2. Select 'Internet Options' and press the right arrow with your controller to select 'Internet.'
3. Choose 'Connection Settings' and select 'Wi-Fi' or 'Wired.'
4. After that, choose 'Change Settings' and pick your active connection.
5. Now, keep pressing the right arrow and browse through 'Type of Security' to 'Auto-Obtain DNS.'
6. Under Auto-Obtain DNS, choose 'No' and then 'Advanced Settings.'
7. Now, enter the DNS address you picked from your account dashboard under 'Primary DNS' and leave Secondary DNS unchanged.
8. Click the 'Confirm' button and choose 'Save.' A connection test will run automatically. Once finished, restart your Nintendo Wii.
Nintendo Wii U
1. Turn on your Wii U and press the 'Home' button.
2. Now, choose 'System Settings.'
3. On the next screen, tap on the 'Internet' option.
4. After that, pick 'Connect to the Internet.'
5. Now, tap 'Connections' in the top-right corner and pick your active Wi-Fi connection.
6. Select 'Change Settings' on the next screen and scroll right to find DNS settings.
7. On the 'DNS' menu, choose 'Don't Auto-obtain.'
8. Now, in the space beside 'Primary DNS', enter the DNS address you picked from your dashboard. Leave Secondary DNS unchanged and tap the 'Confirm' button.
10. Finally, run a connection test by following this path: Home > System Settings > Internet > Connect to the Internet > Connections > Active Wi-Fi > Connection Test.
11. Once the test results are displayed, click OK, and you're good to go!
Final Thoughts
In conclusion, the only way to set up CyberGhost on Nintendo Wii U is to customize your console's DNS settings. You'll get to unlock new digital services that way, but you won't get encryption. Nonetheless, 'SmartDNS' can optimize your traffic, which will positively influence your online gameplay.
Of course, this VPN provider works on other devices as well. Visit our central guide on how to set up CyberGhost to configure it on your computer, phone, tablet, router, and more.
That's all for this guide. If you have any questions or doubts, feel free to post your comments below. Lastly, thank you for reading!
Related