When you purchase through links on our site, we may earn an affiliate commission. Here’s how it works.
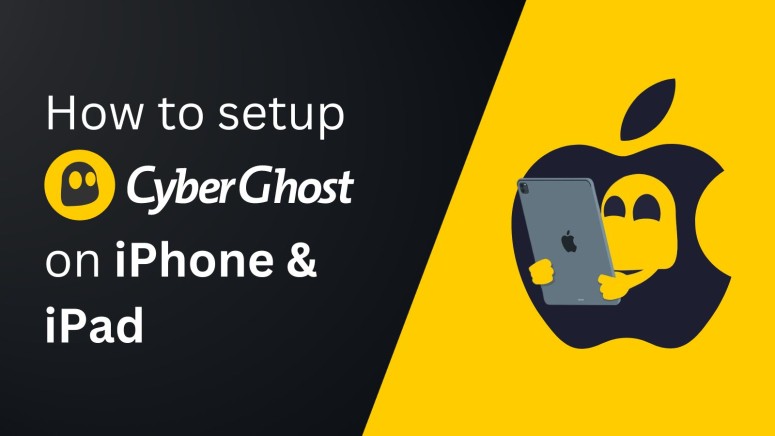
How to Install and Use CyberGhost VPN on iOS
Last updated July 18, 2024

CyberGhost offers a native iOS app, which means that getting started will take only a few minutes. This app is optimized for iOS and iPadOS, allowing you to use it on your tablet as well. It's hosted on the App Store, so your device will keep CyberGhost up-to-date at all times, providing optimal performance.
The only requirement is to have an iPhone running iOS 13.2 or later. If you haven't updated in a while, go to Settings > General > Software Update. If there's anything pending, we recommend you update your device before you proceed with the steps below.
In this guide, we'll teach you how to install CyberGhost VPN on your iPhone (iOS) or iPad (iPadOS), with helpful screenshots to explain every step of the way.
How to Install CyberGhost on iOS
Once you subscribe, you'll need to visit the App Store, from where you can download and install the CyberGhost VPN app. Here's everything you need to do:
1. Sign up for CyberGhost using a Web browser on your computer, phone, or tablet.
2. Next, open the App Store on your device and type 'CyberGhost VPN' in the search bar.
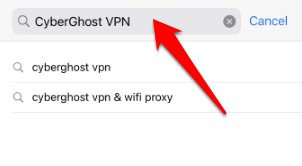
3. Choose 'VPN by CyberGhost - WiFi Proxy' and tap on the 'GET' button. When the installation ends, tap 'OPEN' and launch the CyberGhost VPN app.
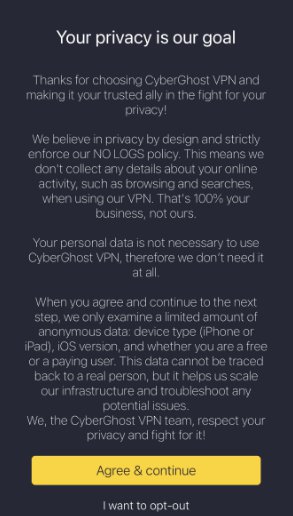
4. Tap the 'Agree & continue' button on the privacy policy screen.
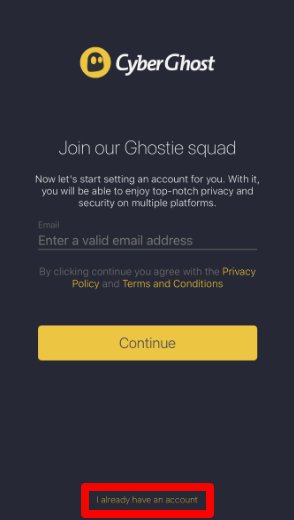
5. Tap on 'I already have an account' on the next screen to continue further.
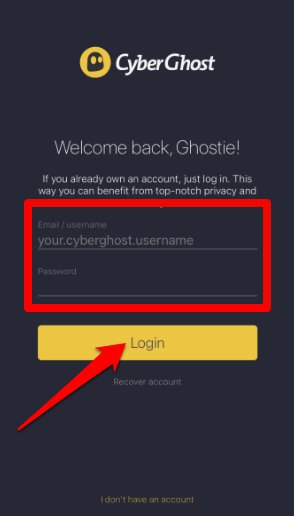
6. Input your username and password and hit the 'Login' button to access your dashboard.
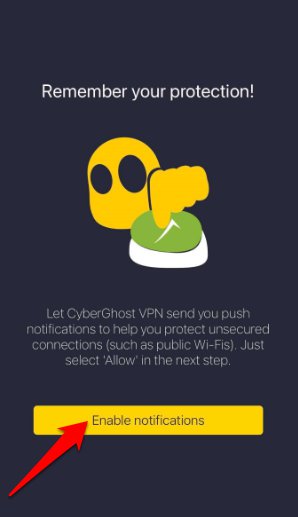
7. CyberGhost will ask you to turn on its push notifications for better protection; tap the 'Enable notifications' button.
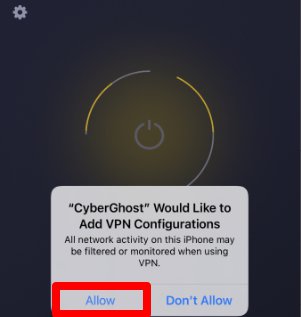
8. Tap the 'Power' button to initiate a VPN connection. Since you're setting up the VPN connection for the first time, you'll receive a notification for confirmation; tap the 'Allow' button.
9. When the Power button turns yellow, you will be connected. CyberGhost will automatically connect you to the best location. If you prefer to connect to another country, follow the below steps.
10. To return from an already connected server, tap the 'X' sign right after the country name. Now, tap 'Best location' to preview the list of all countries where CyberGhost VPN servers are available.

11. Next, tap on the country name where you want to connect and tap the 'Power' button. Finally, the Power button will turn yellow, and your status will be connected.
Final Thoughts
As you can see, getting started with CyberGhost on iOS is incredibly simple. Once you pick a VPN server, this app will encrypt your incoming and outgoing traffic. You can even keep it closed in the background while surfing the Web, watching online content, or playing games.
We're sure you'll want the same protection on your other devices. So, your next Web destination should be our central guide on how to set up CyberGhost. That's where you'll find detailed guides for Windows, macOS, Linux, Android, routers, and more.
That's all for this short (and hopefully helpful) installation guide. If you have any questions, please use the comments section below. Thanks for reading!
Related