When you purchase through links on our site, we may earn an affiliate commission. Here’s how it works.
How to Configure and Use NordVPN on Western Digital My Cloud
Last updated June 29, 2024


If you're using Western Digital's My Cloud, a personal cloud storage device, it is important to safeguard your cloud-synced data by configuring a VPN. The only requirement is that your device supports OpenVPN, allowing you to easily install NordVPN by connecting via SSH.
NordVPN's OpenVPN connection will encrypt your data with AES 256-bit encryption, which is practically unbreakable even by the fastest computers in the world. This means that no government agency or hacker can ever read the contents of your data.
In this article, we'll show you the exact steps to configure and use NordVPN on Western Digital My Cloud devices.
How to Configure NordVPN on Western Digital My Cloud
You can configure NordVPN on Western Digital My Cloud by uploading a suitable .ovpn configuration file to your WD My Cloud settings. Here's a step-by-step guide:
1. Subscribe to NordVPN by accessing its website using any Web browser.
2. After that, visit your device's default IP address, which can be found in the user manual.
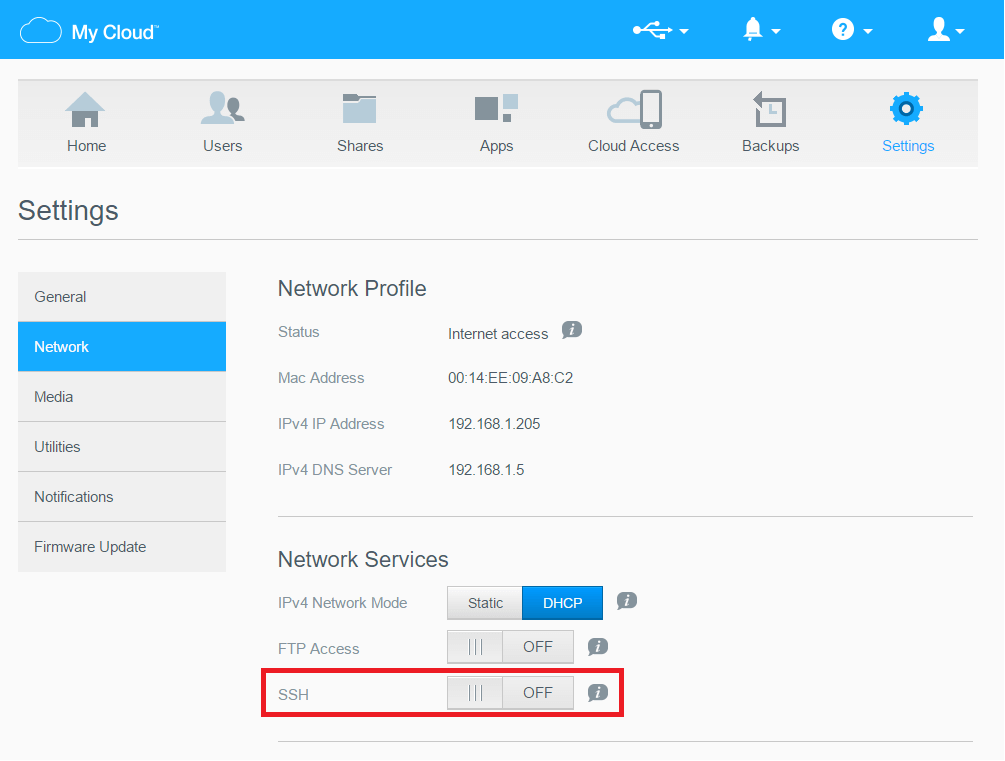
3. Move to 'Settings' and choose 'Network' from the left pane.
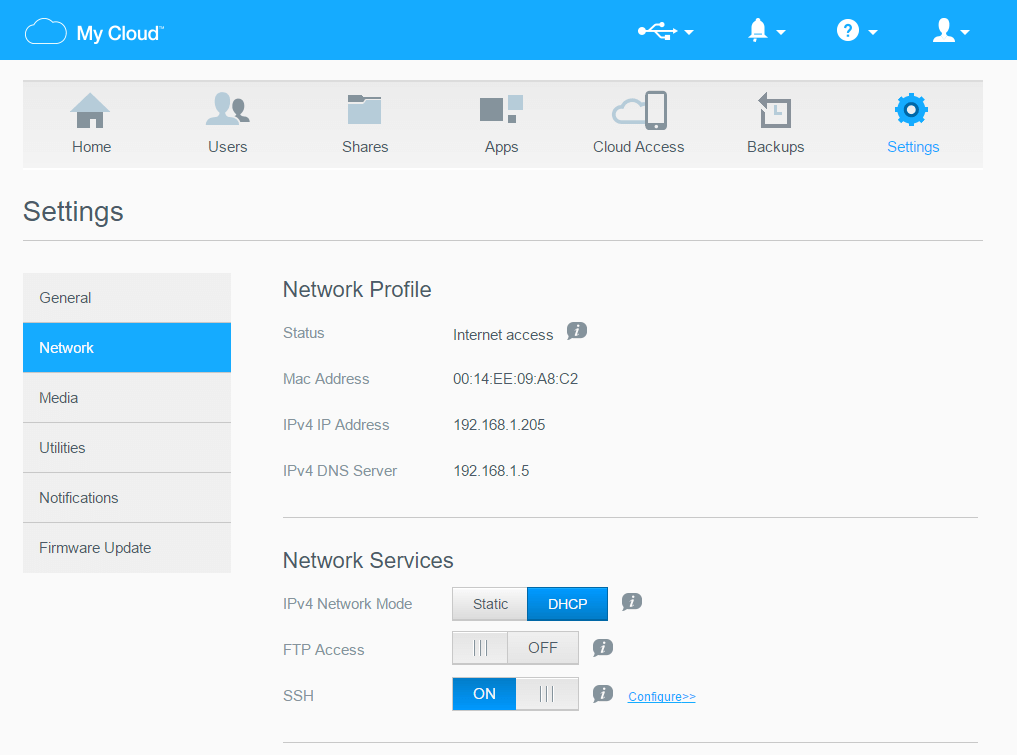
4. Next, enable SSH under the Network Services tab.
5. A new SSH window will now pop up; select 'I accept' and click the 'OK' button.
6. You need to enter your SSH password now, and your connection will be enabled.
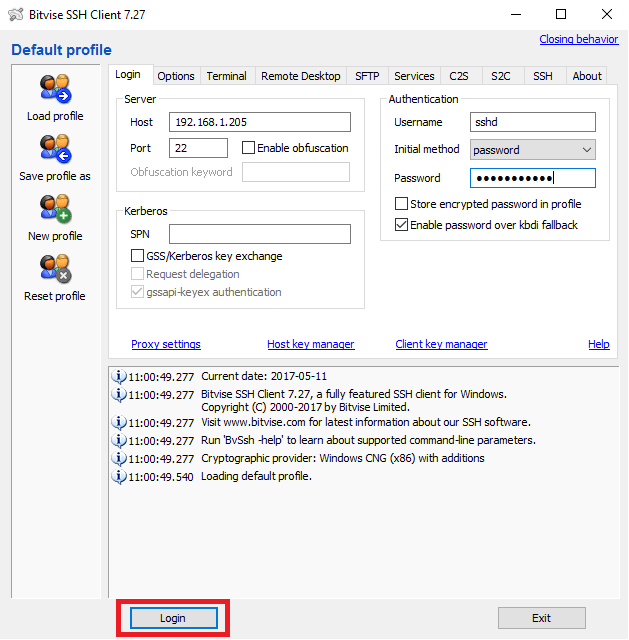
7. Then, download an SSH application like Bitvise SSH Client if you're using a Windows PC.
8. Specify your WD IP address within the 'Host' field under the 'Server' section.
9. Navigate to 'Authentication' and enter your credentials in the Username and Password fields.
10. When done, click 'Login.'
11. Move to the SFTP window.
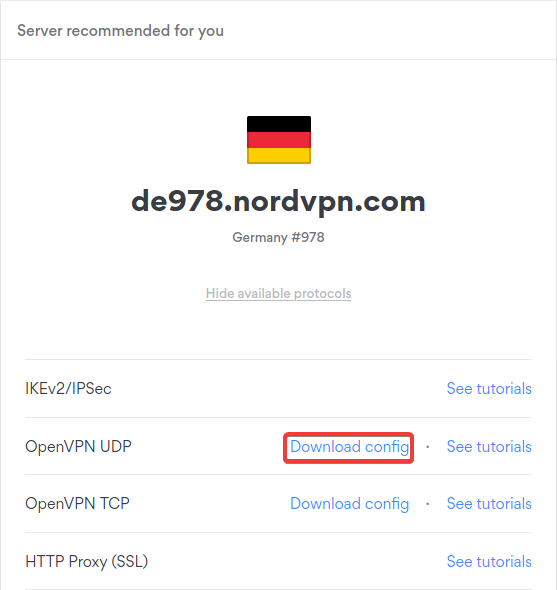
12. Open the NordVPN server tool to select a server in your desired location. Click on 'Show available protocols' and choose 'Download config' next to OpenVPN UDP.
13. Go back to the settings of your device (step 11) and click on the 'Browse' option. Now, drag and drop the .ovpn files into the SFTP window.
14. Type ‘openvpn.bin filename’ in the Terminal and replace ‘filename’ with your .ovpn file name. If that command doesn't work, you need the use one of the following:
openvpn.bin uk180.nordvpn.com.udp1194.ovpn
or
openvpn uk180.nordvpn.com.udp1194.ovpn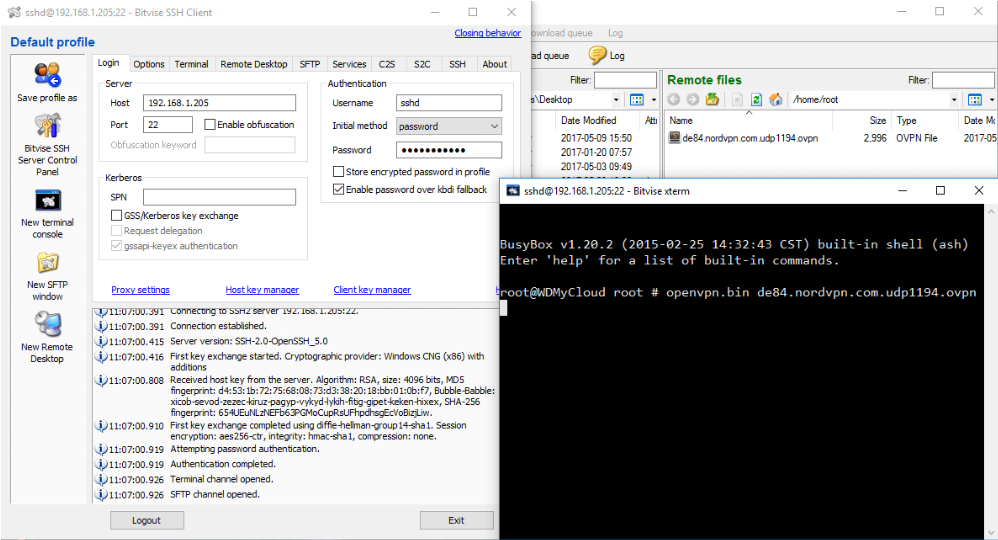
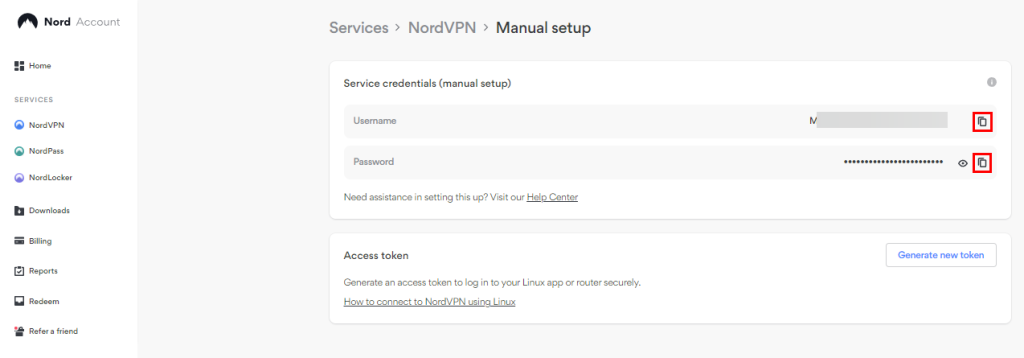
15. After that, hit 'Enter' in the terminal and enter your NordVPN service username and password. To get that, visit your NordVPN account dashboard > 'NordVPN' > 'Set up NordVPN manually.'
16. Copy your service credentials (username and password).

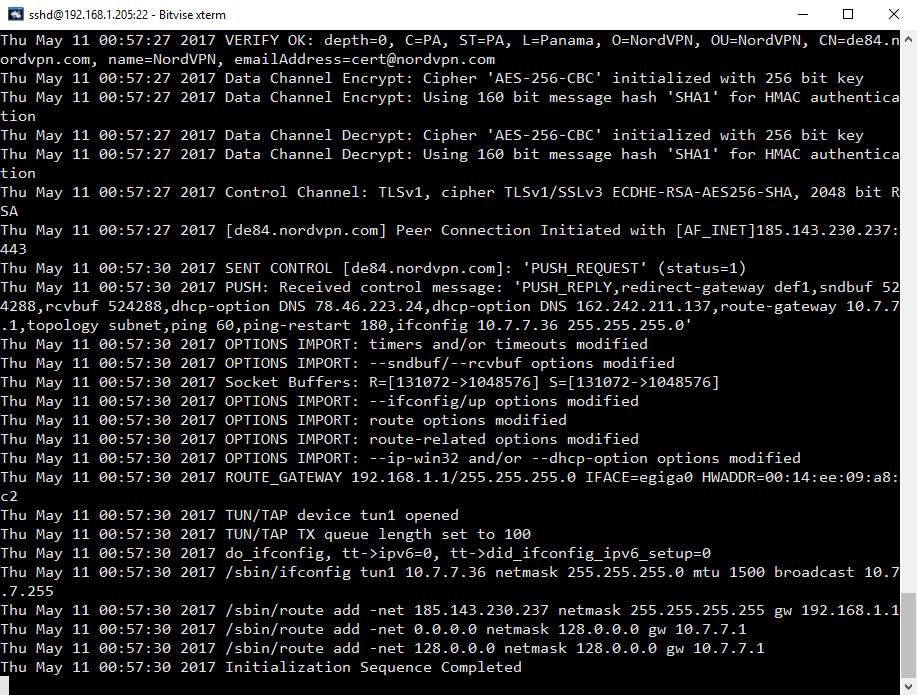
17. As soon as you enter your service credentials, the initialization process will start.
18. Once you get the Initialization Sequence Completed output, your device will get connected.
Final Thoughts
As soon as you establish a VPN connection on your Western Digital My Cloud device, it will switch to using encrypted data upload and download. To get the best possible performance, we recommend updating your device's software to the latest version available.
Also, you'll be using a single out of 10 possible simultaneous connections. So, you may also want to set up and install NordVPN on other devices. Since this VPN supports a range of platforms like Windows, macOS, Android, and more, you can install it on almost all household devices connected to the Web.
That's all! Now you know how to configure and use NordVPN on Western Digital My Cloud. If you have further queries, drop us a comment through the below button. Thanks for reading!
Related