When you purchase through links on our site, we may earn an affiliate commission. Here’s how it works.
How to Configure and Use NordVPN on Tomato
Last updated May 18, 2024

Tomato is a highly popular router firmware due to its user-friendly interface and excellent compatibility with OpenVPN. If you have a router running Tomato custom firmware, you can configure the NordVPN OpenVPN client on your router to get a secure Web connection on all connected devices.
If your router runs on another firmware, you can also flash it with Tomato. However, it's a very complex process that requires some level of technical expertise, so we won't get into that. To make things easier, we suggest getting a pre-flashed Tomato router.
In this article, we will provide a step-by-step guide to teach you how to configure and use NordVPN on Tomato.
How to Configure NordVPN on Tomato
To set up NordVPN on routers running Tomato firmware, you need to add your preferred server's OpenVPN configuration file in Tomato's settings. Here's a detailed guide:
1. Subscribe to NordVPN by visiting its website on any Web-connected device.
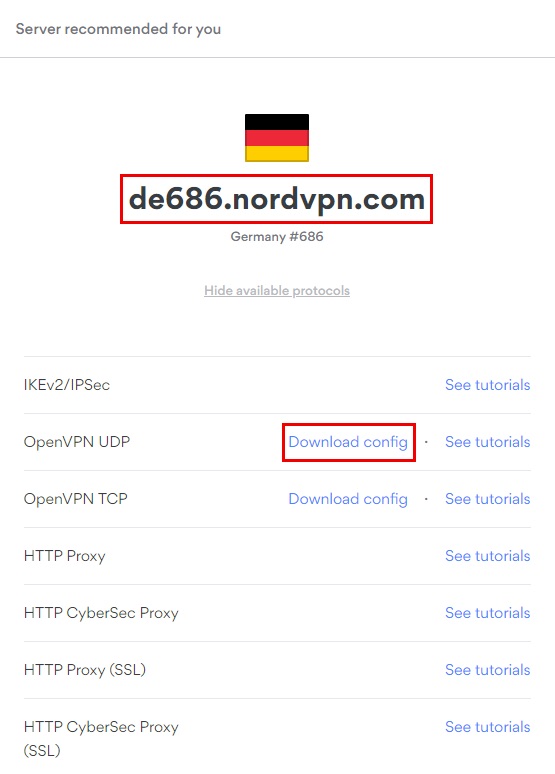
2. Open NordVPN's server tool and choose your preferred server.
3. Click on the 'Download config' button next to OpenVPN (UDP or TCP) to download the .ovpn file.
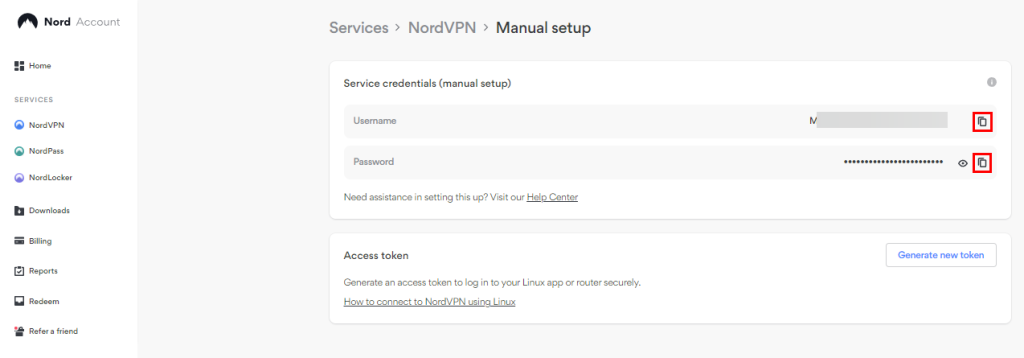
4. Open your NordVPN account dashboard and choose 'NordVPN.'
5. Click on the 'Set up NordVPN manually' button.
6. Enter the verification code received in your NordVPN-associated email inbox.
7. Copy your Username and Password under 'Service credentials (manual setup).'

8. Open the Tomato control panel by visiting 192.168.1.1 or 192.168.0.1 in your browser and logging in.
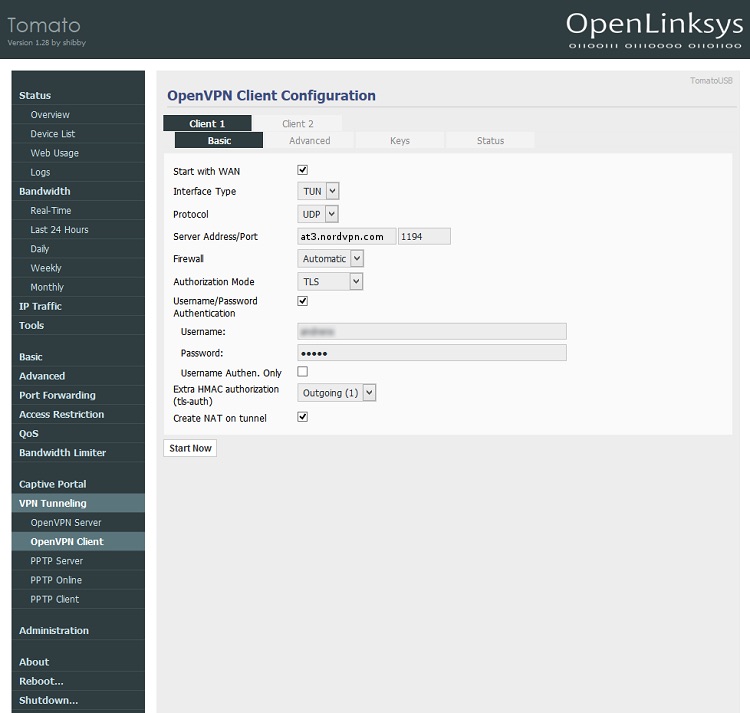
9. Click on 'VPN Tunneling' from the left side menu and choose 'OpenVPN Client' from the drop-down.
10. Now, set the below options as mentioned:
- Start with WAN - Check
- Interface Type - Choose TUN.
- Protocol - Select either UDP or TCP, depending on your preferences.
- Server Address/Port - In the first field, enter the hostname of the VPN server you want to connect to in your desired location. In the second field, enter port number 1194 if you've picked UDP earlier and 443 for TCP.
- Firewall - Automatic
- Authorization Mode - TLS
- Username/Password Authentication - Enter your NordVPN service credentials copied earlier.
- Username Authen. Only - Uncheck
- Extra HMAC authorization (tls-auth) - Choose Outgoing (1)
- Create NAT on tunnel - Check
11. Now, click the Advanced tab and enter the below configuration:
- Poll Interval: 0
- Redirect Internet traffic: Check
- Accept DNS configuration: Strict
- Encryption cipher: AES-256-CBC
- Compression: Disable
- TLS Renegotiation Time: -1
- Connection retry: -1
- Verify server certificate: Uncheck
- Custom Configuration:
remote-cert-tls server
remote-random
nobind
tun-mtu 1500
tun-mtu-extra 32
mssfix 1450
persist-key
persist-tun
ping-timer-rem
reneg-sec 0
auth sha512
#log /tmp/vpn.log
#Delete `#` in the line below if your router does not have credentials fields
#auth-user-pass /tmp/password.txt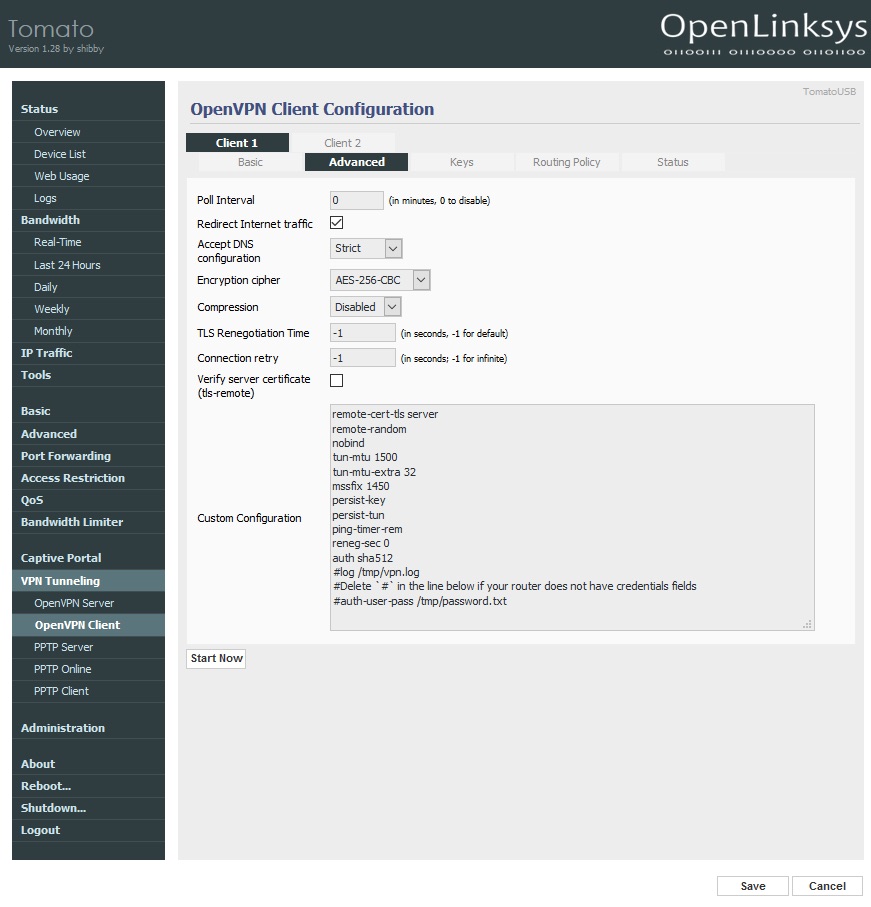
12. Open the .ovpn configuration file you downloaded earlier from NordVPN's website with a text editor.
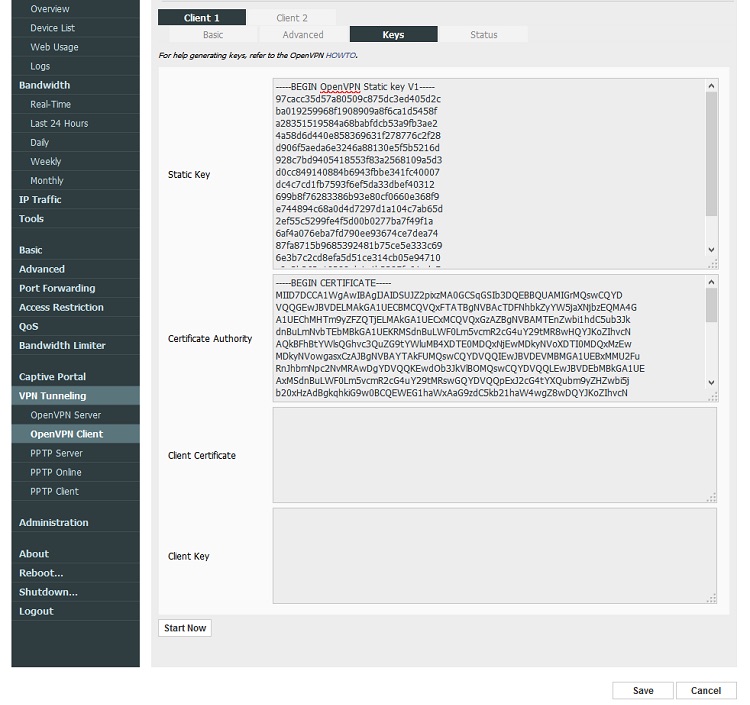
13. Next, under the 'Keys' tab, enter the 'details' as mentioned below:
- Static key - paste text from <tls-auth> to </tls-auth>
- Certificate Authority - paste text from <ca> to </ca>
14. Click the Save button next and choose Start Now to establish a connection.
15. You can visit the Status page to confirm whether or not you've successfully set up a connection.
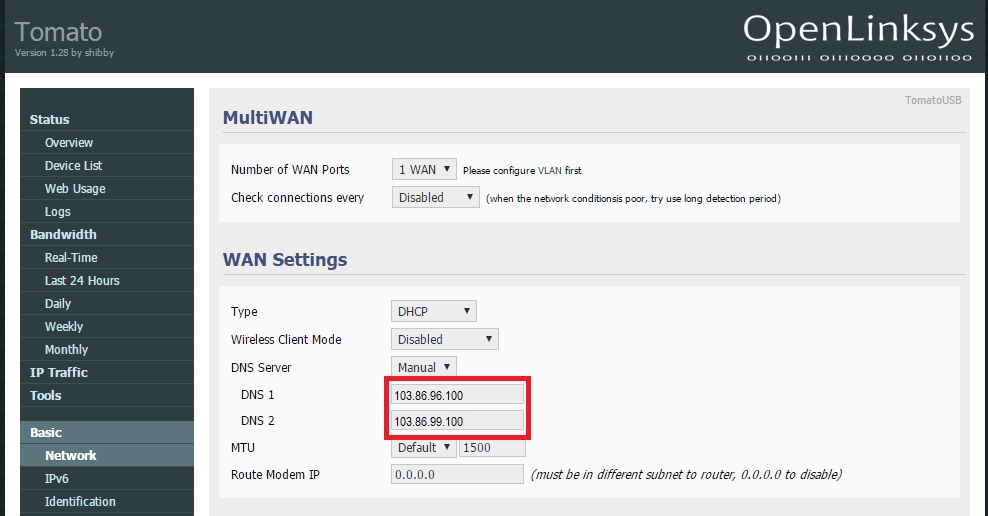
16. To prevent the DNS leaks, enter the below details under 'Basic' > 'Network' > 'WAN Settings:'
- DNS Server: Choose Manual
- DNS 1: 103.86.96.100
- DNS 2: 103.86.99.100
17. To set up NordVPN Kill Switch on your router, navigate to 'Administration' > 'Scripts.'
18. Under Firewall, paste any of the following scripts depending on your requirements:
- If you want every client in LAN to drop the internet connection when the VPN connection drops, use the below script:
WAN_IF=`nvram get wan_iface`
iptables -I FORWARD -i br0 -o $WAN_IF -j REJECT --reject-with icmp-host-prohibited
iptables -I FORWARD -i br0 -p tcp -o $WAN_IF -j REJECT --reject-with tcp-reset
iptables -I FORWARD -i br0 -p udp -o $WAN_IF -j REJECT --reject-with udp-reset- And, if you want only a specific IP address to drop the internet access when your VPN disconnects, use the below script:
WAN_IF=`nvram get wan_iface`
iptables -I FORWARD -i br0 -s `ip address` -o $WAN_IF -j REJECT --reject-with icmp-host-prohibited
iptables -I FORWARD -i br0 -s `ip address` -p tcp -o $WAN_IF -j REJECT --reject-with tcp-reset
iptables -I FORWARD -i br0 -s `ip address` -p udp -o $WAN_IF -j REJECT --reject-with udp-reset
Final Thoughts
While the configuration process may seem lengthy and complex at first, it's actually very simple and straightforward. And the instructions will be more or less the same for all Tomato routers. Once you've configured it, you will be able to protect unlimited devices with NordVPN.
Since NordVPN supports a wide range of platforms, you can set up NordVPN on additional devices that aren't connected to your router. While you won't be able to get unlimited simultaneous connections without a router, you can still connect up to 10 devices at any given time via its native apps.
We hope that this article helped you successfully configure NordVPN on Tomato. Feel free to share your experience with us in the comments below. Thanks for reading!
Related