When you purchase through links on our site, we may earn an affiliate commission. Here’s how it works.
How to Configure NordVPN on Synology
NordVPN works on Synology devices through manual configuration. In other words, you'll get to pick a server from among the VPN's 7,400+ servers in 118 countries and configure a connection on your Synology NAS to that specific server. This will encrypt your incoming/outgoing traffic.
Note that NordVPN mentions Synology 5.1 and 6.1 software versions on its website, which are the most widely used versions at the moment. However, there's no official list of supported Synology NAS devices. That said, as long as your NAS supports VPNs, you should be able to configure NordVPN.
In this article, you'll learn how to configure NordVPN on Synology versions 5.1 and 6.1 with in-depth and thorough instructions.
How to Configure NordVPN on Synology
Older versions of Synology, like 5.1 and earlier, require you to manually set up a NordVPN connection. That's done by inputting a series of information you can find on the VPN's site, which we'll list below. Newer versions of Synology (6.1 and up) make this process easier by allowing you to upload an OVPN file with all the instructions needed. Let's explain everything in detail.
How to Configure NordVPN on Synology 5.1
If your Synology NAS device runs DiskStation Manager 5.1, you can configure NordVPN's OpenVPN client on it. Here, we've provided a step-by-step guide on how to configure and use NordVPN on Synology 5.1.
1. Sign up for NordVPN using a computer and any Web browser.
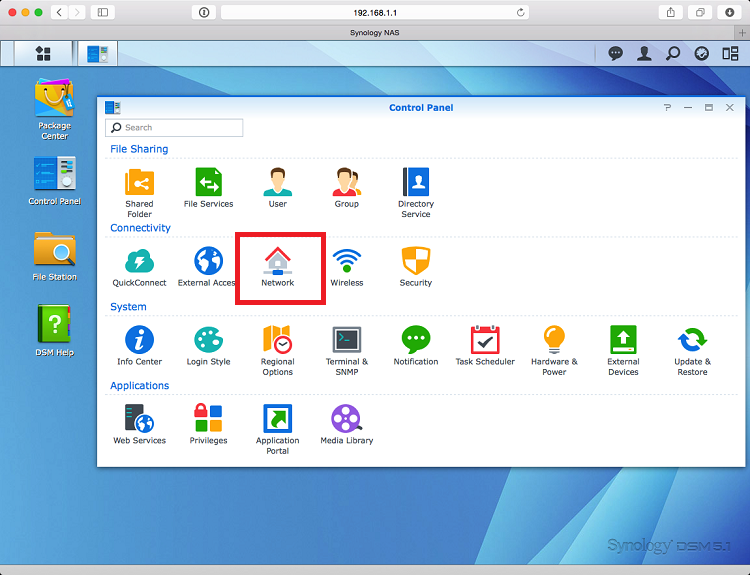
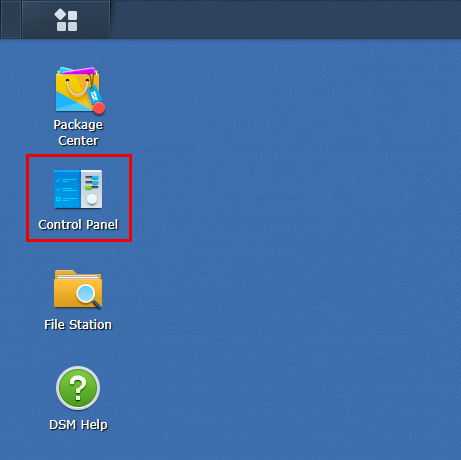
2. Log in to your Synology NAS and choose the 'Control Panel' option.
3. Move on to the 'Network' option.
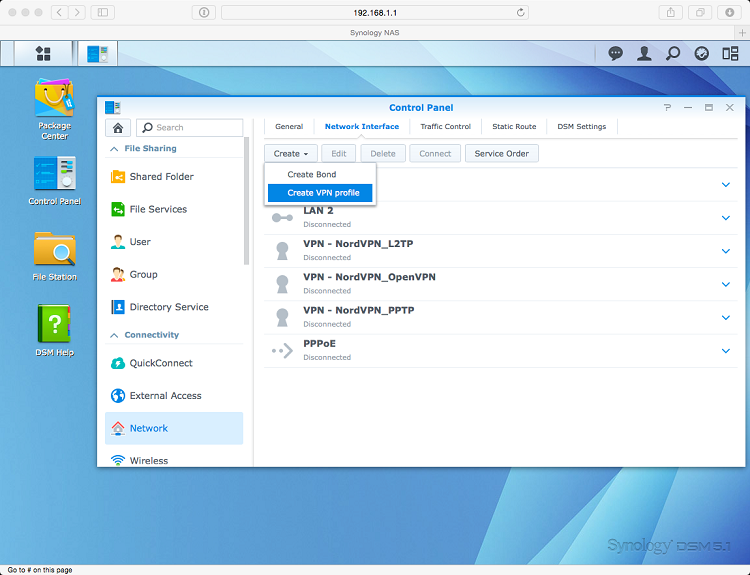
4. On the upcoming screen, create a new VPN profile.
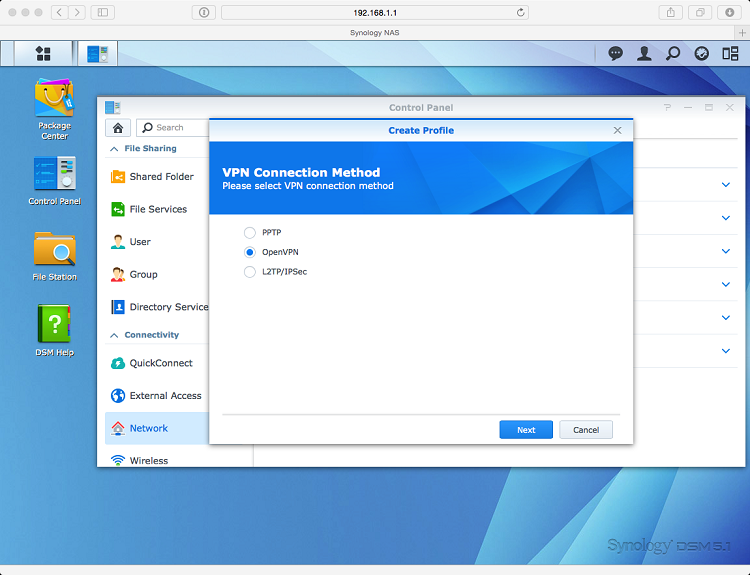
5. Select the 'OpenVPN' option in the pop-up window and click 'Next.'
6. Now, download NordVPN's CA certificates for further steps.
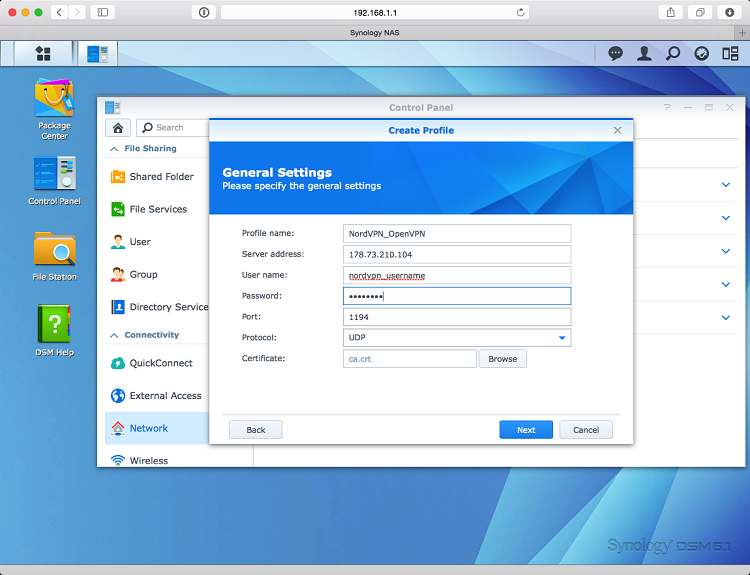
7. After that, enter the following information:
- Profile Name – Input any name you want (use something memorable).
- Server Address – Enter the NordVPN server hostname in your preferred location.
- User name – NordVPN service username (from your NordVPN Account dashboard).
- Password – NordVPN service password (from your NordVPN Account dashboard).
- Port – 1194 (recommended).
- Protocol – UDP (recommended).
- Certificate – Upload the CA certificate for the server you've picked.
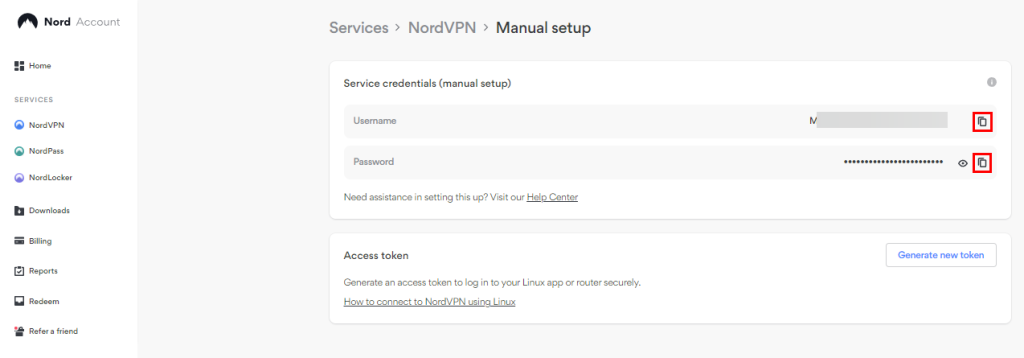
Here's how you can get your NordVPN service credentials:
- Navigate to NordVPN account dashboard > 'NordVPN.'
- Click on 'Set up NordVPN manually.'
- Enter the verification code (from your NordVPN-associated email).
- Copy the credentials under the box titled 'Service credentials (manual setup).'
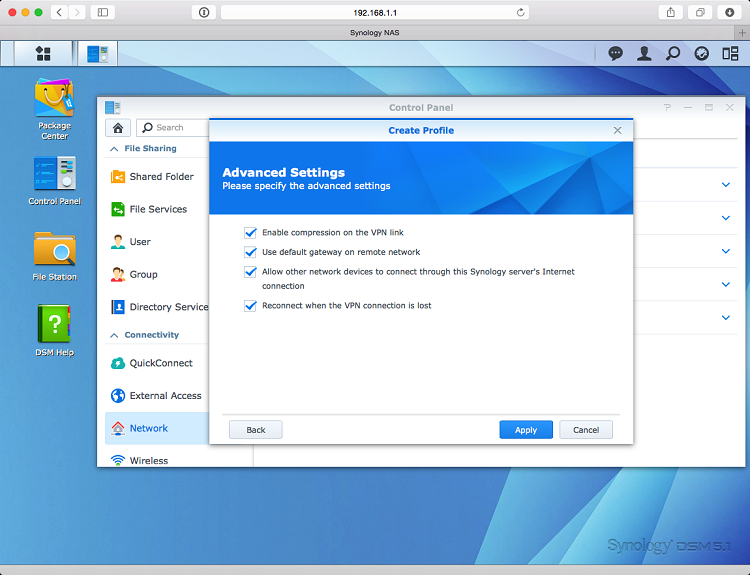
8. Click 'Next' and check all the boxes in the Advanced Settings, and hit 'Apply.'
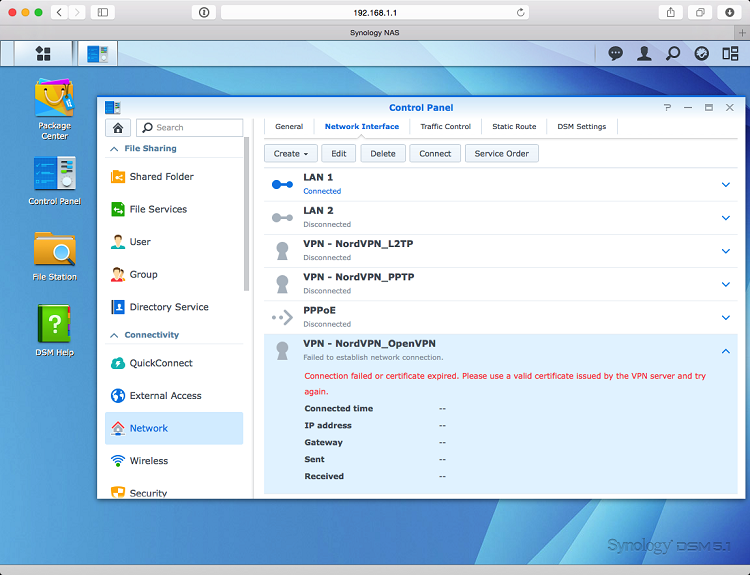
9. Now, when you click on 'connect' from your recently created VPN profile, an error will pop up.
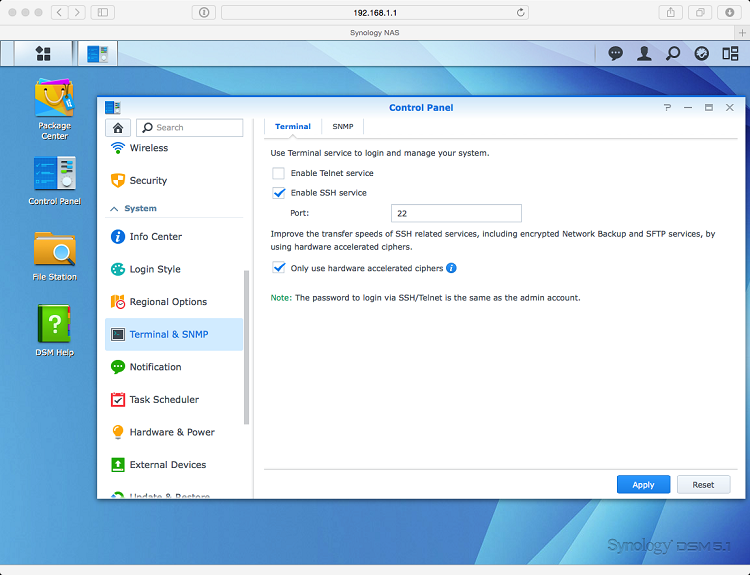
10. You need to edit your OpenVPN profile from 'Terminal & SNMP' > check 'Enable SSH service.'
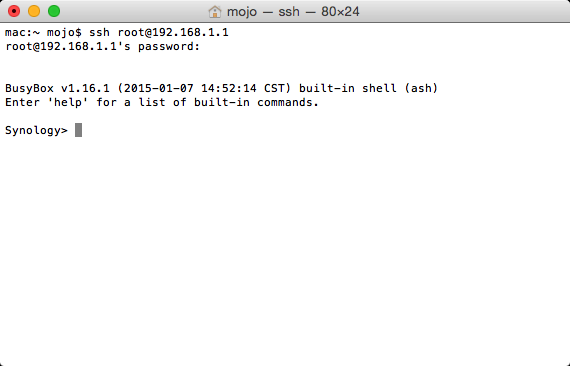
11. Open a terminal window on the device you're using and enter the below command:
ssh root@(ip of your synology)Note: The root password is the one you use for administrative access to your NAS device.
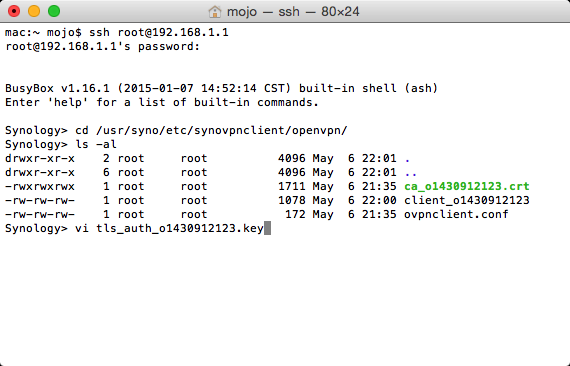
12. After that, change directories by typing in the below command:
cd /usr/syno/etc/synovpnclient/openvpn
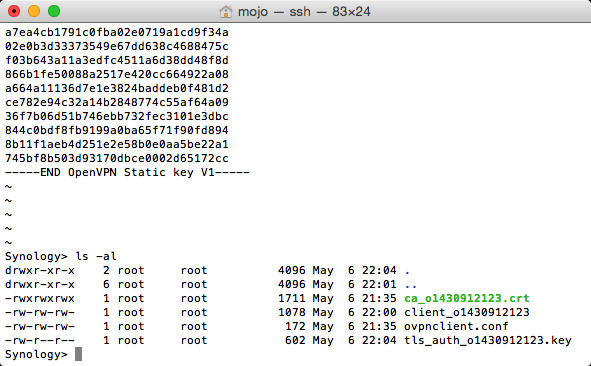
ls -al
13. Type in the below command and replace the connection_id with your actual connection ID:
vi tls_auth_connection_id.key14. Open the directory with the extracted CA certificates, and you'll see the tls-auth.key files there.
15. Select the one key file corresponding to the VPN server you're going to use.
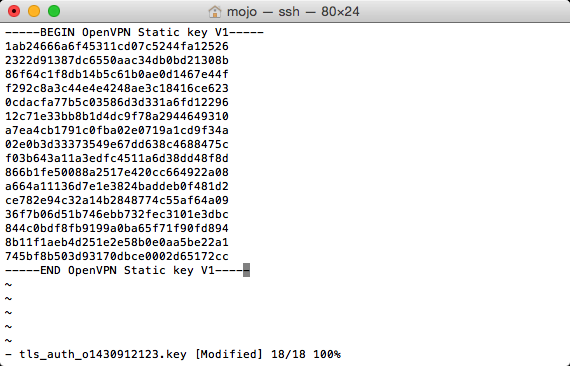
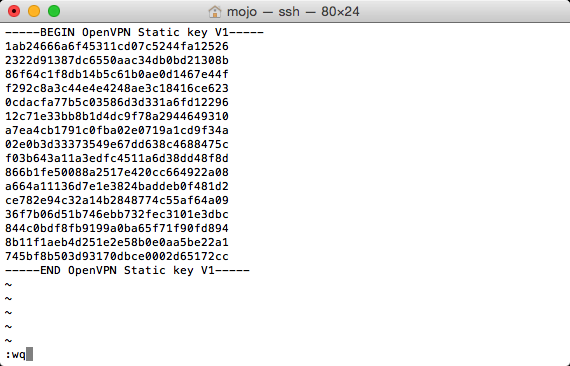
16. Open it in a text editor and copy the content.
17. Launch a terminal window, press 'A,' and paste the content you've copied earlier.
18. Next, press the 'Escape' button and type in :wq.
19. If you're using the ls -al command instead, you'll get a different output like the image below.
20. To finish the client_(connection_id) file, open the file with vi and then paste the below content.
21. Replace the tls-auth.key with the name of the key file you've created before.
cipher AES-256-CBC
remote-cert-tls server
auth SHA512
tls-auth tls_auth_o1430912123.key 1
tun-mtu 1500
tun-mtu-extra 32
mssfix 1450
persist-key
persist-tun
ping 15
ping-restart 0
ping-timer-rem
log-append /volume1/tmp/NordVPN.log
22. Now, save the file by pressing the 'Escape' button and typing :wq.
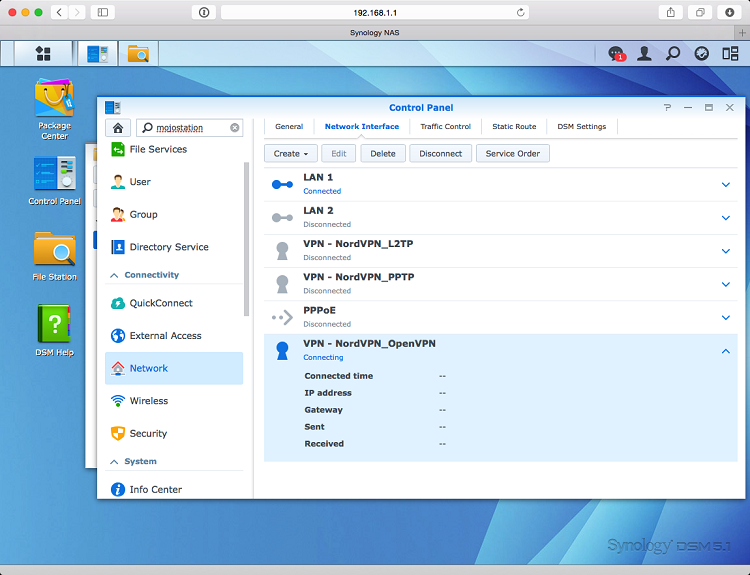
23. Go back to your web browser and click 'Connect.'
24. Now, NordVPN will be connected to your Synology NAS.
25. To disconnect, simply click the 'Disconnect' button on the Synology Network list.
How to Configure NordVPN on Synology 6.1
To configure NordVPN on Synology 6.1 or later, you'll need to download an OpenVPN file from NordVPN's website. Then, you'll upload that file to your Synology NAS. Just follow these steps:
1. Get NordVPN using a Web browser on your computer.
2. Now, log into your Synology device and visit the Control Panel.
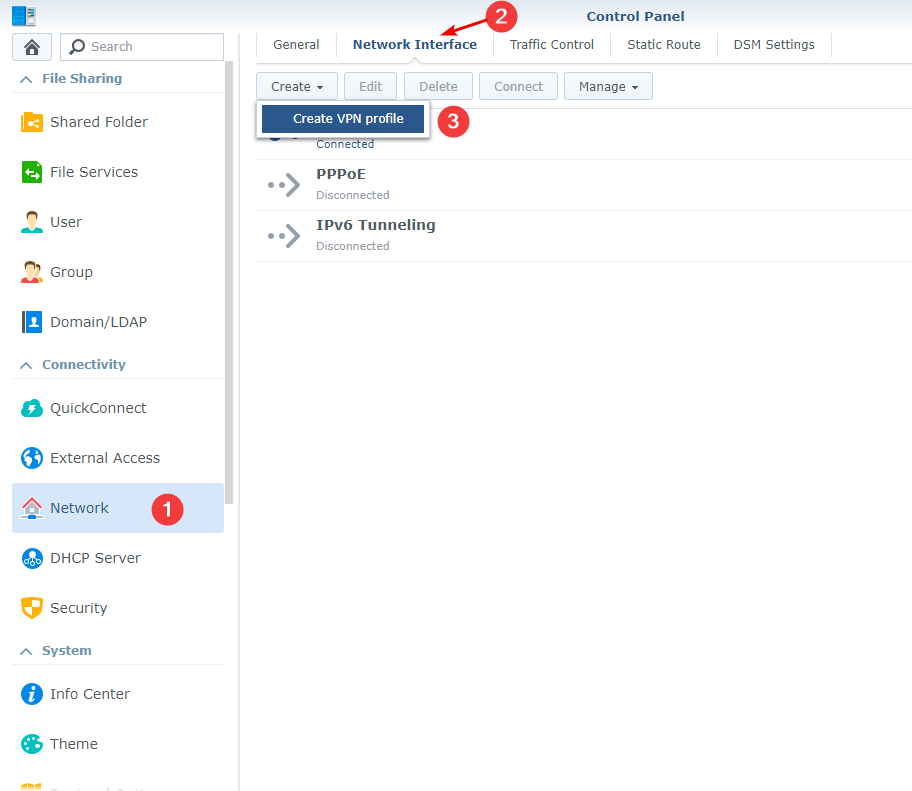
3. Navigate to Network and follow this path: 'Network Interface' > 'Create' > 'Create VPN profile.'
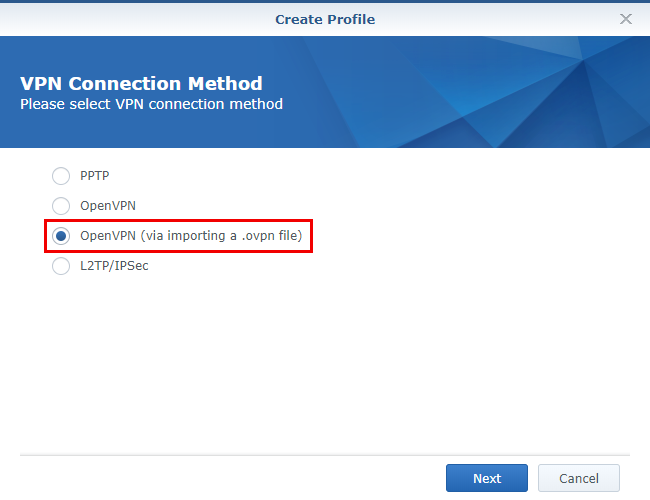
4. Check the option 'OpenVPN (via importing a .ovpn file)' and click the 'Next' button.
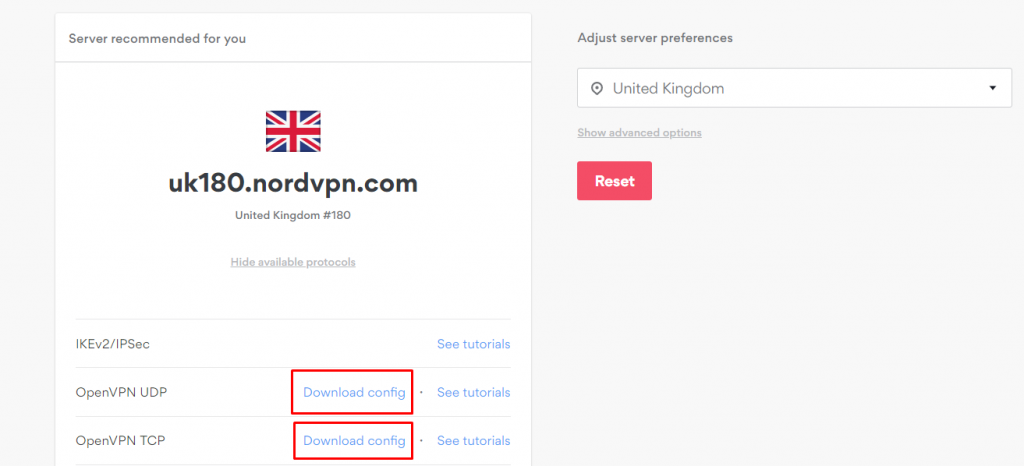
5. Open NordVPN's server configuration page.
6. Choose 'Show available protocols' > 'Download config' next to OpenVPN.
7. Now, fill in the fields mentioned below:
- Profile name: Any name.
- Username: NordVPN service credentials (from your Nord Account dashboard).
- Password: NordVPN service credentials (from your Nord Account dashboard).
- Import .ovpn file: The .ovpn file you downloaded earlier.
- CA certificate: Download NordVPN's certificate files, and find the certificate having the same number as your chosen server. Open the 'Create Profile' screen from earlier, click the 'Browse' button on the right side of the CA certificate field, and upload the ca.crt file manually.
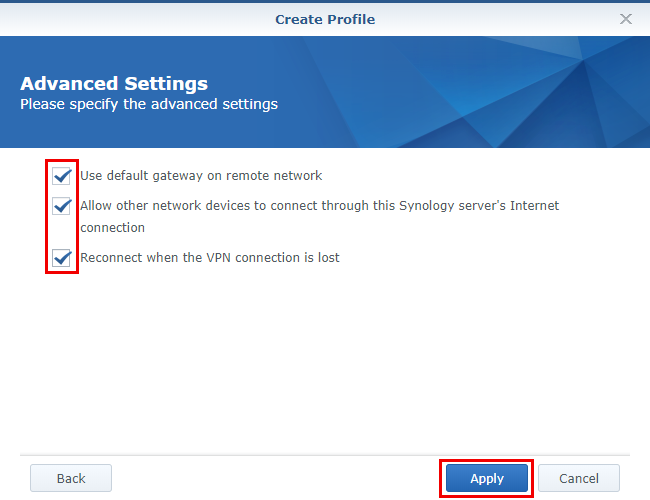
8. Click on 'Next', check all the boxes under Advanced Settings and hit 'Apply.'
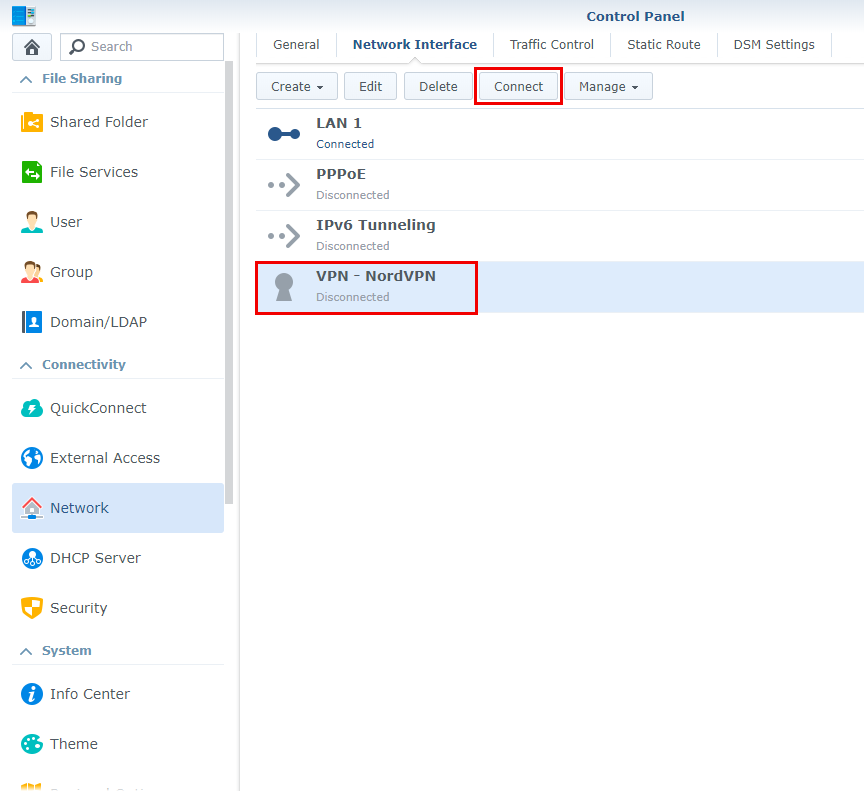
9. Click on the profile you created and hit 'Connect.' The status of this profile will become Connected.
10. In case you face any issues with the connection, open the .ovpn configuration file and add the line:
log-append /var/log/NordVPN.log11. If it doesn't help, contact NordVPN's 24/7 chat support and share the log file from the directory.
/var/log/NordVPN.logFinal Thoughts
Even though configuring NordVPN on Synology NAS devices takes some time, you'll end up with a highly secure connection on your file-sharing device. NordVPN's nicely organized website makes it easy to gather the required information, making this otherwise complex procedure as simple as possible.
Remember that NordVPN gives you up to 10 simultaneous connections, so why not use it on more devices (especially those you use on the go)? Our central guide on how to set up NordVPN will provide more information on how to make that happen.
Furthermore, even though NordVPN offers high-end data protection and everything else you need for your NAS device, it's not the only option available. If you're still open to alternatives, check out the best VPNs for Synology NAS to see what kind of features you can expect from NordVPN's competitors.
That's all! Now you know how to set up and use NordVPN on Synology NAS devices. If you have any extra questions, drop us a comment below. Thanks for reading!

