When you purchase through links on our site, we may earn an affiliate commission. Here’s how it works.
How to Configure and Use NordVPN on Peplink/Pepwave
Last updated June 18, 2024

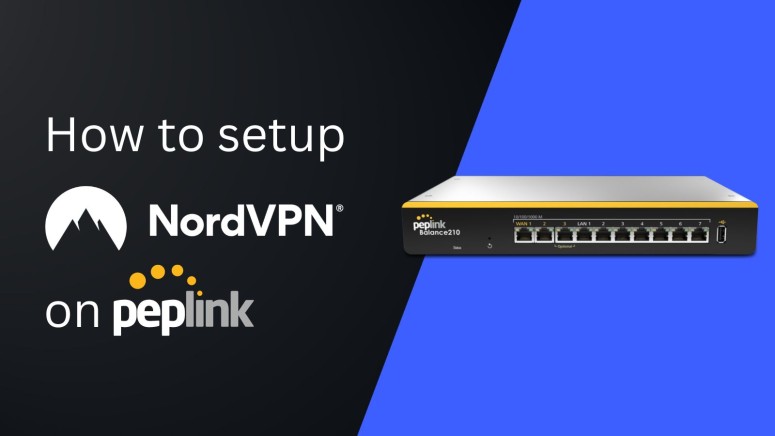
Peplink/Pepwave routers can run OpenVPN connections and help you encrypt your entire Web activity through NordVPN. However, for this setup process, you need firmware version 8.1.1 or later and an OpenVPN WAN license from your reseller.
After setting it up, you'll be able to connect and secure unlimited devices to your router, including the ones that don't support VPN apps, like smart TVs and gaming consoles. Overall, the setup takes less than 10 minutes and requires no prior technical knowledge.
In this guide, we will help you configure and use NordVPN on Peplink/Pepwave using step-by-step instructions.
How to Configure NordVPN on Peplink/Pepwave
To configure NordVPN on a router made by Peplink/Pepwave, all you must do is upload its .ovpn configuration files via your router's control panel along with your service credentials. Here's a complete step-by-step guide.
1. Get a NordVPN subscription using your computer and your preferred browser.
2. Log into your router's interface by entering its default IP in your Web browser's search bar.
3. Once you can access the interface, navigate to 'Network' from the top bar.
4. Choose WAN in this section from the left sidebar.

5. Click the OpenVPN WAN connection name option to access OpenVPN WAN settings.
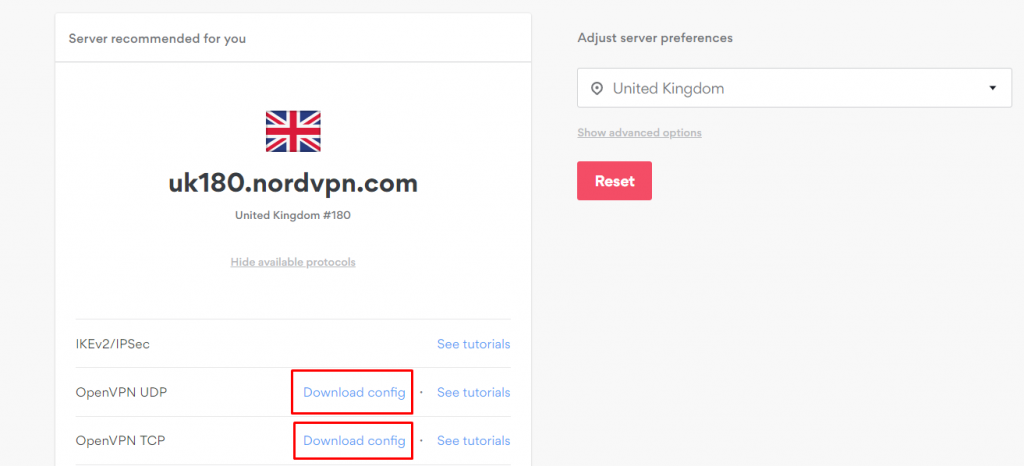
6. Open the NordVPN server tool, pick a server, and click on 'Download config' next to OpenVPN.

7. Go back to your router's interface and click Choose File.
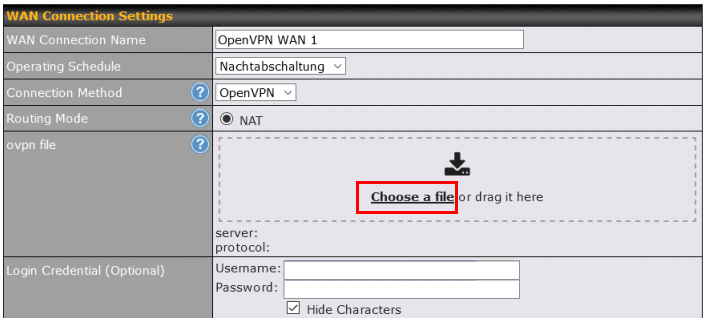
8. Now, from the pop-up window, select the .ovpn file and hit Open.
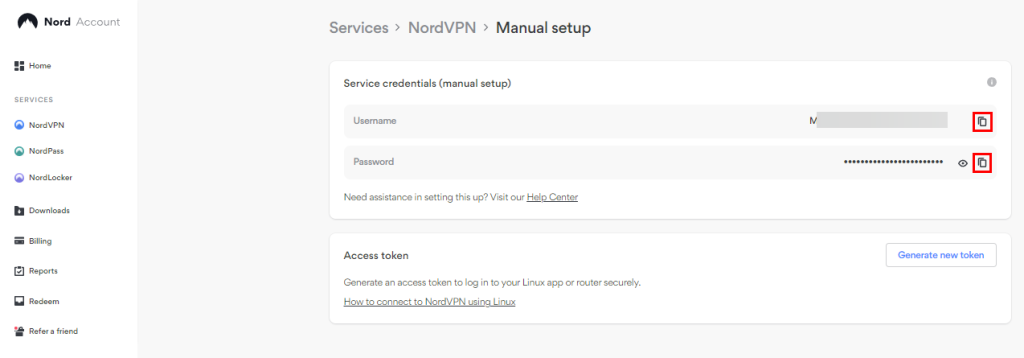
9. To find your credentials, open your NordVPN account dashboard and choose 'NordVPN.'
10. Click on 'Set up NordVPN manually.'
11. Verify yourself by entering the security code from your NordVPN registered email.
12. Copy the username and password from 'Service credentials (manual setup).'

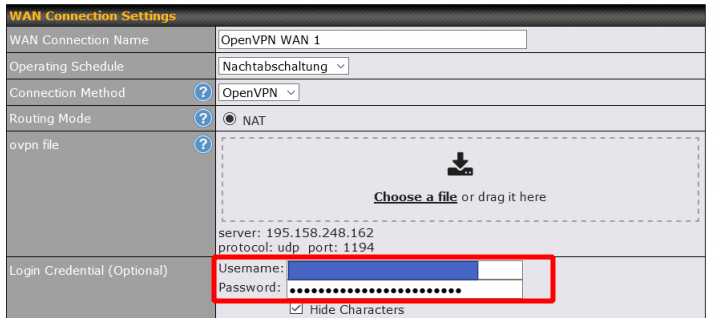
13. Open your router's admin page and enter your credentials under 'WAN Connection Settings.'
14. Uncheck the option Obtain DNS server address automatically.
15. Check the 'Use the following DNS server address(es)' option and enter the below DNS servers:
103.86.96.100
103.86.99.100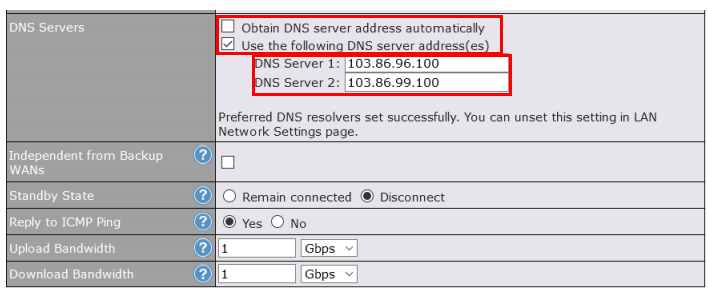
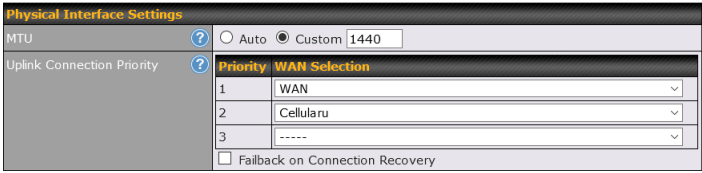
16. Navigate to Physical Interface Settings and set priorities under Uplink Connection Priority.
17. You can rank the connections on a priority basis in this Priority WAN Selection section.
18. Check the 'Enable' option and click on 'Save' or 'Save and Apply' from the bottom of the window.
19. Go to the account dashboard and check if OpenVPN WAN is connected to NordVPN's server.
20. To control the traffic flowing through the OpenVPN connection, create an Outbound Policy.
21. Navigate to 'Network' and select 'Advanced.'
22. Next, click 'Outbound Policy' and choose 'Add Rule' from the left pane.
23. Here, you can set up a priority rule where OpenVPN will get the priority.
24. To use the NordVPN kill switch whenever your VPN disconnects, choose to enforce the priority rule.
25. Drag it to the top to run it on priority and click on 'Apply changes' from the top right corner.
Final Thoughts
You can use both OpenVPN UDP and TCP to configure NordVPN with Peplink/Pepwave. UDP offers faster connection speeds, whereas TCP is more secure. Note that to switch between the two protocols, you'll have to reconfigure the router entirely with a new config file.
That said, you may also want to take advantage of NordVPN's limit of 10 simultaneous connections. For that, you can directly install and set up NordVPN natively on your devices, such as computers, smartphones, and tablets.
That's all! Now you know how to configure and use NordVPN on Peplink/Pepwave routers. If you have any questions, don't hesitate to drop us a comment below. Thanks for reading!
Related