When you purchase through links on our site, we may earn an affiliate commission. Here’s how it works.
How to Configure and Use NordVPN on Padavan
Published on May 4, 2022

All the Padavan firmware-based routers can run NordVPN. You have to use the OpenVPN client of NordVPN with this open-source custom firmware. But the setup process can be a bit tough for first-time VPN users. That's why we've provided a complete step-by-step guide here to help you set up, configure and use NordVPN on the Padavan router. Have a look.
1. First, visit the NordVPN website.
2. Next, click the Grab the Deal button and choose a subscription plan on the next screen.
3. You’ve to fill in the required details now and complete your purchase.
4. Once done, access your router’s login page by visiting one of these IPs- 192.168.1.1 or 192.168.0.1.
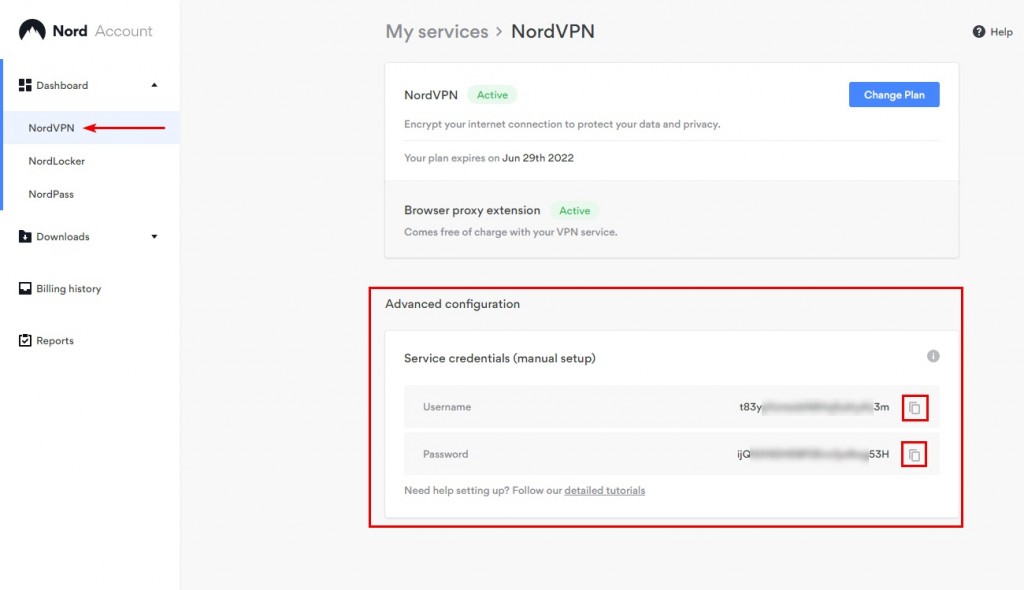
5. Now, enter the default login credentials from your User Manual and access your dashboard.
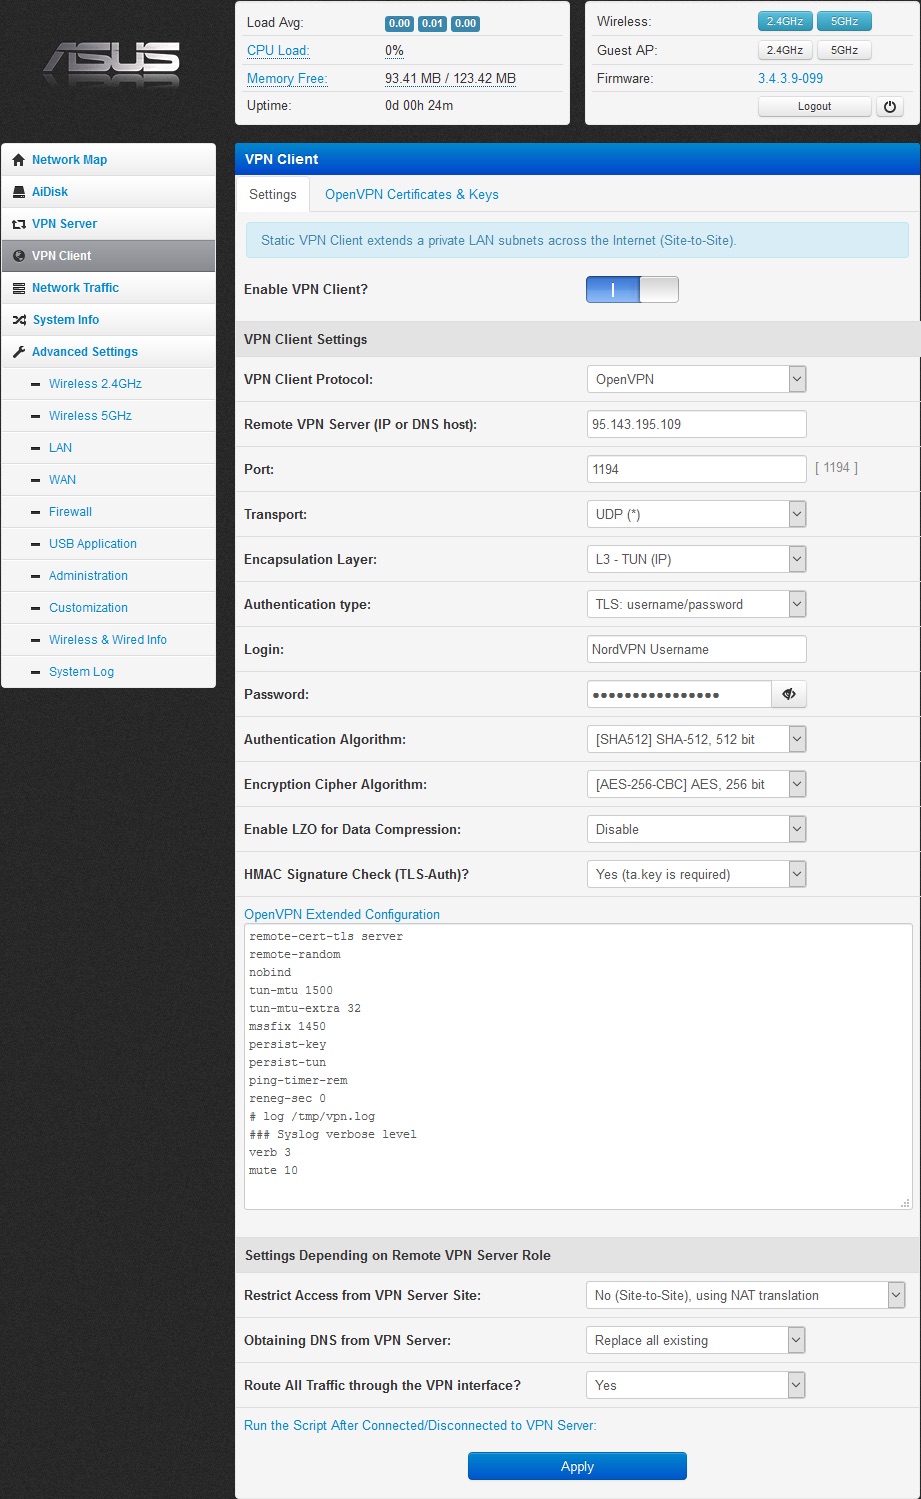
6. Next, navigate to VPN Client and choose the Settings tab.
7. Then, fill in the details mentioned below.
- Enable VPN Client: Toggle on the bar
VPN Client Settings
- VPN Client Protocol: Choose OpenVPN
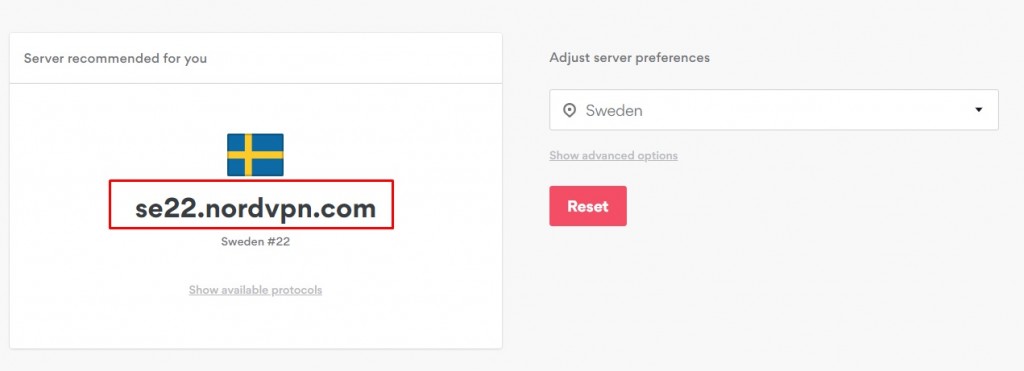
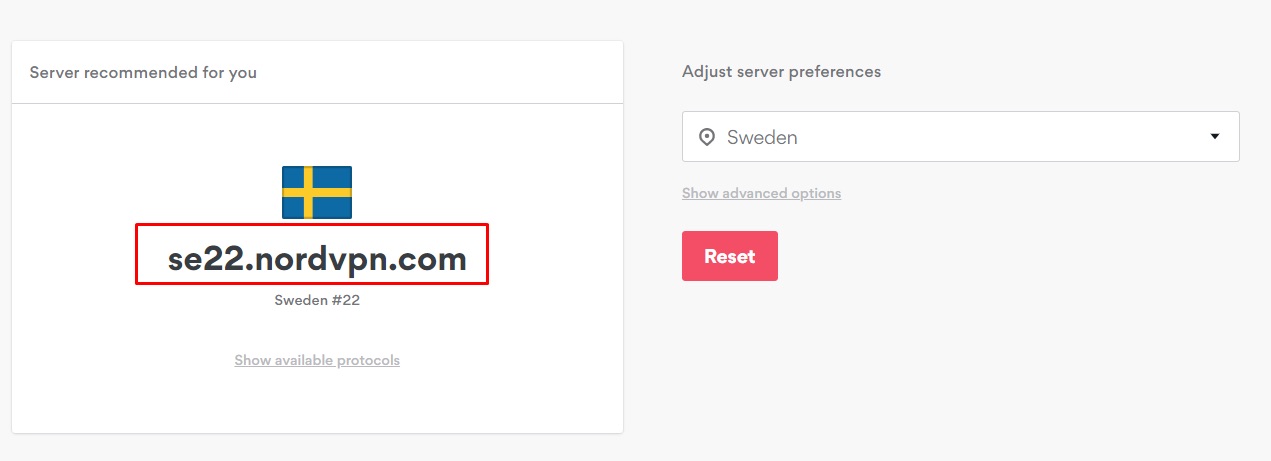
- Remote VPN Server (IP or DNS host): Click here to find the VPN server IP for the one in your preferred location and enter it in this field.
- Port: 1194
- Transport: UDP
- Encapsulation Layer: Choose L3 - TUN (IP)
- Authentication type: Select TLS: username/password
- Login: Username
- Password: ****

- Authentication Algorithm: Set as [SHA512) SHA-512, 512 bit
- Encryption Cipher Algorithm: Choose [AES-256-CBC] AES 256 bit
- Enable LZO for Data Compression: Disable
- HMAC Signature Check (TLS Auth): Select Yes (ta.key is required)
Access the OpenVPN Extended Configuration Menu (Copy & Paste the below code)
remote-cert-tls server
remote-random
nobind
tun-mtu 1500
tun-mtu-extra 32
mssfix 1450
persist-key
persist-tun
ping-timer-rem
reneg-sec 0
# log /tmp/vpn.log
### Syslog verbose level
verb 3
mute 10
Settings Depending on Remote VPN Server Role
- Restrict Access from VPN Server Site: Pick No (Site-to-Site), using NAT translation
- Obtaining DNS from VPN Server: Set as Replace all existing
- Route All Traffic through the VPN interface: Select Yes
8. Once done, hit the Apply button and move to the OpenVPN Certificates & Keys tab.

9. Now, click here to download the ca.crt and ta.key files and copy-paste the content of those files into the 'ca.crt (Root CA Certificate):' and 'ta.key (TLS Auth Key) - secret:' fields.
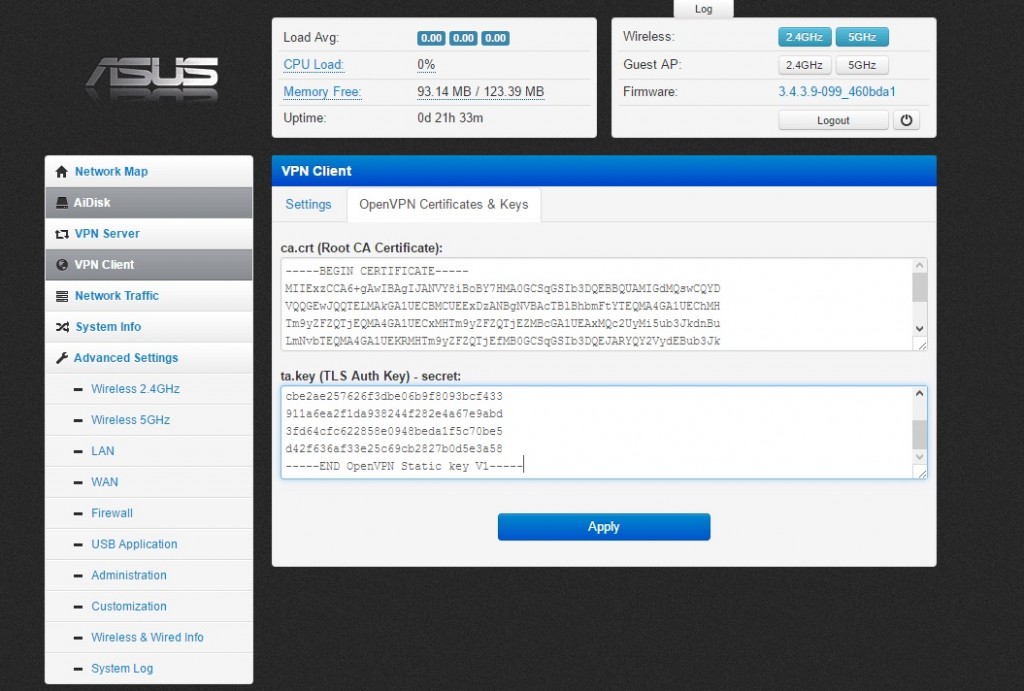

10. Once done, click the Apply button and move on to making your changes permanent.
11. You can do that in the below-mentioned methods-
- Run the console command- "mtd_storage.sh save"
- Go to Advanced Settings> Administration> Settings press "Commit" at the right of "Commit Internal Storage to Flash Memory Now"
- Reboot your router.
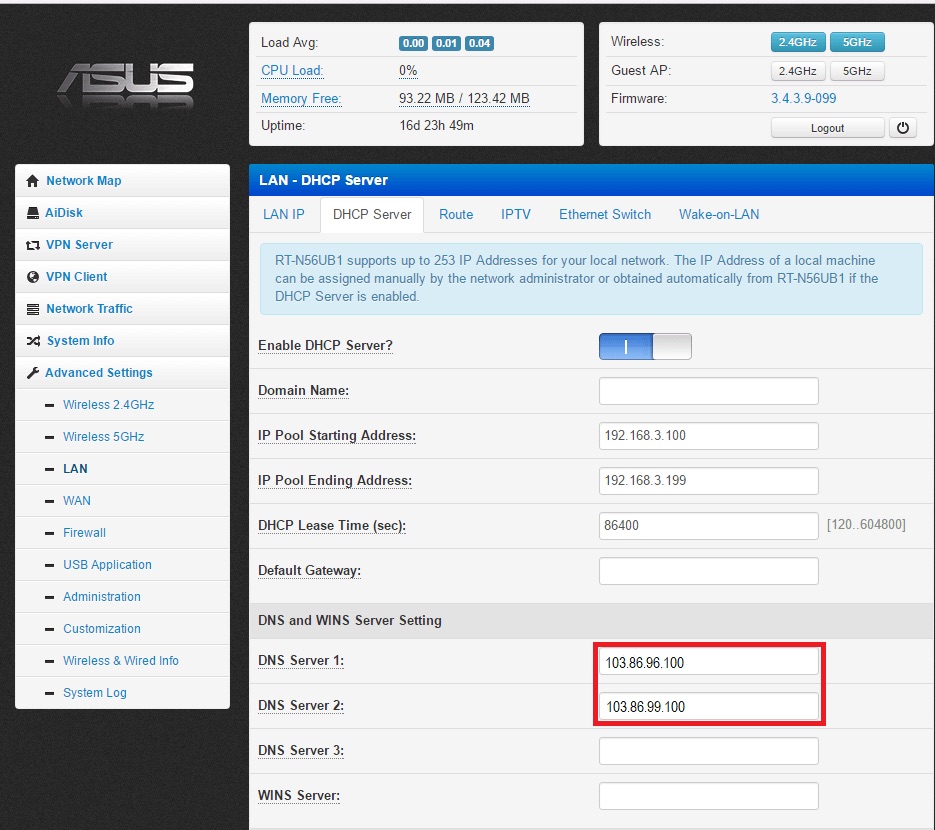
12. If you want complete DNS leak protection, fill in the below details on the LAN - DHCP Server tab-
- Enable DHCP Server: Toggle on the bar
- Domain Name: leave blank
- IP Pool Starting Address: 192.168.3.100
- IP Pool Ending Address: 192.168.3.199
- DHCP Lease Time (sec): 86400
- Default Gateway: leave blank
DNS and WINS Server Setting
- DNS Server 1: 103 86.96.100
- DNS Server 2: 103.86.99.100
- DNS Server 3: leave blank
- WINS Server: leave blank
13. When done, your entire connection will be encrypted.
That’s all! Now you know how to configure NordVPN on routers running Padavan. If you’ve further queries, drop us a comment through the below button. Thanks for reading!
Related