


When you purchase through links on our site, we may earn an affiliate commission. Here’s how it works.
How to Stop Kodi Buffering Issues in 2026 (5 Easy Fixes)

Kodi can play your local and online media, allowing you to combine your cloud-based library with those hosted by add-ons. As you can see, we're talking about streaming here, meaning you need a stable and speedy connection to avoid Kodi buffering issues.
You can often fix issues related to Kodi's long buffering time on your own. For example, you can check the performance of your Internet connection, delete Kodi's junk files that slow down its performance or use a VPN to optimize your data flow. That said, it's also important which add-ons you use, as unofficial third-party Kodi add-ons can often be problematic.
In this article, we'll explain the most common reasons for Kodi's long buffering times. Then, we'll go through a series of steps to resolve Kodi buffering issues before wrapping up with some useful FAQs.
Why Is Kodi Buffering?
Kodi could struggle with buffering for several reasons, including a slow Internet connection and faulty Kodi settings. Here are the most common reasons for buffering on Kodi:
- Slow Internet connection speed.
- Unstable Internet connection or network issues.
- Intentional throttling imposed by your Internet provider.
- Unoptimized Kodi settings and the presence of too many junk files.
- Limited bandwidth from the streaming source.
- Network congestion at the source.
As you can see, Kodi's performance can be improved by focusing on three specific aspects. You need to focus on the speed and performance of your Internet connection, the stability of your streaming sources (especially if you use unofficial add-ons), and optimizing your Kodi settings.
How to Stop Kodi Buffering?
There's a range of possible solutions to stop Kodi buffering issues, which include removing Kodi's cache and junk files, using a reliable VPN service, tweaking the application's settings, refraining from using unofficial add-ons, and resetting the application to its factory settings.
Solution #1: Clear Kodi’s Cache & Junk Files
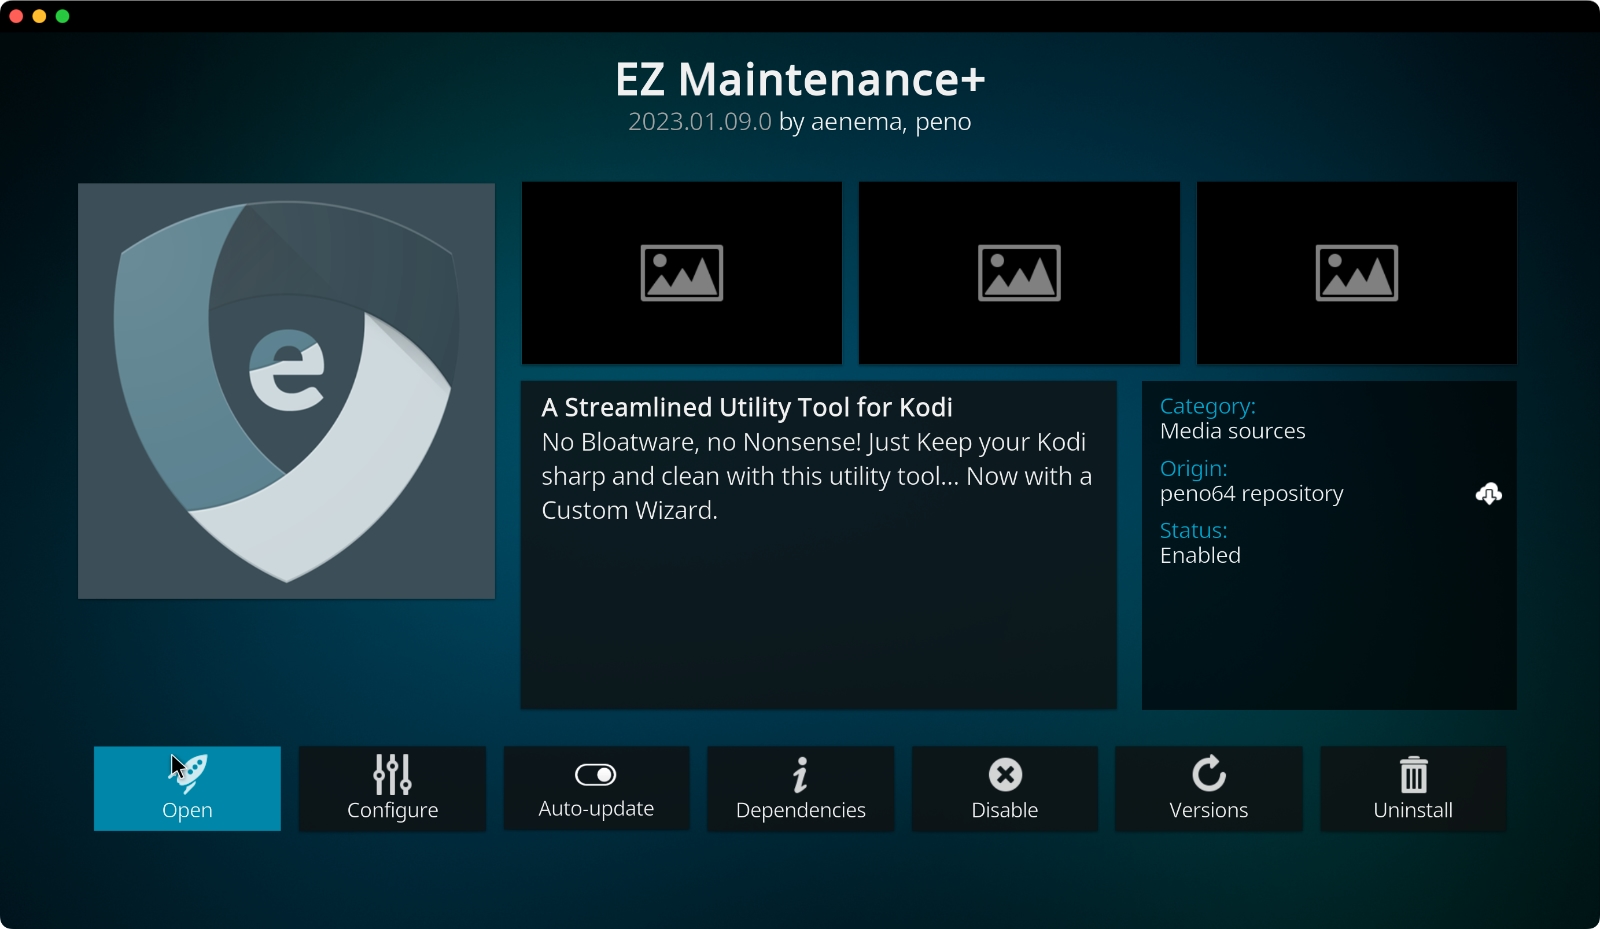
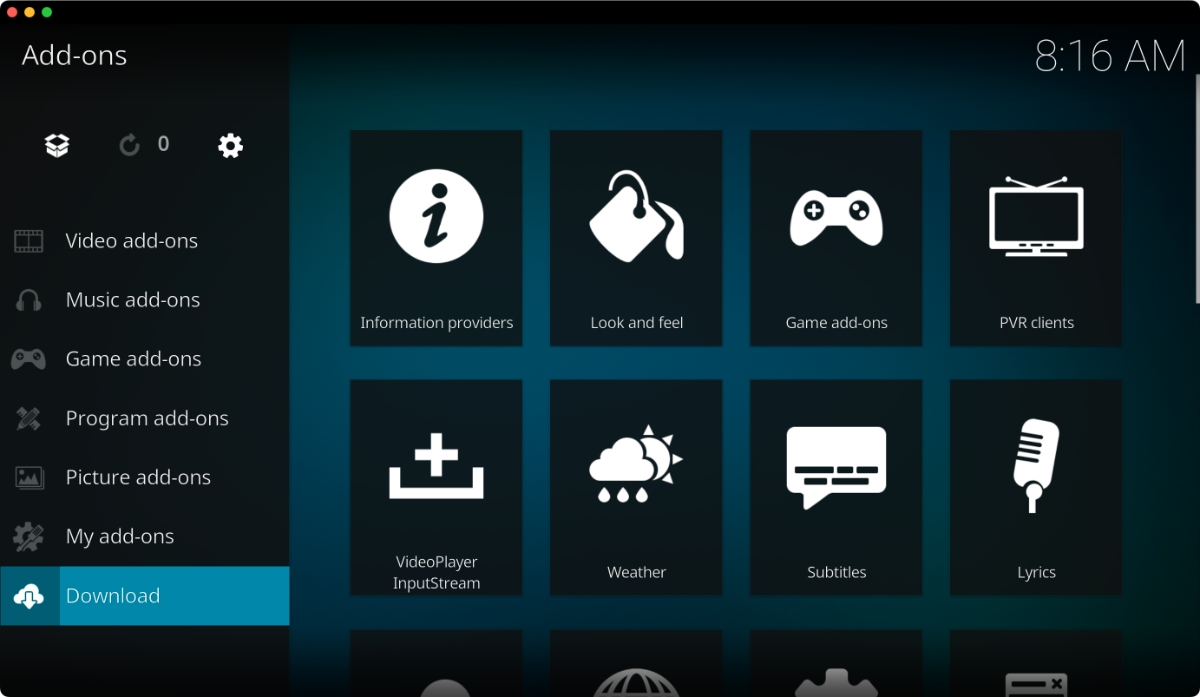
As you use Kodi, the application generates cache files – which might corrupt over time. Therefore, a solution to stop buffering on Kodi is removing those files. To be able to remove Kodi's cache and junk files, you need to install a third-party addon called EZ Maintenance+, like so"
- Launch Kodi and enable the application's support for unknown sources.
- Go to Settings > File Manager > Add Source.
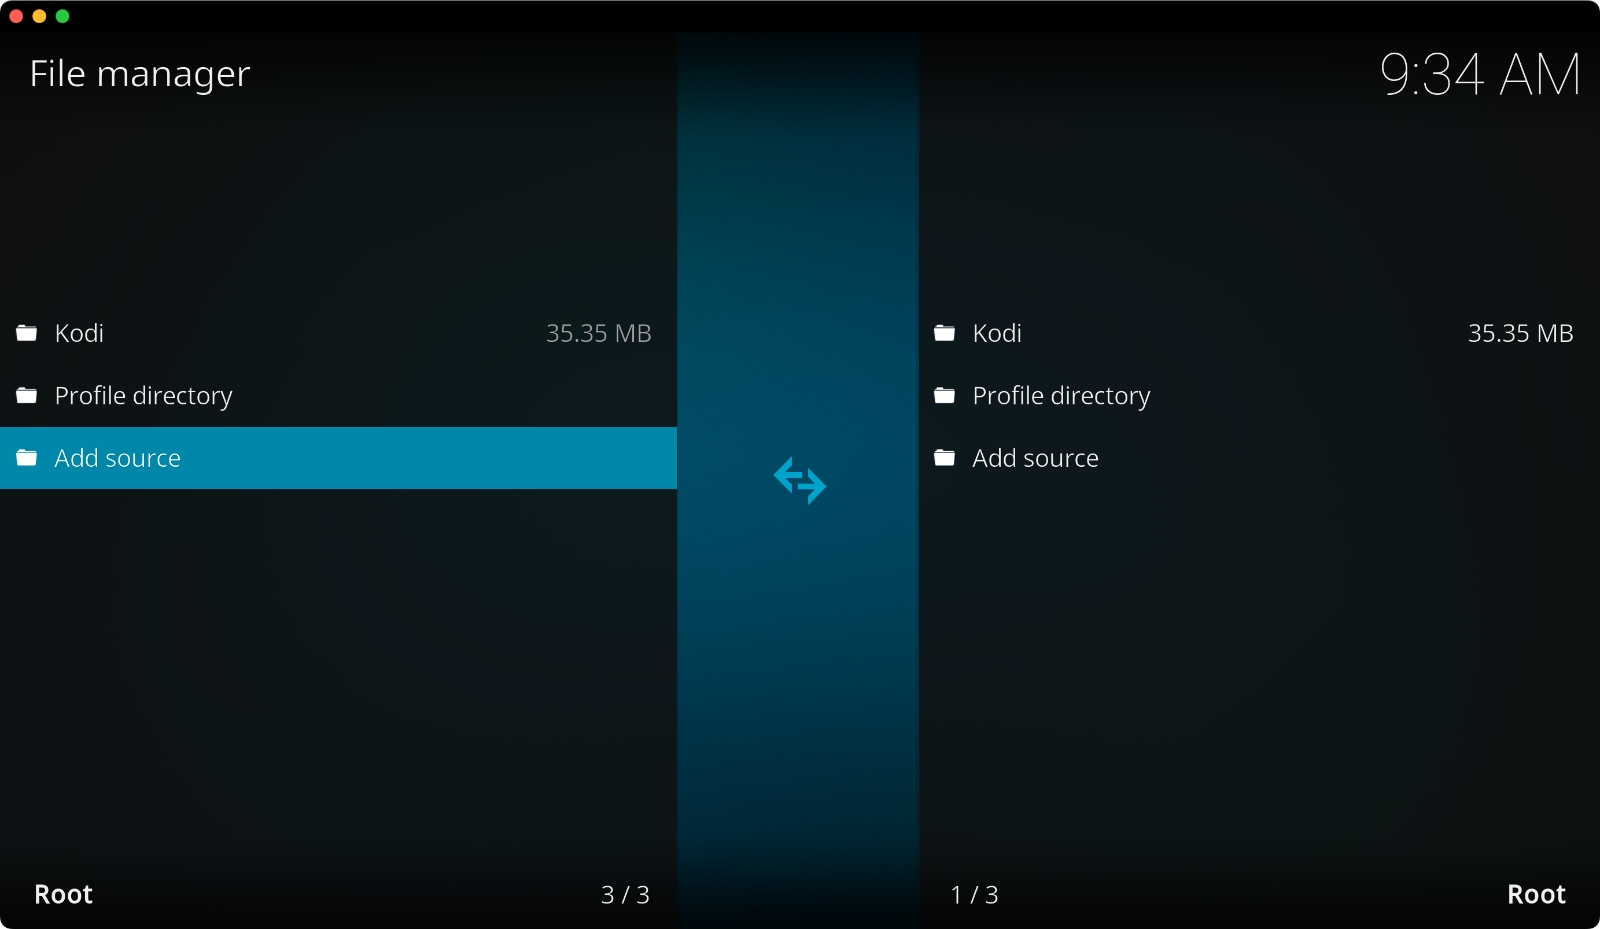

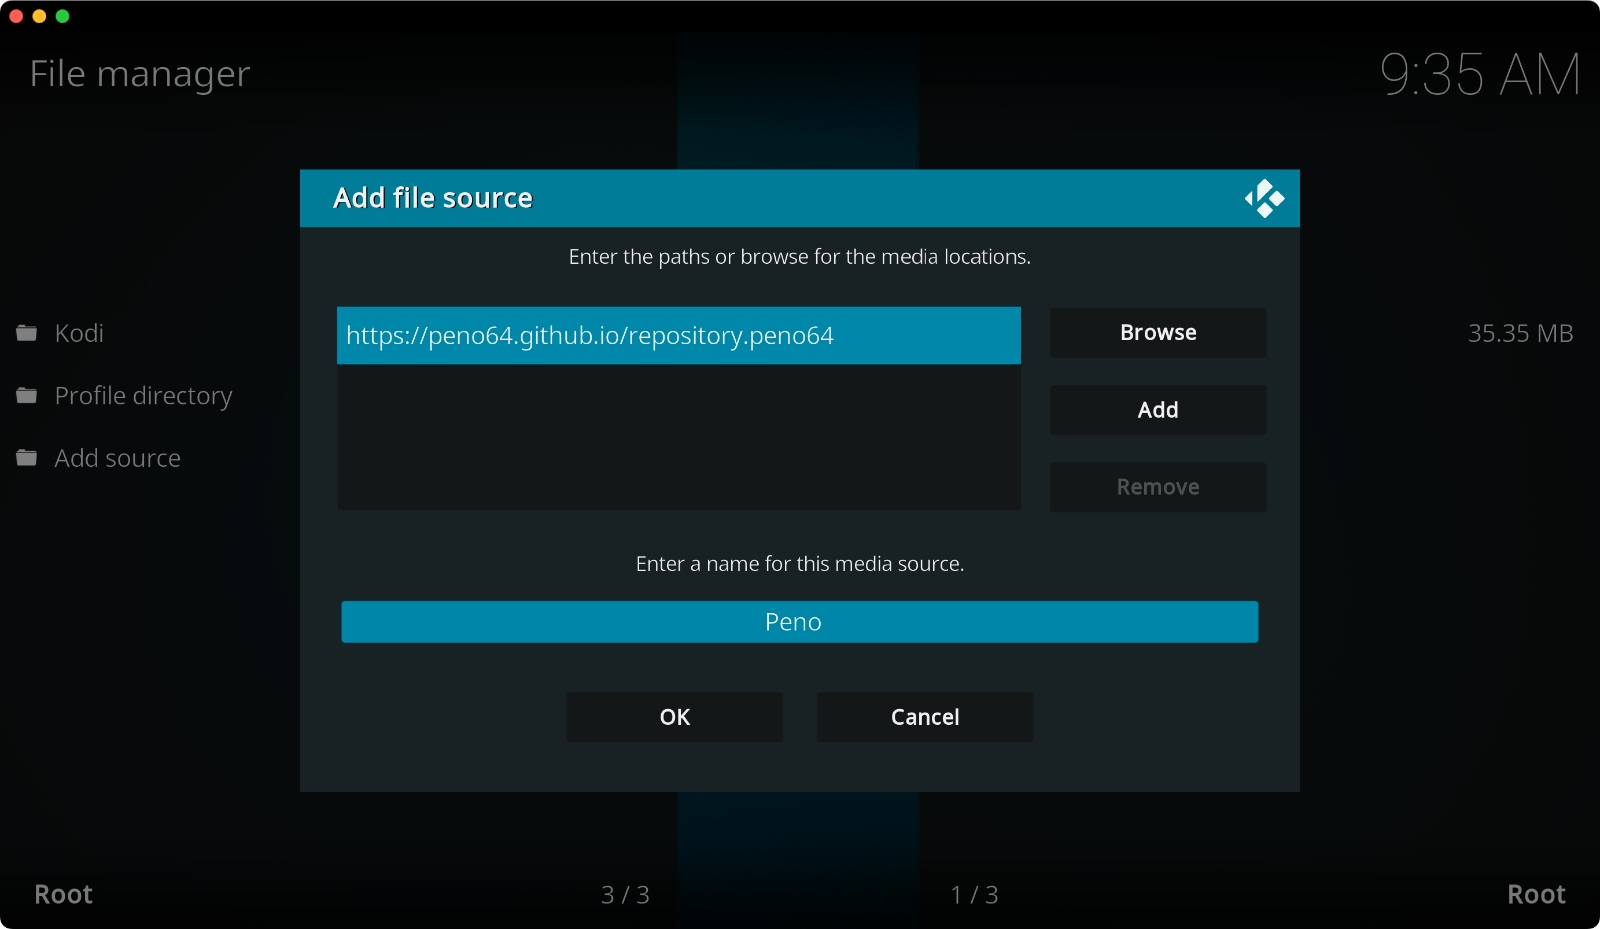
- Click "<None>" and input the following URL: https://peno64.github.io/repository.peno64.
- Pick "OK" and provide a name for the newly added repository ("Peno").
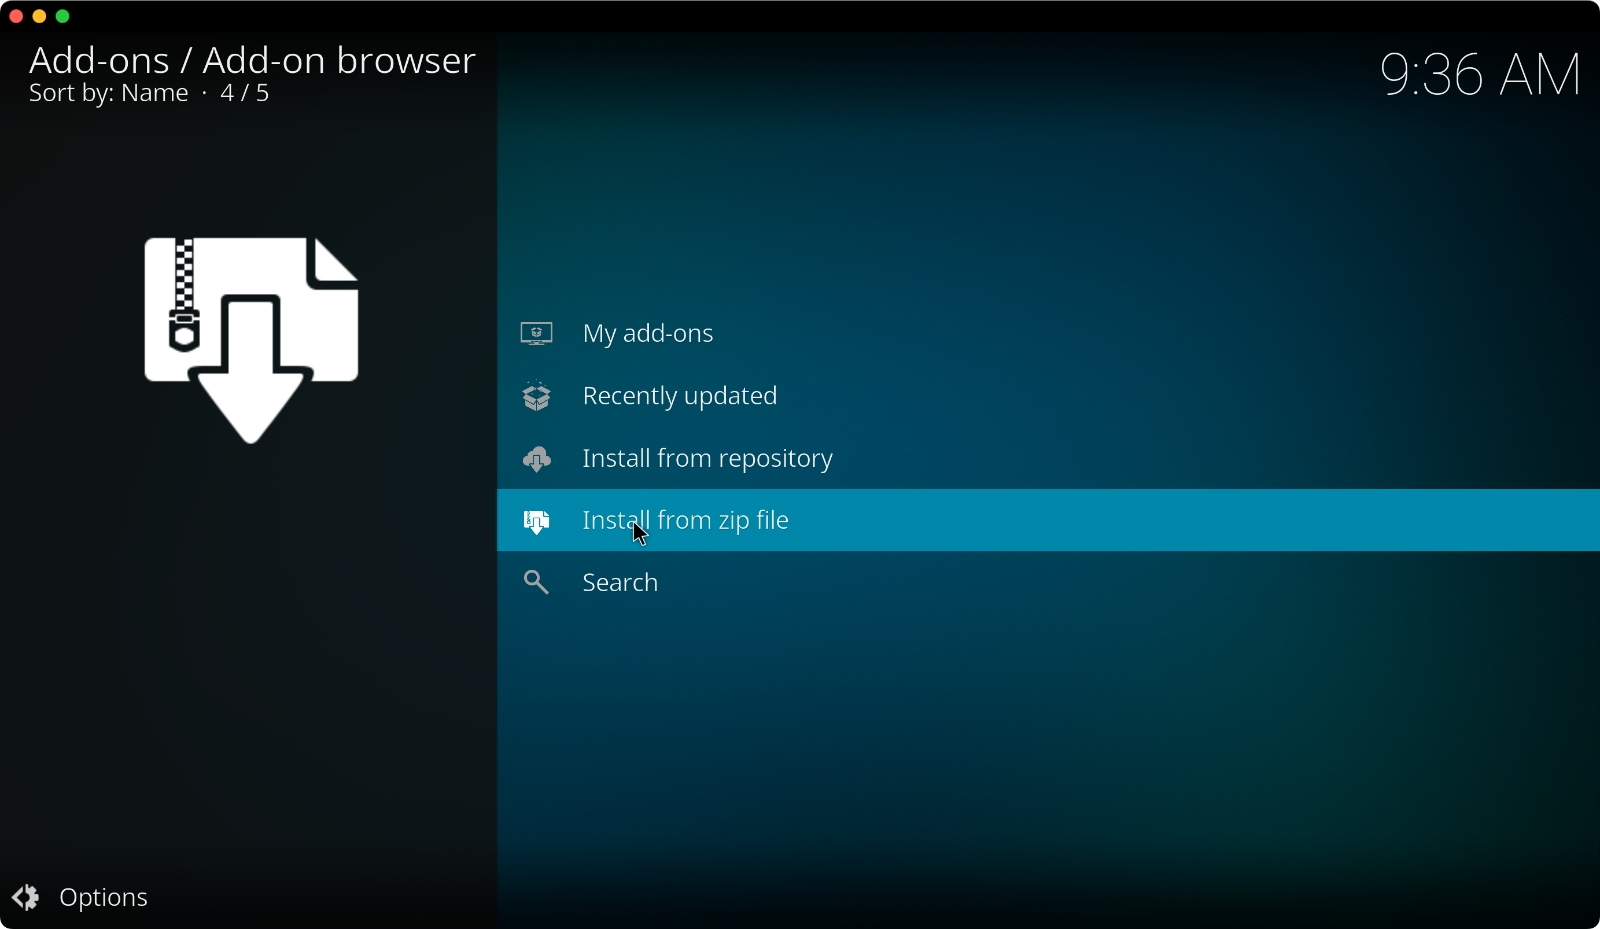
- Return to "Add-ons," click the open box icon, and pick "Install from ZIP File."
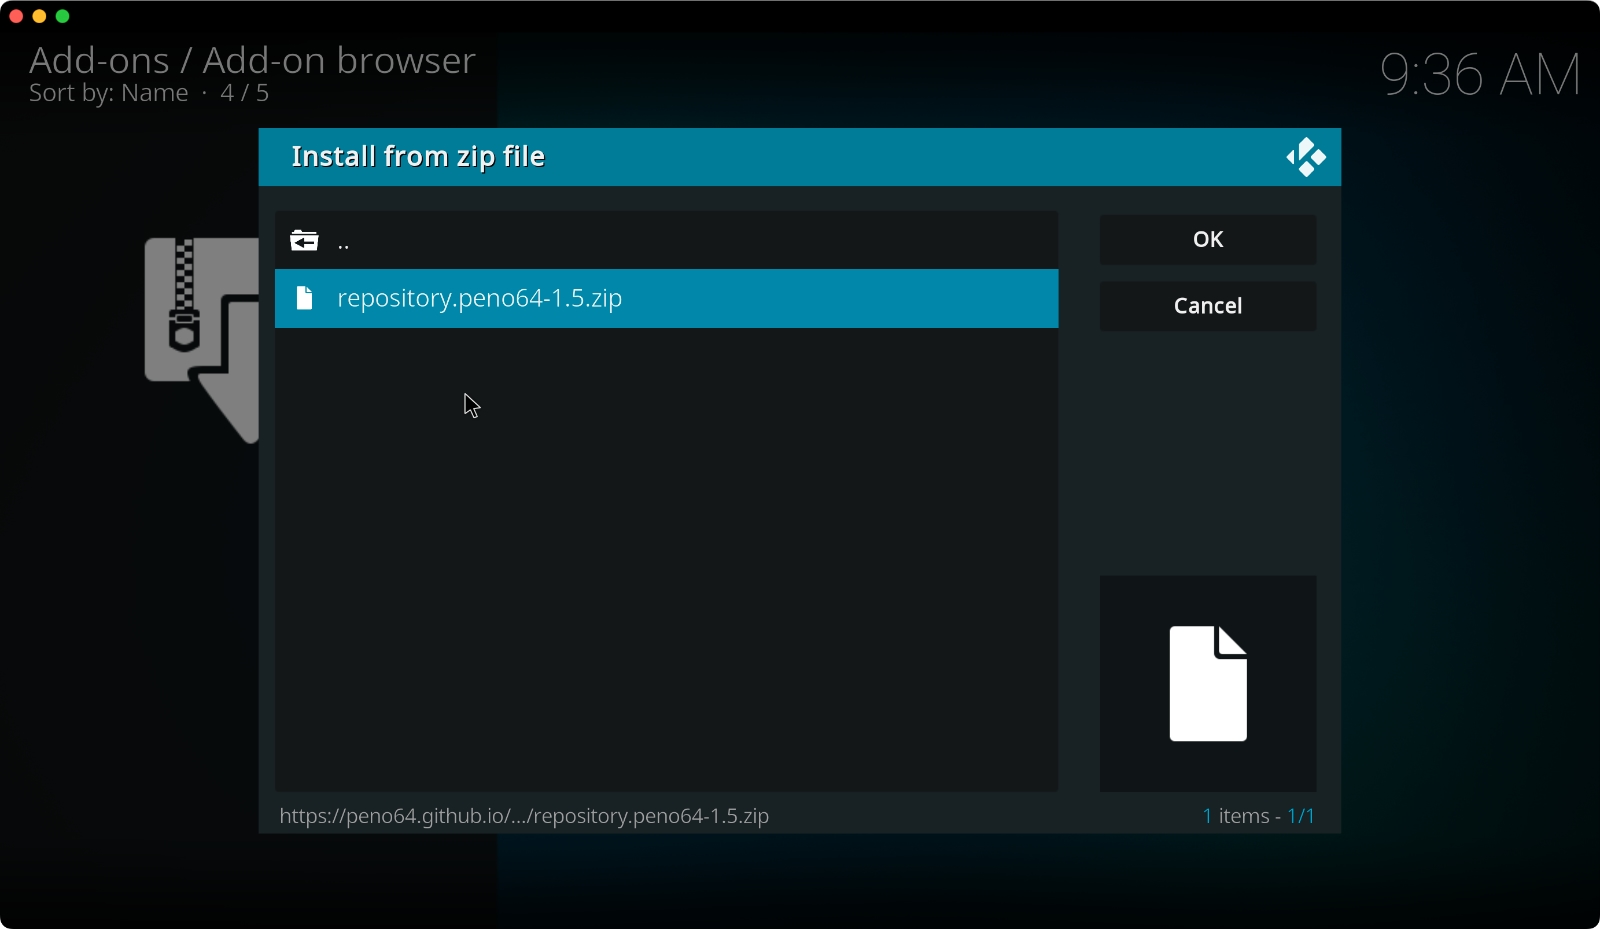
- Navigate to "Peno" and install the ZIP file you'll find there.
- Go to Install from Repository > Peno65 Repository > Program Add-Ons.
- Pick the EZ Maintenance+ add-on and install it.
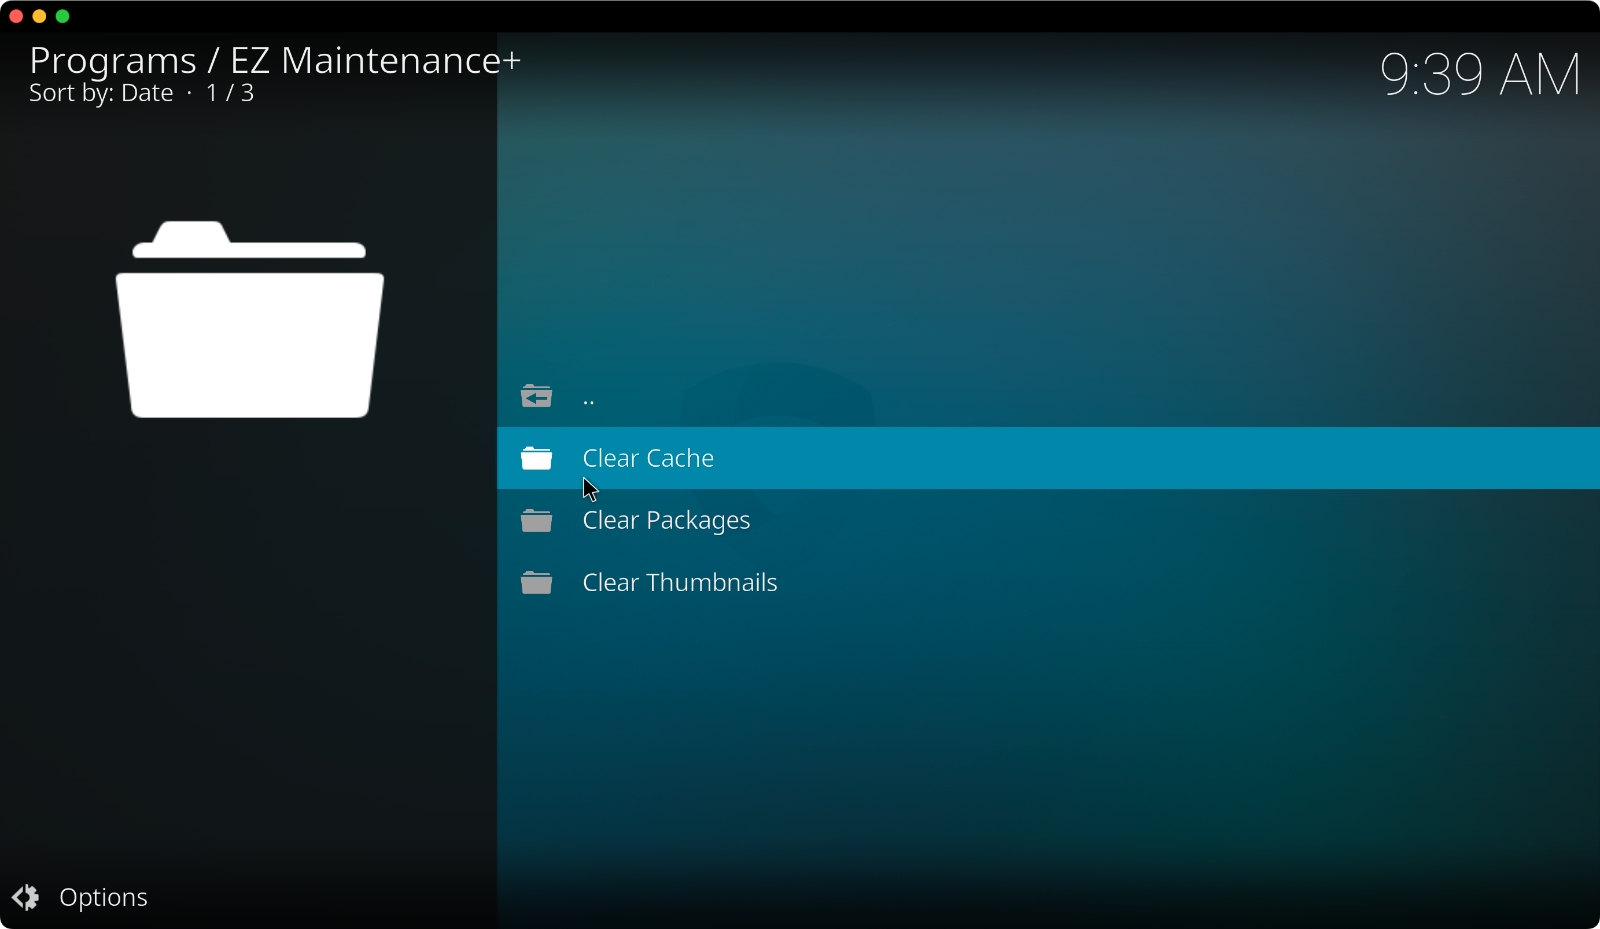
- Open the add-on and pick "Maintenance" from its home screen.
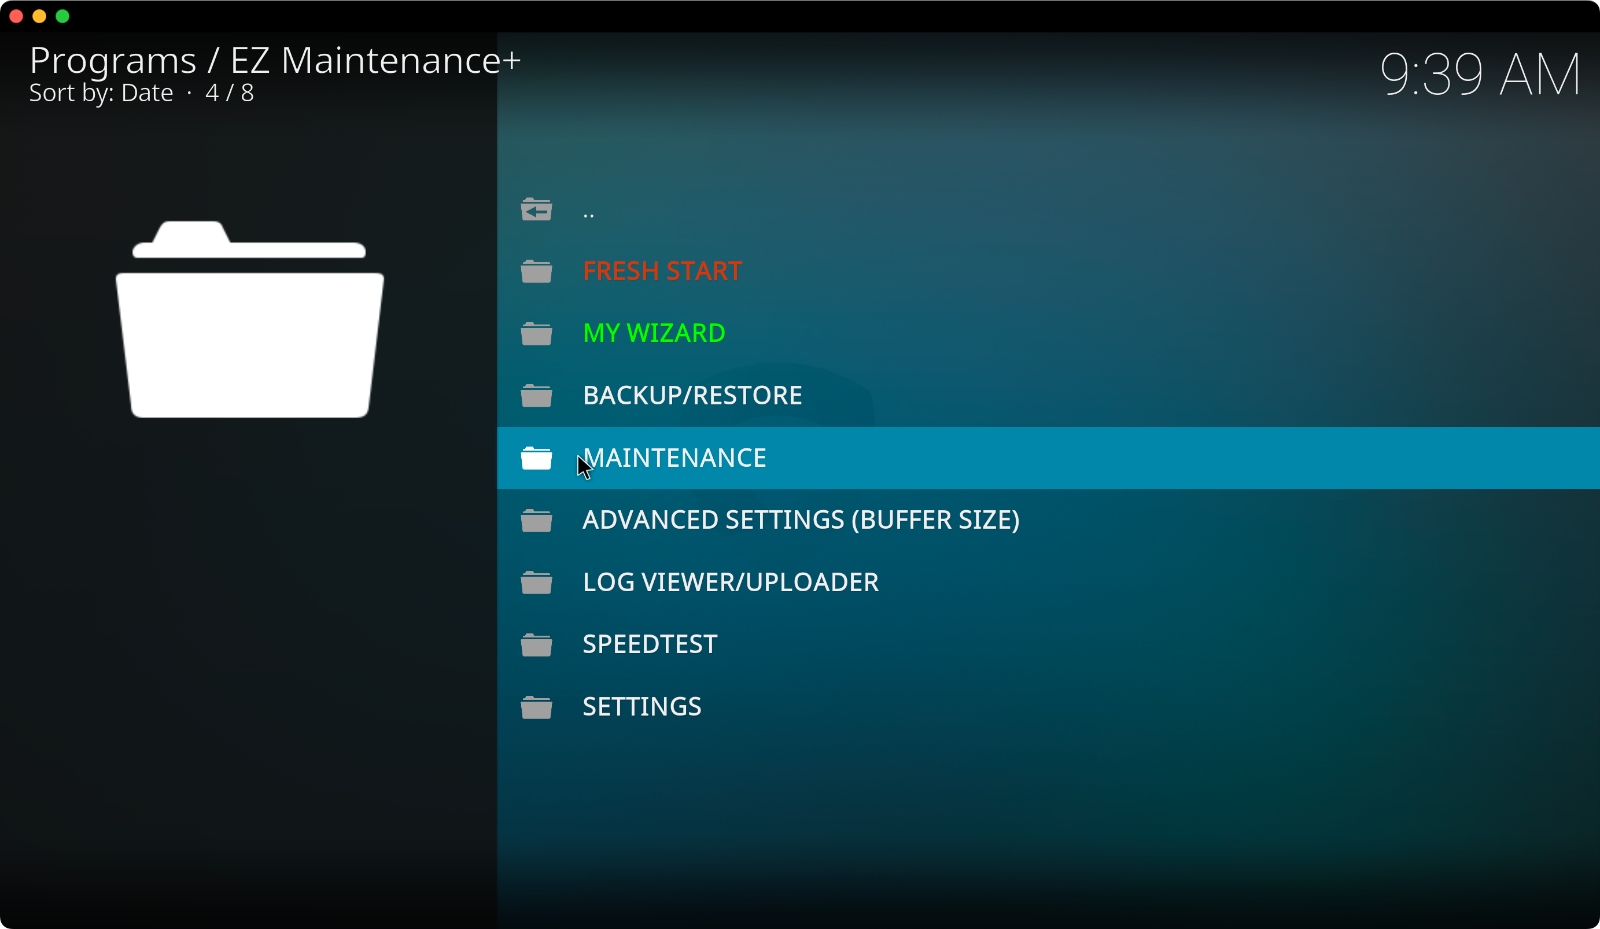
- Use all three options found here: Clear Cache, Clear Packages, and Clear Thumbnails. Upon clicking each action, you'll need a notification in the top-right corner of your screen.
Solution #2: Use a Reliable VPN Service
Most Kodi users utilize a VPN service, and rightfully so. We have seen how vulnerable Kodi infrastructure is and how the applications, IPTV services, and add-ons are hosted on insecure servers.
Without a reliable VPN service, your personal information, like your location, is consistently logged. This could easily expose you to hackers and third-party cyberattacks.
Aside from that, VPNs re-route your Internet data, which can help unblock new types of Kodi add-ons, resolve streaming issues, and even bypass any throttling imposed by your ISP.
Here are step-by-step instructions on how to install a VPN on your Kodi to stop buffering:
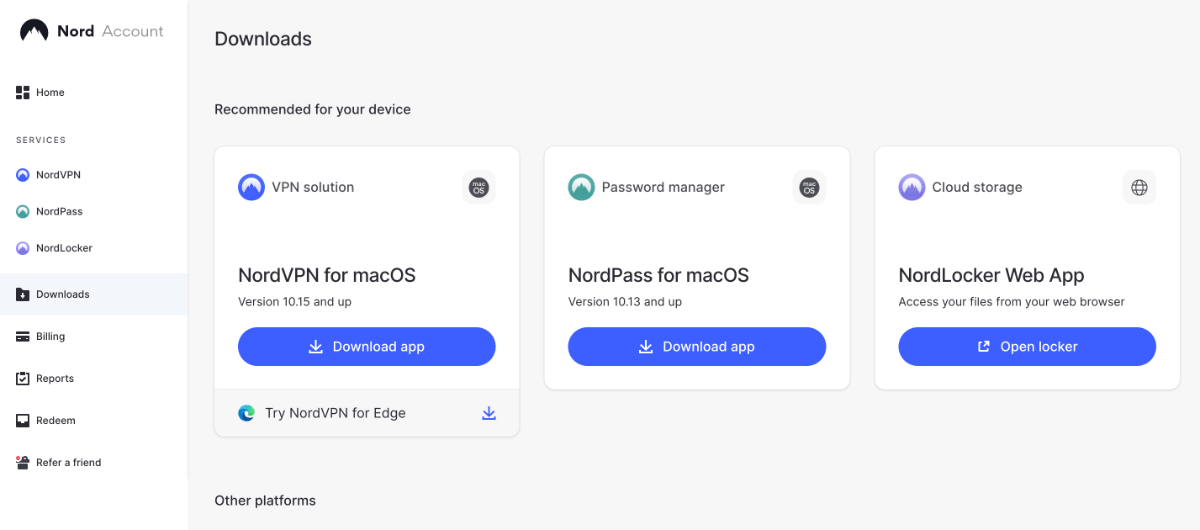
- Pick a VPN suitable for Kodi and media streaming (we recommend NordVPN).
- Download and install the VPN on the device(s) you use to run Kodi.

- Launch the VPN and log in using your credentials.
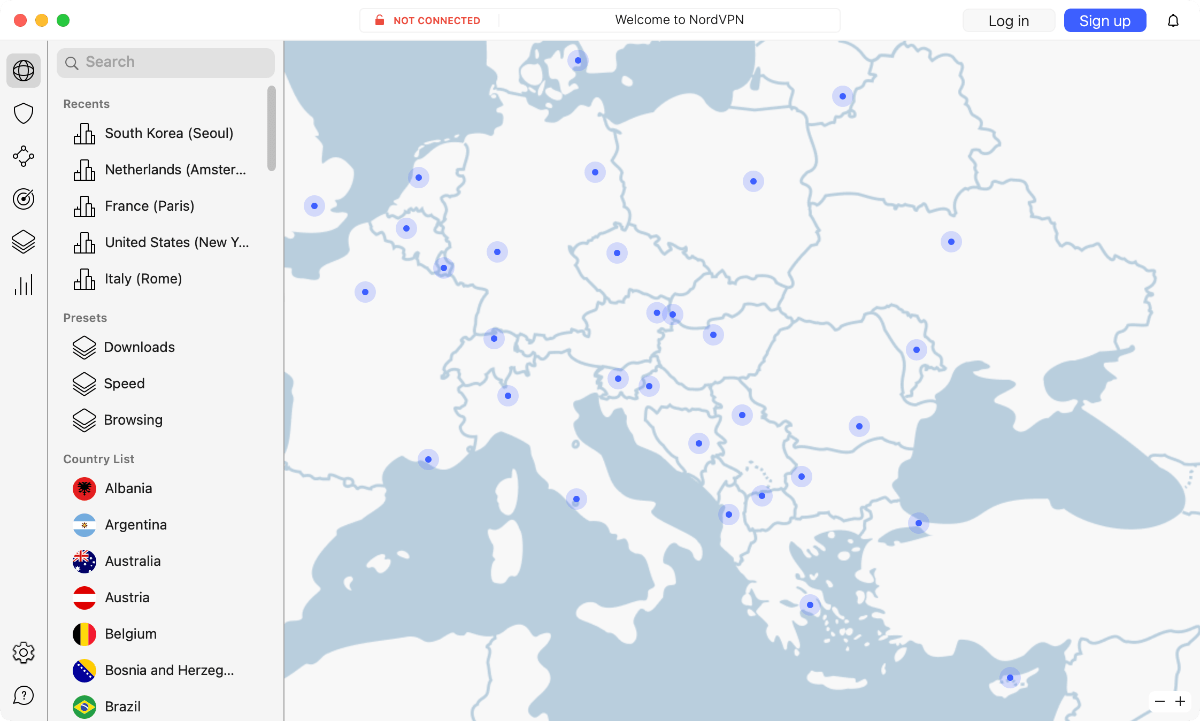

- You can now pick a server.
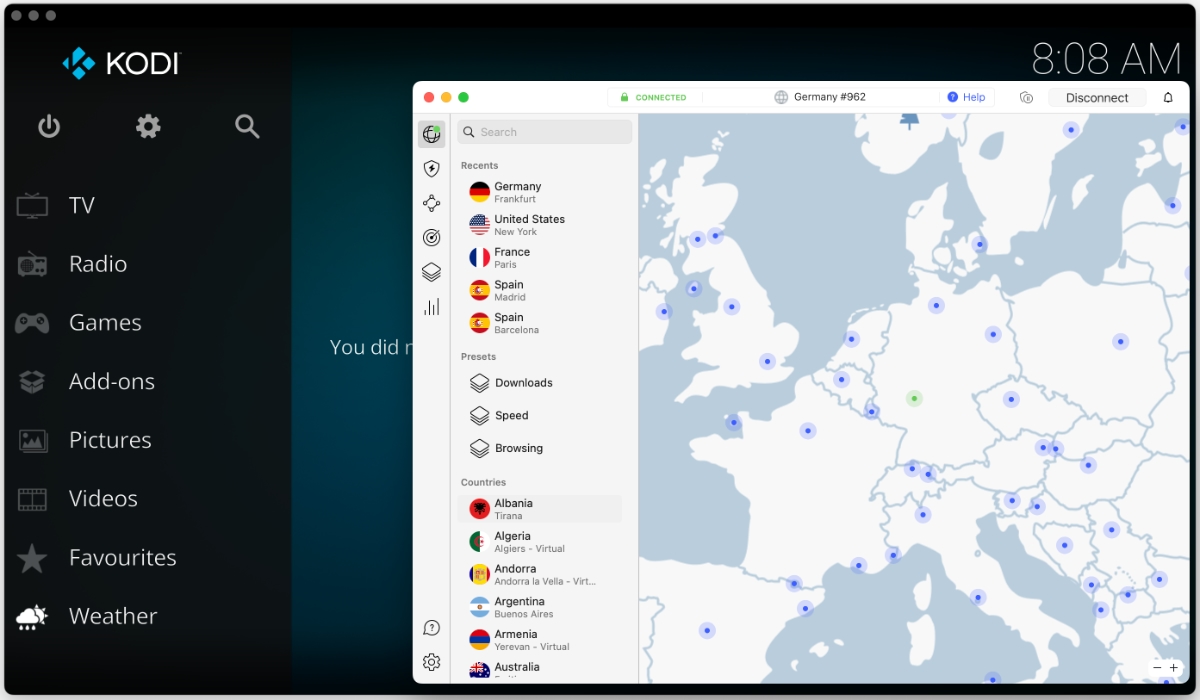

- Keep your VPN connection active as long as you use Kodi.
By doing this, now you have successfully changed your IP address. You can return to the home screen, and the VPN will continue working in the background. If you want to disconnect from the VPN service anytime, you can relaunch the service and disconnect from the server.
Solution #3: Tweak (Hack) Kodi’s Settings
There’s a way to optimize how Kodi streams files based on your device’s specs and Internet connection speed. This is done by editing an XML file called ‘AdvancedSettings.’
Where Is Kodi’s ‘AdvancedSettings’ File Located?
Please look at the following bullet points, where we’ve covered the file’s location on several different platforms.
- Windows: Press the Windows key + R and paste the following navigation path: %APPDATA%roamingkodiuserdata. Press Enter to confirm the path.
- MacOS: Navigate to /Users/(yourusername)/Library/Application Support/Kodi/userdata.
- Linux: Go to ~/.kodi/userdata/.
- Android: Use any File Manager to go to Android/data/org.xmbc.kodi/files/.kodi/userdata.
- iOS: Navigate to /private/var/mobile/Library/Preferences/Kodi/userdata/.
If you don’t see the ‘advancedsettings.xml’ file in the directory you’ve opened, feel free to create one. That is done by creating a new text file and ensuring you use the XML file format.
How to Edit Kodi’s ‘AdvancedSettings’ File?
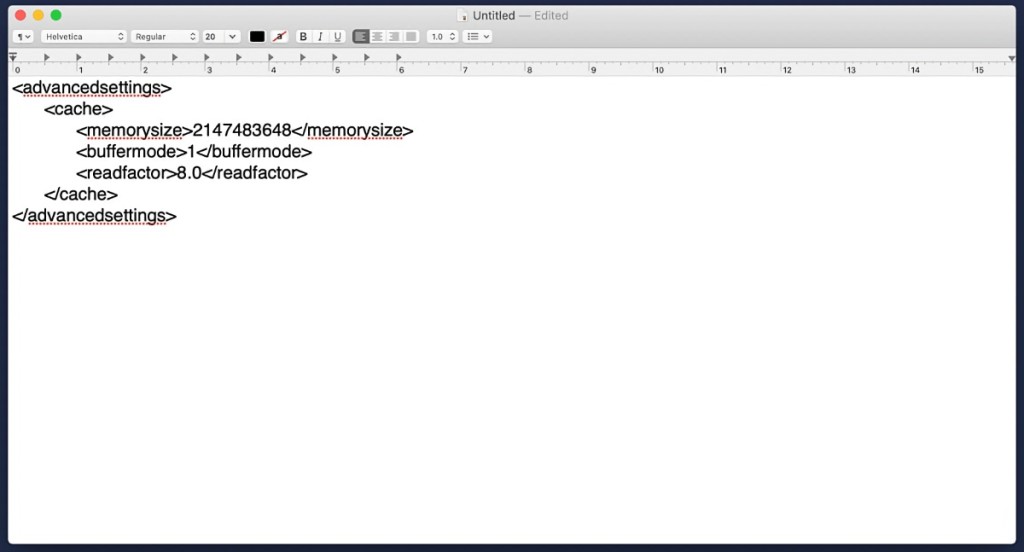
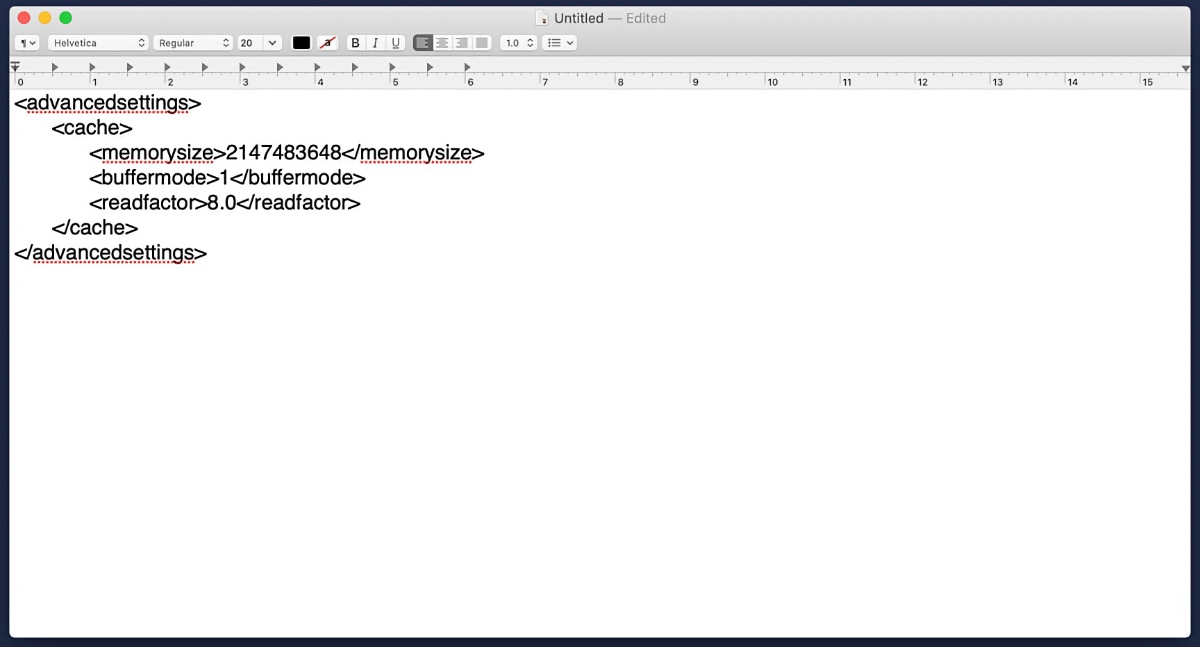
For Kodi to recognize the file, you need to use a set of codes. That said, we’ll give you these codes and then show you what the file should look like.
- <memorysize> - This is a numerical value telling Kodi how much RAM to use. However, make sure to input this value in bytes. For example, if you want to set Kodi to use 2GB of RAM, you’ll need to input ‘2147483648’ in this field. For this purpose, you can use an online converter to get a precise number.
- <buffermode> - This is also a numerical value, and there are three possible values here (0, 1, 2, and 3). To allow Kodi to buffer all Internet filesystems, you need to input ‘0.’ To buffer all Internet and local file systems, you must go with ‘1.’ Then, ‘2’ is used to buffer only ‘true’ Internet filesystems (like HTTP). And to prevent all buffering, go with ‘3.’
- <readfactor> - Once again, a numerical value. By default, the value of this field is set to ‘4.0.’ If you have an above mid-range CPU, you can double that number.
What Should the ‘AdvancedSettings’ File Look like?
Take a look below, and you’ll see an image showing the XML file's final appearance. Make sure to take a good look and then replicate the file on your device using the same codes found below.
Finally, we’d like to offer some helpful tips and tricks regarding Kodi’s ‘advancedsettings’ file. So, don’t forget to check out the following bullet points.
- To be recognized by Kodi, this must be an XML file. So, save the text file as an XML file or rename it to include the new file extension.
- Each command has opening and closing arguments. For example, to allow Kodi to use a specific portion of your RAM, you’ll need to begin with <memorysize> and then end this command with </memorysize>.
- Make sure the XML file is saved in the appropriate folder, as described above.
Solution #4: Stop Using Illegal and Untested Kodi Addons

We understand that “unofficial” Kodi addons might be quite enticing. After all, they promise the latest Hollywood blockbusters without you having to pay anything. However, remember that these “unofficial” add-ons can quickly destabilize your Kodi.
When discussing “unofficial” addons, we typically talk about copyright infringement and digital piracy. Therefore, this is precisely what’s illegal about Kodi. Besides, that alone should be a reason enough to stop using illicit types of software.
There’s also another thing to keep in mind. With piracy comes malware, which is especially true for Kodi. Most “unofficial” repositories are ridden with malware, causing all kinds of streaming- and buffering-related problems with Kodi.
Therefore, we recommend uninstalling Kodi add-ons that come from unofficial sources. Make sure to use those found in the Add-ons > Download section of your Kodi, as the application's developers check those.
Solution #5: Reset Kodi to Its Factory Settings
If nothing else helps, it’s time to think about resetting Kodi to its factory settings. This will remove all your Kodi-stored content and set Kodi’s preferences to their default values. This is the most drastic step you can take to fix Kodi buffering.
So, here’s how to reset Kodi to its factory settings. Go through the following steps:
- Install the EZ Maintenance+ Kodi add-on (you can find the instructions here).


- Launch the add-on and select "Fresh Start."
- You'll see a warning to switch to Kodi's default skin (check if you use a third-party one).
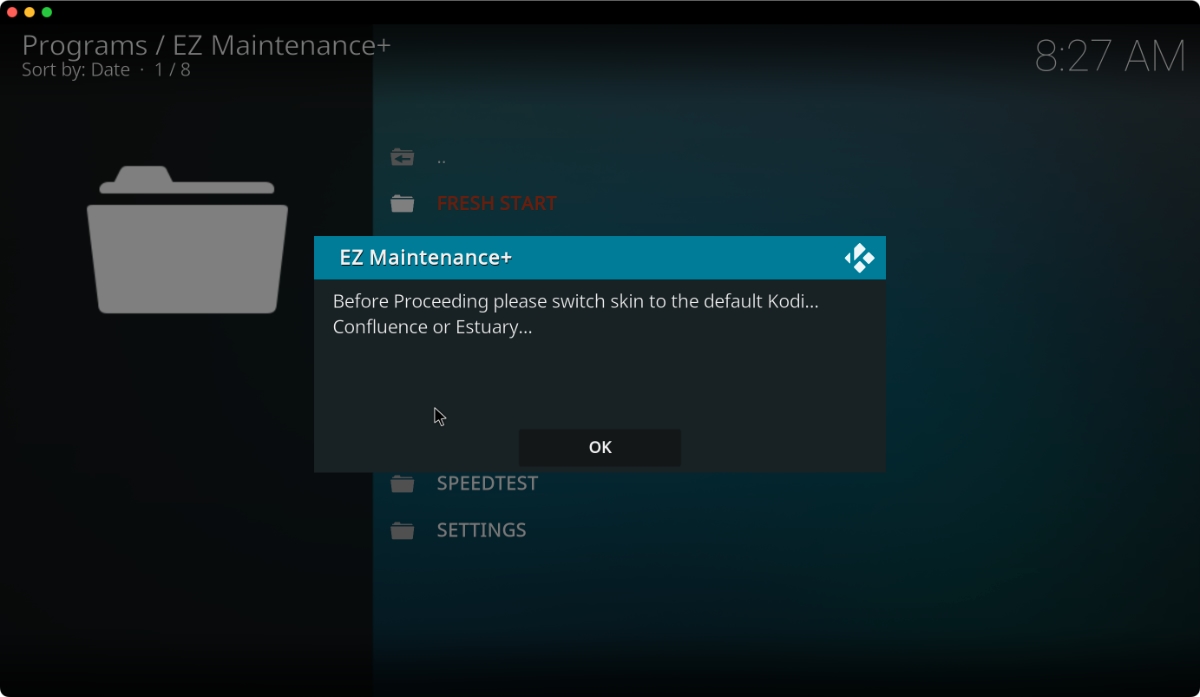
- Then, confirm your decision by clicking on 'OK.'
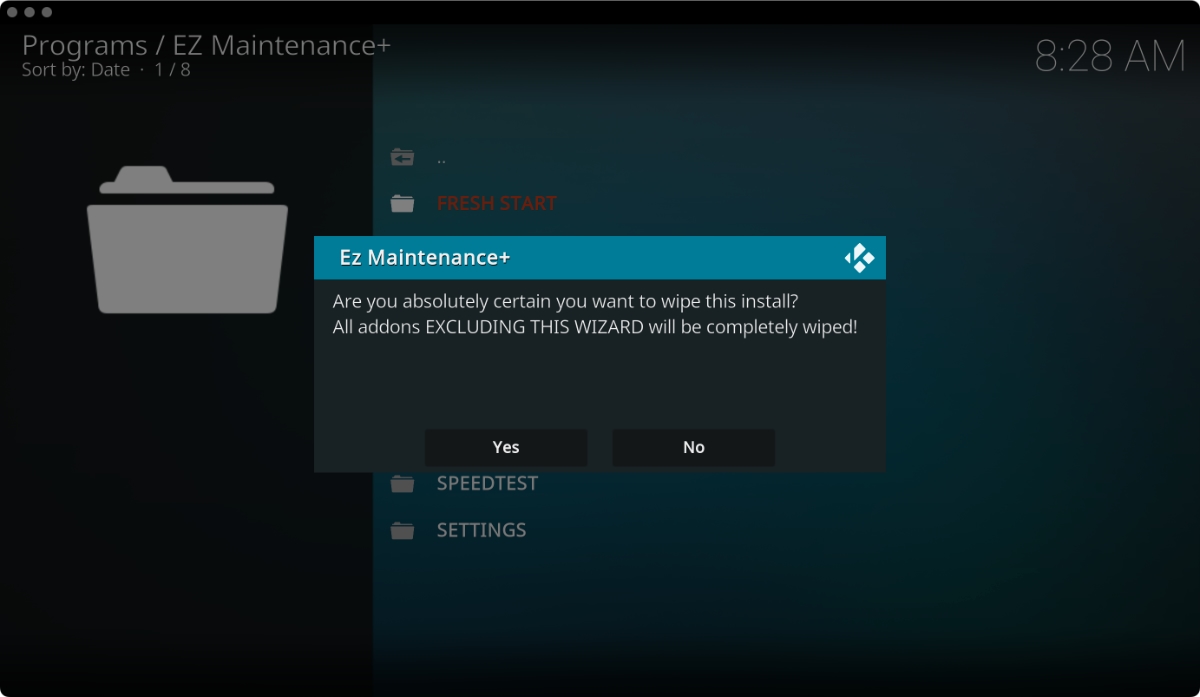
- Once done, a confirmation should appear on your screen. That's it!


Final Thoughts
Kodi is an excellent application that provides a hassle-free streaming experience unlike any other app on the market. However, like any other software, it sometimes faces bugs and buffering issues. This can annoyingly disturb the streaming experience for a lot of Kodi users.
As you've seen above, we have a handful of solutions to stop Kodi buffering issues or considerably reduce the number of instances. Getting a reliable VPN service and clearing or allocating a bigger space for the video cache could significantly improve the stuttering problem. And, like always, if nothing works, try resetting Kodi on your device to fix Kodi buffering.
You’ve reached the end of our guide on how to stop Kodi buffering issues. If you have any questions for us, don’t forget to post a comment below. And, of course, don’t forget to share this article online. Thanks – and enjoy using Kodi!
Related


Get expert insights on threats, breaches, scams, and security trends — delivered every Monday.
Most Popular