When you purchase through links on our site, we may earn an affiliate commission. Here’s how it works.
How to Use NordVPN on Roku in 2026?
Last updated May 17, 2024

Many Roku users are unable to access popular channels like Max, Disney+, and more due to regional restrictions. Hence, users often ask if they can use NordVPN on Roku to bypass these geo-blocks. While Roku doesn’t have built-in support for installing VPNs, you can set up NordVPN on Roku using alternative methods.
For instance, if you have a Windows or macOS device, you can set up a virtual router and share a VPN connection. You can also use NordVPN’s SmartDNS, which unblocks geo-blocked content but doesn’t provide the full security benefits of a VPN. For complete security and access to all Roku channels, you can configure NordVPN on a router.
In this article, we will discuss whether NordVPN works on Roku and provide a step-by-step guide on how to set up NordVPN on Roku using various workarounds. In the end, we have some frequently asked questions.
Does NordVPN Work on Roku?
Yes, NordVPN works on Roku. However, it can be complicated to set up NordVPN on Roku because it does not natively support VPN applications.
In other words, you’ll have to rely on alternative methods to use NordVPN on Roku, like through SmartDNS, installing NordVPN on a router, sharing your VPN connection over WiFi, or establishing a virtual router on Windows or macOS.
Among these methods, configuring NordVPN on a router is the best option. This method's biggest benefit is that it lets you connect all your devices simultaneously, including those that don’t natively support VPN apps like Roku TV and gaming consoles.
How to Use NordVPN on Roku
You can use NordVPN on Roku via its SmartDNS feature, as well as by sharing your VPN with Roku over WiFi and setting it up on a router. That said, you cannot directly install NordVPN on Roku because it does not have built-in VPN support. Let’s take a closer look.
Method #1: Set Up NordVPN on Roku with Smart DNS
NordVPN offers SmartDNS integrated into its SmartPlay feature, which lets you unblock geo-restricted content on smart TVs. However, since Roku doesn’t allow you to change its DNS settings, you need to do that on your router - in the following way:
- Get a NordVPN subscription using any Web browser.
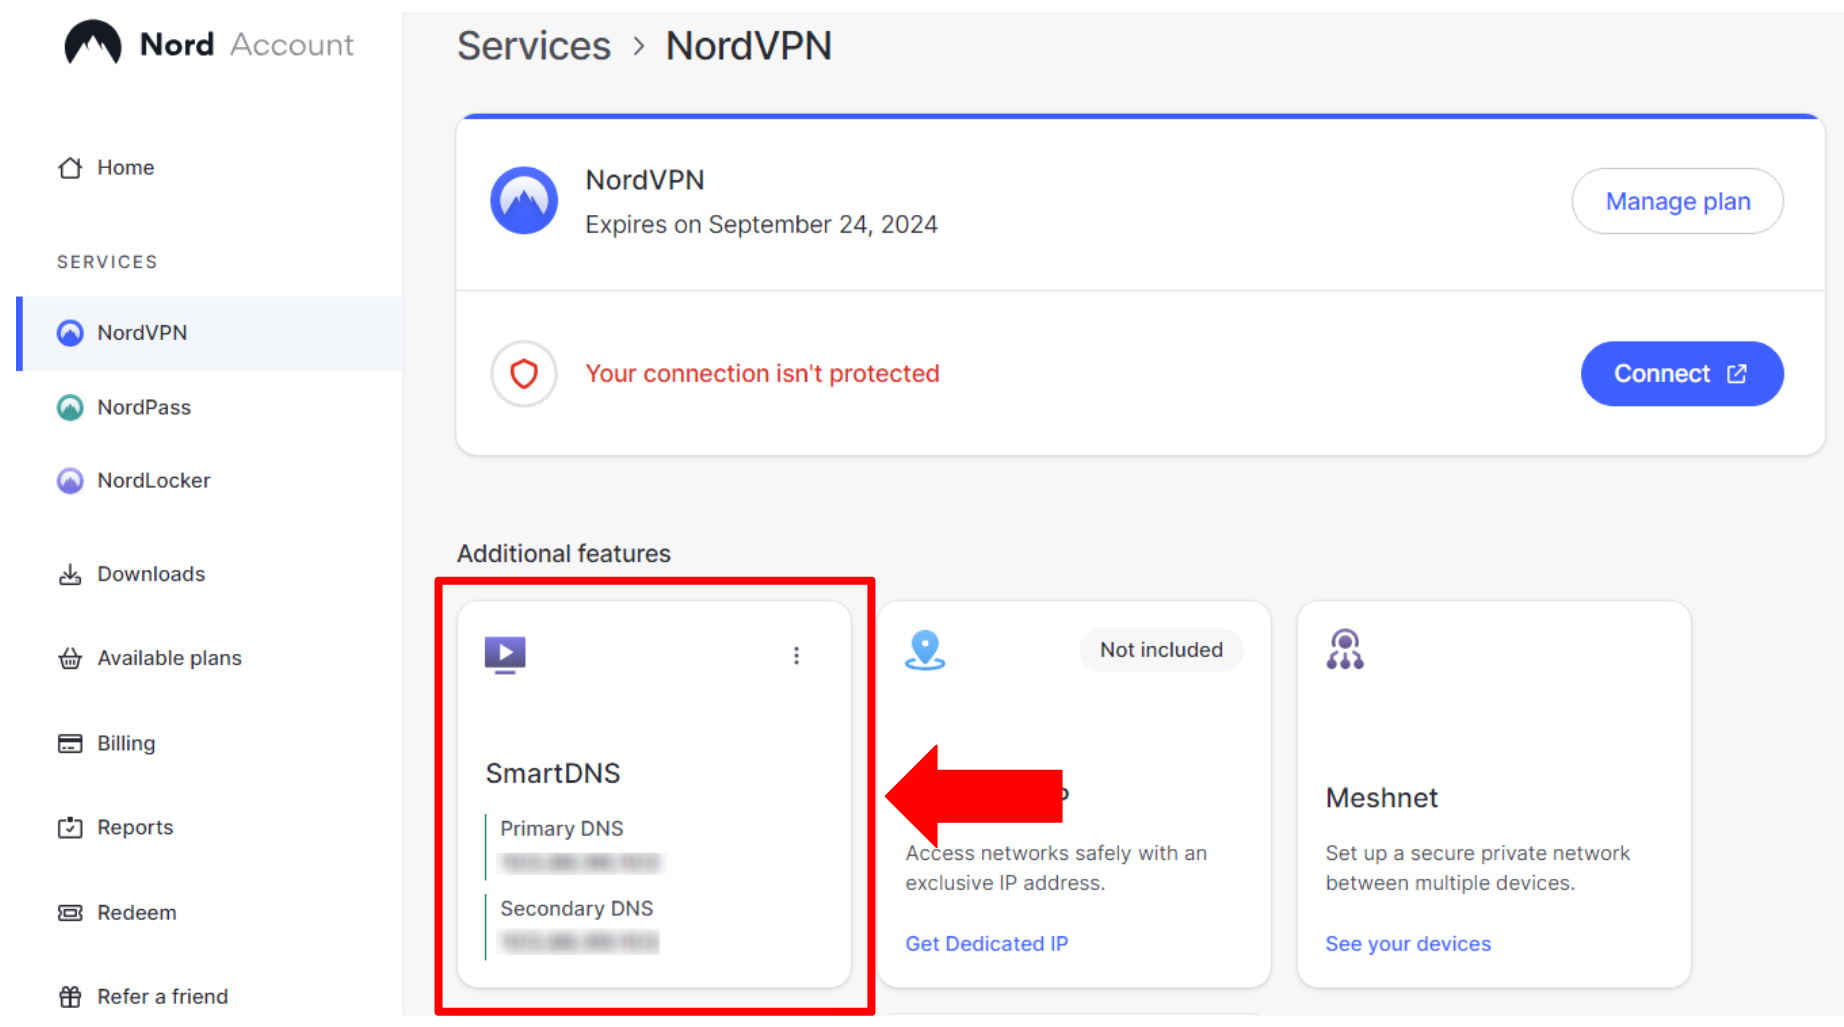
- Open your NordVPN DNS dashboard and click ‘NordVPN’ under ‘Services.’
- Enable ‘SmartDNS’ under ‘Additional Features.’
- Copy the primary and secondary DNS.
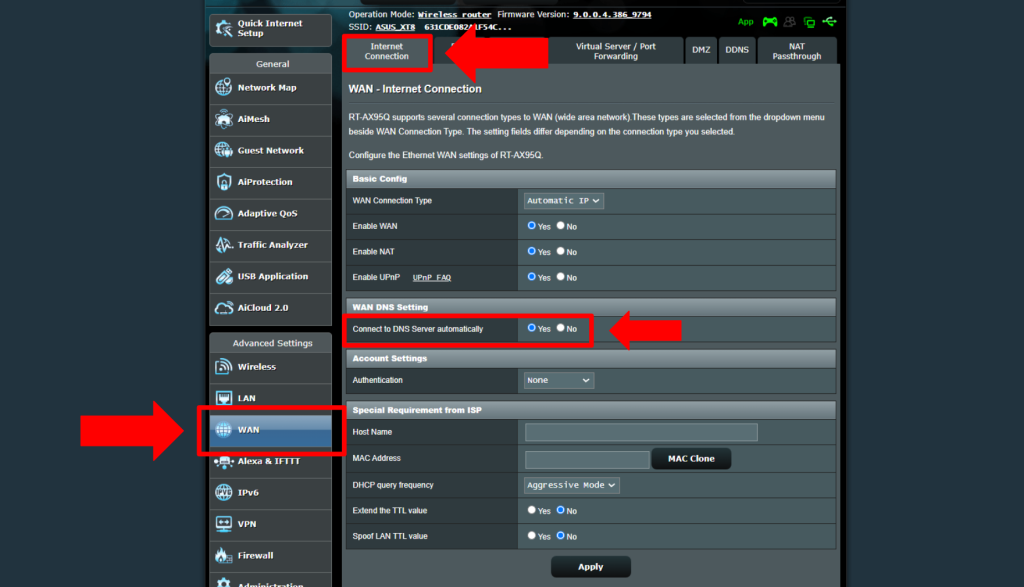
- Access your router’s admin panel using a Web browser.
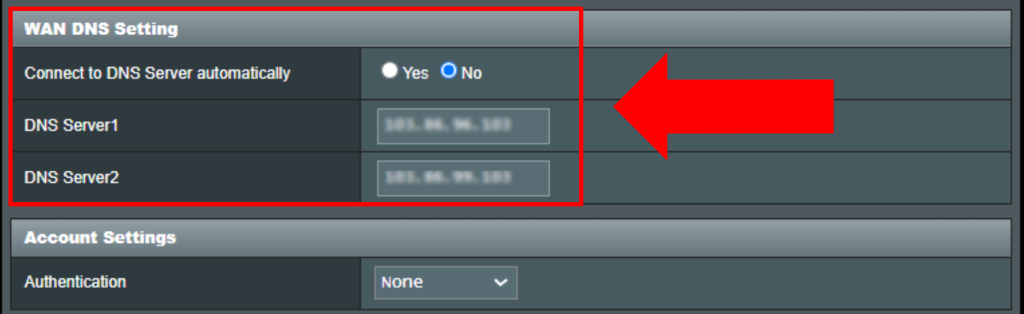
- Navigate to its WAN settings.
- Paste the primary and secondary DNS addresses copied earlier into the right fields.
- Connect Roku to your router and unblock geo-restricted content. That’s it!


Note that some Roku devices come with a default Google DNS, and you can’t change it directly on Roku. However, you can block Google’s DNS by setting the following custom firewall rules in your router’s settings:
#Block Google’s DNS
iptables -I FORWARD --destination 8.8.8.8 -j REJECT
iptables -I FORWARD --destination 8.8.4.4 -j REJECT
Method #2: Share VPN Connection
You can also share a VPN connection from a device running Windows 7 and newer versions and use it on Roku to unblock global content. Let’s look at the steps to do it.
- Subscribe to NordVPN using its official website.
- Install the NordVPN client on your device and log in.
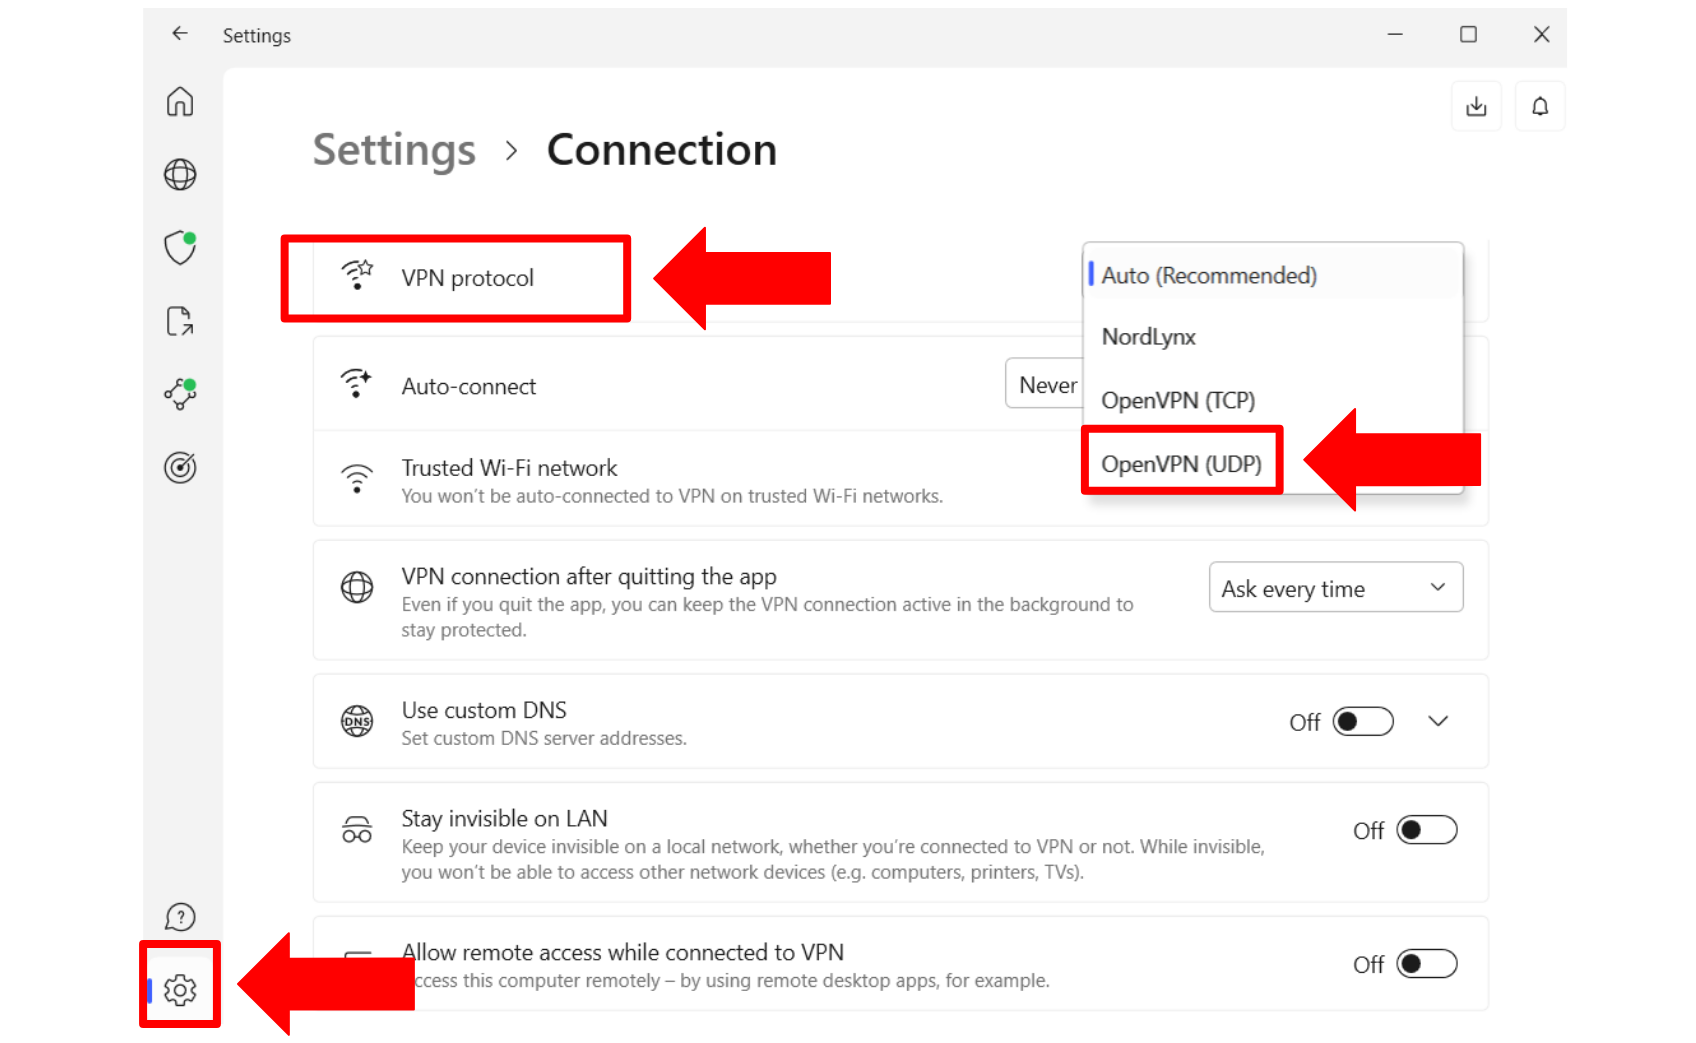
- Choose OpenVPN UDP from Settings > Connections > VPN Protocol.
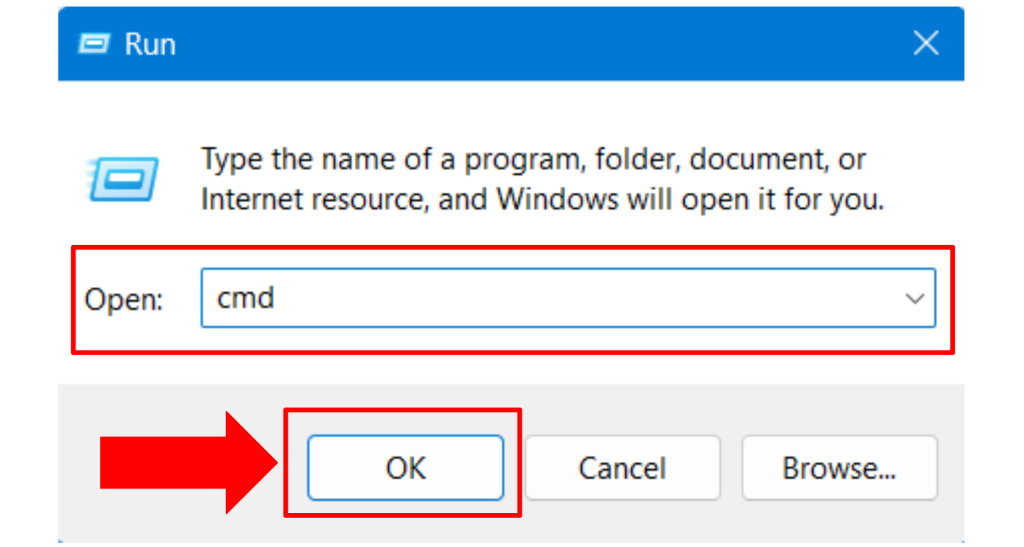
- Press Windows + R to open the Run box, type “cmd,” and click ‘OK.’
- Enter the following command in the Command Prompt:


netsh wlan show drivers- If next to ‘Hosted network supported’ says ‘Yes,’ you can set up a virtual Wi-Fi.
- Enter the following commands to configure shared network settings and press Enter:
netsh wlan set hostednetwork mode=allow ssid=NetworkName key=NetworkPassword- Type the following command and press Enter to start the virtual network:
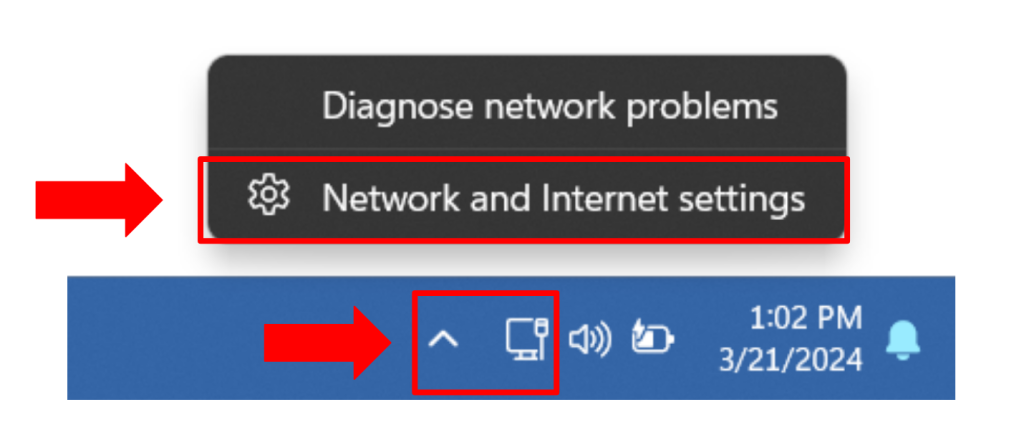
netsh wlan start hostednetwork - Open the Network and Internet settings.
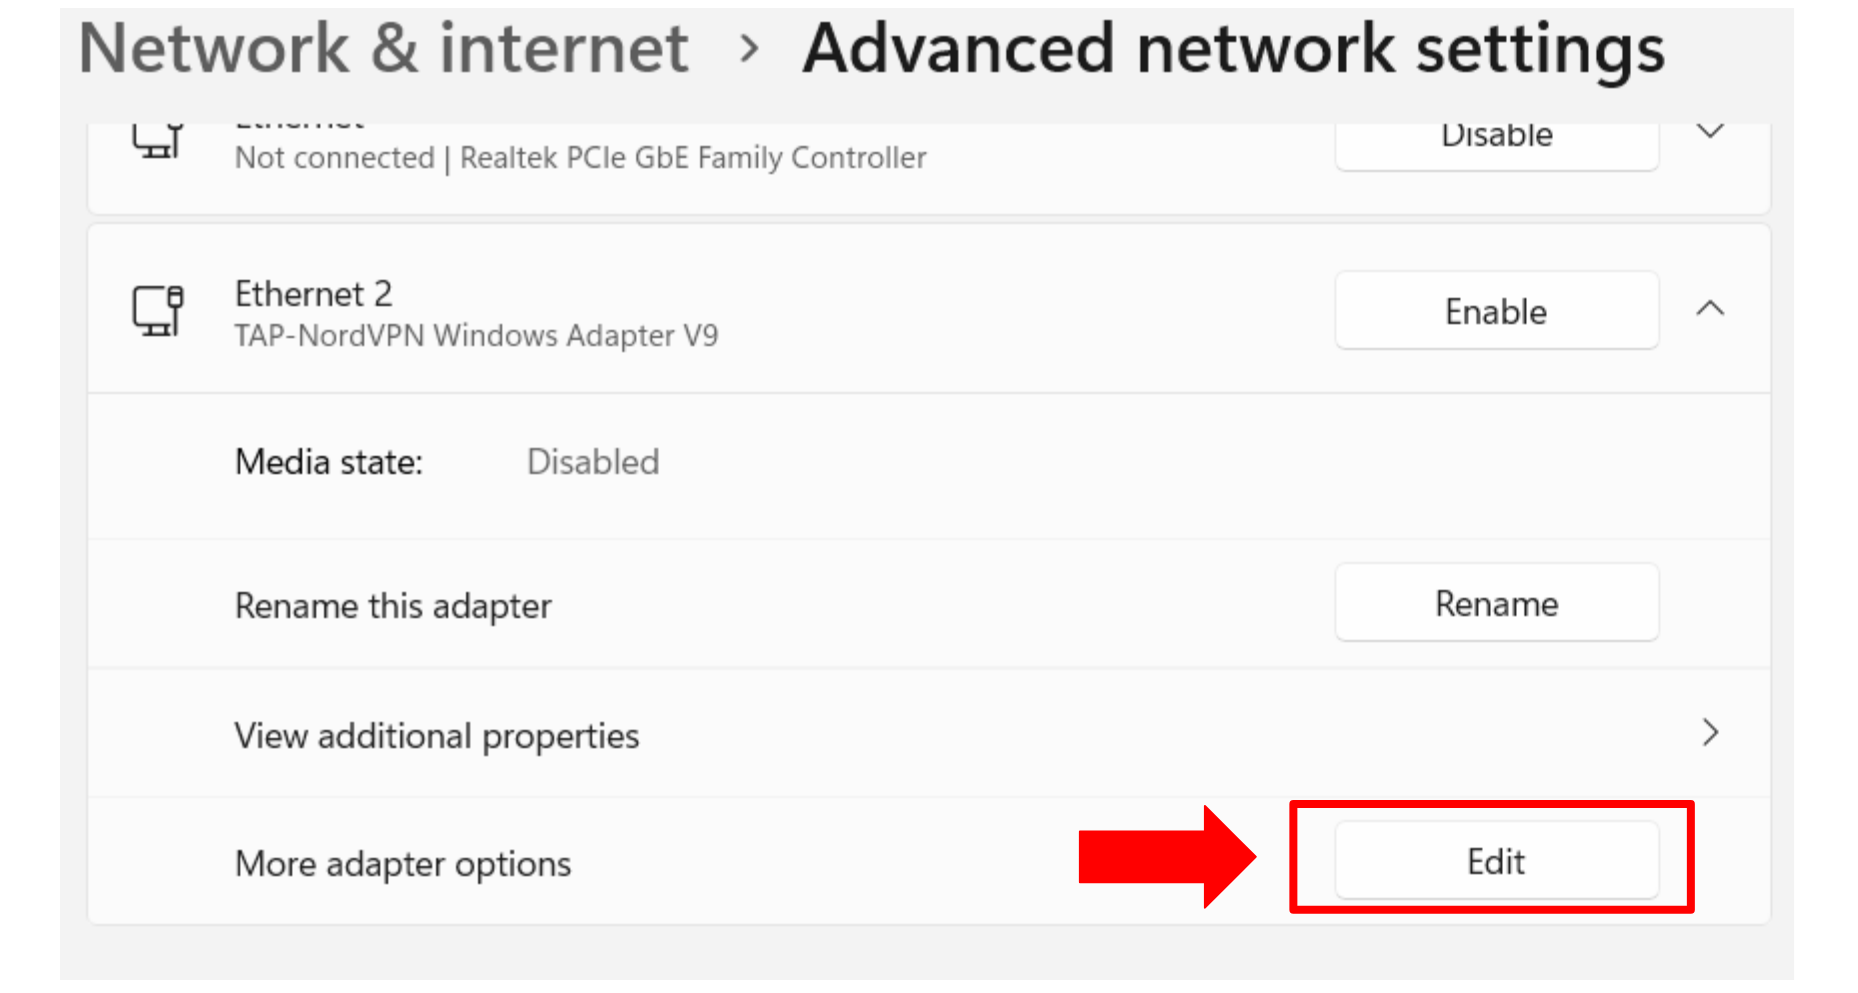
- Click on Advanced network setting’ > TAP-NordVPN Windows Adapter V9.
- Choose ‘Edit’ next to ‘More adapter options.’
- Click on the ‘Sharing’ tab and check, ‘Allow other networks users to connect…’
- Open the ‘Home network connection’ dropdown and select ‘Local Area ConnectionMeta-description: Learn how to install NordVPN on Roku TV and access restricted channels from anywhere in the world.


Method #3: Install NordVPN on Your Router
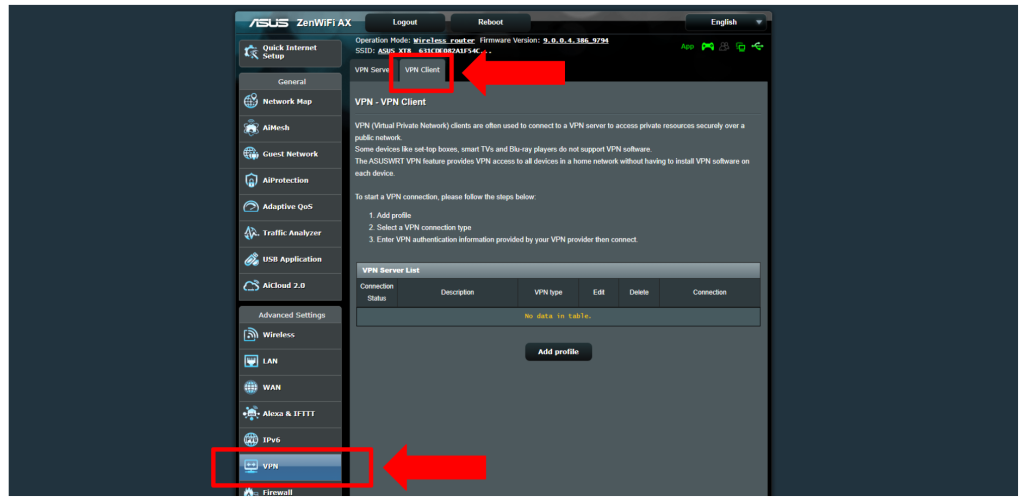
If your router has a built-in OpenVPN client, you can set up NordVPN for Roku without much effort. In this guide, we will be using an ASUS ZenWiFi AX XT8 router. However, the process is similar for all OpenVPN-compatible routers. Let’s see how you can set up NordVPN on Roku using this method.
- Go to NordVPN’s website and sign up for NordVPN.
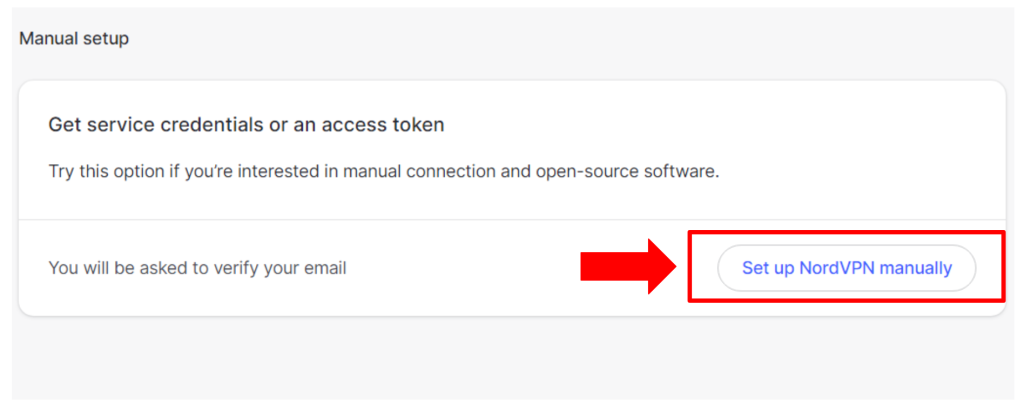
- Open your NordVPN account dashboard.
- Scroll down and choose ‘Set up NordVPN manually.’
- Verify your email by entering the code you received to inbox.
- Copy your NordVPN service credentials (username and password).
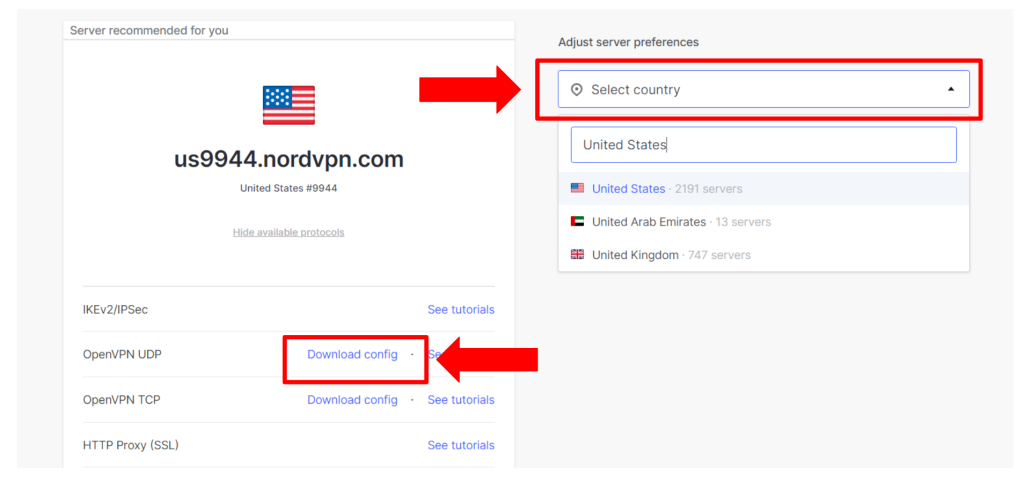
- Go to NordVPN’s OpenVPN setup page and pick a server.
- Click on ‘Download config’ next to OpenVPN UDP and save this file.
- Open your router’s control panel by entering its default gateway in your browser.
- Log in with your router’s credentials (for ASUS, the default is “admin” for both fields).
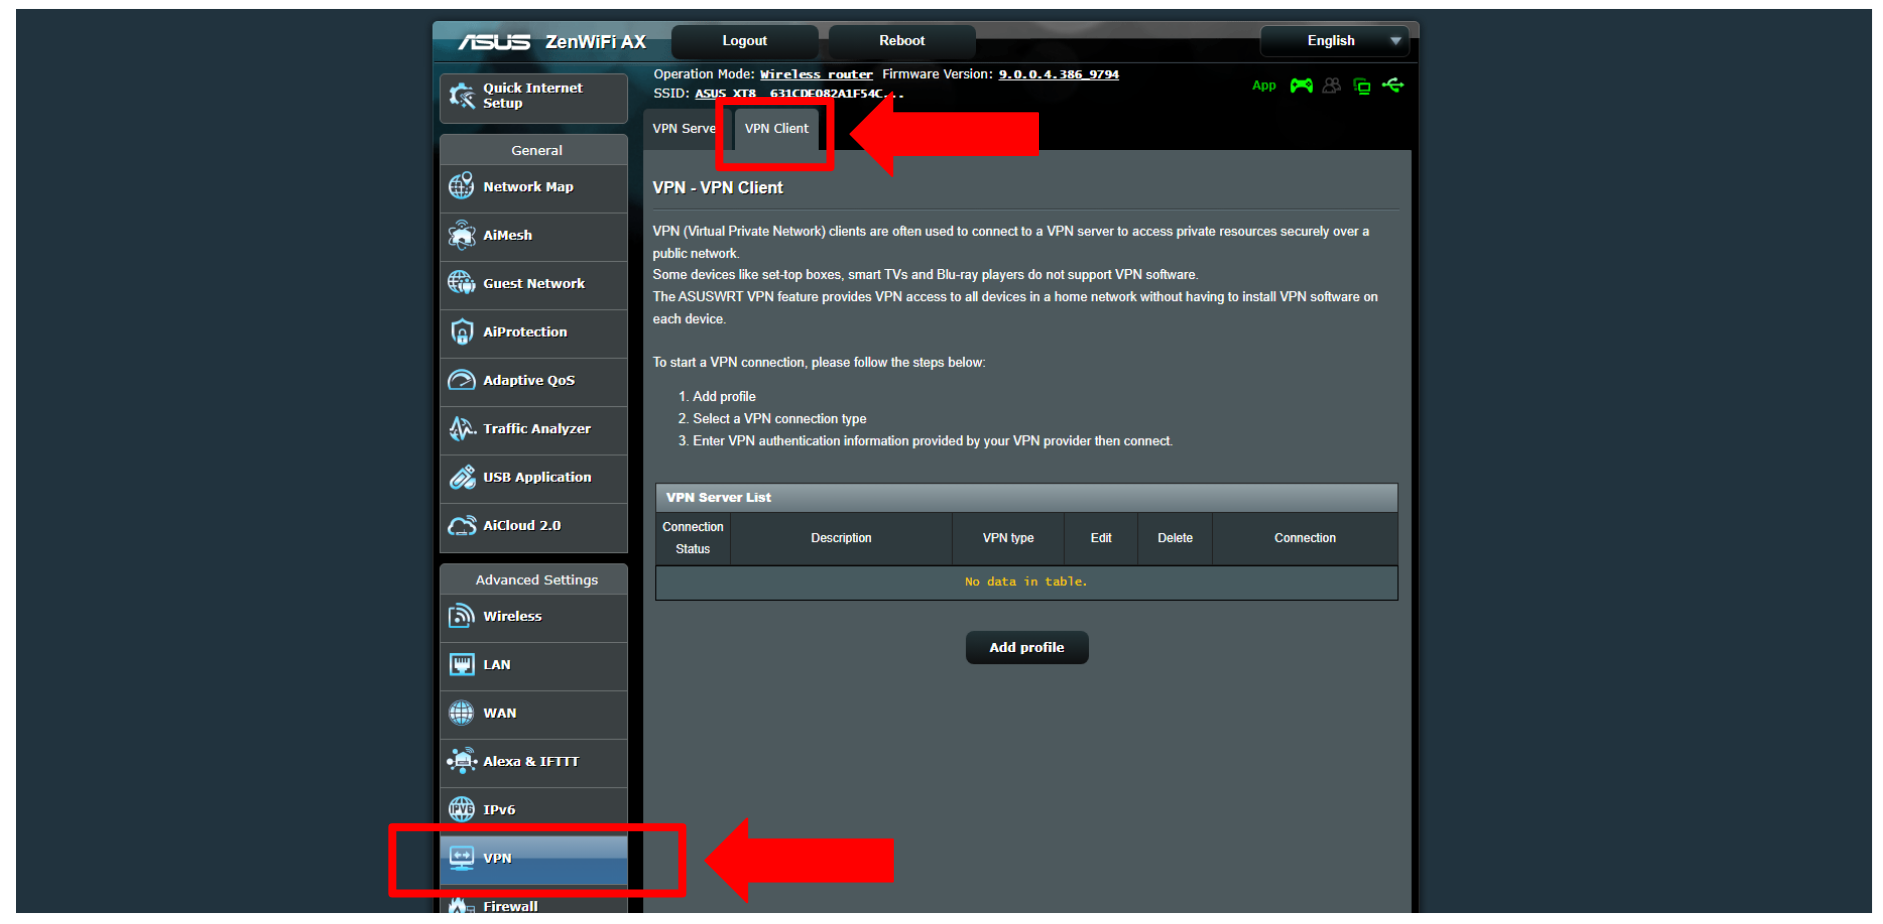
- Click on the ‘VPN’ tab and choose ‘VPN Client.’
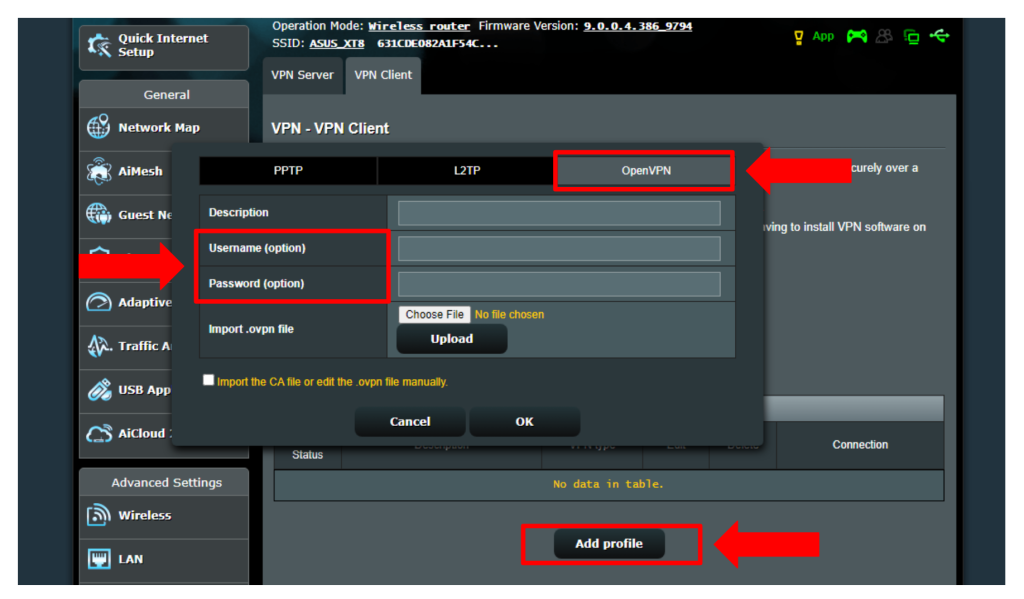
- Choose Add Profile > OpenVPN.
- Enter the NordVPN service credentials copied earlier in the required fields.
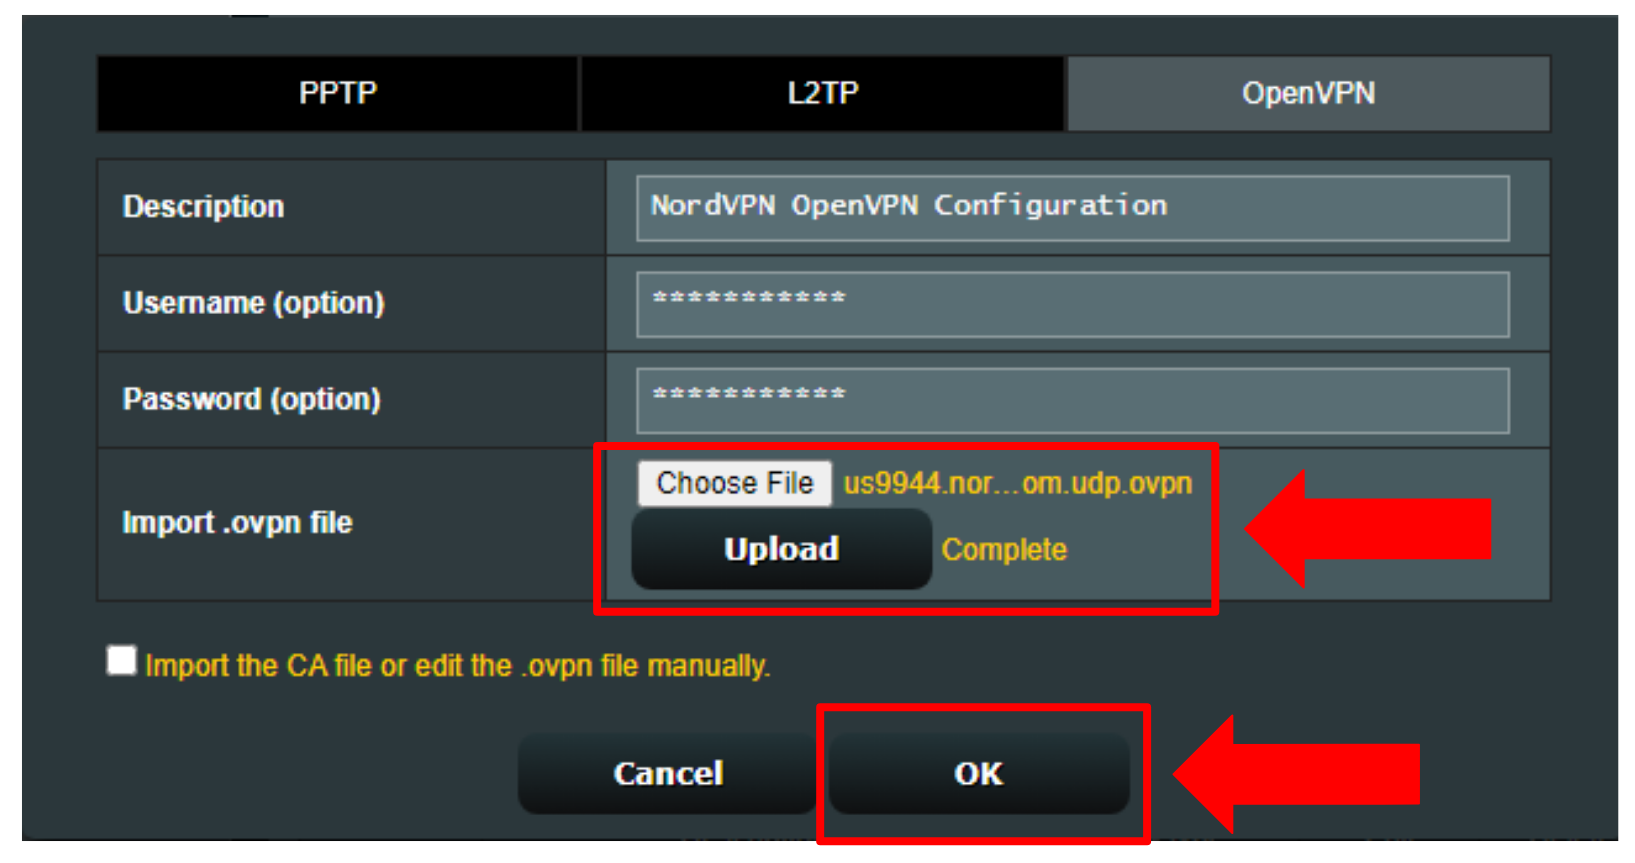
- Import your OpenVPN UDP config file in the router’s settings and click ‘OK.’
- Click the ‘Activate’ button and wait for a blue check mark.


Method #4: Install NordVPN on a Virtual Router
Other than a physical router, you can also add NordVPN to Roku using a virtual router. You can set it up on both Windows and macOS. First, let’s see how to configure it on Windows.
Add NordVPN as a Virtual Router for Windows
To configure a virtual router on Windows, you need to enable a mobile hotspot and configure the NordVPN TAP adapter so that Roku can use it. Here are the steps that you can follow:
- Get a NordVPN plan and sign up on its official website.
- Install and open the NordVPN client on your Windows PC.
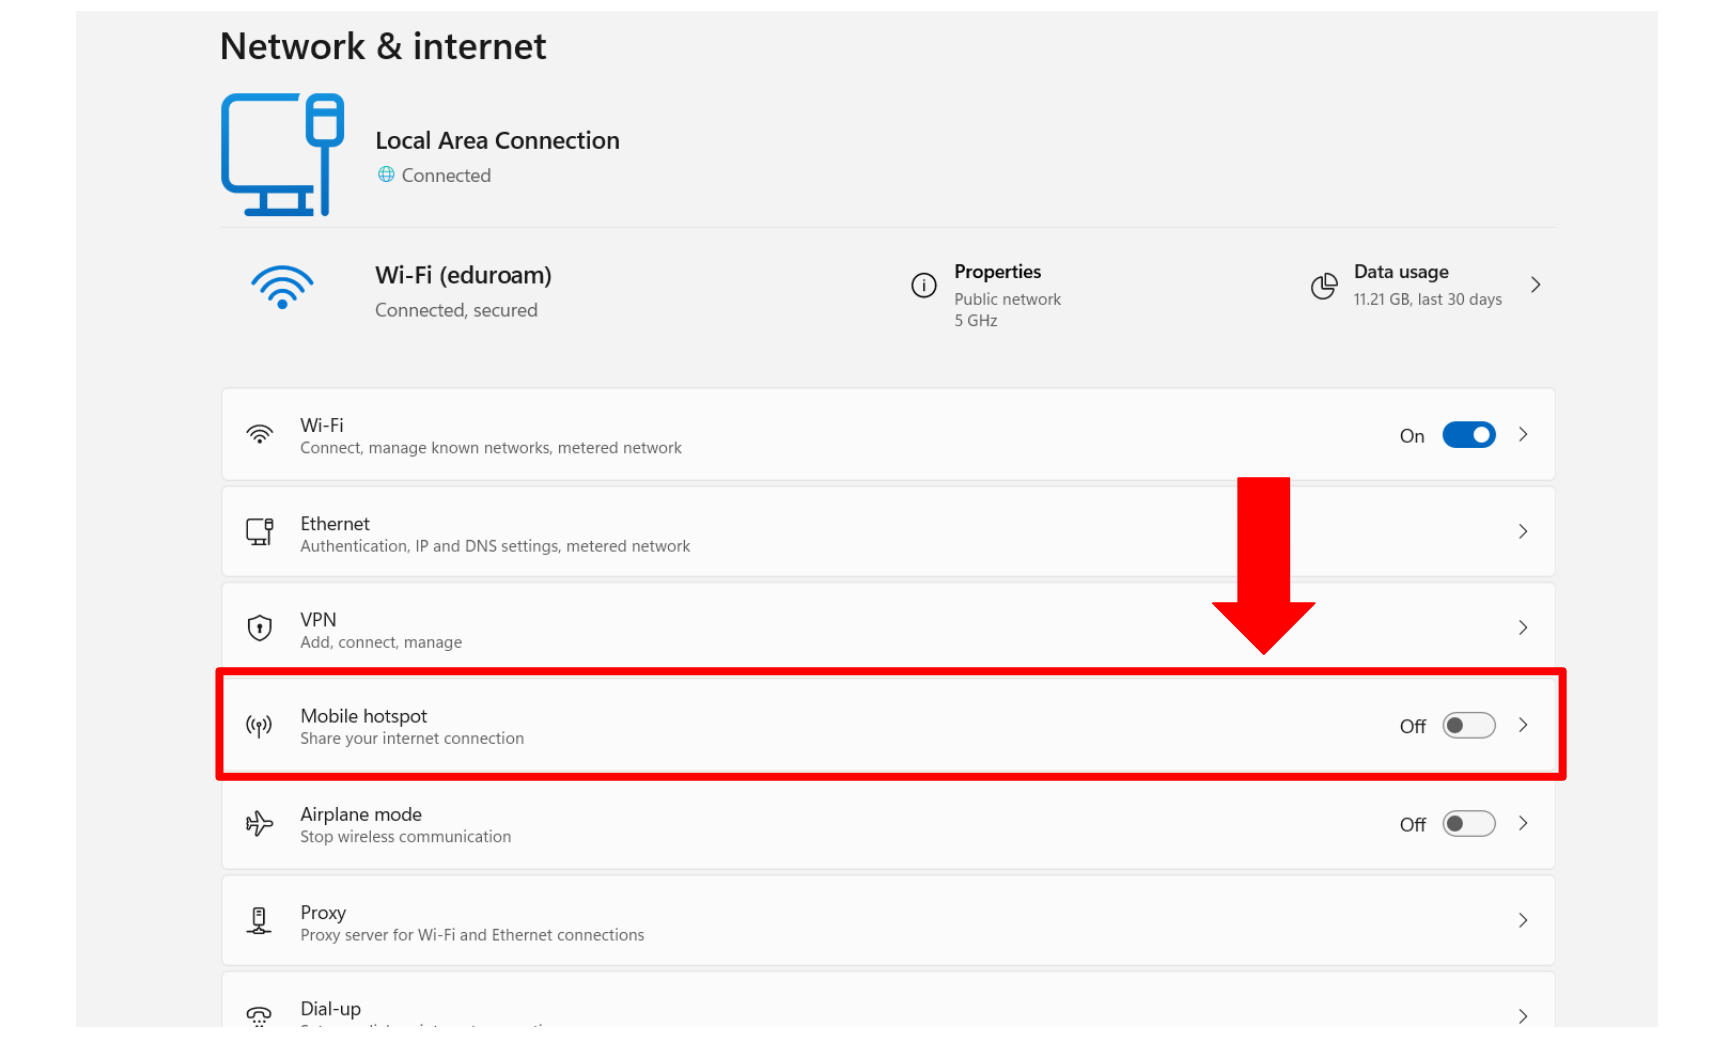
- Navigate to the Network & Internet settings on your device.
- Toggle on ‘Mobile Hotspot.’
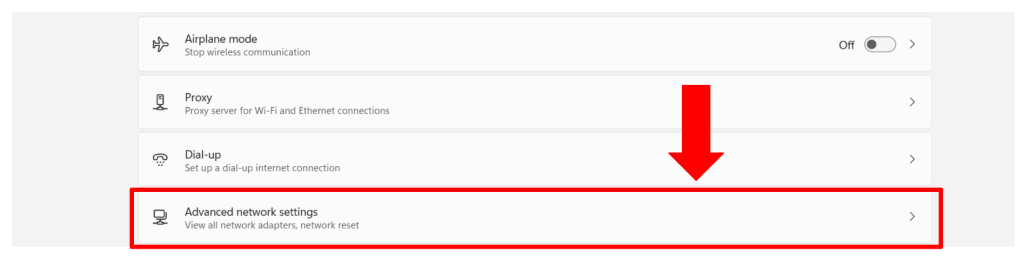
- Scroll down and click ‘Advanced network settings.’
- Choose ‘TAP-NordVPN Windows Adapter’ and click ‘Edit.’
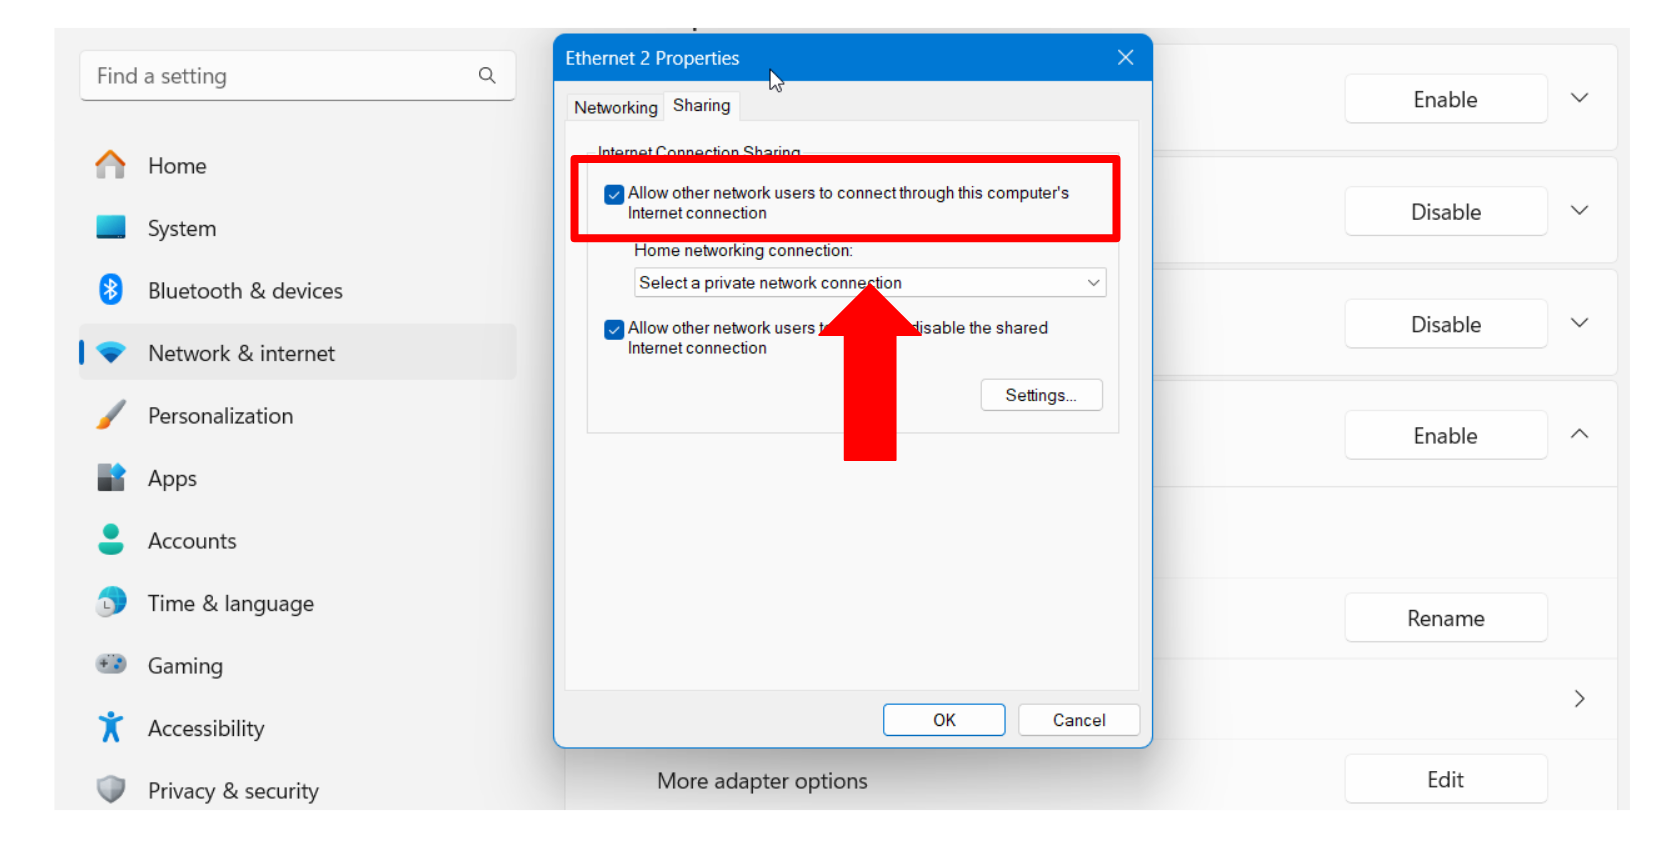
- Check the box “Allow other network users to connect through …” and click ‘OK.’
- Launch the NordVPN client and connect to your preferred server.
- Log into your Roku account and go to Settings > Network.
- Click on Set up Connection > Wireless.
- Connect to your NordVPN virtual router network.


Add NordVPN as a Virtual Router for Mac
Adding NordVPN as a virtual router for macOS is as simple as Windows devices. Here’s a step-by-step guide.
- Purchase a NordVPN subscription using your Web browser.
- Go to NordVPN’s server page and choose a VPN server.
- Copy the server address (we’ll use this later).
- Use an Ethernet cable to connect your macOS device to the Internet.
- Go to Apple > System Settings.
- Navigate to the Network tab and click the ‘+’ sign.
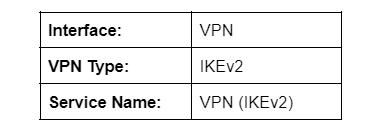
- Enter the following details:
- Paste the NordVPN server address copied earlier.
- Click ‘Authentication Settings’ and enter your NordVPN username and password.
- Click ‘Advanced’ and choose ‘Send all traffic over a VPN connection.’
- Select ‘Connect’ and navigate to the System Settings.
- Choose Sharing > Internet Sharing.
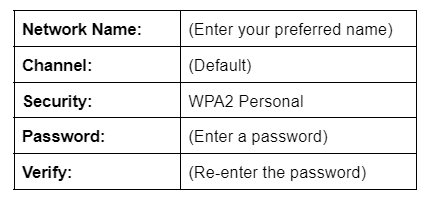
- Click ‘WiFi’ and choose ‘OK’ after adding the following details:
- Connect your Roku to this virtual router to use NordVPN on Roku TV.
Final Thoughts
Since Roku does not natively support VPN apps, you need to rely on alternative methods to set up NordVPN on Roku. While there are several methods to use NordVPN on Roku, configuring it on your router is the best option. This method allows you to connect unlimited devices to NordVPN, including Roku TV, and protects them all from security threats.
We recommend NordVPN for Roku TV because it has implemented SmartPlay technology in all its apps, which combines the benefits of SmartDNS with the VPN’s security and unblocks restricted channels on Roku seamlessly. Alternatively, you can also set up NordVPN’s SmartDNS to unblock streaming channels but without the security benefits of a VPN.
We hope that this article taught you everything you need to know about setting up NordVPN for Roku. Feel free to share your experiences with us in the comments below.
Related