When you purchase through links on our site, we may earn an affiliate commission. Here’s how it works.
How to Download and Add NordVPN Extension on Firefox
Last updated May 22, 2024

NordVPN makes it easy for you to connect on the go using its Firefox extension. Downloading and adding NordVPN to Firefox is remarkably simple and takes less than a minute. However, keep in mind that NordVPN's extensions and apps are not the same, as extensions come with limited features.
More precisely, the NordVPN Firefox extension is great for bypassing geo-blocks and protecting your privacy within the browser. However, you won't be able to switch between protocols, access specialized servers, or use a kill switch. For that, you'll need to use NordVPN's native application.
In this article, you'll learn how to set up the NordVPN Firefox extension with detailed, step-by-step instructions.
How to Set Up NordVPN Firefox Extension
To set up NordVPN on Firefox, you need to sign up, download its extension, and log in. The entire procedure should not take more than a few minutes. Here's what you need to do:
1. Subscribe to NordVPN using your computer and Firefox.
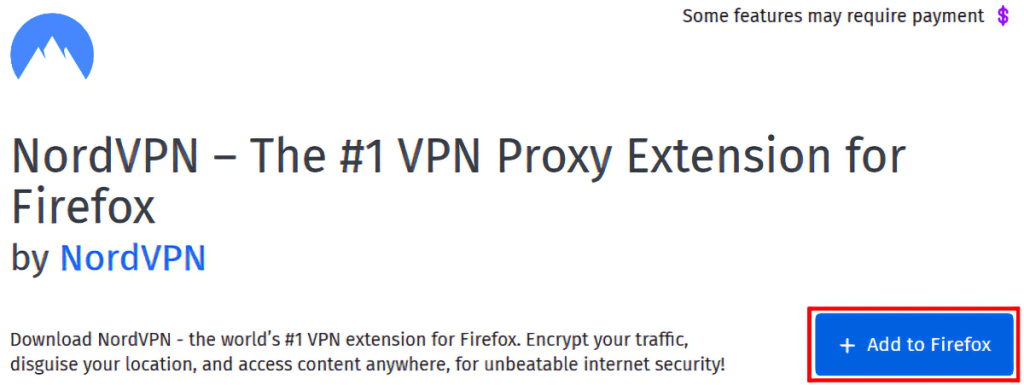
2. Visit NordVPN's listing on the Firefox Add-Ons page and click 'Add to Firefox.'

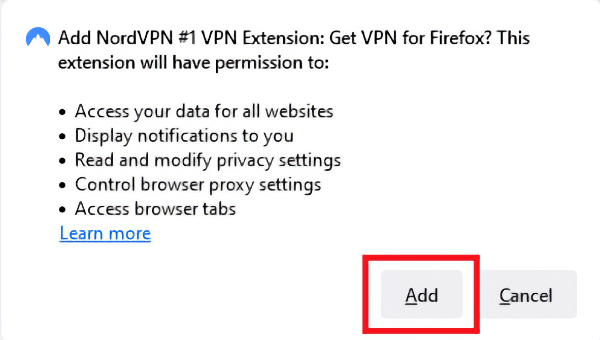
3. You'll be asked to confirm your decision. Go with 'Add.'
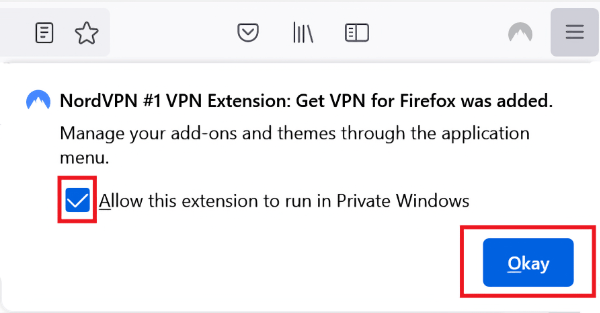
4. Check the box, 'Allow this extension to run in Private Windows,' and click 'Okay.'
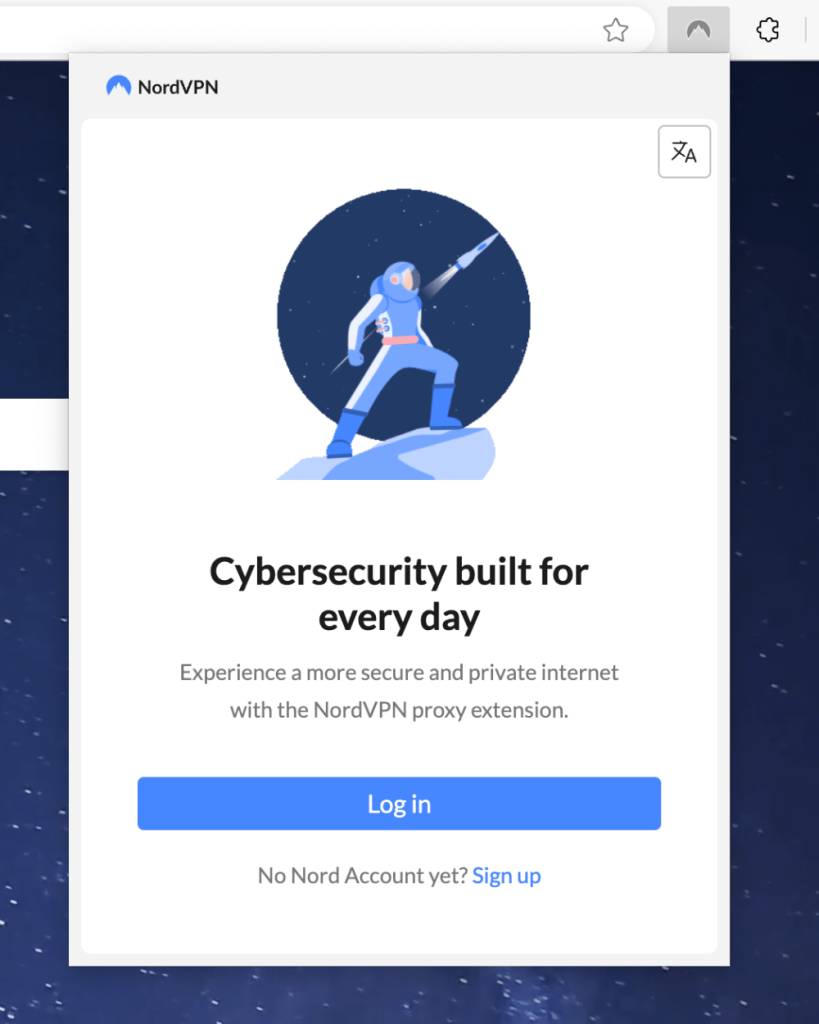
5. To launch NordVPN, click on its icon in the top-right corner.
6. The first time you open it, you'll need to click 'Log In' and enter your credentials.

7. Go with 'Quick Connect' to allow NordVPN to connect you to the closest server.
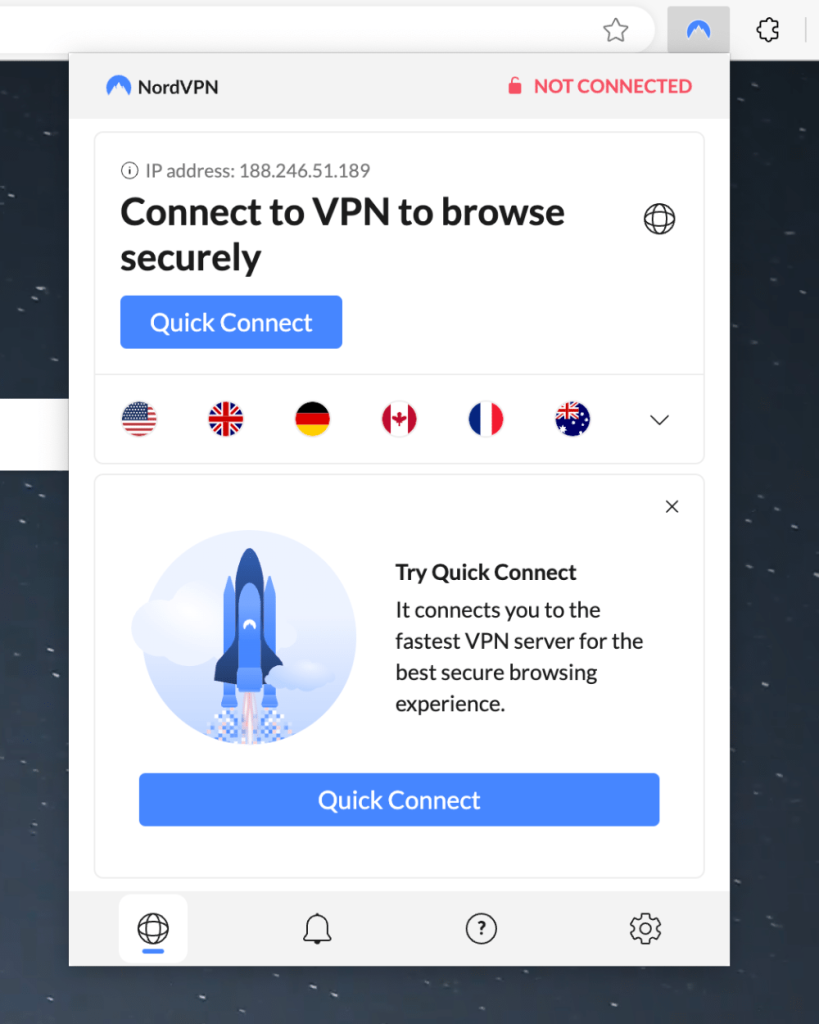

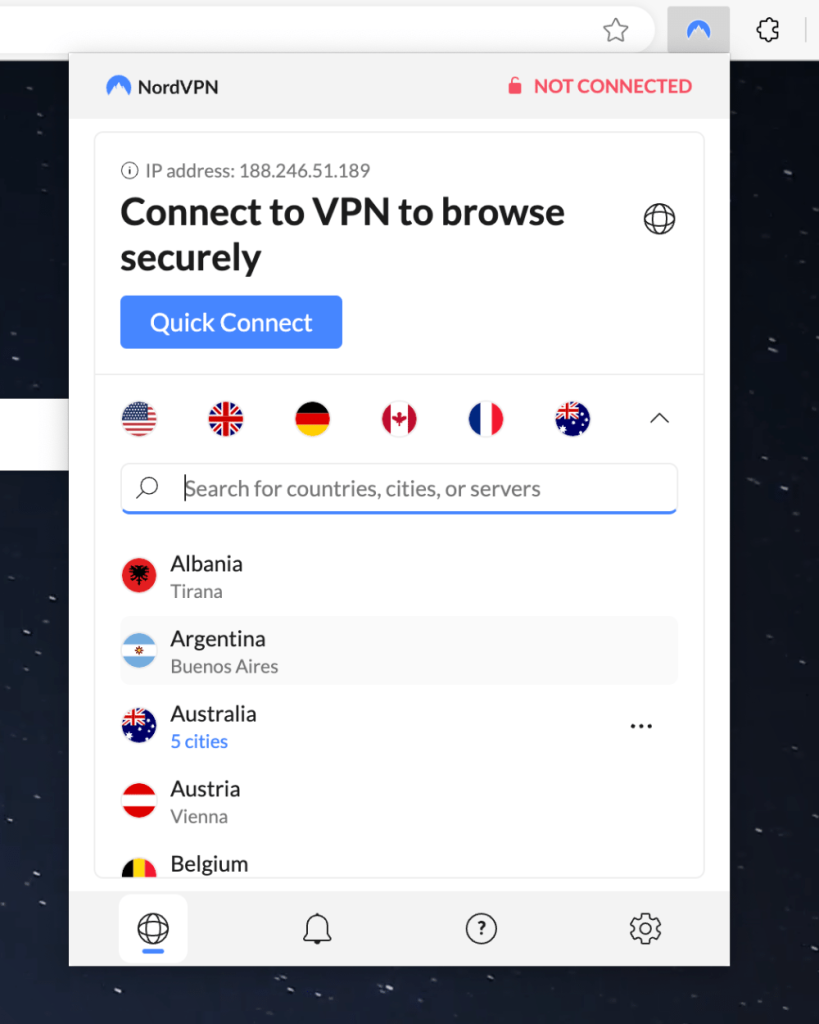
8. Click on the dropdown button to pick a specific server location.

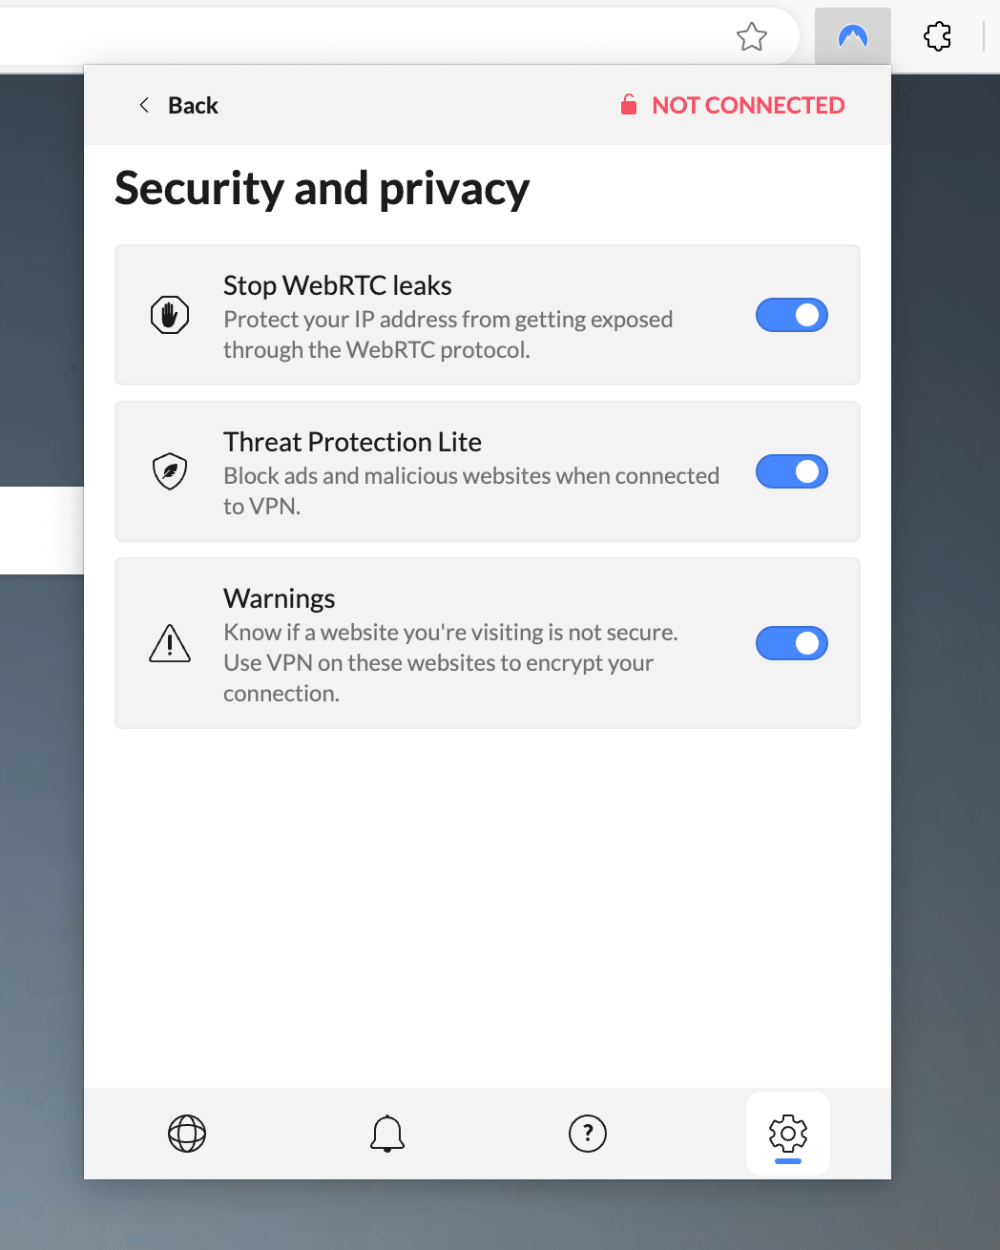
9. Click on the 'cogwheel icon' to visit NordVPN's settings.
10. Enable the following additional security features:
- Stop WebRTC leaks
- Threat Protection Lite
- Warnings

Final Thoughts
NordVPN's Firefox extension is fast, lightweight, and very quick to set up. However, remember that it will only secure your browser activities. If you want protection across all apps connected to the Web on your device, you should download its native client on your computer.
Since NordVPN allows up to 10 simultaneous connections, you should download and set up NordVPN on all the devices in your household so that you can protect them at once. In our guide, we've covered dozens of devices and platforms, showing you how to take full advantage of your subscription.
We hope that you now know how to install and add NordVPN on Firefox. If you have further queries, feel free to drop us a comment below. Thanks for reading!
Related