When you purchase through links on our site, we may earn an affiliate commission. Here’s how it works.
How to Download, Install, & Use CyberGhost VPN on Raspberry Pi
Last updated June 17, 2024


You can set up CyberGhost VPN's OpenVPN client on your Raspberry Pi with an ARM processor running Raspbian and RaspBMC Linux distributions. However, before going ahead, you must ensure that all the software packages are updated.
Once you have all the necessary software packages, you can proceed with configuring the network settings. If you run into any unforeseen issues, you can always consult Rasberry Pi's official documentation, as most of the technicalities have been thoroughly documented.
In this article, we'll teach you how to download, install, and use CyberGhost VPN on Raspberry Pi.
How to Download and Install CyberGhost VPN on Raspberry Pi
You can install CyberGhost VPN on Raspberry Pi by downloading the VPN's OpenVPN config files and using a set of commands to update the settings on your Raspberry Pi. Here is a step-by-step guide.
1. First, subscribe to CyberGhost VPN using your computer and a Web browser.
2. Open your CyberGhost VPN's account login page and sign in.
3. Open your account's dashboard, and go to 'VPN' > 'Configure Device' from under Manual Setup.
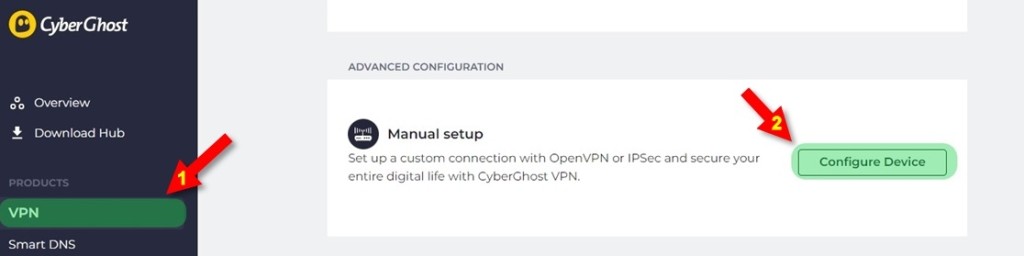

4. Click on the 'Configure' button.
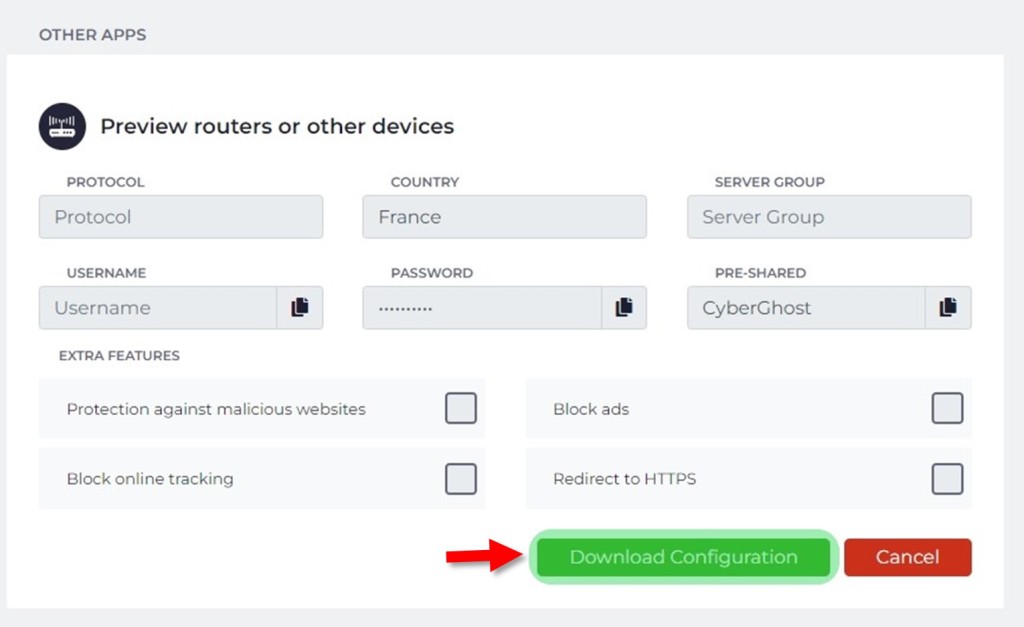
5. Fill in the details below:
- PROTOCOL - OpenVPN 2.3 or OpenVPN TCP 2.3
- COUNTRY - Select your preferred location
- SERVER GROUP - Choose the available server group (UDP/TCP)
- DEVICE NAME - OpenVPN NAS Synology
- EXTRA FEATURES - Tick all the boxes
6. Hit the 'Save Configuration' button.

7. You'll go to 'Manage Devices,' where you need to click 'View' under 'Router or other devices.'
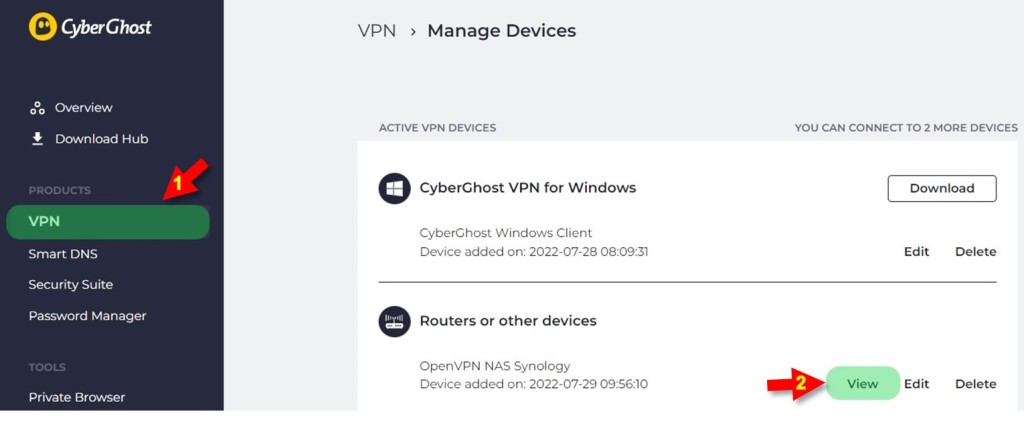

8. Note your Server Group, Username, and Password for future use.
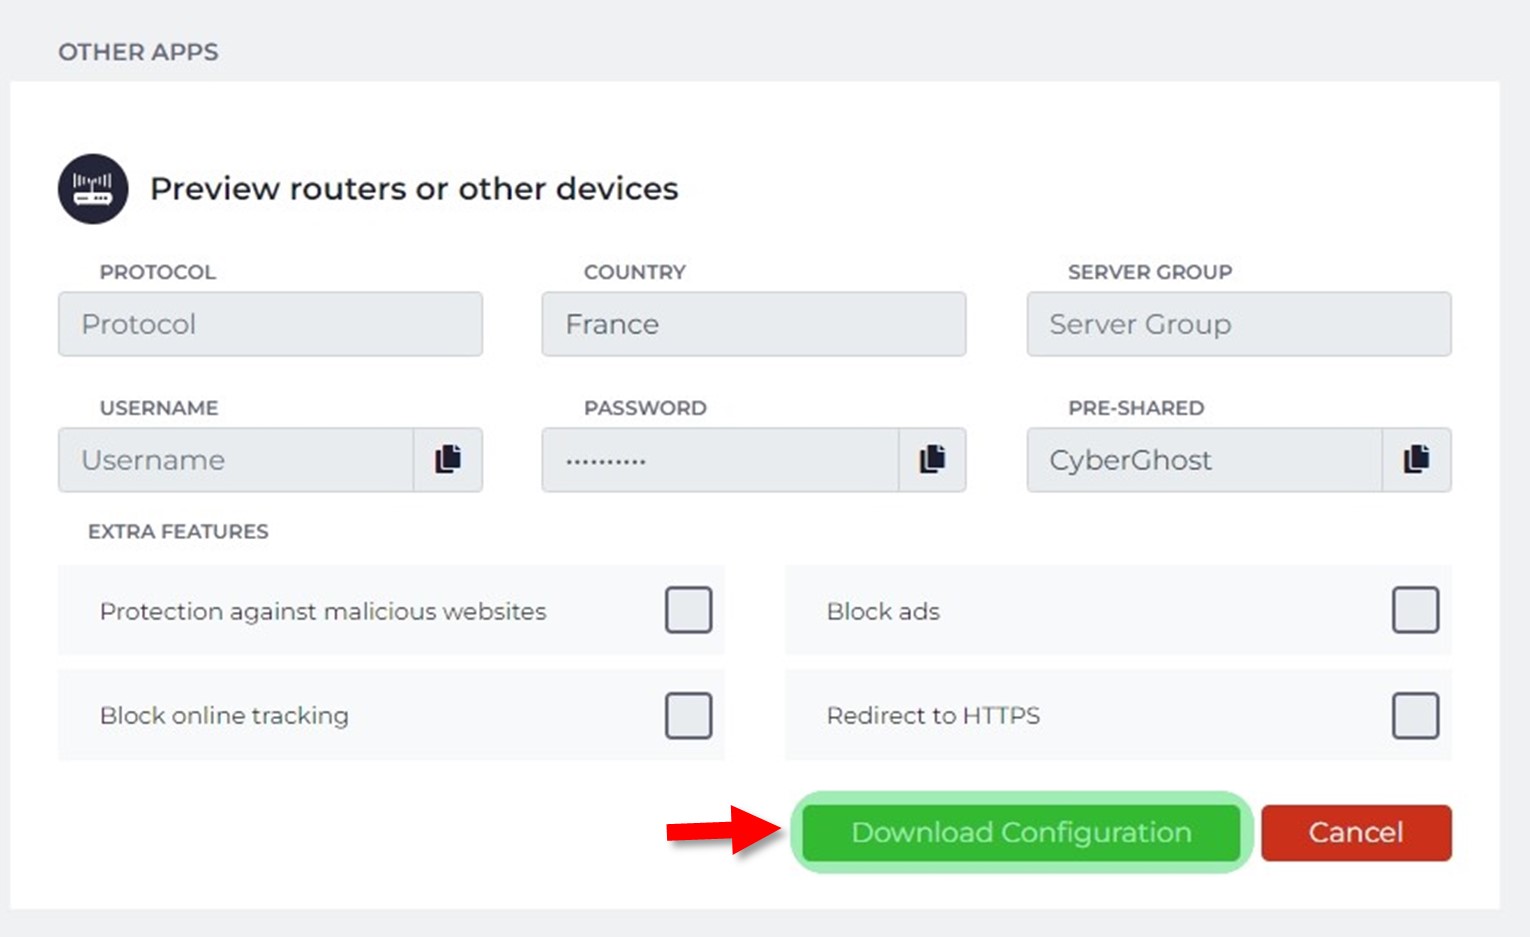
9. Now, hit the 'Download Configuration' button.
10. A .zip file will download now on your system; extract it to get the below documents:
- ca.crt - Server security certificate
- client.crt - Client safety certificate
- client.key - Key file
- openvpn.ovpn - OpenVPN configuration file
11. Once done, rename the openvpn.ovpn file with 'CG_AnotherCountry.conf' [Replace 'AnotherCountry' with the country code of the location you want to connect to, e.g., 'CG_USA.conf']
12. Copy all the files into the OpenVPN directory on your Raspi device.
13. Enter the command below to move to the folder where you've kept all the unzipped files:
cd [path to configuration folder]14. Next, copy all the entries existing in this folder:
sudo cp CG_AnotherCountry.conf /etc/openvpn/
sudo cp ca.crt /etc/openvpn/
sudo cp client.crt /etc/openvpn/
sudo cp client.key /etc/openvpn/
15. Ensure that your system is running the latest version and you've got the right packages. Enter the below command in a console to download the package information.
sudo apt-get update && sudo apt-get upgrade16. Download the required OpenVPN package with the help of the below command.
sudo apt-get install openvpn openssl openresolv17. Now, move on to the OpenVPN folder by entering the below command.
cd /etc/openvpn18. Next, create a user.text file in the OpenVPN folder to save the username and password that you've received from your CyberGhost online account. Type in the below command for that.
sudo nano user.txt19. Once you create the .text file, type in your Username and Password noted earlier, as shown below.
Username
Password
20. Now, save the changes by pressing CTRL+O and exit by typing CTRL+X.
21. Next, open your configuration 'CG_AnyCountry.conf' file with the following command.
sudo nano CG_AnotherCountry.conf22. You've to extend the auth-user-pass line now:
[...]
auth-user-pass
[...]
23. Use the path to your credential file to extend this line:
[...]
auth-user-pass /etc/openvpn/user.txt
[...]
24. Now, paste the two lines below 'verb 4' in the configuration passage.
up /etc/openvpn/update-resolv-conf
down /etc/openvpn/update-resolv-conf
25. After that, save the file by pressing CTRL+O and exit via CTRL+X.
26. Now, enter the below command and add the associated line to autoload the file.
sudo nano /etc/default/openvpnAUTOSTART="CG_AnyCountry"27. Next, save it with CTRL+O and exit by pressing CTRL+X.
28. Once done, type the below command in your console to enable the OpenVPN connection.
sudo update-rc.d openvpn enable29. Check your configuration with the following command.
cat /etc/resolv.conf30. Finally, start the OpenVPN service using the following command.
sudo service openvpn startFinal Thoughts
To install CyberGhost on Raspberry Pi, you first need the OpenVPN config files. After that, you have to copy them to the OpenVPN directory on Raspberry Pi, update the credentials, and enable the connection. While it's a one-time process, you'll have to reconfigure it if you want to change the server location.
That said, you may also want to protect all your other devices with CyberGhost VPN, many of which come with a native app that you can install with a few clicks. For more information, check out our complete guide on how to set up and install CyberGhost VPN on a wide range of devices.
That's all. Everything should work fine, and your VPN connection should be established on the Raspberry Pi by now. If you have any comments, feel free to write them below. Thanks for reading!
Related