When you purchase through links on our site, we may earn an affiliate commission. Here’s how it works.
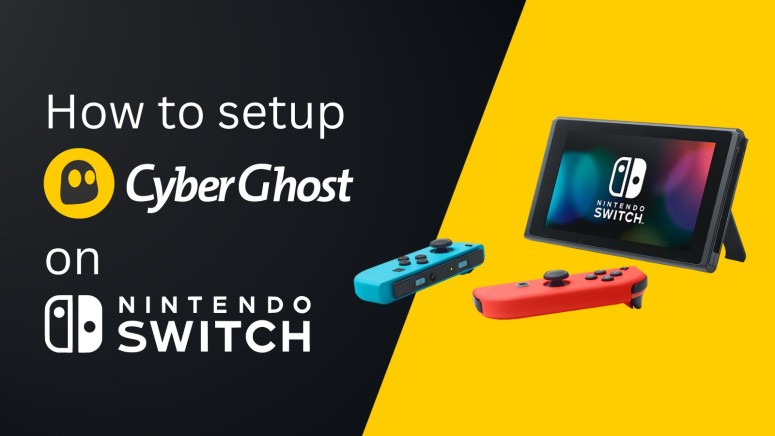
How to Set Up and Use CyberGhost VPN on Nintendo Switch
Last updated July 22, 2024

Since Nintendo Switch consoles don't support VPNs, you won't find any dedicated VPN apps that you can download directly onto your device. However, CyberGhost offers a solution. You use its 'SmartDNS' to re-route your device's traffic to bypass network restrictions and optimize your gameplay.
Keep in mind that 'SmartDNS' technologies work great for unblocking content and optimizing traffic, but they lack encryption. So, they're not a complete replacement for VPNs, but they do a great job overall on gaming consoles, such as Nintendo Switch.
In this guide, we'll explain how to set up CyberGhost on Nintendo Switch by optimizing your device's DNS settings. Of course, we've also provided useful screenshots.
How to Set Up CyberGhost on Nintendo Switch
Once you subscribe to the VPN, you'll access your online dashboard to reveal DNS addresses. Then, you'll input those into your Switch. Let's go over everything:
1. Sign up for CyberGhost using a Web browser and any Web-connected device.
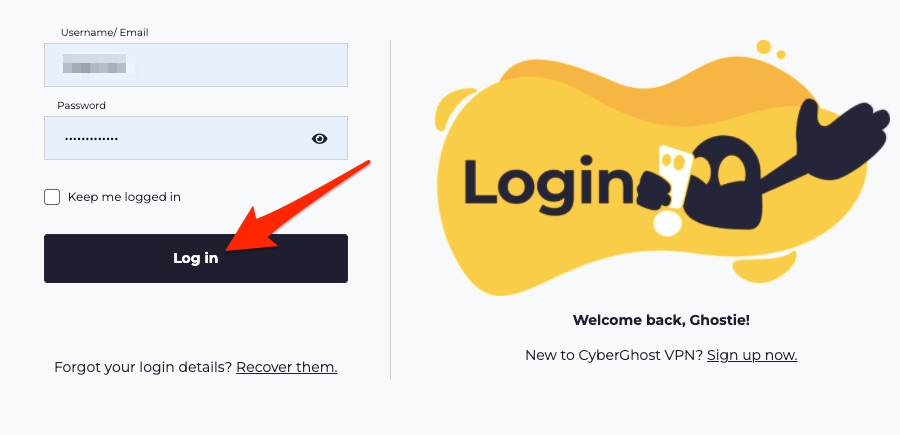
2. Now, visit the CyberGhost official website and click 'My Account' in the top right corner.
3. Enter your username and password and hit the 'Login' button to proceed.
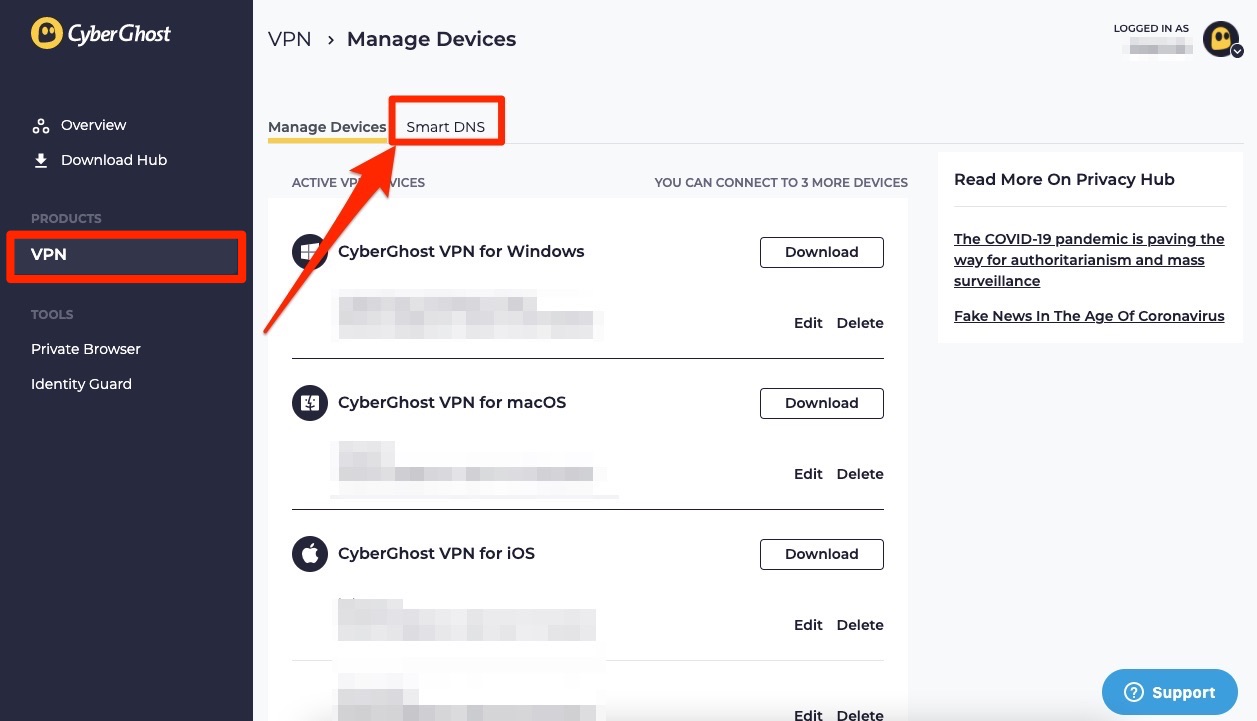
4. Select 'VPN' from the left pane and navigate to the 'Smart DNS' tab.

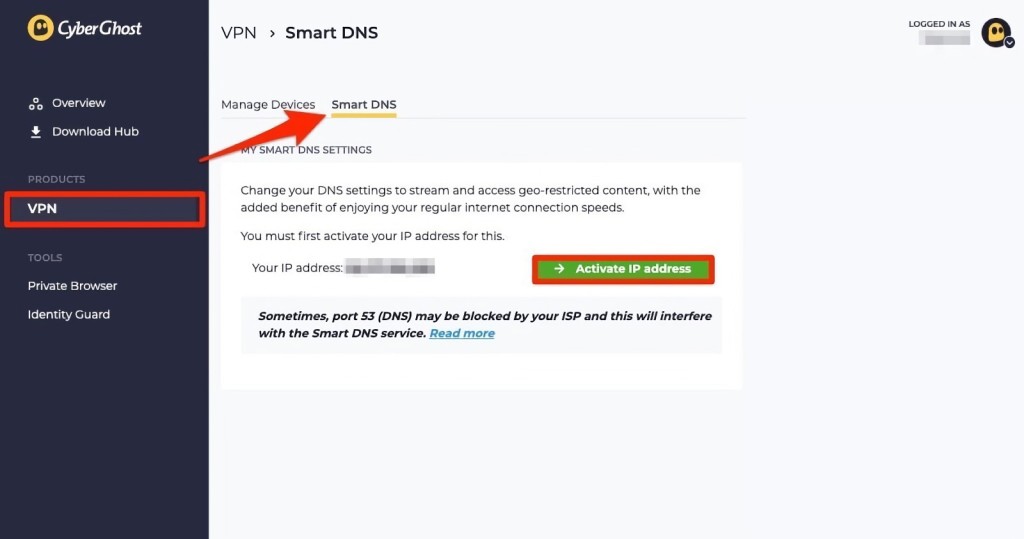
5. Under this tab, click the green 'Activate IP address' button.

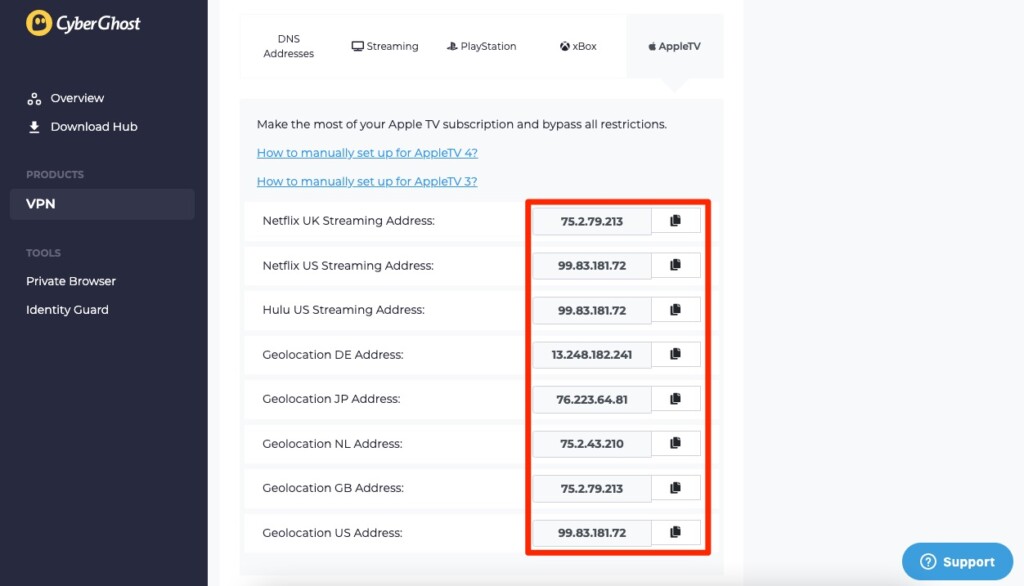
6. Choose any DNS server address listed under the 'DNS Addresses' tab.

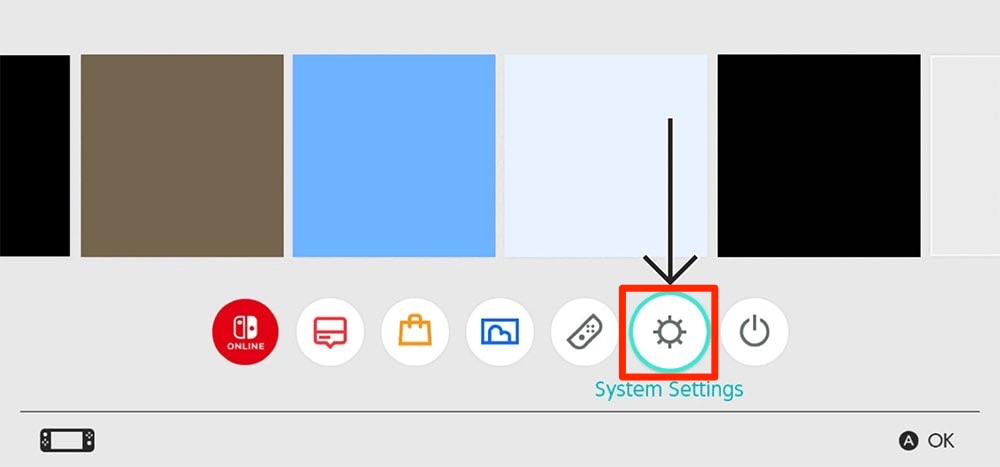
7. Next, turn on your Nintendo Switch and navigate to 'System Settings.'
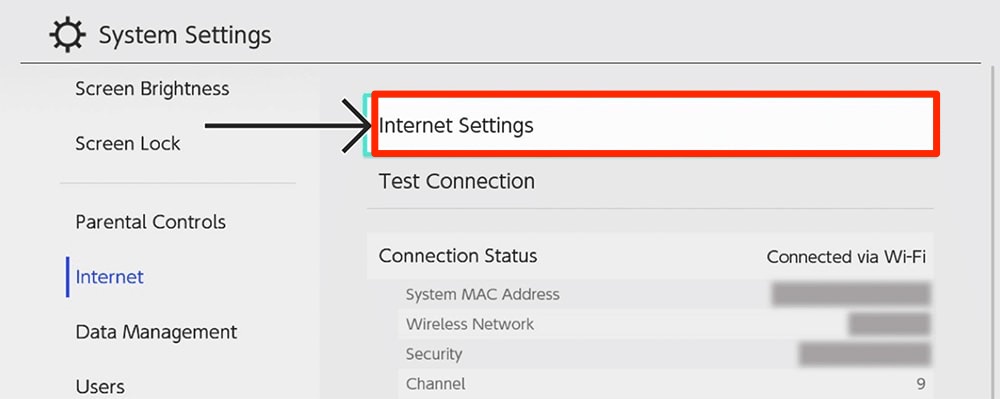
8. Then, choose 'Internet' from the left pane and 'Internet Settings' on the right side.
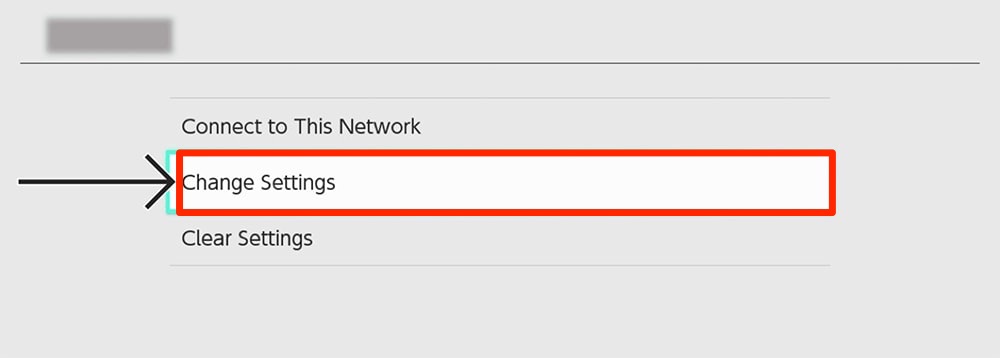
9. Pick the Wi-Fi connection you're using right now and click 'Change Settings.'
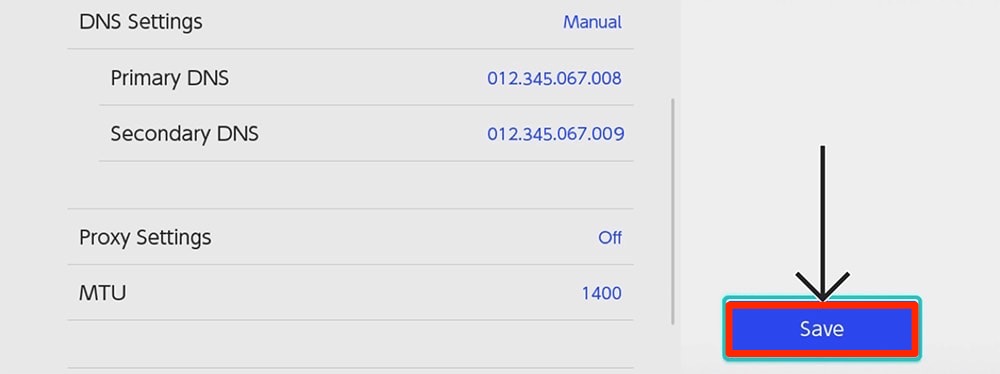
10. A sub-menu will open. Keep the below settings as mentioned and scroll down to 'DNS Settings.'
- Proxy Settings: Turn Off;
- MTU: Default;
- IP Address Settings: Automatic.
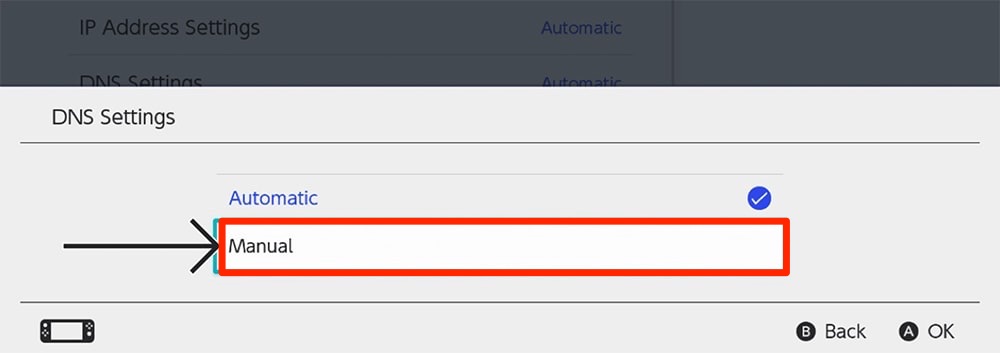
11. Under 'DNS Settings,' select 'Manual.'
12. Now change the 'Primary DNS' with the one you selected from your account dashboard and leave 'Secondary DNS' blank.
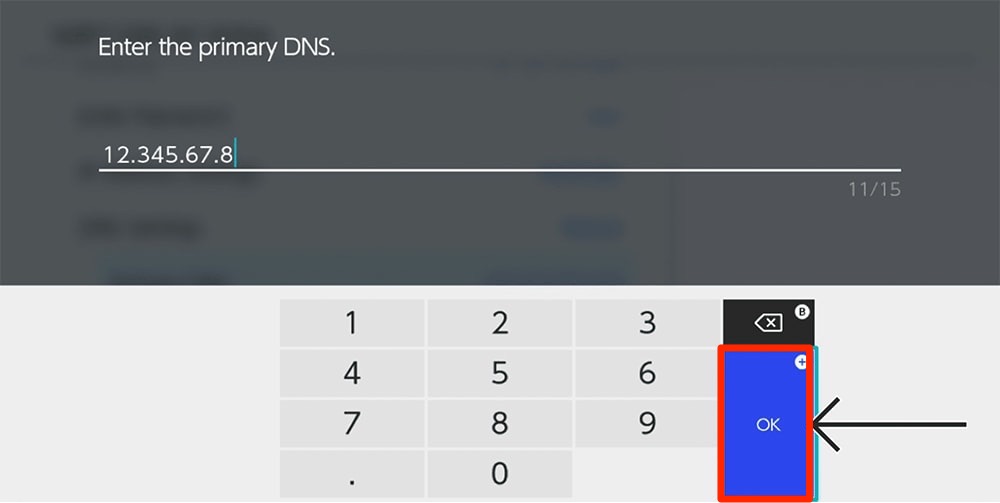
13. Finally, hit the 'Save' button.
Final Thoughts
Setting up CyberGhost VPN on Nintendo Switch takes only a few minutes. Once done, your console will reroute its traffic as long as your new DNS settings are active. To undo those changes, just go back to the DNS settings on your console and switch them back to their default values.
We'll also remind you that this VPN gives you 7 simultaneous connections. So, why not learn how to set up CyberGhost on your other devices? It's compatible with computers, smartphones, tablets, streaming devices, and even routers!
That's all for our guide on configuring CyberGhost on your Switch console. If you have any questions, let us know via the comments section below. Thanks for reading!
Related