When you purchase through links on our site, we may earn an affiliate commission. Here’s how it works.
How to Set up and Use NordVPN Proxy on BitTorrent
Last updated May 18, 2024

BitTorrent is one of the most widely used torrent clients available today. However, when downloading via BitTorrent, the entire P2P network can see your actual IP address and location. To keep yourself safe and protected, you need to follow certain basic security practices, like using a VPN or a proxy.
An exposed IP address puts you at risk of DDoS attacks and government identification. Fortunately, you can use a NordVPN proxy to preserve your privacy while torrenting. It will hide your IP address and change your virtual location, making you completely unidentifiable on the Web.
In this article, we've provided a step-by-step guide here to help you set up and use NordVPN Proxy on BitTorrent.
How to Set up NordVPN on BitTorrent
To set up NordVPN on BitTorrent, you need to add its proxy server's IP address to BitTorrent's settings and adjust several other variables. Here's a step-by-step guide for it.
1. Subscribe to NordVPN from your PC using any Web browser.
2. Next, launch the BitTorrent client.
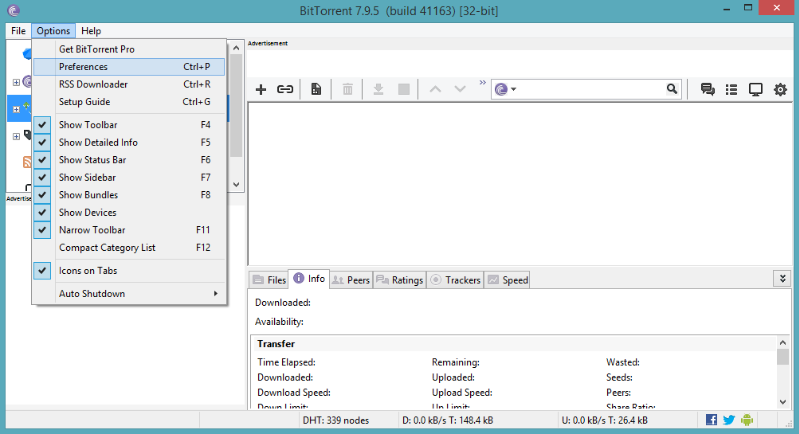
3. Choose 'Options' from the toolbar and click on 'Preferences.'
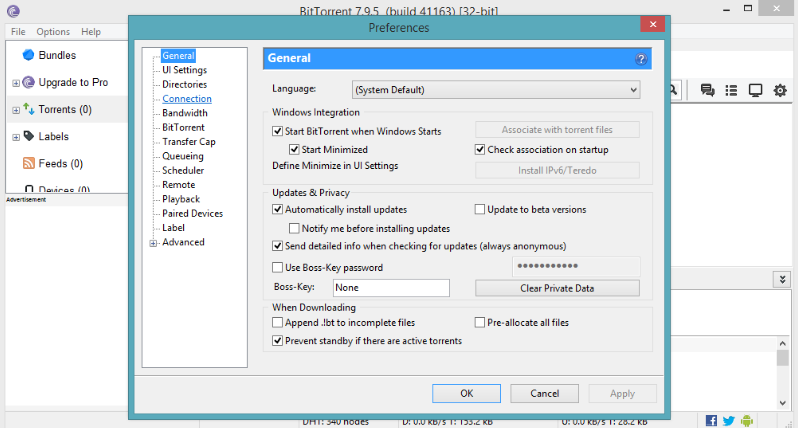
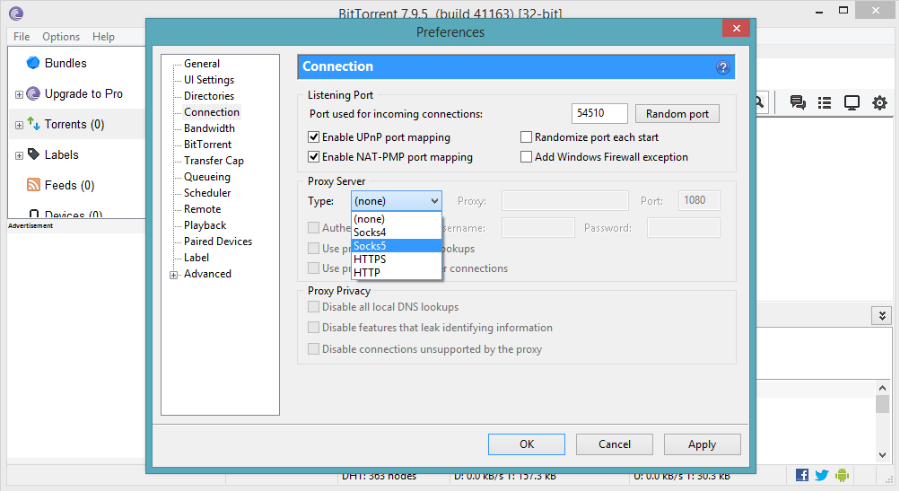
4. Click on 'Connection' from the left pane of the Preferences window.
5. Navigate to the Proxy Server field and click the drop-down button right beside 'Type.'
6. Select 'Socks5' from the drop-down menu.
7. Fill in the Proxy field with one of the following server IP addresses based on your location preference:
amsterdam.nl.socks.nordhold.net
atlanta.us.socks.nordhold.net
dallas.us.socks.nordhold.net
los-angeles.us.socks.nordhold.net
nl.socks.nordhold.net
se.socks.nordhold.net
stockholm.se.socks.nordhold.net
us.socks.nordhold.net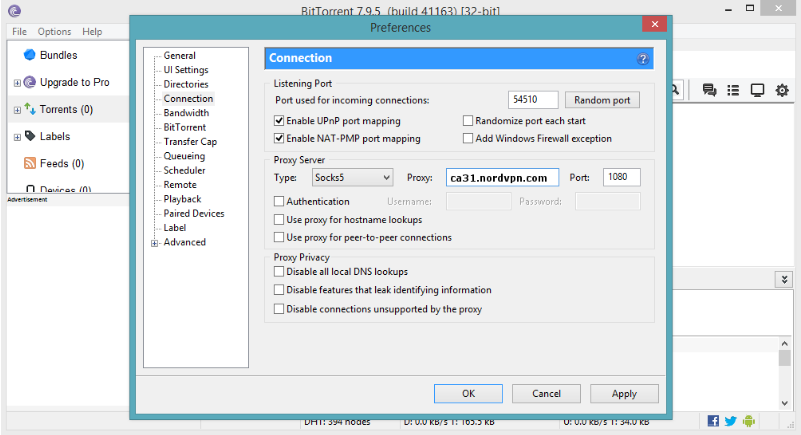
8. Enter '1080' in the port field now and check the following boxes:
- Authentication
- Use proxy for hostname lookups
- Use proxy for peer-to-peer connections
- Disable all local DNS lookups
- Disable features that leak identifying information
- Disable connections unsupported by the proxy

9. Open the Nord Account Dashboard and click on 'NordVPN' > 'Set up NordVPN manually.'
10. Copy the username and password written under the 'Service credentials (manual setup).'
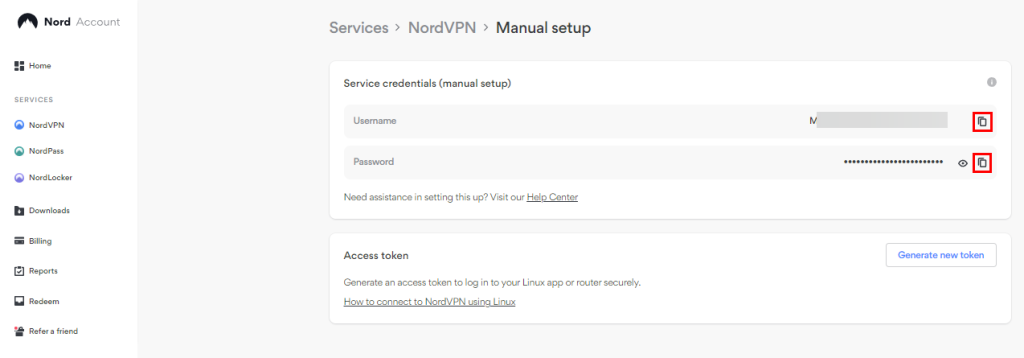

11. Paste these credentials next to the 'Username' and 'Password' fields.

12. Click on 'Apply,' and you'll get connected to the NordVPN Proxy server.
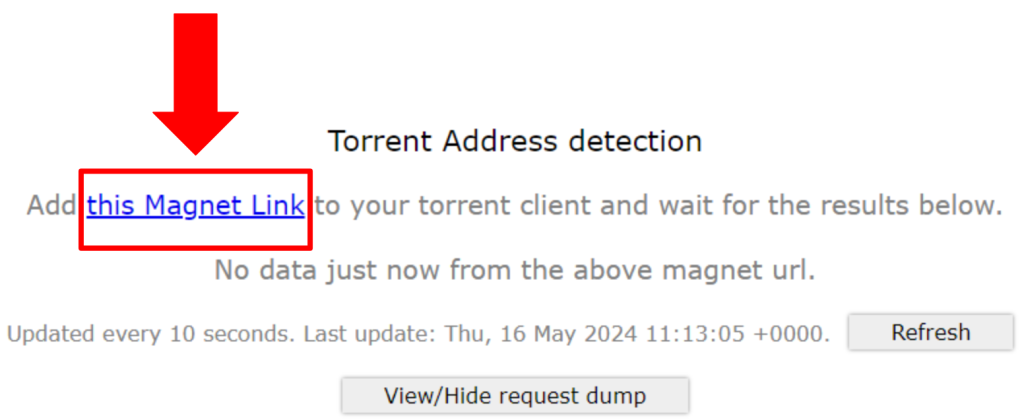
13. Now, to confirm whether or not your real IP is masked, click here.
14. Scroll down and click on 'Activate' under the box titled 'Torrent Address detection.'


15. Then, click on the 'this Magnet Link' button.

16. Choose BitTorrent from the pop-up window.

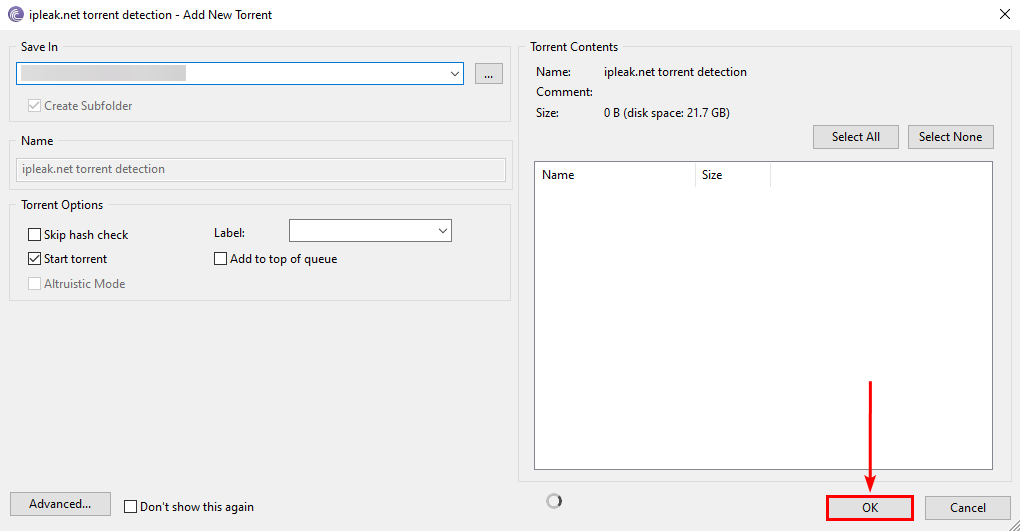
17. After BitTorrent launches, save the torrent file to your device and click on 'OK.'
18. Now, let the magnet link synchronize.
19. Go back to the Ipleak website to check whether your real IP got replaced with the Proxy's IP.

20. If your real IP is not visible, you've successfully connected to the NordVPN proxy server.
Final Thoughts
While NordVPN's proxy server configuration will hide your IP address and real location on BitTorrent, it won't encrypt your Web traffic. In other words, you'll become anonymous, but the SOCKS5 proxy won't give you the security benefits of a full-fledged VPN.
For maximum security and privacy, it is recommended that you set up and install NordVPN natively on your computer or smartphone/tablet. Alternatively, you can also set it up on a router and then connect your torrenting device to the VPN-enabled Wi-Fi.
That's all! Now you know how to set up and use NordVPN Proxy on BitTorrent. If you have further queries, drop us a comment using the button below. Thanks for reading!
Related