When you purchase through links on our site, we may earn an affiliate commission. Here’s how it works.
How to Use CyberGhost VPN with Kodi on Linux
Last updated July 27, 2024


Both CyberGhost VPN and Kodi support a wide range of Linux distributions. That said, you can't directly integrate these two. What that means is you have to install CyberGhost and Kodi separately, which allows you to use them side-by-side.
Upon connecting to a server through CyberGhost, this VPN will allow you to access new types of Kodi add-ons, optimize your streaming experience, bypass bandwidth throttling, and hide what you do online.
In this guide, we'll show you how to use CyberGhost VPN with Kodi on Linux. We'll explain everything from scratch and include helpful screenshots.
How to Use CyberGhost with Kodi on Linux
Your first step is to set up CyberGhost on your Linux machine. Then, you'll connect to a server before you open Kodi and start streaming. Here's everything you need to do:
1. Sign up for CyberGhost VPN using your preferred Web browser.
2. Visit the CyberGhost official website and click the 'My Account' button in the top-right corner.
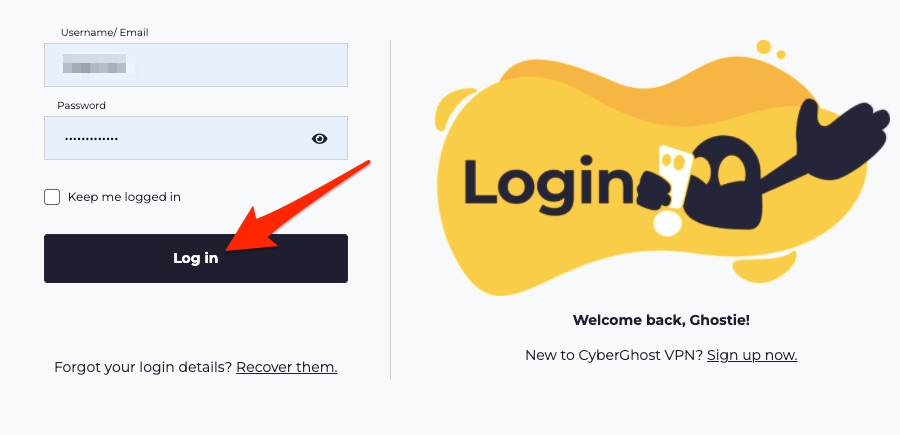
3. On the next page, fill out the username and password fields; then, hit the 'Log in' button.
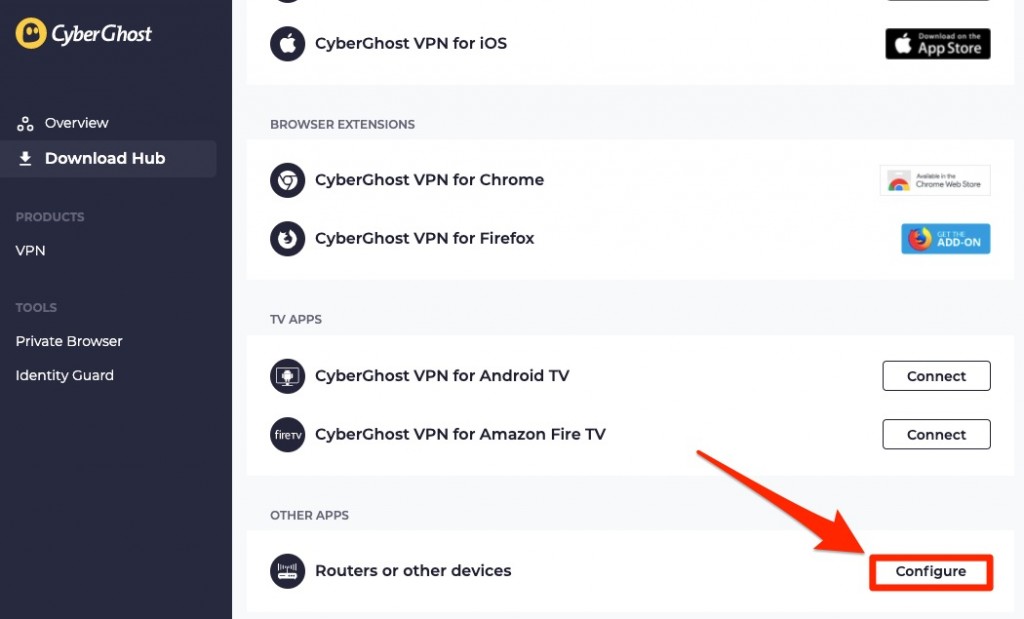
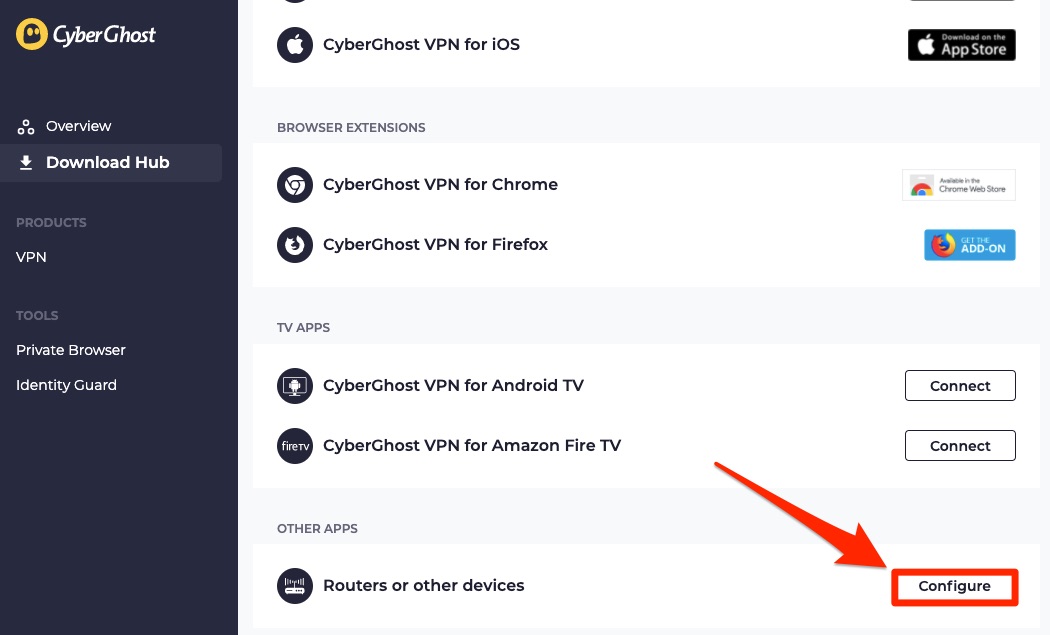
4. Navigate to 'Routers or other devices' and hit the 'Configure' button.
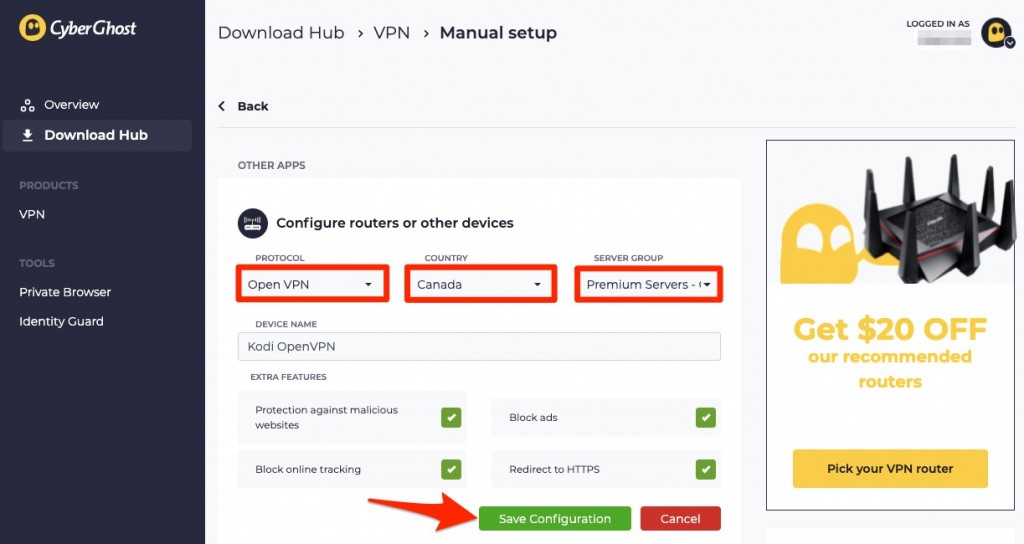
5. Fill in the required details on the next screen; do it as mentioned below. Once done, click 'Save configuration.'
- PROTOCOL: OpenVPN.
- COUNTRY: Select the country where your preferred Kodi add-on is available.
- SERVER GROUP: Choose any from the available list.
- DEVICE NAME: Enter Kodi OpenVPN
- EXTRA FEATURES: Tick all the boxes.

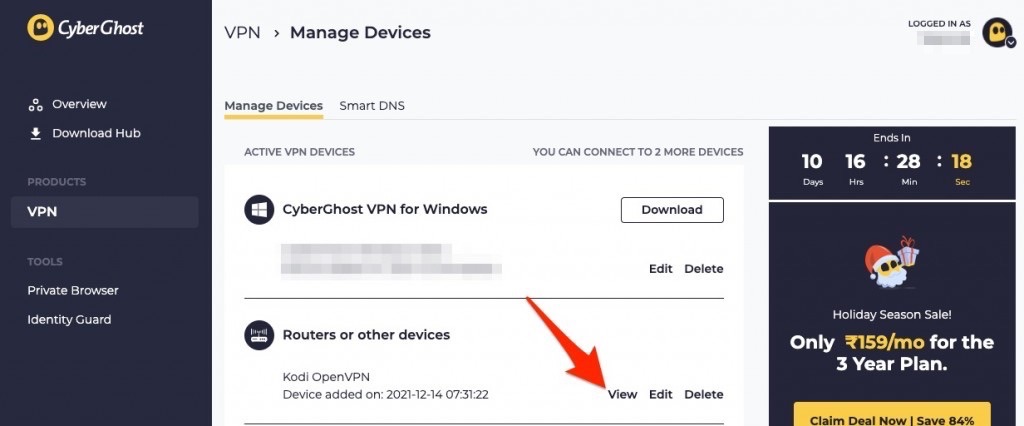
6. You'll be redirected to the 'Manage Devices' page; locate 'Routers or other devices' and click 'View.'
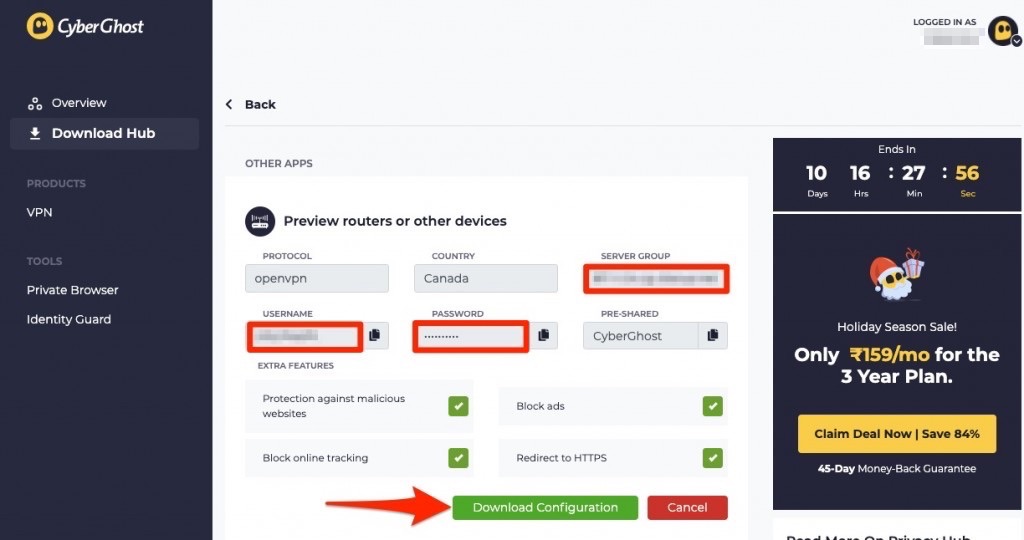
7. Now, note your username, password, and server group; then, click 'Download Configuration.'
8. The OpenVPN configuration .zip file will download now; save it in your preferred location. You'll get the below entries:
- client.key: Your private key file.
- ca.crt: Certificate from the certification authority.
- client.crt: The user certification file.
- openvpn.ovpn: Complete OpenVPN configuration.
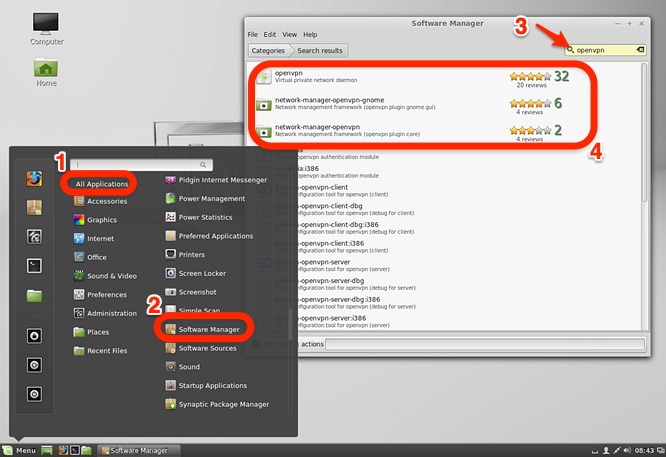
9. Install OpenVPN and the 'Network Manager' on your Linux. To do so, go to Menu > All Applications > Software Manager and search for 'OpenVPN.'
10. A list will come up next; double-click on the below programs to install:
- openvpn
- network-manager-openvpn gnome
- network-manager-openvpn
11. Ensure that already installed components are updated. Enter the following commands:
sudo apt-get install openvpn
sudo apt-get install openvpn bridge-utils
sudo apt-get install network-manager-openvpn network-manager-openvpn-gnome
sudo apt-get install psmisc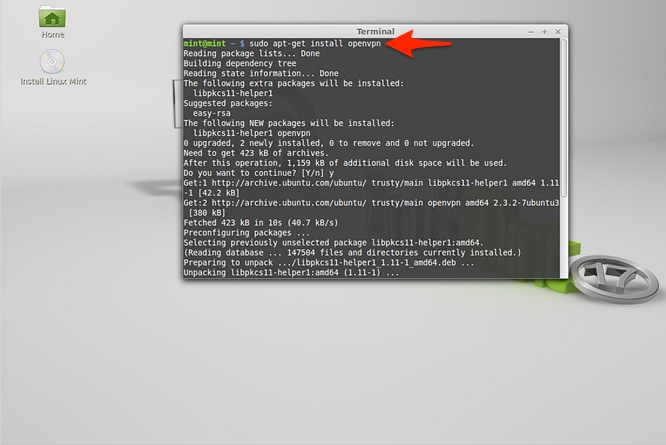
12. Next, restart the required VPN components using the following command:
sudo restart network-manager13. First, click here to download the repository of 'Kodi VPN Manager.'
14. Then, launch Kodi and navigate to the 'Add-ons' section.
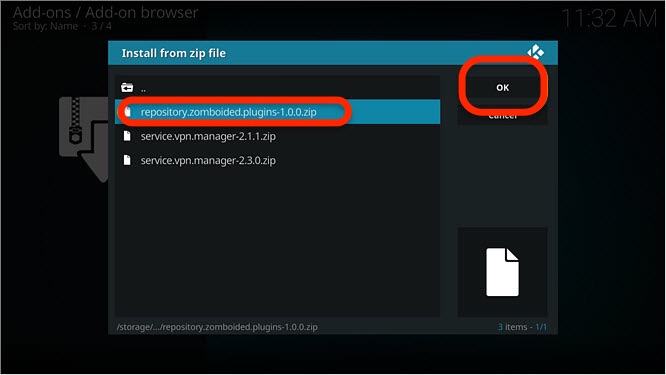
15. Select 'Install from ZIP file' and pick the path to the repository folder. Click 'OK.'

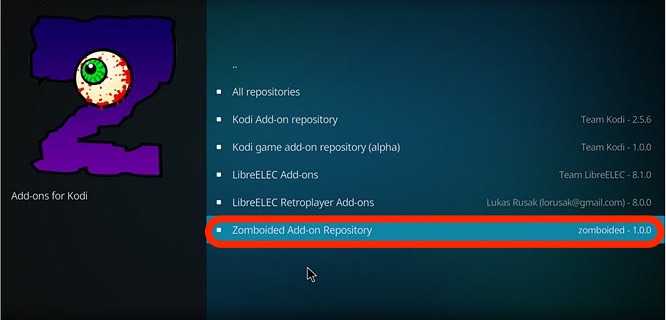
16. When the repository is installed, click 'Install from repository.'
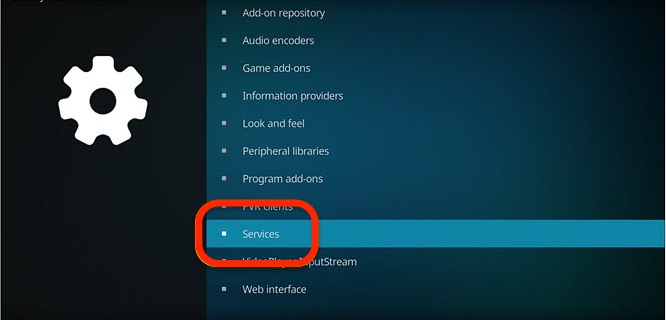
17. Select 'Zomboided Add-on Repository' and click 'Services.'
18. Hit the 'VPN Manager for the OpenVPN' button and then click 'Install.'
19. Once the installation process ends, locate 'My add-ons' and click 'Services.'
20. Next, choose 'VPN Manager for OpenVPN' and hit the 'Configure' button.
21. Move to the 'VPN Configuration' tab and click 'VPN Provider' to select 'CyberGhost.'
22. Enter your username and password that you've noted earlier.
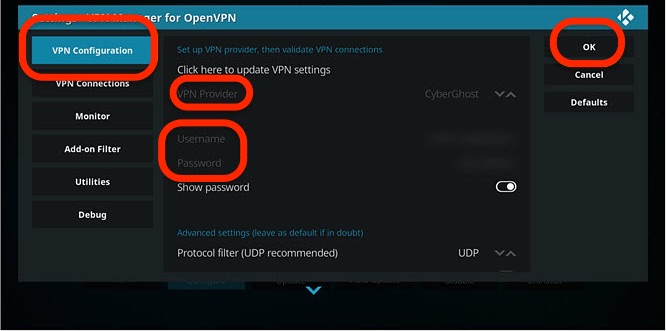
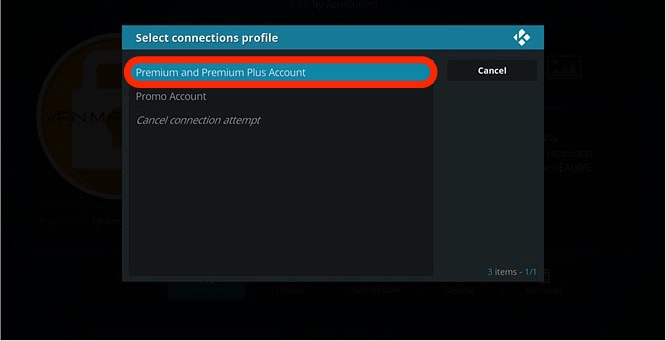
23. Hit 'OK' and choose the plan you're using under 'Select connections profile.'
24. A pop-up notification will appear, click 'OK' to proceed.
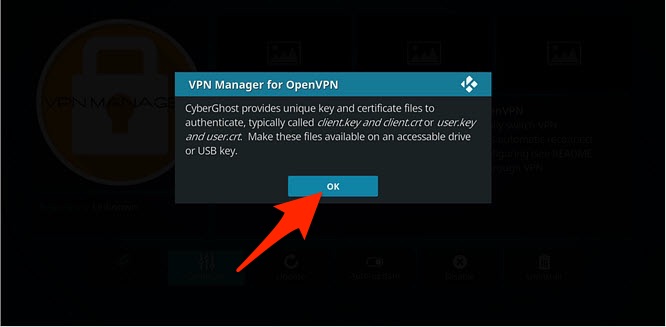
25. Select your client certificate (client.crt) and the user key (client.key) from the extracted ZIP file.
26. Once done, the VPN manager will connect you to the CyberGhost VPN.
Final Thoughts
As you can see, getting started with CyberGhost and Kodi on Linux isn't the simplest procedure. That said, keep in mind that you'll end up with total data encryption on your computer. Aside from using the VPN with Kodi, you can use it with any application to protect your traffic and unblock content.
Also, your CyberGhost subscription comes with 7 simultaneous connections. So, why try it on your other devices as well? To learn more, head over to our central guide on how to set up CyberGhost.
That's all for our guide on using CyberGhost with Kodi on Linux. Please use the comments section below if you have any questions or doubts. Thanks for reading!
Related