
How to Use Portrait Mode on iPhone X – A Quick Guide
Last updated June 16, 2021

In photography, a “portrait” refers to an image that only has the face, or the face and shoulder, of the subject. Anyone who understands a little background in photography would definitely be excited about the Portrait Mode inclusion on the latest iPhone generation. Portrait Mode on iPhone X is a type of photo format that is added to the iOS Camera app with iOS 11 update. It uses twin-lens camera to create an artistic photography effect, whereby the subject is in focus and the background becomes generally blurred or it may be totally blackened. Let's take a look at how to use Portrait Mode on iPhone X.
How to use the Portrait Mode on iPhone X
Let's take a look at how you can use this new photography mode on iPhone X.
- Launch the Camera app;
- Swipe left one step in the rotating menu so that 'Portrait' is highlighted in yellow;
- Tap the shutter button to take your portrait shot.
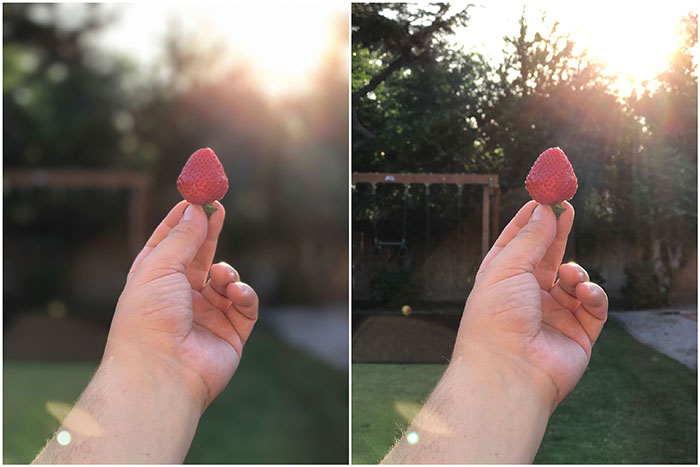
Image Courtesy of TechCrunch.com
How to optimize Portrait Mode Use
Now that you know how to use the Portrait Mode on iPhone X, we'd like to give you a few tips and tricks. Hopefully, these will help your photos to stand out.
- Find a space that isn't too busy or distracting to create a photo that really pops.
- You need the subject of the photo to be fairly close to bringing out the details, about 2.5 meters or less.
- The background needs to be significantly further away to create a more pronounced depth of the image.
- Use appropriate lighting to achieve your desired overall effects on photo composition.
- For a more cinematic look, pull down a bit the exposure.
Use Portrait Mode's Lighting Effects
At the moment, there are five lighting effect settings that you may choose from.
- Use of the default Natural Light to showcase an image's realistic texture vis-a-vis the Portrait Mode's blurry background effect.
- Utilize Studio Light to result in photos that look like they were taken in a studio, brightening highlights under the right conditions.
- Try out Contour Light to add depth and shade to your subject's lowlights for improved definition.
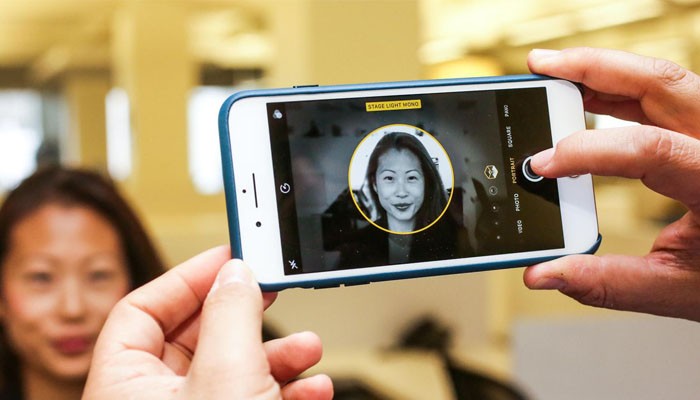
- Use Stage Light to cut out the subject and put it against a dark background, as if it is under a dramatic stage lighting.
- Finally, use Stage Light Mono to put the entire image in black and white.
Conclusion
Just like with any area of photography, you need to take some time and practice. After all, practice makes perfect, right?
In case you have your own tips and tricks, don't hesitate to post a comment using the comments section below. We'd love to hear what you think.
Related


Get expert insights on threats, breaches, scams, and security trends — delivered every Monday.
Most Popular
Get expert insights on threats, breaches, scams, and security trends — delivered every Monday.
Most Popular