When you purchase through links on our site, we may earn an affiliate commission. Here’s how it works.
How to Set Up and Use CyberGhost VPN on VU+Solo²
Last updated July 22, 2024

VU+Solo² is a digital HDTV satellite receiver that's compatible with VPN services. More precisely, you can set up CyberGhost manually using OpenVPN. In other words, you're free to pick any server, and set up an OpenVPN connection manually on your satellite receiver.
Since you'll be using OpenVPN, CyberGhost will encrypt your device's entire incoming and outgoing traffic, allowing you to unblock new content, as well as preserve your privacy.
In this guide, we'll explain the steps to configure CyberGhost on your VU+Solo² receiver. We'll make sure to explain each step thoroughly, as the following procedure can be a bit complex.
How to Set Up CyberGhost on VU+Solo²
First, you should get a subscription to this VPN. Then, you'll configure an OpenVPN connection, which you'll then add to your VU+Solo² device. Here are the steps you should follow:
1. Sign up for CyberGhost using a Web browser on your desktop or mobile device.
2. Now, visit CyberGhost's official website and click the 'My Account' button.
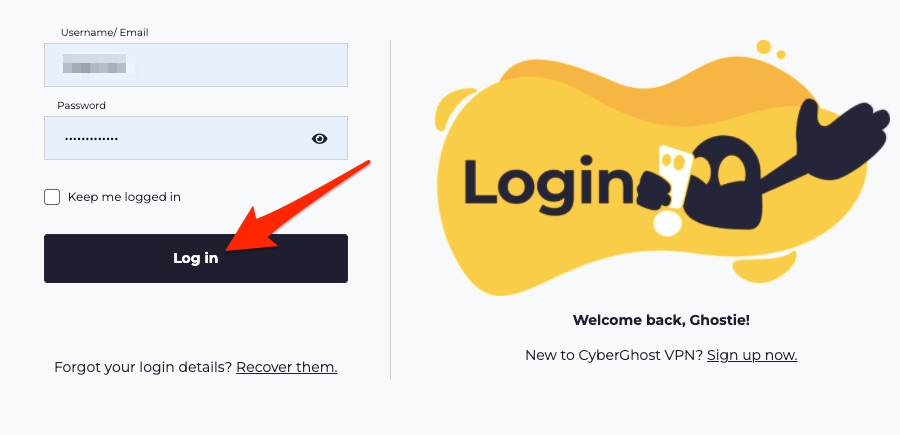
3. Input your username and password and click the 'Log in' button to proceed.
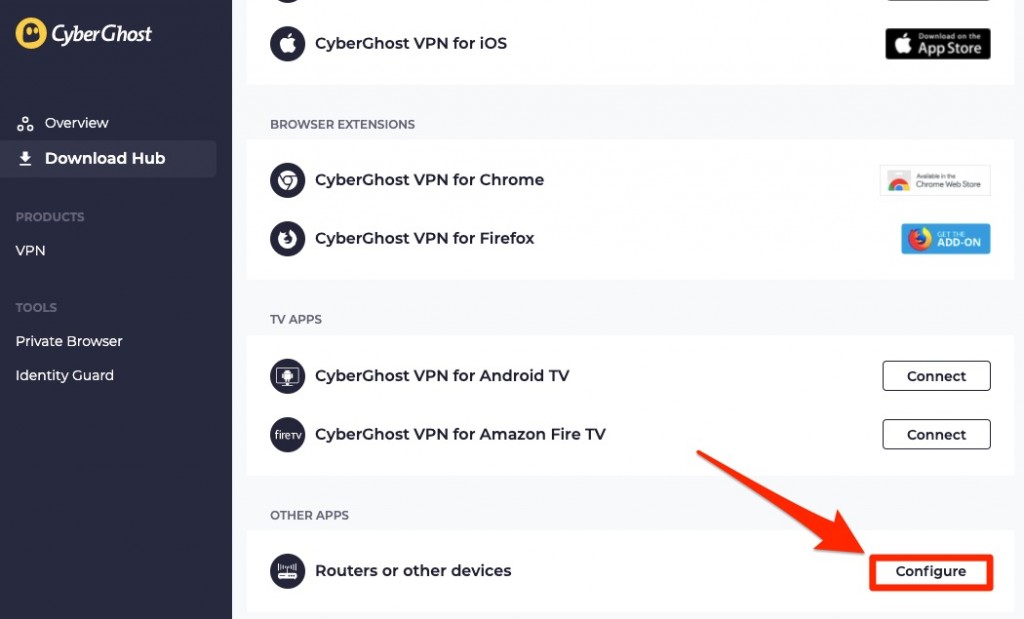
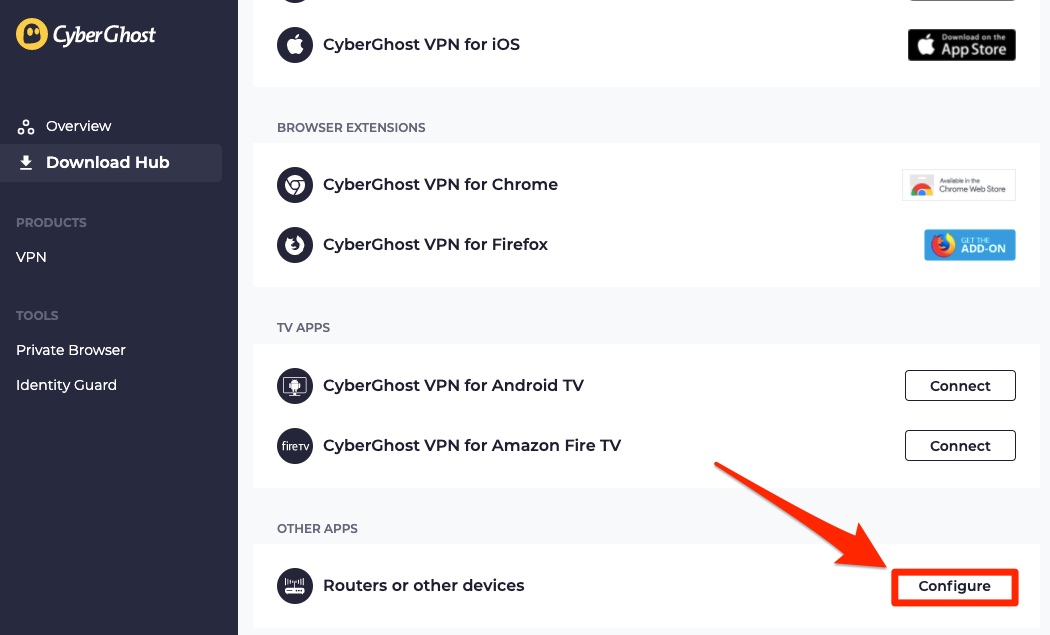
4. Navigate to 'Router or other devices' and hit the 'Configure' button on the right.
5. Next, fill in the details as mentioned below. When done, hit the 'Save Configuration' button.
- PROTOCOL: OpenVPN
- COUNTRY: Any location
- SERVER GROUP: Select one from the available options(UDP/TCP)
- DEVICE NAME: Sat Receiver OpenVPN
- EXTRA FEATURES: Tick the options that you want

6. You'll be redirected to the 'Manage Devices' page. Find 'Routers or other devices' and click the 'View' option.
7. The OpenVPN configuration will be previewed; take note of the Server Group, Username, and Password fields.
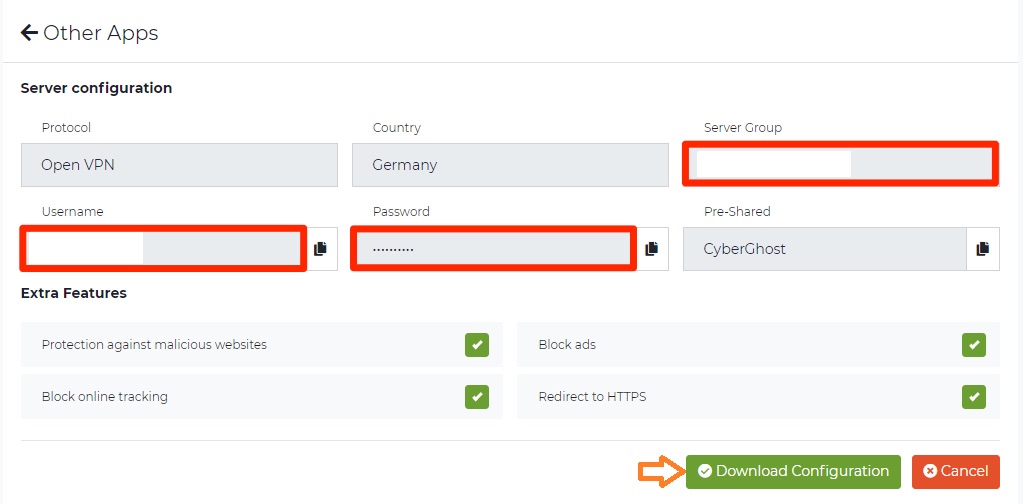
8. Once done, click the 'Download Configuration' file.
9. A .zip file will download now on your system; extract that to get the below entries:
- ca.crt: Certificate from the certification authority
- client.key: Your private key
- client.crt: User certification file
- openvpn.ovpn: OpenVPN configuration
10. Once done, rename the openvpn.ovpn file and save it as 'CyberGhost.conf.'
11. Now, save your username and password in the pas.key file to log in automatically. Type the below commands in a terminal window to do so.
sudo nano pas.key
Username
Password
12. Next, press CTRL+O to save the changes and exit the nano editor with CTRL+X.
13. Open the configuration file now with the below command:
sudo nano CyberGhost.conf14. You've to extend the line 'auth-user-pass' with the path to your credentials file:
[...]
auth-user-pass /etc/openvpn/pas.key
[...]
15. Now, connect your device through Telnet and type the following command:
opkg install openvpn16. Once the setup is finished, reboot your device.
17. Now, you need to connect your device through FTP or SSH and create a new folder named openvpn within the /etc/ path.
18. Next, copy the 'CyberGhost.conf' and 'pas.key' files along with all other certificates and the key files from the .zip file into the OpenVPN folder on your VU+.
19. Finally, you're all set to start your OpenVPN connection. Do that by following the below path: Menu > Setup > System > Network > OpenVPN Setup >Press the Green button.
Final Thoughts
Setting up CyberGhost on VU+Solo² isn't the simplest procedure - but it's well worth it. In the end, you'll get total data encryption, as well as the ability to unblock new content. Just keep in mind that you'll get those benefits as long as your OpenVPN connection is active on your device.
Aside from VU+Solo², this VPN works on a huge range of devices. So, your next destination should be our guide explaining how to set up CyberGhost on your computer, phone, tablet, router, and more.
That's all for this guide on configuring CyberGhost on VU+Solo². If you have any questions, feel free to post them via the comments section below. Thanks for reading!
Related