When you purchase through links on our site, we may earn an affiliate commission. Here’s how it works.
How To Play it Safe and Encrypt Email
Last updated July 14, 2021

Email is one of the oldest internet technologies and was invented all the way back in 1972 by Ray Tomlinson. At least, Tomlinson is responsible for some of email's more familiar attributes. It's not accurate to say that email is an internet technology as such. After all, it predates ARPANET. The primordial internet itself.
At its core email is exactly what it says on the box: a digital method of sending text messages to each other. Although email technology has evolved drastically over the decades, we are still using the same essential technology today.
The problem is that early network technologies like email assumed that everyone on the network was basically honest and not malicious. Remember that no one thought everyone in the world would use the technology. It was the military, government, and universities in the minds of these inventors.
The end result of this is that standard email is sent in plain text format. This means that anyone can read the email data just by monitoring your network packets. Not good!
Trust No One
Despite its poor privacy, email is still critical to everyone who uses the web. So what can be done to make sure that your messages are kept safe from eyes that are not meant to see them? That's exactly what we'll be showing you in this article. The technology is known as encryption, and with it, you can secure your email with confidence.
How Email Encryption Works (In General)
Most of us have actually encountered encryption in our daily lives at some point. If you've ever spoken in Pig Latin or have solved puzzles using a substitution cipher you've worked with basic encryption.
Essentially, encryption mixes up plain, understandable messages using a specific method and can only be unscrambled if you know how to undo that method. This way you can send a message to someone and know that only they will read it.
In its simplest form encryption is symmetric. In other words, you can decode the message using the same "key" as the one used to encode it. Think of Pig Latin as an example. If you know how Pig Latin words are formed, you can simply reverse that process and get the original words back.
If you use encryption with a symmetric key, you can give the key to the recipient (through another channel), and they can then decrypt the message.
More commonly, email encryption is asymmetric. In this case, there's a public key that anyone can use to encrypt the message, but only those with the private key can unscramble it. This is the more common method these days, but we'll get into the technical details shortly.
Using a VPN
Virtual Private Networks (VPNs) use encryption technology to scramble all of the data that passes through your internet connection. This means that no one looking in from outside can make any sense of the network packets passing through various nodes on the web.
This is the first layer of protection that most people should use. Yes, it's not an email-specific form of encryption, but protects your emails in transit anyway. It's no substitute for email-specific encryption though. So think of them as complementary. If you're looking for a good VPN recommendation, have a look at ExpressVPN.
Types of Email Encryption: S/MIME & PGP/MIME
There are two widely-used encryption standards when it comes to email: S/MIME and PGP/MIME.
The "MIME" bit is short for Multipurpose Internet Mail Extensions. It's the format that virtually all modern email is sent in. This is the technology that allows you to attach files and images in your email. Rich formatting and special characters are also possible thanks to MIME.
S/MIME is popular with corporations and other business clients. It uses a centralized certificate system to authenticate senders and recipients.
PGP/MIME does basically the same thing, but the certificate system is decentralized. You don't get the private and public keys from a central authority. Instead, you generate them using the PGP software.
S/MIME is pretty straightforward to set up on email clients like Outlook. If you use web-based mail like Gmail, it's easier to use a solution based on PGP. In either case, the protection is very strong.
An Important Note on S/MIME, PGP, and the EFAIL Vulnerability
While these two encryption technologies are still pretty much the norm right now, a devastating flaw was discovered in 2018 which introduces serious vulnerabilities in both. It's known as EFAIL.
The exact details of how EFAIL works are pretty complicated. The short version is that it makes use of external email content (such as HTML and images pulled from a server) to trick the target into sending a plain decrypted text to the attacker. The attacker intercepts the encrypted email (which they can't read) and then modifies it. The email is then sent to the target who has the decryption key. The decrypted text is then sent back to the attacker using the aforementioned exploit.
Since there aren't any good alternatives to the two main email encryption technologies and the actual encryption remains secure, there are some changes you need to make to stay safe:
- Disable automatic decryption in the email client. Remove the keys from your client. Decrypt it manually in a separate application.
- Disable HTML email rendering, at least until you know the issue has been patched in your client.
That should keep things safe for now, but hopefully, both S/MIME and PGP will get updates that make these exploits impossible. Until then, be extra careful in your use of either technology. Here is the list of all email encryptions below.
- Windows
- Mac
- iOS
- Android
- Gmail
Setting Up Email Encryption on Windows (Outlook)
Despite being the most vanilla of choices, Outlook is still one of the most popular email clients around. You'd think people would stop using it with the popularity of webmail, but there are still plenty of advantages to using a client like Outlook. Not least of which is the security of taking mail off the server and storing them on the local machine only.
You can set up Outlook to automatically encrypt and decrypt emails sent between you and your contacts. Before you can even start setting it all up, however, you’ll need a digital certificate.
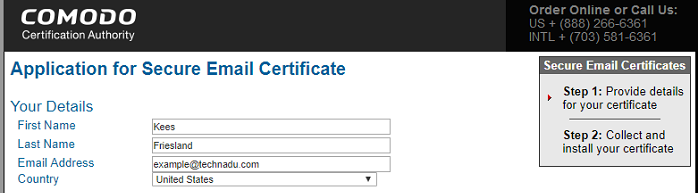
If you recall, we’ll be using S/MIME with the desktop email clients, so the certificate in question has to come from a central authority. Should it be a business email account, the company, you work for might issue you with a certificate and act as the central authority themselves. If you want a secure email in your private capacity, then you’ll have to get one from a third-party. Examples of these include Comodo and Digicert.
Before you do anything, head over to the trusted certificate provider of your choice and sign up for your private and public keys. The certificate will be mailed to the email address in question.
Here I've signed up for a free certificate from Comodo.
The Firefox Workaround
Important! Comodo still offers a free certificate, but getting their issuing to work was a little bit of a hassle. Neither Chrome nor Edge will work with their certificate issuing method anymore. All I had to do was complete the form in Firefox, and it worked perfectly!
When you receive the email, click on the link to download your certificate file.
Thanks to some sort of glitch in the latest Outlook version, you'll need to convert the certificate file using Firefox:
- Go to options
- Select privacy and security
- Click view certificates to open the certificate manager
- Choose import
- Open the downloaded certificate (remember to change the file type)
- In the certificate manager, choose backup
- Save the certificate in a location of your choice as a .p12 file and set a password. Remember this password!
We're going to import this converted certificate into Outlook later.
Outlook Setup
Now that we have the certificate, it's time to set it up in Outlook.
I'm using the latest Office 365 version, but most recent versions work in a very similar way.
Step 1: Click File>Options. You should see this window.
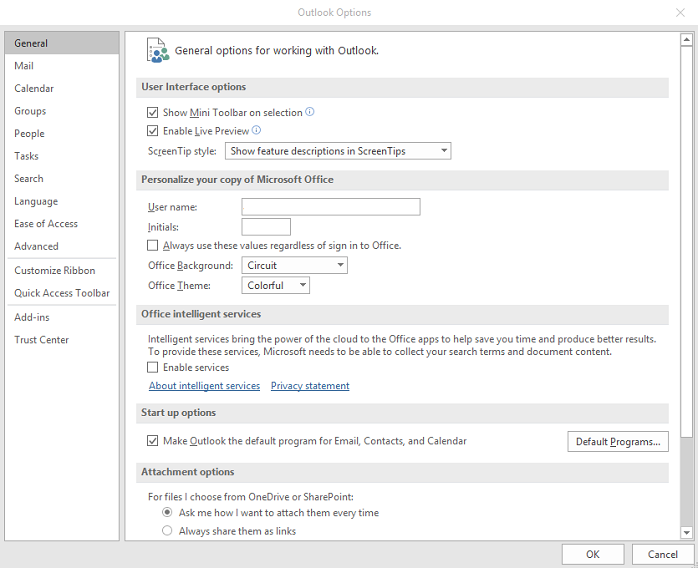
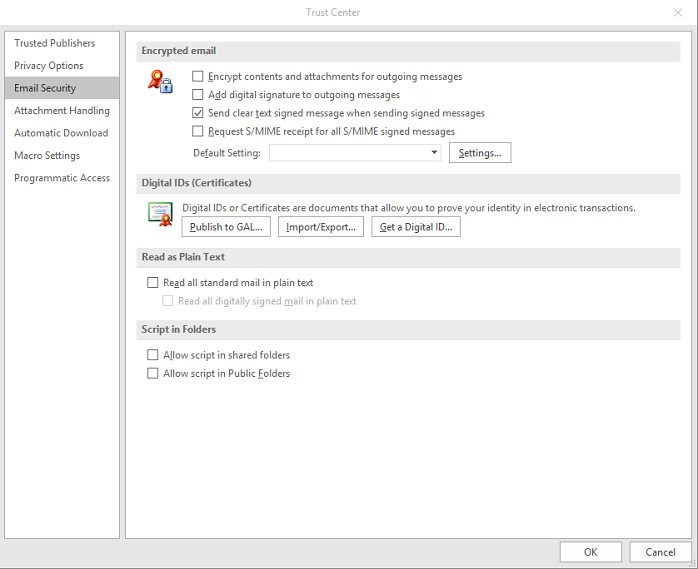
Step 2: Click on Trust Center>Email Security. This is what you should see:
Step 3: OK, now click on Import/Export. This dialogue box should open:
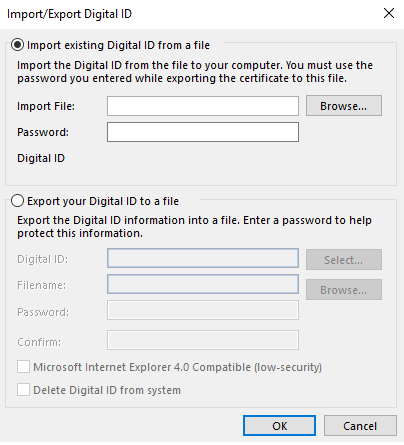
Click on Browse, navigate to the certificate you saved from Firefox, enter the password you used when creating it and click OK.
Step 4: Go back to Trust Center > Email Security and Click on Settings under Encrypted E-mail
It should look like this example:
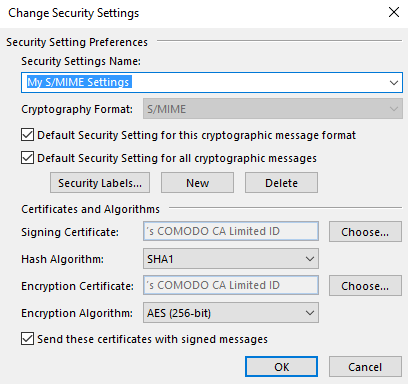
Step 5: Hit OK, and you should be good to go.
Sending Encrypted Mail in Outlook
Now we are ready to send some encrypted email, but you also need the other person's digital signature to decode each other's messages.
To do this each of you will have to send one another a non-encrypted email containing your digital signature. Microsoft has a very short and sweet set of instructions on how to do this right here. Once you have each received a digitally-signed email from one another, you can select the encryption option in the new mail window under the options tab.
Setting Up Email Encryption on a Mac
If you’re not a big fan of Windows and have chosen to join the Church of Apple, then you’ll have to follow a different path to getting your mail client to send encrypted messages.
That being said, it's easier on Mac-OS than in Windows. The built-in email client has native support for S/MIME, so it's pretty much smooth sailing.
Getting a Certificate
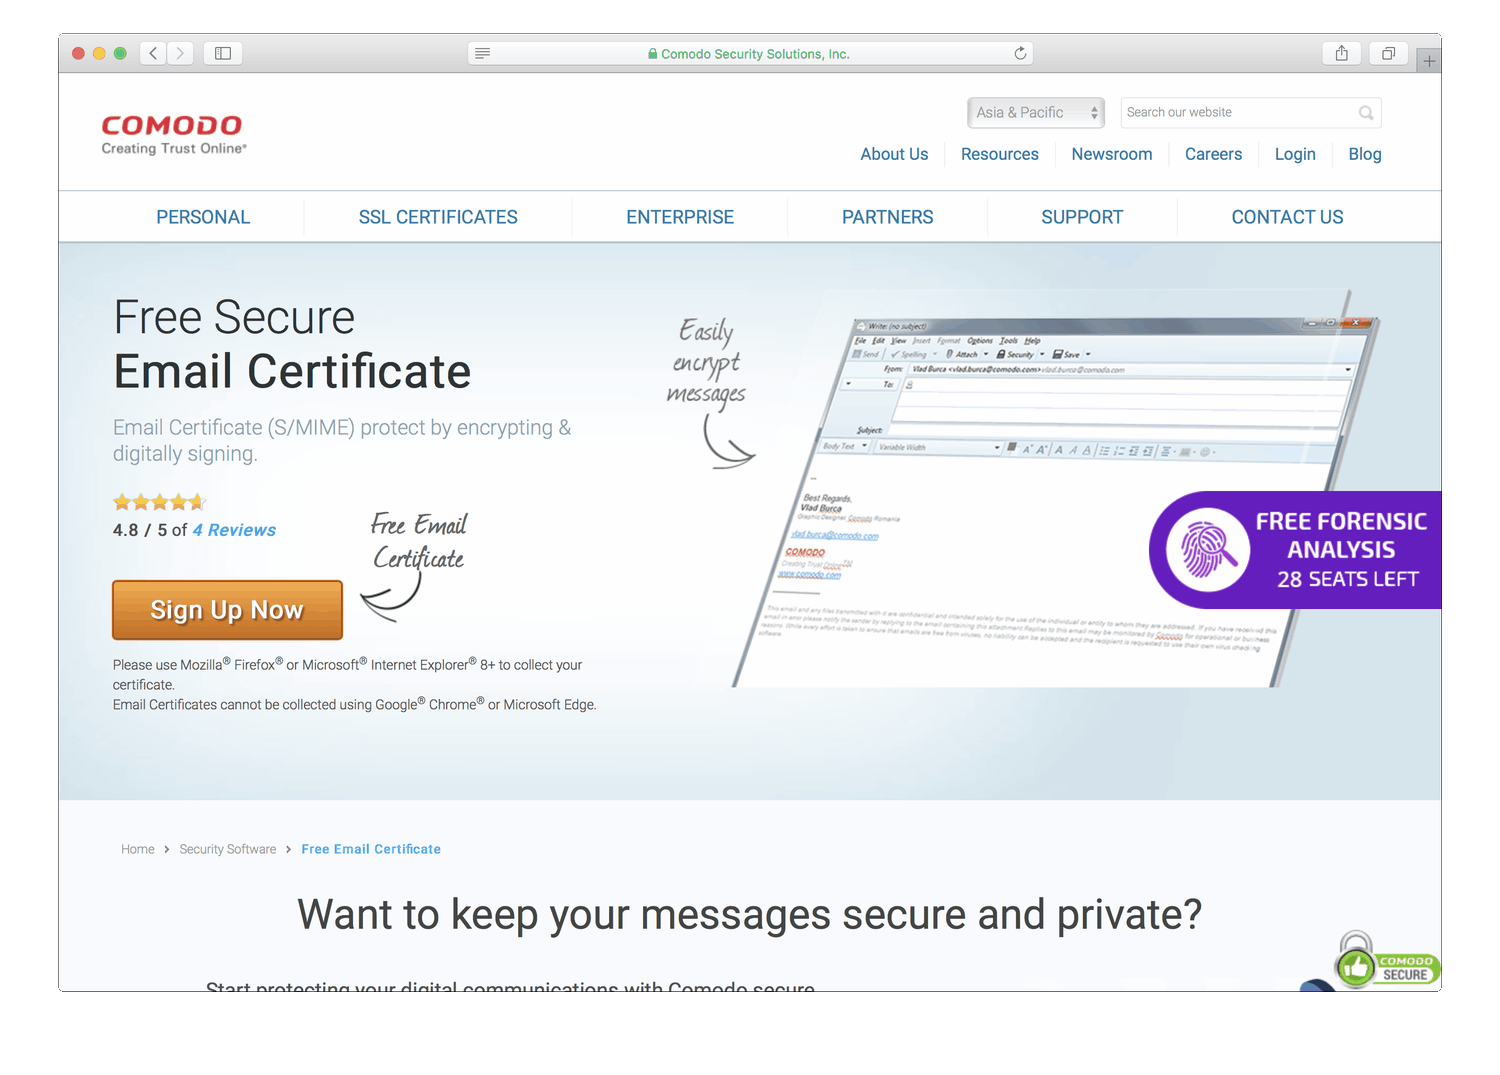
As with Outlook, you first need to get a certificate from a certificate authority. As always, you can get it from whomever you want, but we're going to use Comodo again since its compatible and free.
Step 1: When on the site, just click "Sign Up Now" on the free secure email certificate page.
Step 2: Fill in the form as directed. Be careful to put the exact Email Address in.


Step 3: If all goes well, you'll get a success message.

Step 4: Now check your inbox for the certificate link. Click it to download the certificate.
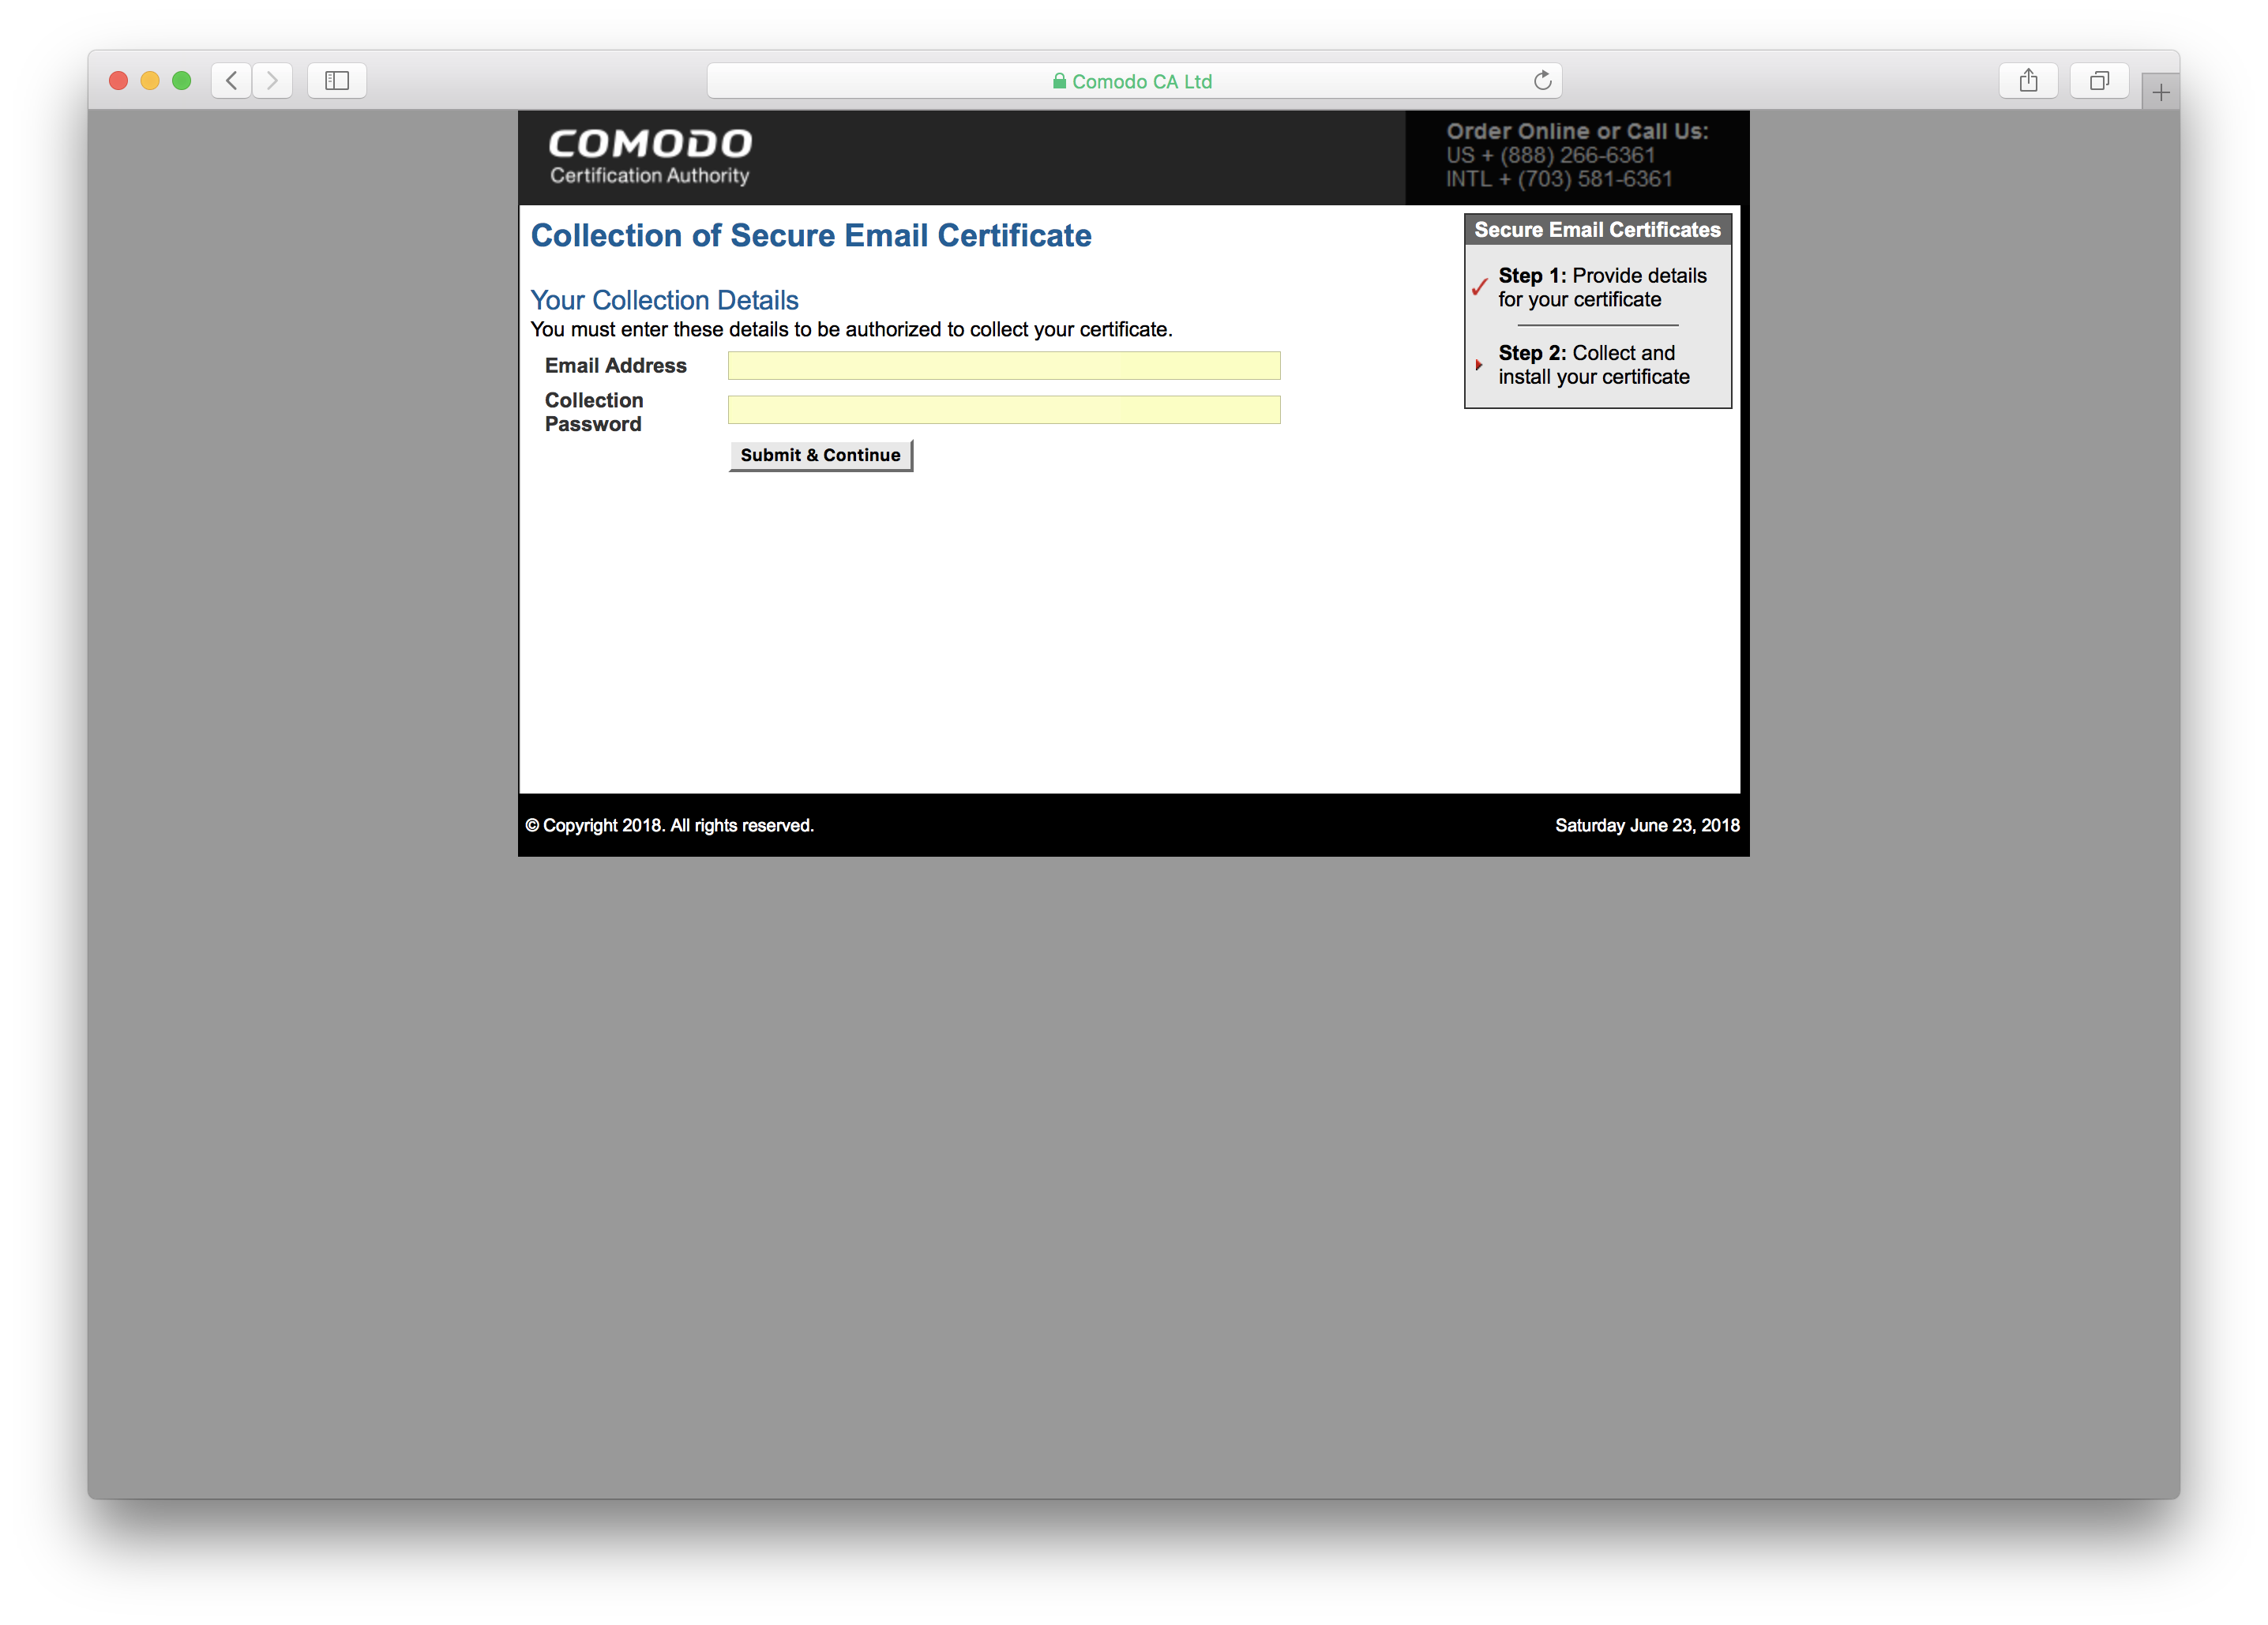
Step 5: You'll need to use the Collection Password that you received in the mail just moments ago. Enter it and download the certificate.
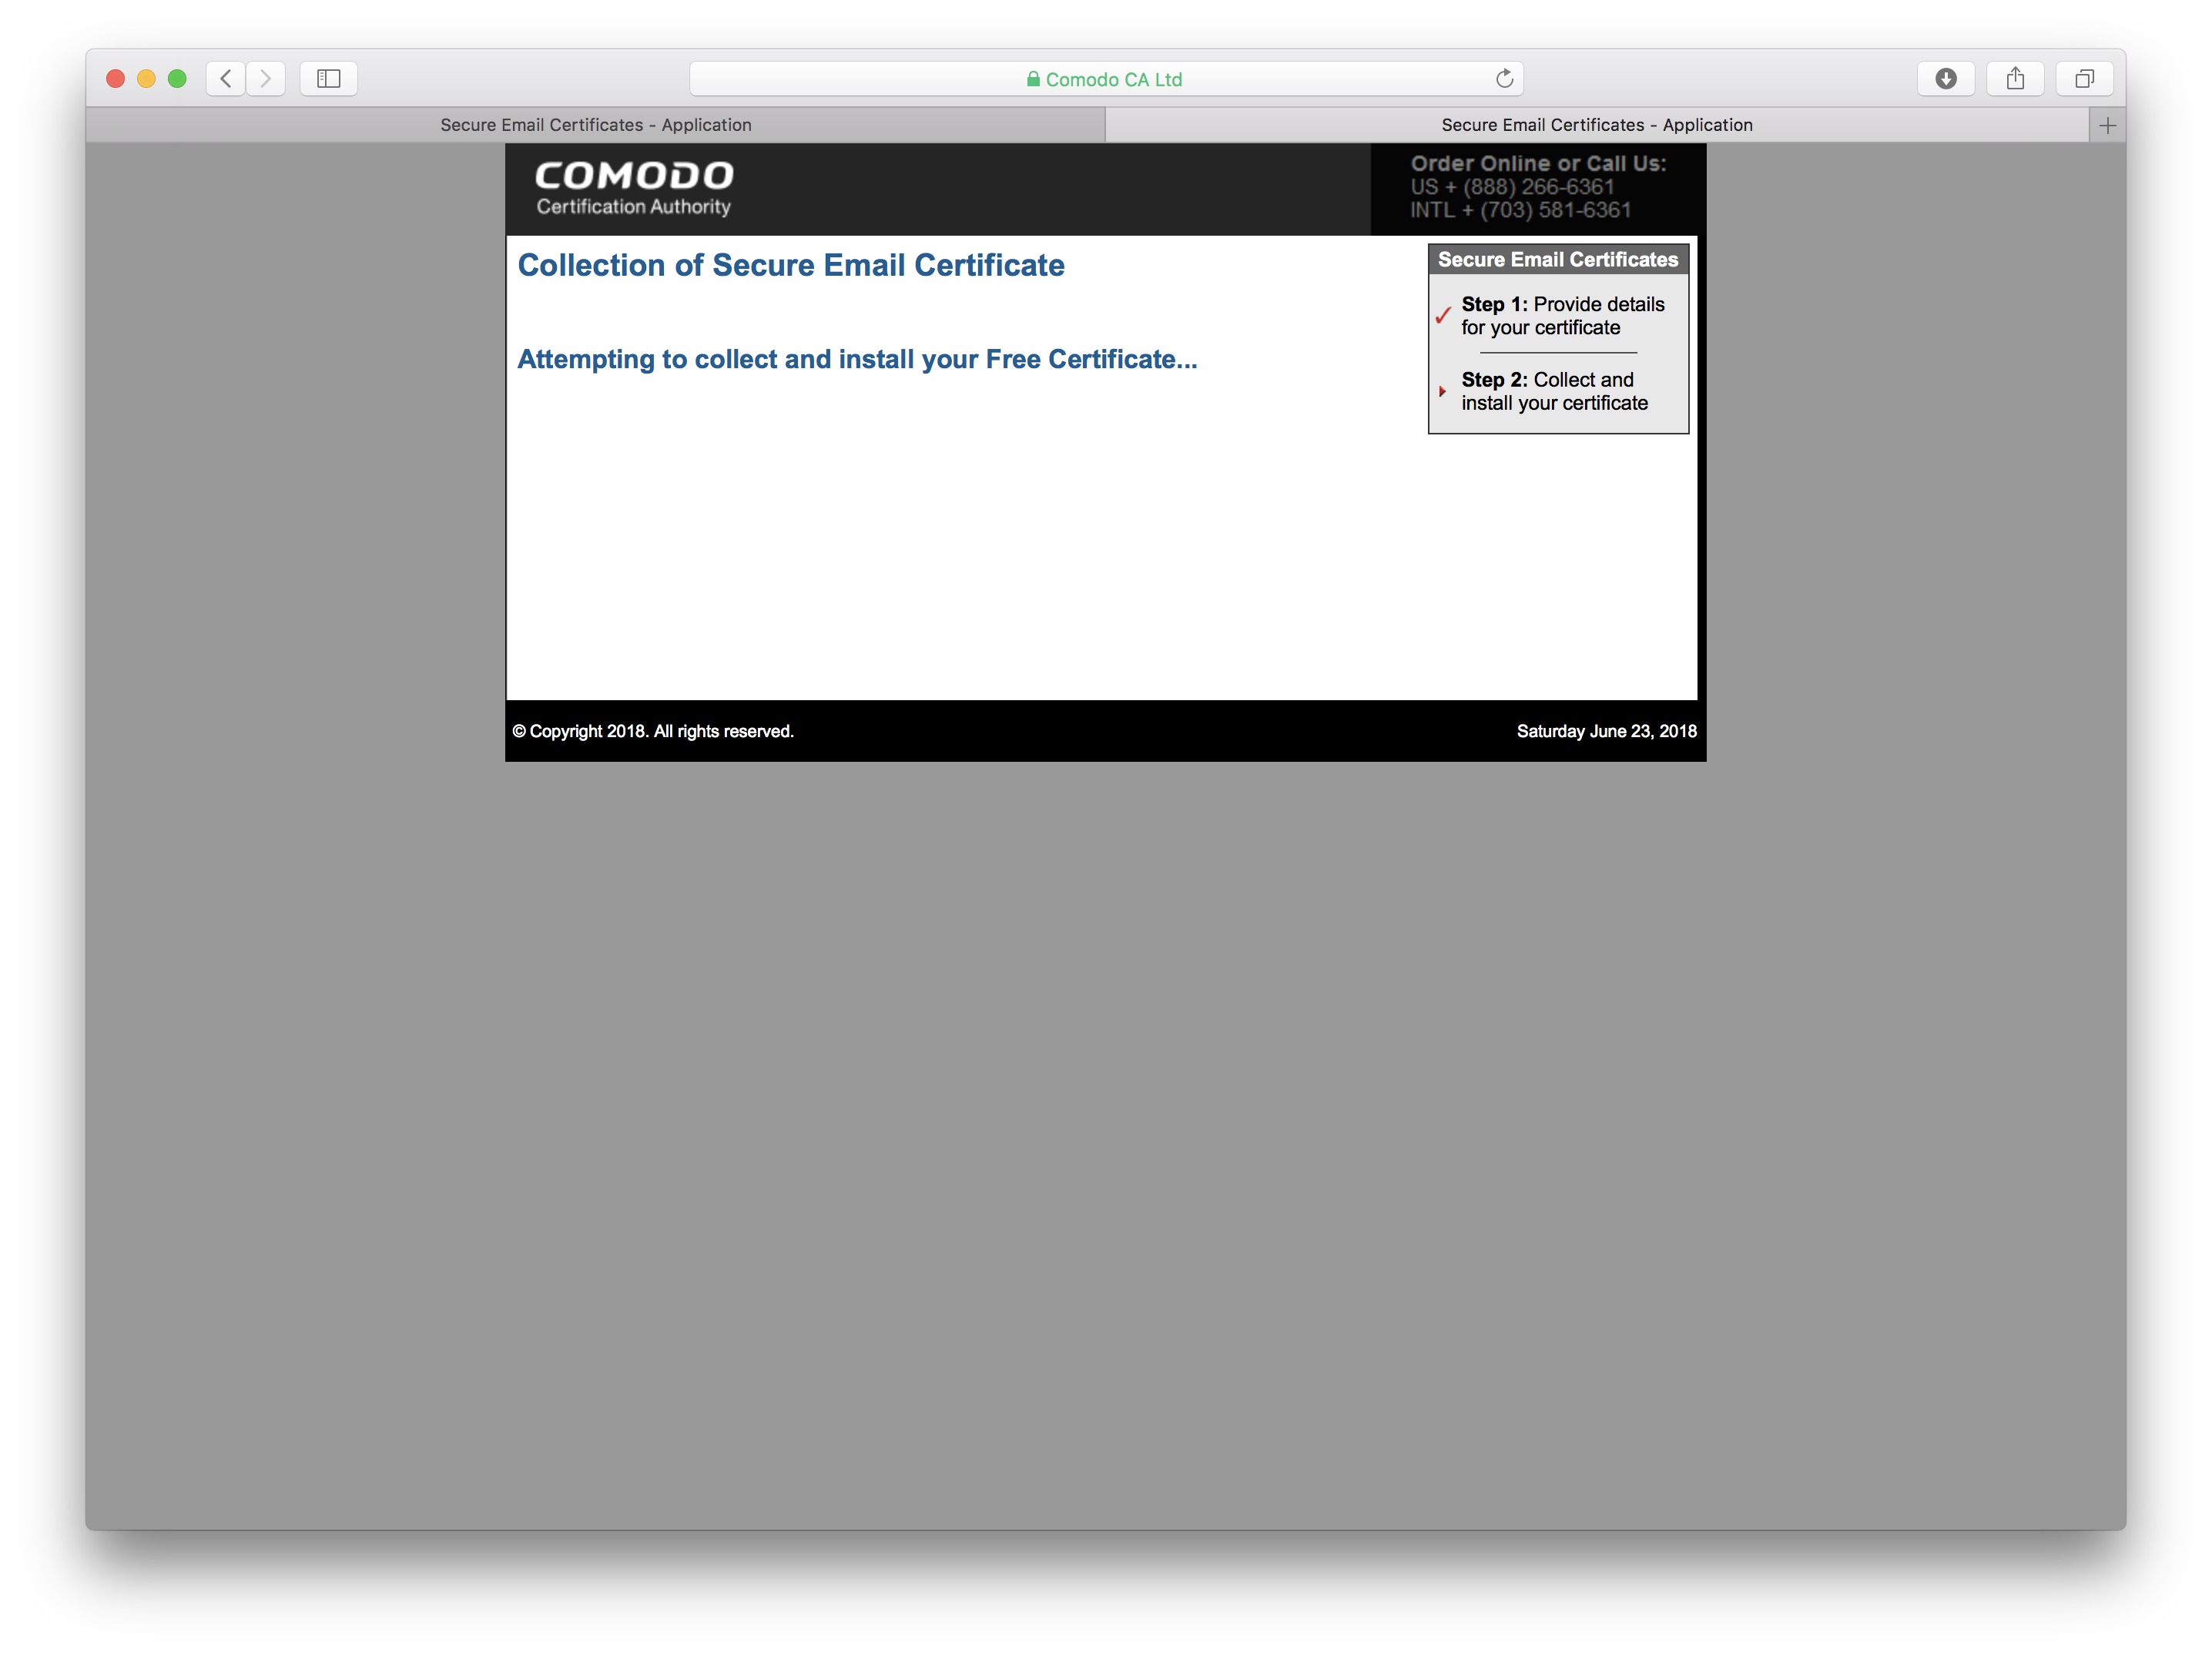
Step 6: The certificate should download to your system. If you are using Chrome, it won't work properly instead use Safari.
Step 7: Navigate to the download location and run the file. An "add certificates" wizard should pop up to help you.

If you want to use the certificate on other Macs you'll have to export it on the Mac with the certificate using the Keychain Access application. On the target machine, you'd use the same app to import the certificate and add it to the keychain. Alternatively, if you keep the downloaded file, you can copy it to other Macs the usual way.

Configuring the Apple Client
Step 8: Now that you're certificate is installed, open the Mail (Apple email client). If it was already open, restart it.
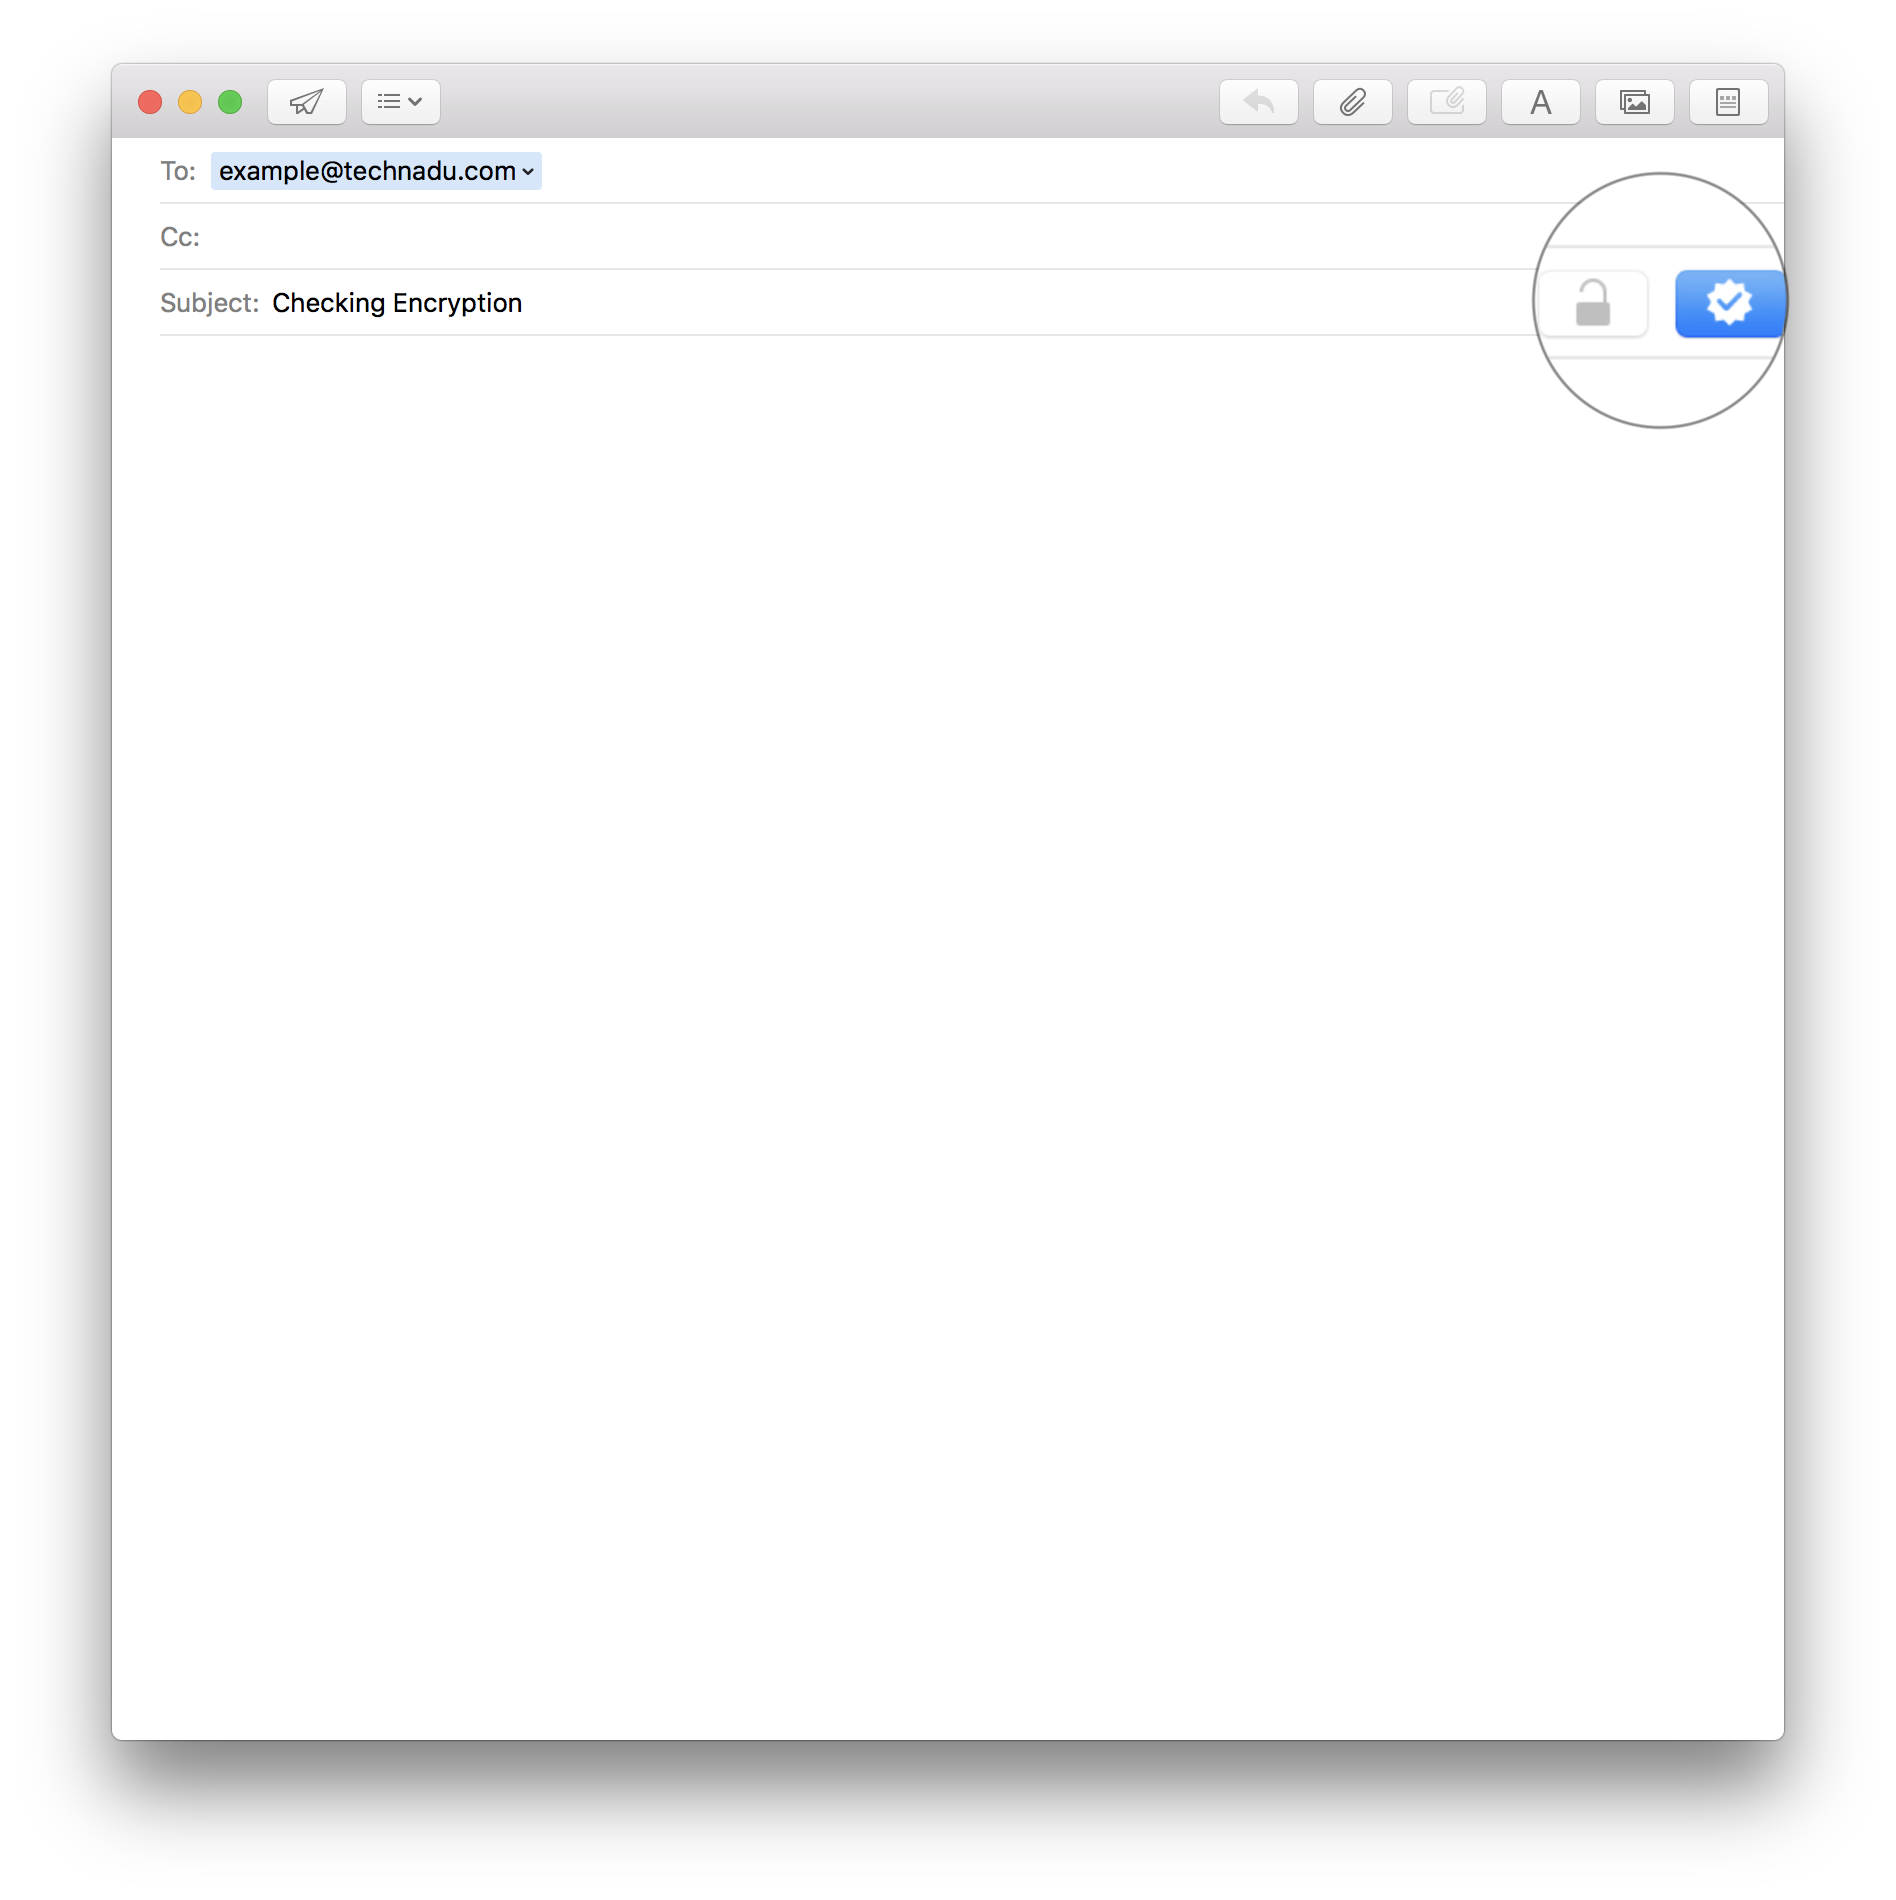
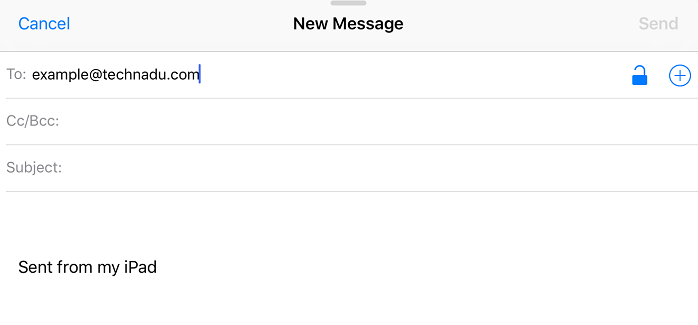
Step 9: Compose a new email; you'll see a little blue check mark on the subject line of the mail. This indicates that the application is going to digitally sign the mail with your certificate. You'll also see a grayed out open padlock icon next to it. This means you can't encrypt the mail since you don't have the recipient's certificate yet.
Step 10: Now send an email (blank if you like) to the person. Just remember not to put any sensitive info into this non-encrypted mail! When you first send a signed mail to a person, MacOS should ask you for permission to use the certificate. Feel free to choose "Always Allow."

Step 11: The person should send a similar signed, yet blank email back. Now you both have each other in your respective keychains.
Now when you send a mail to that person, you'll see the little padlock icon is blue and closed. If you want to disable encryption, just click the little padlock to open it. That's all! Your emails to that recipient will be encrypted in future. Just remember to exchange certificates with anyone the first time.
Email Encryption for iOS Devices
In the greater scheme of things, not that many people use Macs. Windows is still by far the most dominant operating system out there. When it comes to phones and tablets, however, things aren’t quite so skewed. While Android has the most users, Apple owns a significant portion of the mobile market. On top of this, the average person is more likely to send their emails from a smartphone than a PC these days. So it’s extra important to have some form of email encryption set up on your iPhone or iPad.
The good news is that the native email application in iOS supports S/MIME natively. It's much easier to get working than the above Outlook process.
Step 1: Go into iOS settings and then to accounts and passwords.
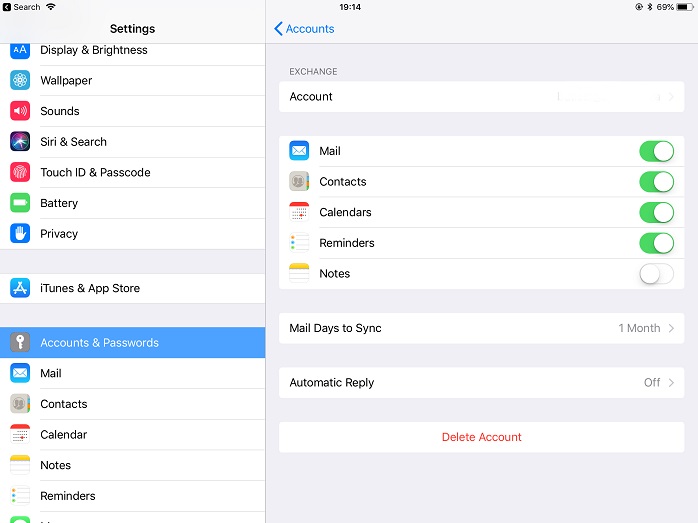
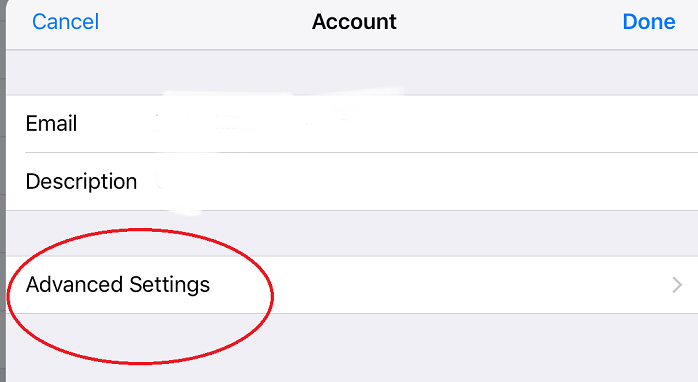
Step 2: Choose the mail account in question. Tap the account again on the next screen, then tap on advanced settings.
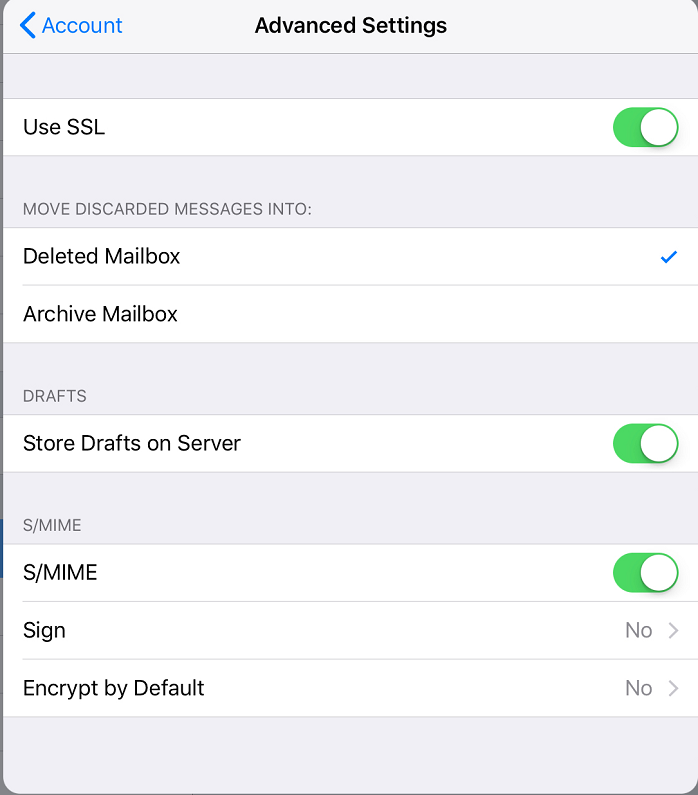
Step 3: Now switch S/MIME on. Be sure to change Encrypt by Default to Yes.
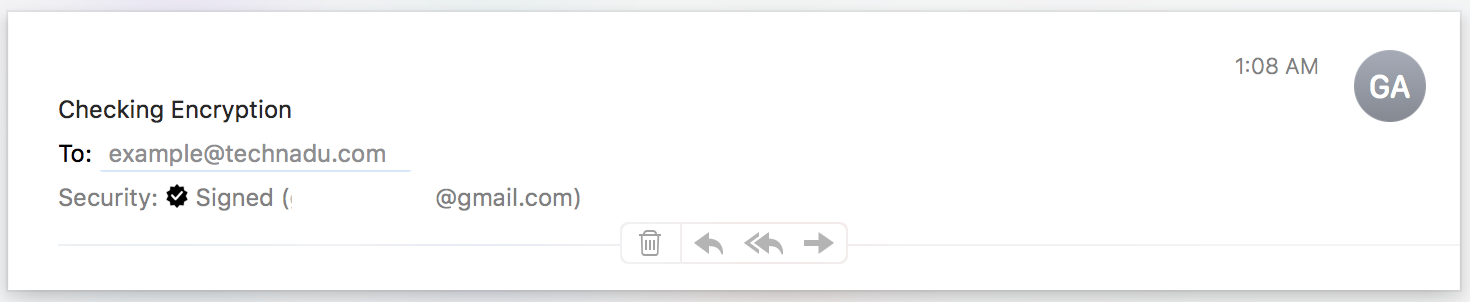
Step 4: That's all you need to do since your iOS device will pull certificate info from a global server list. You'll see a little padlock next to recipient names like this:
Just tap it, so it closes, and the email will be encrypted. If the padlock is red, it means there's no certificate found. All that person has to do is send you an email with their certificate attached.
When they have done this, you'll need to tell iOS that you trust the certificate. You can do this in the actual email with the certificate attachment:
- Tap their address in the email.
- Now tap view certificates.
- Then tap install.
- Choose done.
Now that person should have the blue padlock as well. By the way, if you want to attach your own certificate to a message, you can switch that on under advanced settings too.
Email Encryption for Android Devices
Android phones are the most popular mobile devices in the world, and nothing beats sending and receiving emails on the go, which is why most people do it. The good news is that you can secure the emails sent from your Android device easily using encryption technology.
The bad news is that, unlike iOS, there aren't many mail client apps that have native S/MIME support. That's a bit of a pain, but we can work around it.
As is the usual case with Android, you have a few choices available when deciding how to encrypt your mail, First of all, you can choose whether you want to use S/MIME or PGP/MIME. Personally, since we already went through the trouble of getting a certificate, I would go with S/MIME.
Email Encryption with Ciphermail
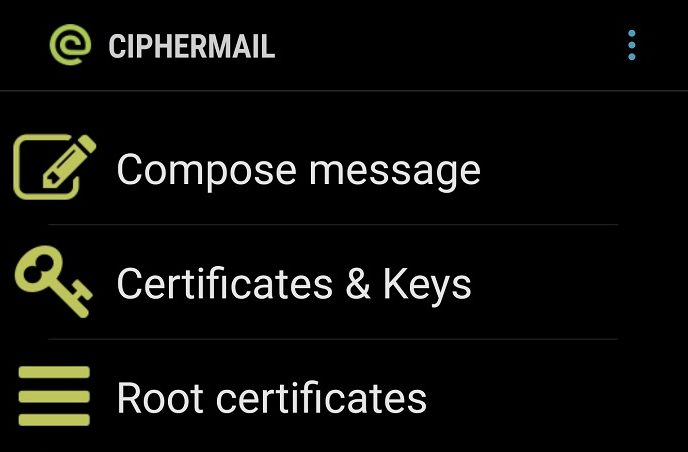
You can grab Ciphermail directly from the Google Play Store. This app doesn't send and receive email at all. Instead, it relies on another mail app like Gmail or the Android mail client.
To use Ciphermail, you'll have to do the following:
- Import all the certificates for the recipients you need to send secure email.
- Import your own certificate.
- Configure the SMTP settings for your mail service.
Don't know how to do any of those things? Luckily Ciphermail has created a Ciphermail Quick Start Guide that will get you rolling in no time! The app itself also has an excellent wizard that will guide you through everything in minutes.
Email Encryption for Gmail
Gmail is one of the most popular web-based email applications in the world. Created by search giant Google, this service hit the 1 billion user mark back in 2016 already.
Google has been beating the privacy drum for some time, and so you'll be happy to know that Gmail has built-in automatic encryption. Specifically, it uses Transport Layer Security to encode emails.
That's awesome, right? However, there's a catch to this, and it's a rather big one. It only works if the person you're sending the message to is also using a provider that runs TLS. In practice, this means that if you're sending something to another Gmail user, you don't have to do anything special. Your email is already safely encrypted. If the email address is not a Gmail address, then all bets are off.
The simplest solution to this is asking the recipient to provide you with a Gmail address. Given that Gmail is free, it's not such a tall order. Sometimes, however, it's just not possible for some reason. That's when you should use an encryption plugin for Gmail.
Using an Encryption Plugin for Gmail
If you are using Chrome, you can download email encryption tools from the Chrome Web Store. They neatly insert themselves into the Gmail app and let you write encrypted messages easily. All you have to do is provide a password, and if the recipient enters it, they'll decrypt the message.
Of course, that raises the question of how you get the password to the recipient. You can't encrypt that! Giving them a call, telling them in person (for future reference) or using an encrypted chat app are all good solutions.
I suggest FlowCrypt as a starting point. Although it uses PGP, the software was patched almost as soon as the EFAIL announcement was made.
FlowCrypt Installation Instructions
Here's how to install FlowCrypt in Chrome.
Step 1: Open Chrome. At the top left of the browser window, click "Apps."
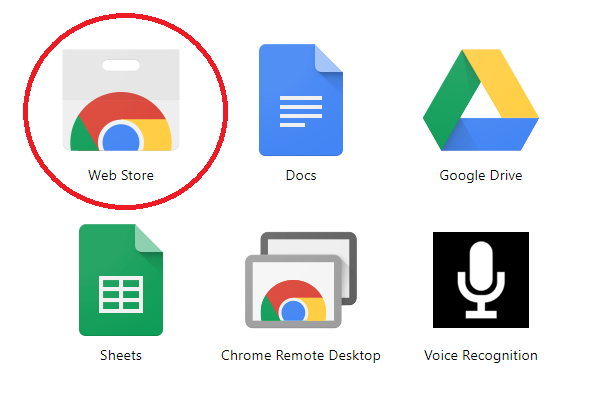
Step 2: Now Click on "Web Store". This will take you to the storefront.
Step 4: In the web store, search for 'Flow Crypt."It should look like this.

Step 5: Click "Add to Chrome." This will install the extension.

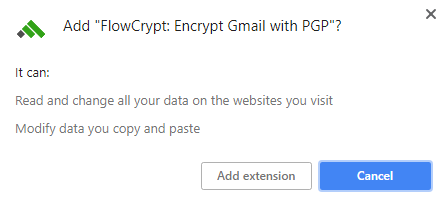
Step 6: When Google asks, agree to add FlowCrypt.
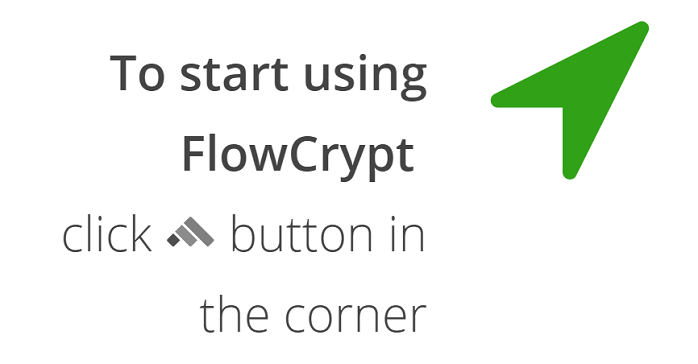
Step 7: Click the FlowCrypt icon at the top right of the browser window.
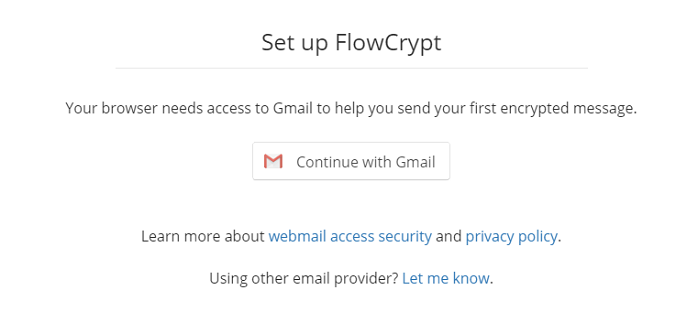
Step 8: Click on "Continue With Gmail"
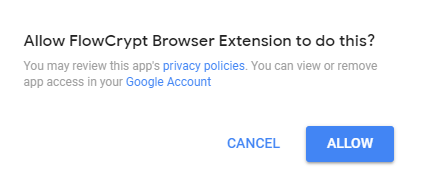
Step 9: Now click "Allow" when asked for permissions.
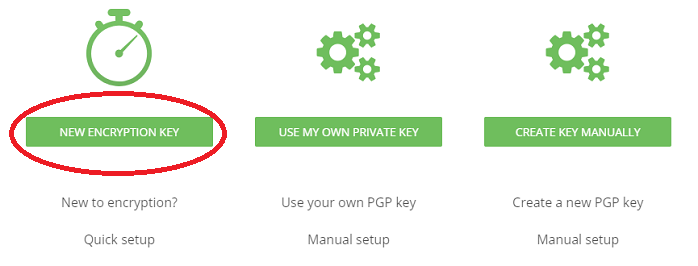
Step 10: After doing this, you'll be asked what encryption key you'd like to use. Most people can just click on "New Encryption Key," which is the quick setup.
Step 11: Following this, you'll have to set quite a strong passphrase. Make sure you either never forget it or write it down in a safe place.

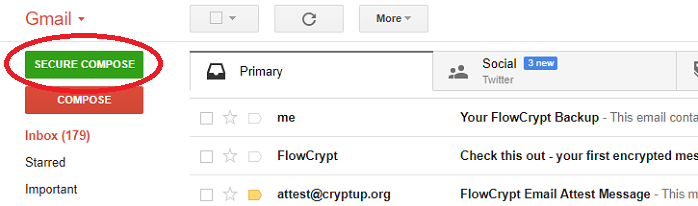
Step 12: Now all you have to do when sending encrypted mail is click "secure compose" in Gmail.
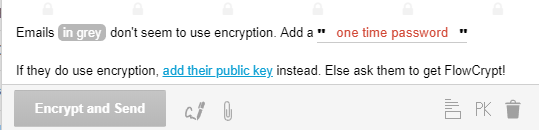
Step 13: If the recipient doesn't have encryption, just click "add one-time password" in the email compose window and choose one. The person on the other end can use the password to unlock their message.
Keep It Secret, Keep It Safe
Yes, when Gandalf the Grey uttered those words in the Lord of the Rings he wasn’t referring to your emails. But the advice is still just as relevant. Not every email you send has to be secured with strong encryption. The real test is when you imagine what would happen if some stranger could read the email in question. If the answer is “lots of bad things” then you should probably encrypt it.
As we saw above, it’s not hard to set up good email encryption. Once you have your client and certificates sorted, it’s about the same as sending a regular email regarding difficulty.
While there are alternatives to email, such as Signal, the fact is that we’ll be using this ancient form of electronic mail for years to come. In fact, email is much more likely to evolve than disappear. So if you are going to use it, use it safely!
Related


Get expert insights on threats, breaches, scams, and security trends — delivered every Monday.
Most Popular
Get expert insights on threats, breaches, scams, and security trends — delivered every Monday.
Most Popular