

When you purchase through links on our site, we may earn an affiliate commission. Here’s how it works.
How to Set Up and Use NordVPN on iPhone and iPad
Setting up NordVPN on your iPhone or iPad is quick and straightforward, making it easy to stay private and secure while browsing or streaming. Whether you're traveling or just want to unblock content, using a VPN on iOS ensures your data stays protected on any network.
In this article, we'll teach you how to set up and use NordVPN on iPhone and iPad using NordVPN's native app and manual configuration. But before we delve into that, first let's explore what you need before installing NordVPN on your device.
Things You Need Before Installing NordVPN on Your iOS
Before you can set up and use NordVPN on your iPhone or iPad, there are a few essential prerequisites to keep in mind. First and foremost, you’ll need a valid NordVPN subscription. While the app is free to download from the App Store, its core functionality, including access to NordVPN’s global server network, is locked behind a paid plan. Fortunately, NordVPN offers several pricing tiers, and once you’ve subscribed, you can use the same account across multiple devices, including both your iPhone and iPad.
You’ll also need an active Apple ID to download the NordVPN app from the App Store. This is a standard requirement for any app installation on iOS devices. If you don’t already have an Apple ID, you can create one for free by visiting Apple’s official website or through your device’s Settings menu. Make sure your Apple ID is signed in and connected to the App Store to ensure a smooth installation process.
Finally, confirm that your device is running a compatible version of iOS. NordVPN supports devices running iOS 13.0 or later, which covers most iPhones and iPads released in recent years.
To check your current version, go to Settings > General > About, and update your software if necessary by navigating to Settings > General > Software Update. Keeping your iOS up to date not only ensures compatibility with NordVPN but also provides essential security and performance improvements.
How to Set Up NordVPN on iOS (iPhone and iPad)
You can install NordVPN on your iPhone or iPad in 2 different ways. The easiest method is to download its native iOS/iPadOS app from the App Store. This will give you access to all the security features that NordVPN offers for your device. The only requirement is iOS or iPadOS version 14.2 or newer.
If you don't want to use NordVPN's app, you can configure the VPN manually. However, you'll be able to configure the OpenVPN protocol only and won't get the option for other protocols NordVPN offers (NordLynx and IKEv2/IPsec). Plus, you'll have to re-configure it every time you wish to change your VPN server location. Let's explore the best ways to setup NordVPN on iOS.
Method #1: Download the NordVPN Native iOS App
With this method, you can start using NordVPN on your device in less than a minute or two. You'll also automatically get access to all its features and new updates. Here's a step-by-step guide for it.
1. Sign up for NordVPN using your iPhone/iPad and any Web browser.
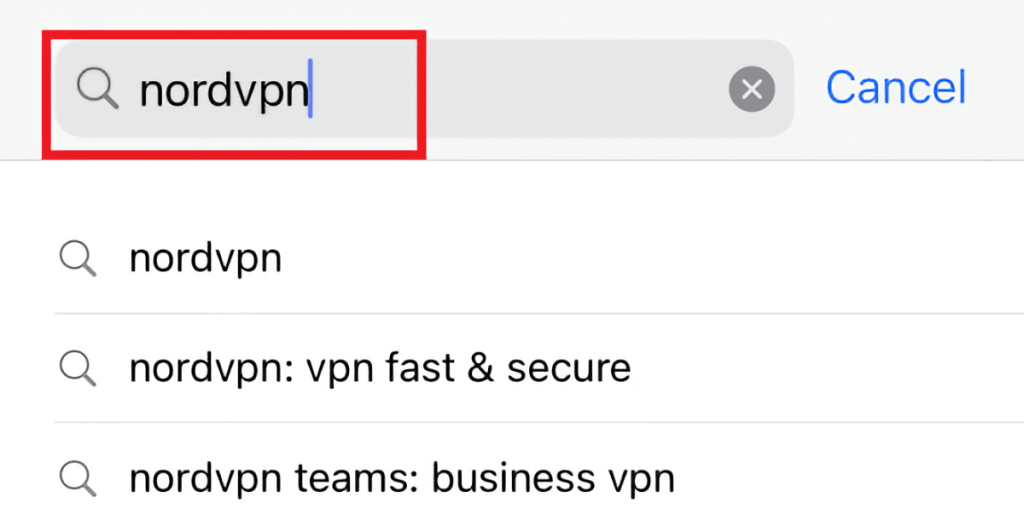
2. Visit the App Store and use the Search tab to look up 'NordVPN.'

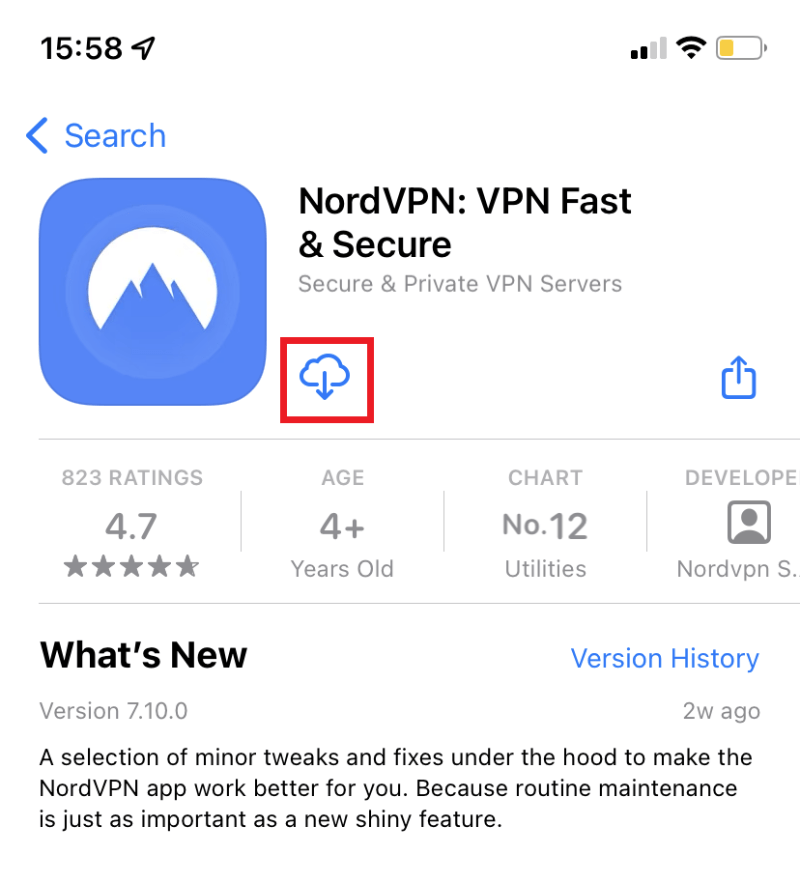
3. Tap on NordVPN's icon, and you'll open its App Store overview.
4. Then click on the 'Download' button, and NordVPN will automatically install on your device.
5. Once the app is installed, tap 'Open' and then select 'Log In' from the app's main screen.
6. Enter your NordVPN email and password.
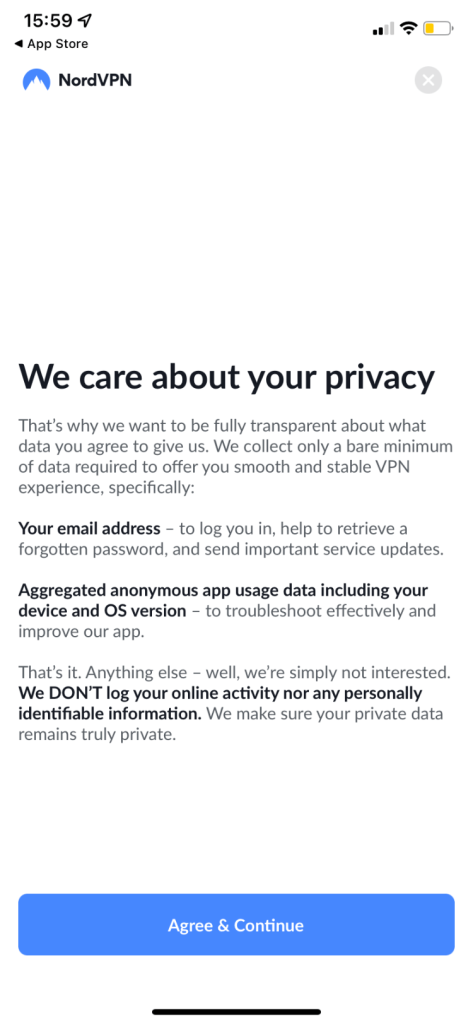
7. Tap 'Agree & Continue' to accept NordVPN's privacy policy.

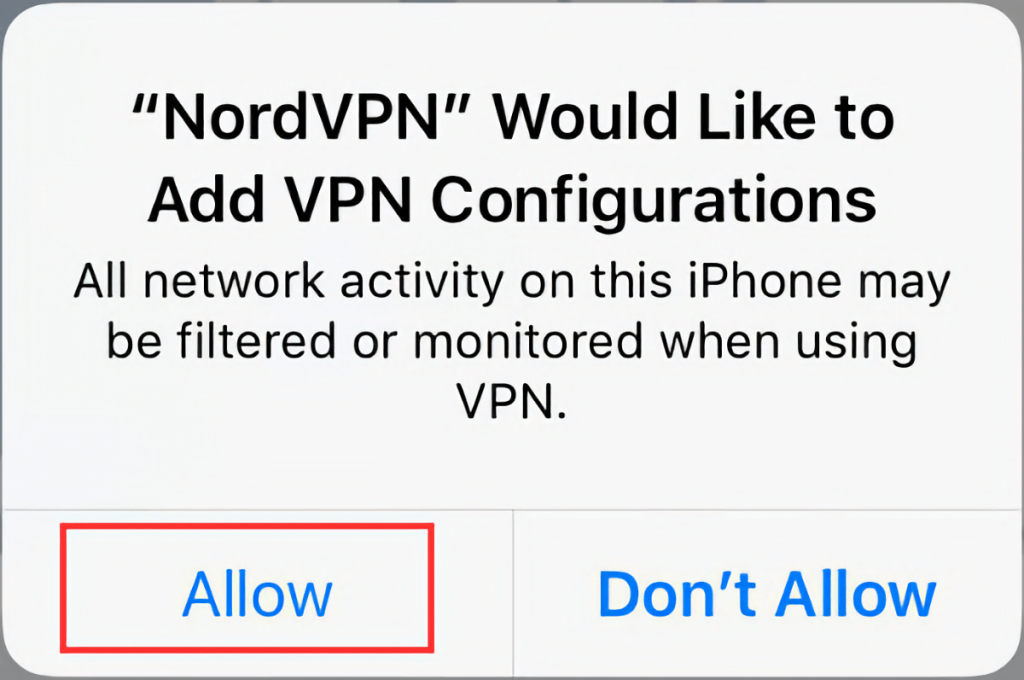
8. Choose 'Allow' to add the VPN configurations (this is a one-time setup).
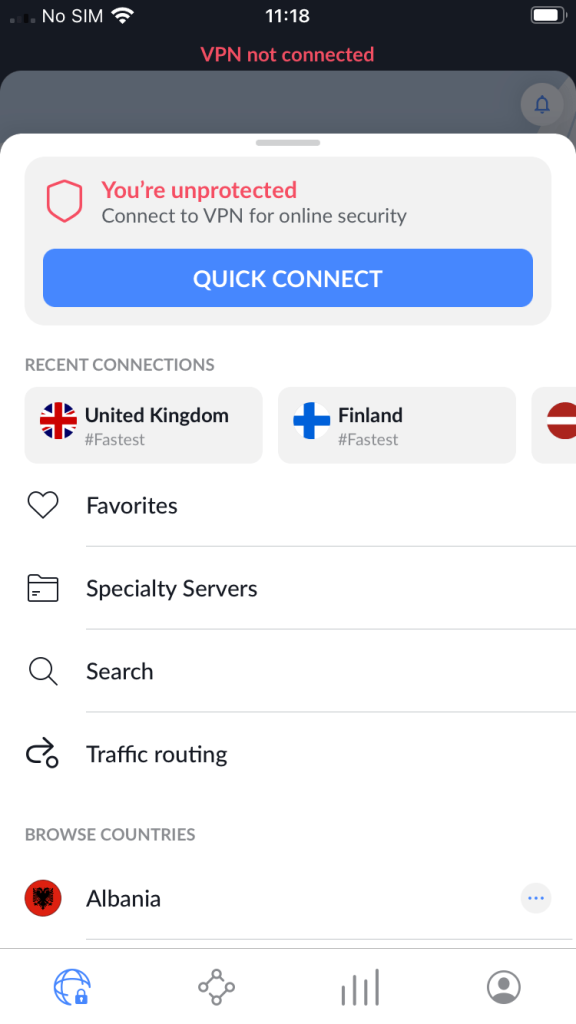
9. Choose 'Quick Connect' to connect to the closest server or pick a location manually from underneath. That's it!

Method #2: Set Up NordVPN Manually via OpenVPN
Those who don't want to use the NordVPN iPhone/iPad app can set up the VPN manually through a client called OpenVPN Connect. Here's how you can do it.
1. Subscribe to NordVPN using your iPhone/iPad and any Web browser.
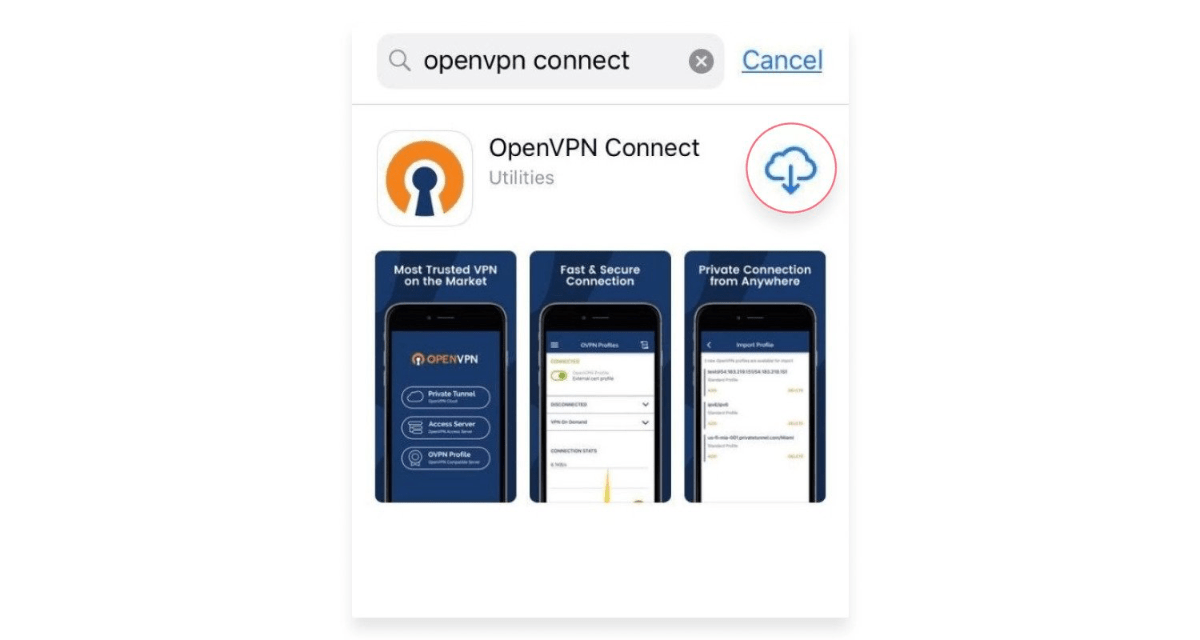
2. Open the App Store and search for the 'OpenVPN Connect' app.
3. Tap on 'Get' to download and install the app on your iPhone or iPad.

4. Open the NordVPN server tool to select a server in your desired location.
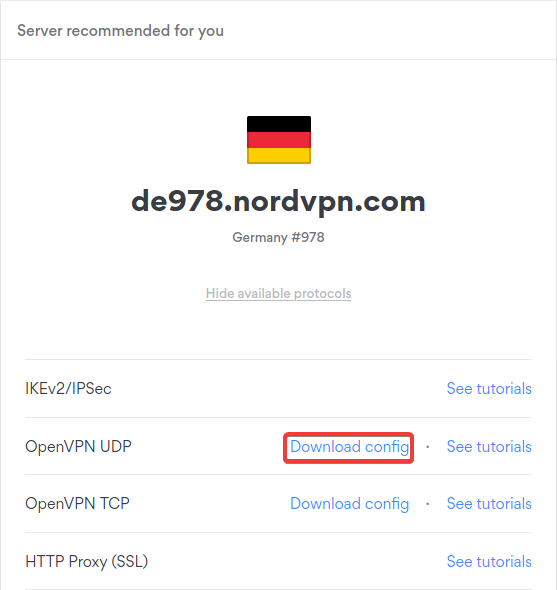
5. Click on the 'Show available protocols' option and choose 'Download config' next to OpenVPN UDP.
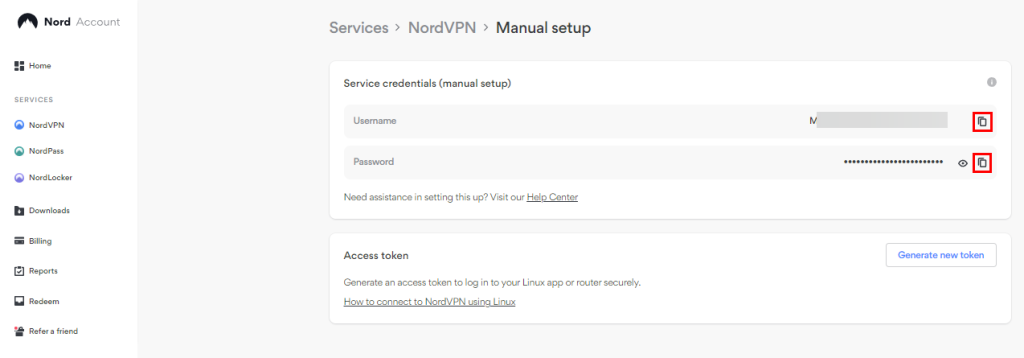
6. Visit your NordVPN Account dashboard from the Safari browser.
7. Choose 'NordVPN' followed by 'Set up NordVPN manually.'
8. Copy your username and password credentials from the 'Service credentials (manual setup)' box.

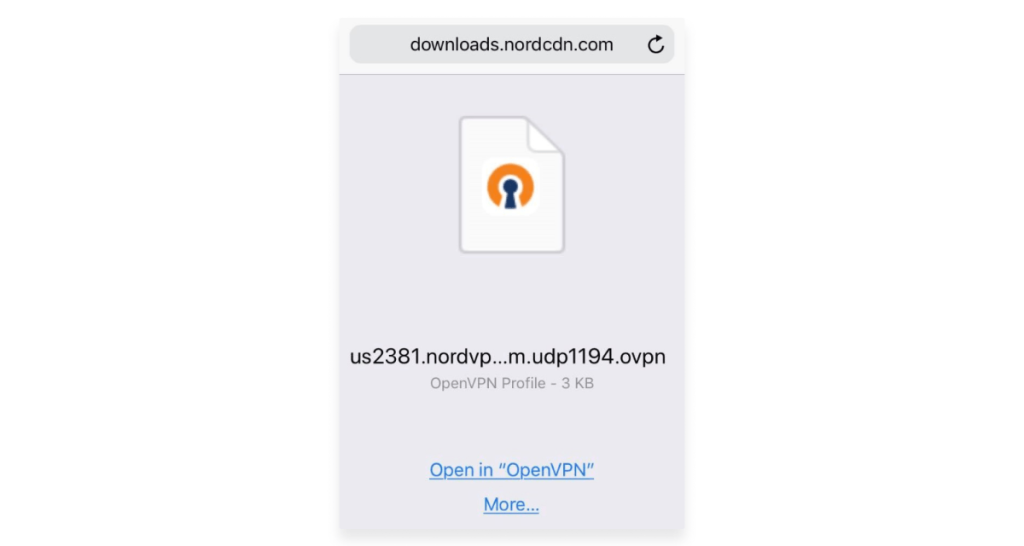
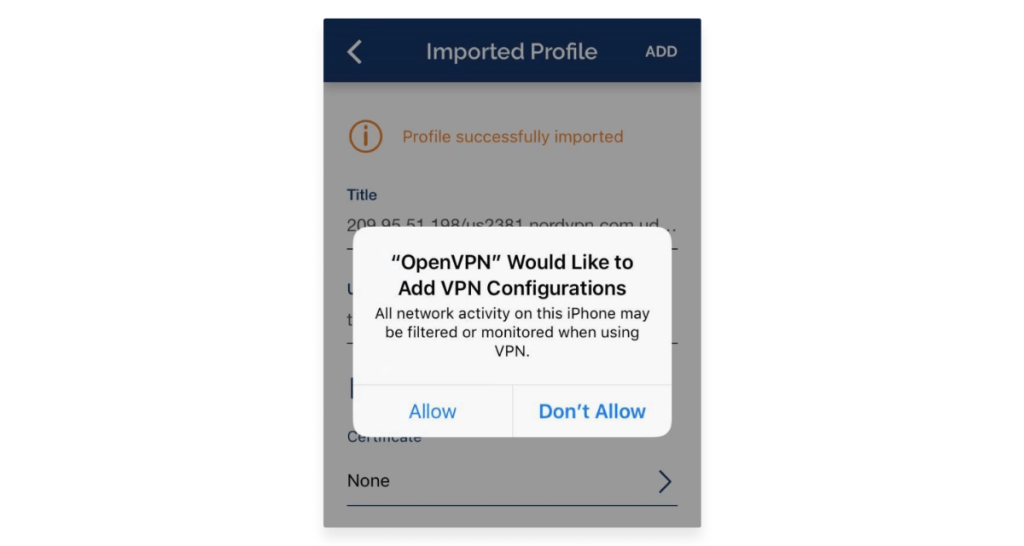
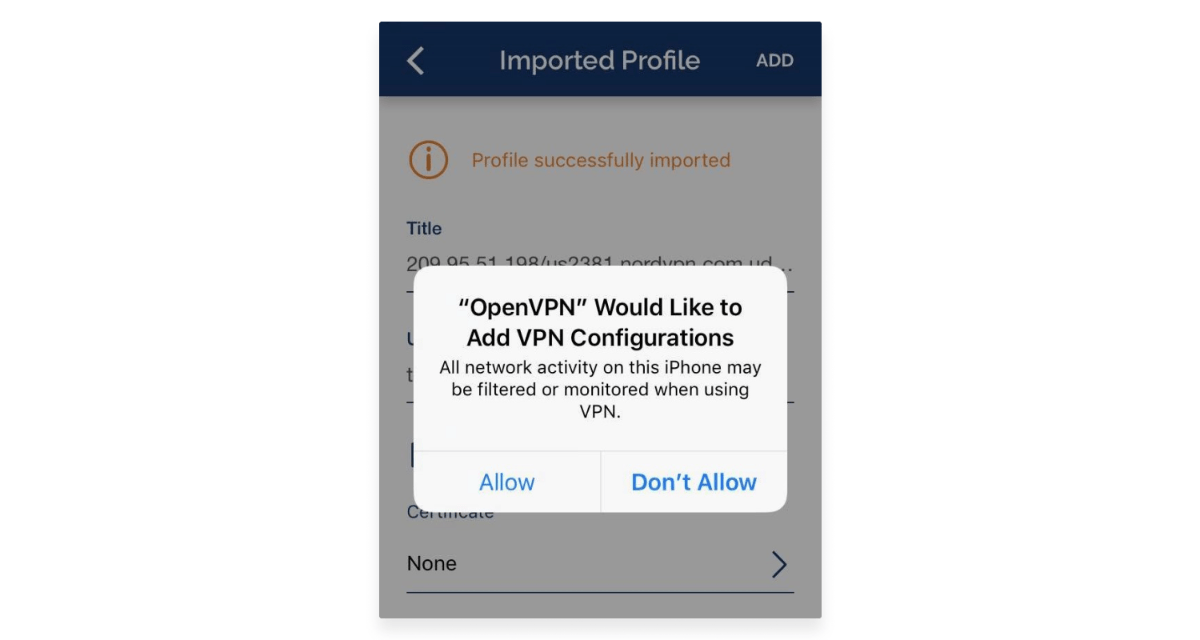
9. Find the newly downloaded OVPN file, tap on it, and choose 'Open in OpenVPN.'
10. Enter the NordVPN service credentials that you copied earlier, and choose 'Allow.'
11. Toggle the switch on the left side to turn on your VPN connection.
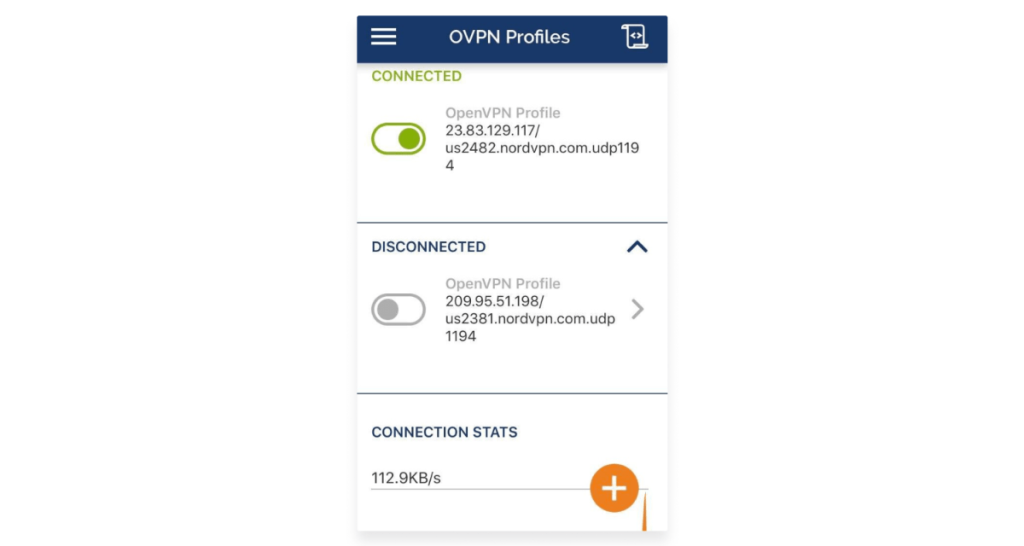

12. Once the VPN connection turns green, your NordVPN connection will become active.
Final Thoughts
Among the two options that we've discussed, downloading NordVPN from the app store is the easiest method, as it does not require any manual setup. It is also the superior method because it allows you to connect to NordVPN's 8,900+ servers in 129 countries on the go. However, advanced users may want to manually configure OpenVPN instead of relying on its app.
The biggest downside of a manual configuration is that you'll have to re-configure it if you want to change your servers. Hence, it may not be ideal for users who change server settings often. Besides that, you can also set up and install NordVPN on your router to secure both your iPhone and iPad, along with other devices in your home.
We hope that this article helped you successfully install NordVPN on your iPad and iPhone. Feel free to comment below if you have any questions.
Related