
When you purchase through links on our site, we may earn an affiliate commission. Here’s how it works.
How to Configure NordVPN on Synology
If you want to keep your Synology NAS secure, private, and protected from unwanted access, setting up NordVPN is one of the best steps you can take. The good news? You can connect your NAS to any NordVPN server using Synology’s built-in VPN tools - no special tricks or complicated workarounds needed. The setup process simply depends on which DiskStation Manager (DSM) version you’re running.
In this guide, we’ll walk you through the exact steps for configuring NordVPN on both older DSM versions (like 5.1) and newer ones (like 6.1+). We’ll also share a few tips we’ve learned along the way to keep your connection fast, stable, and running quietly in the background.
What Are the Best Security Practices for NAS + VPN?
When you're using a NAS with a VPN like NordVPN, the goal isn’t just to “get it working” - it’s to make sure the entire setup stays secure, stable, and protected against outside threats. A VPN adds a strong layer of encryption, but your Synology NAS still needs proper configuration and good digital hygiene to keep everything locked down.
Below are the essential security practices we recommend based on real-world use.
- Always Use Updated OpenVPN Config Files: Outdated .ovpn files can cause weak encryption or connection issues.
- ✔ Download the latest configs from NordVPN before setting things up.
- Stick to Strong Encryption Standards: Choose servers using AES-256 or AES-256-GCM for maximum security.
- ✔ Avoid outdated ciphers or older VPN protocols unless absolutely necessary.
- Disable Synology Services You Don’t Use: Every open service is a potential entry point.
- ✔ Turn off SSH, Telnet, WebDAV, or FTP if you aren’t using them daily.
- ✔ Re-enable SSH only when you need to modify VPN files (DSM 5.1 users).
- Enable 2FA on Your Synology Account: Two-factor authentication protects your DSM login even if someone gets your password.
- ✔ Use Google Authenticator or Synology Secure SignIn.
- Use Strong, Unique Passwords for NAS & VPN: Avoid reusing passwords across devices or services.
- ✔ Store them in a password manager.
- Restrict Remote Access When Possible: If you don't need remote access, don’t enable it.
- ✔ Consider accessing the NAS only through VPN or your LAN.
- ✔ Limit exposed ports or block WAN access entirely.
- Use “Reconnect When VPN Connection is Lost”: This prevents your NAS from accidentally sending unprotected traffic if the VPN drops.
- ✔ Enable auto-reconnect in your VPN profile settings.
- Keep DSM and All Apps Updated: Regular updates patch security holes you may not even know about.
- ✔ Turn on auto-update for critical packages.
- ✔ Schedule DSM security updates.
- Monitor Your Logs Occasionally: Just a quick glance helps you spot issues early.
- ✔ Look for repeated login attempts, failed VPN connections, or unusual behavior.
- Protect Your Home Network: Your NAS is only as secure as your network.
- ✔ Use a strong Wi-Fi password.
- ✔ Disable WPS.
- ✔ Keep your router firmware updated.
- ✔ Use guest networks for visitors.
- Don’t Install Untrusted Packages: Only use apps from Synology’s official repository or trusted developers.
- ✔ Avoid third-party apps unless you fully trust the source.
- Limit Admin-Level Access: Not everyone needs admin rights.
- ✔ Create user groups with limited permissions.
Using a VPN with your NAS is a great start, but it’s not the whole picture. When you combine encrypted VPN traffic with good NAS hygiene, you end up with a setup that’s not only fast and functional but also extremely hard to break into. If you follow the tips above, your Synology + NordVPN combo will stay stable, secure, and worry-free.
How to Configure NordVPN on Synology
Older versions of Synology, like 5.1 and earlier, require you to manually set up a NordVPN connection. That's done by inputting a series of information you can find on the VPN's site, which we'll list below. Newer versions of Synology (6.1 and up) make this process easier by allowing you to upload an OVPN file with all the instructions needed. Let's explain everything in detail:
How to Configure NordVPN on Synology 6.1
To configure NordVPN on Synology 6.1 or later, you'll need to download an OpenVPN file from NordVPN's website. Then, you'll upload that file to your Synology NAS. Just follow these steps:
1. Get NordVPN using a Web browser on your computer.
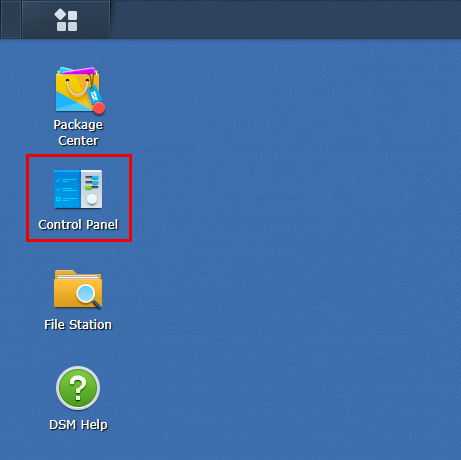
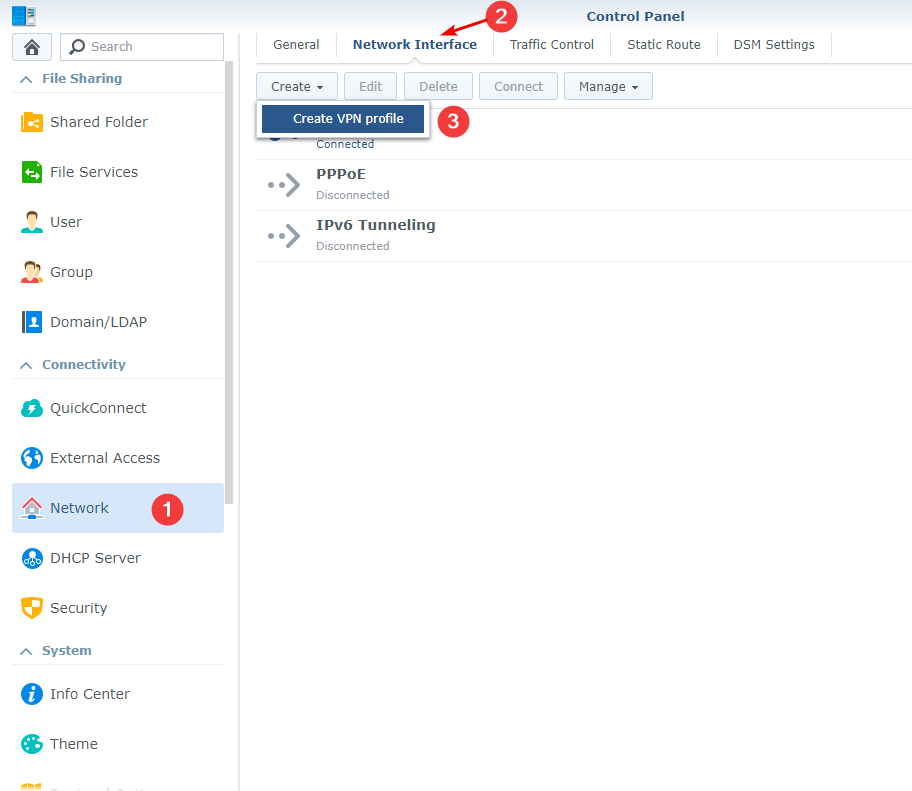
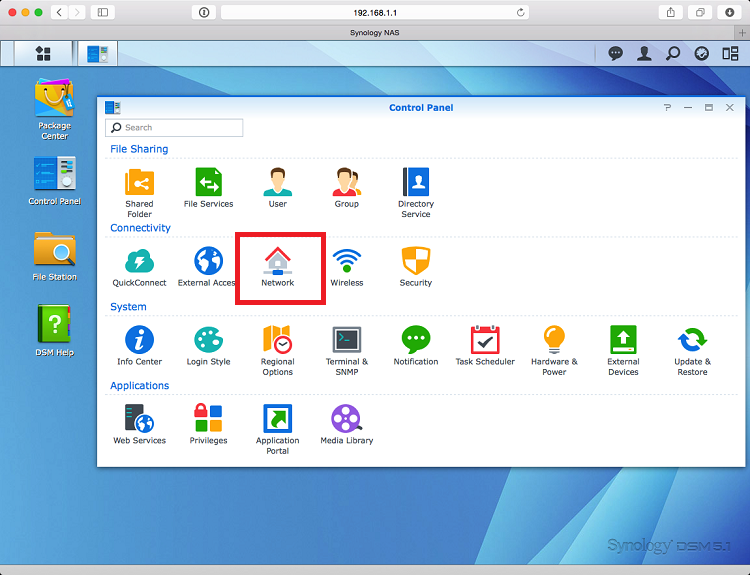
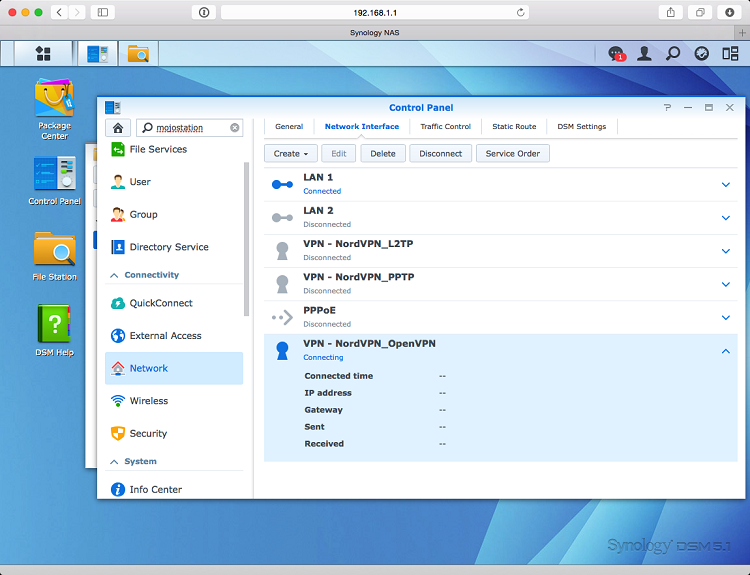
2. Now, log into your Synology device and visit the Control Panel.
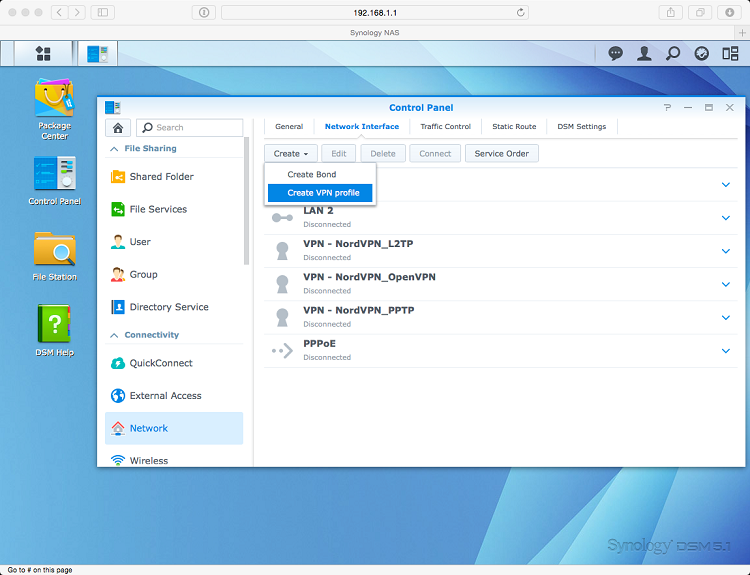
3. Navigate to Network and follow this path: 'Network Interface' > 'Create' > 'Create VPN profile.'
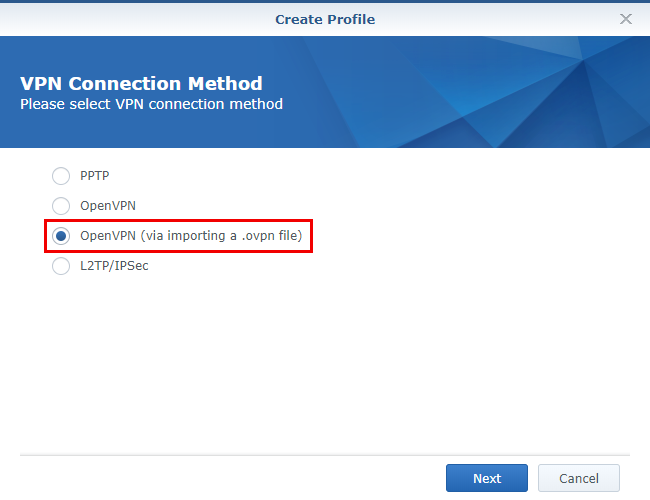
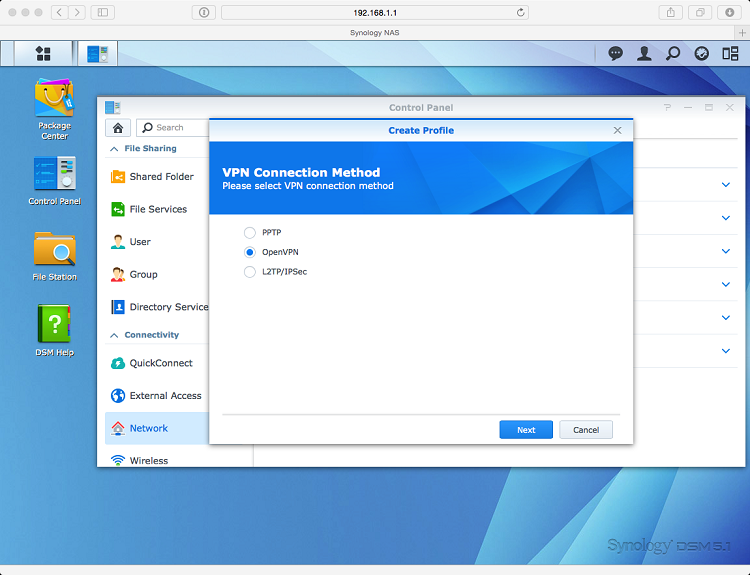
4. Check the option 'OpenVPN (via importing a .ovpn file)' and click the 'Next' button.
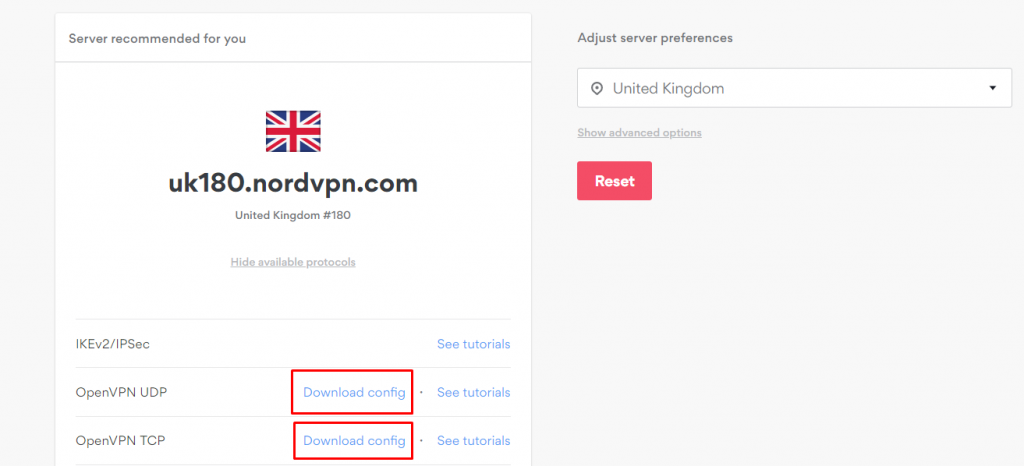
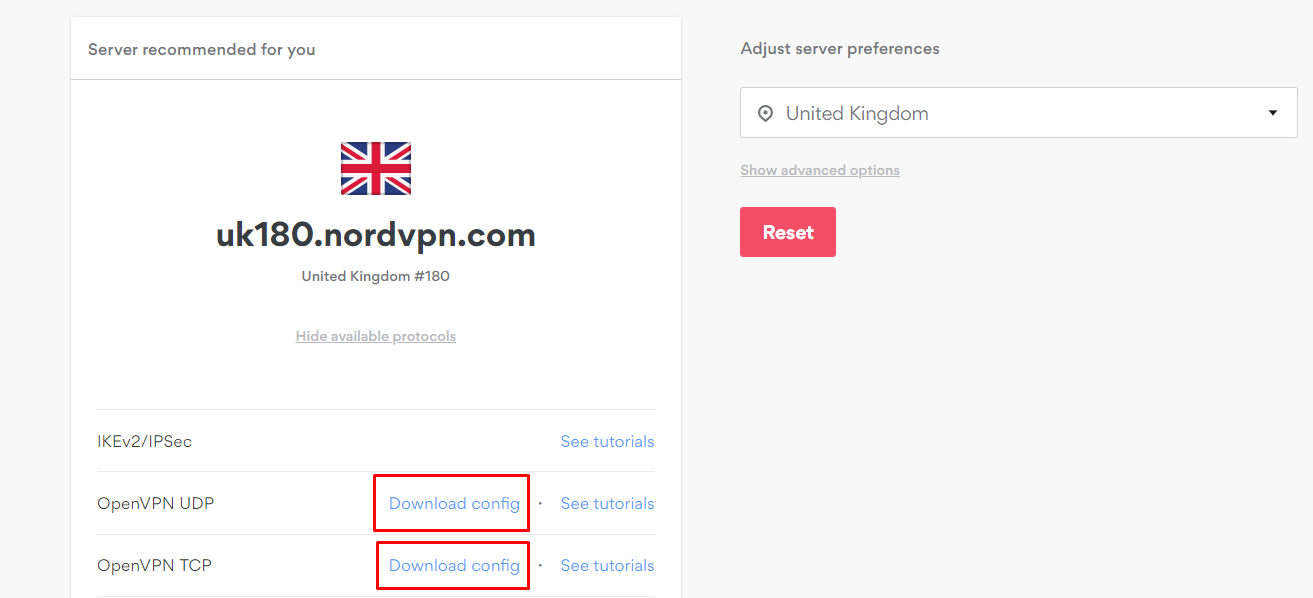
5. Open NordVPN's server configuration page.
6. Choose 'Show available protocols' > 'Download config' next to OpenVPN.
7. Now, fill in the fields mentioned below:
- Profile name: Any name.
- Username: NordVPN service credentials (from your Nord Account dashboard).
- Password: NordVPN service credentials (from your Nord Account dashboard).
- Import .ovpn file: The .ovpn file you downloaded earlier.
- CA certificate: Download NordVPN's certificate files, and find the certificate having the same number as your chosen server. Open the 'Create Profile' screen from earlier, click the 'Browse' button on the right side of the CA certificate field, and upload the ca.crt file manually.
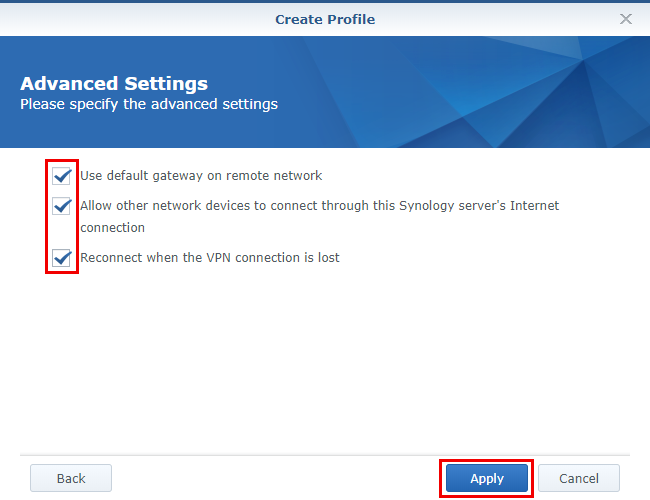
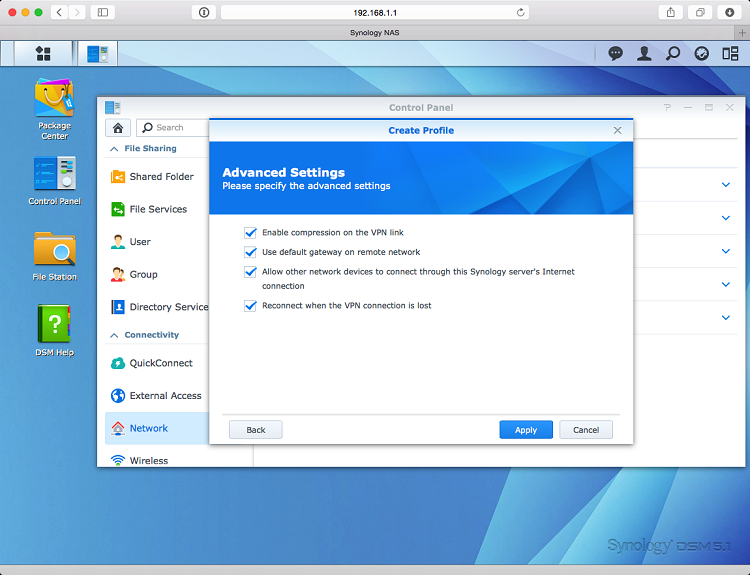
8. Click on 'Next', check all the boxes under Advanced Settings and hit 'Apply.'
9. Click on the profile you created and hit 'Connect.' The status of this profile will become Connected.

10. In case you face any issues with the connection, open the .ovpn configuration file and add the line:
log-append /var/log/NordVPN.log11. If it doesn't help, contact NordVPN's 24/7 chat support and share the log file from the directory.
/var/log/NordVPN.logHow to Configure NordVPN on Synology 5.1
If your Synology NAS device runs DiskStation Manager 5.1, you can configure NordVPN's OpenVPN client on it. Here, we've provided a step-by-step guide on how to configure and use NordVPN on Synology 5.1.
1. Sign up for NordVPN using a computer and any Web browser.
2. Log in to your Synology NAS and choose the 'Control Panel' option.

3. Move on to the 'Network' option.
4. On the upcoming screen, create a new VPN profile.
5. Select the 'OpenVPN' option in the pop-up window and click 'Next.'
6. Now, download NordVPN's CA certificates for further steps.
7. After that, enter the following information:
- Profile Name – Input any name you want (use something memorable).
- Server Address – Enter the NordVPN server hostname in your preferred location.
- User name – NordVPN service username (from your NordVPN Account dashboard).
- Password – NordVPN service password (from your NordVPN Account dashboard).
- Port – 1194 (recommended).
- Protocol – UDP (recommended).
- Certificate – Upload the CA certificate for the server you've picked.
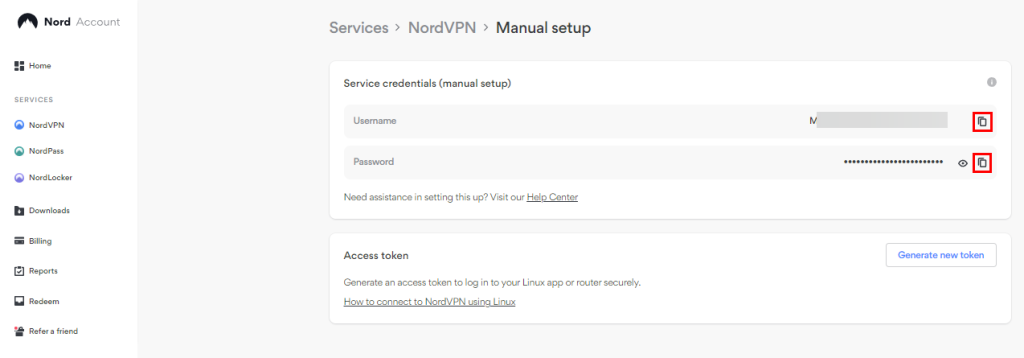
Here's how you can get your NordVPN service credentials:
- Navigate to NordVPN account dashboard > 'NordVPN.'
- Click on 'Set up NordVPN manually.'
- Enter the verification code (from your NordVPN-associated email).
- Copy the credentials under the box titled 'Service credentials (manual setup).'


8. Click 'Next' and check all the boxes in the Advanced Settings, and hit 'Apply.'
9. Now, when you click on 'connect' from your recently created VPN profile, an error will pop up.
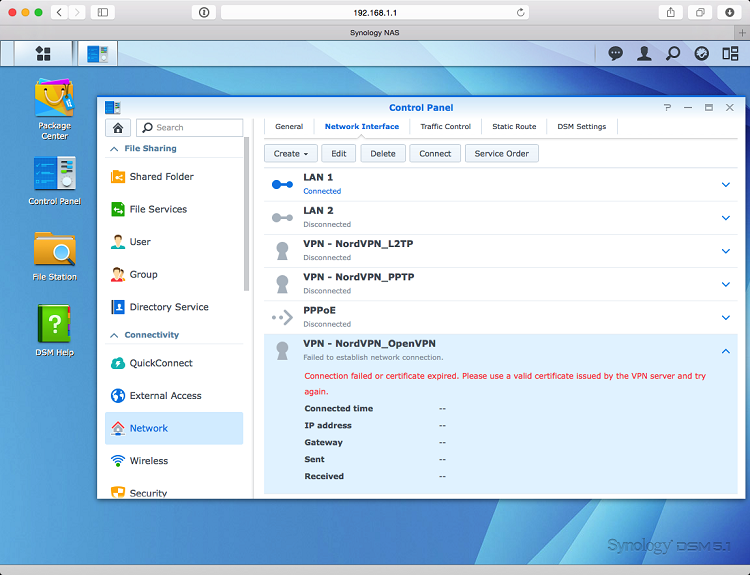
10. You need to edit your OpenVPN profile from 'Terminal & SNMP' > check 'Enable SSH service.'
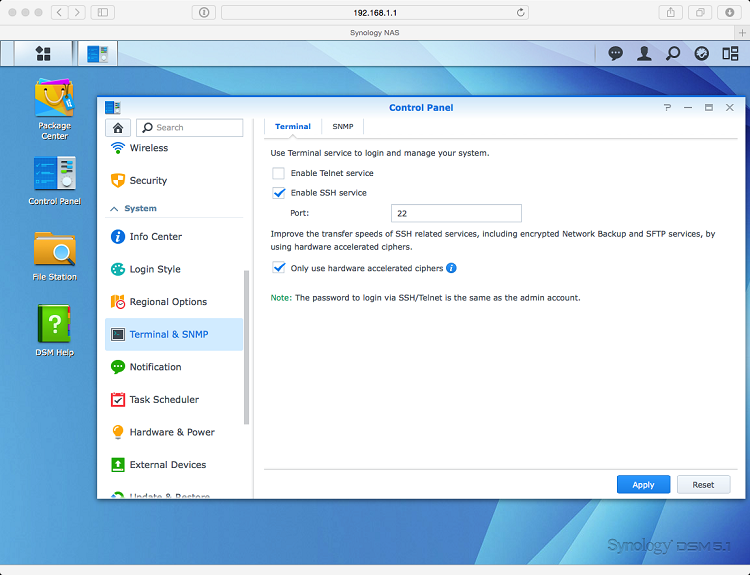
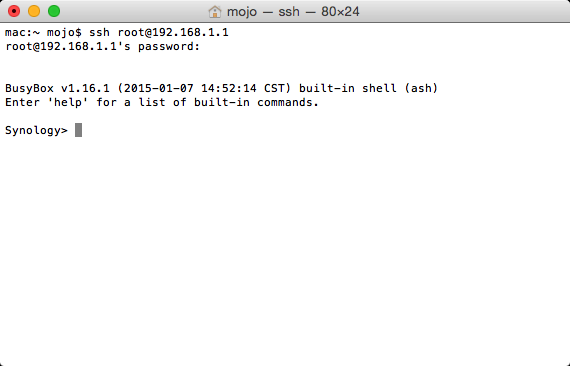
11. Open a terminal window on the device you're using and enter the below command:
ssh root@(ip of your synology)Note: The root password is the one you use for administrative access to your NAS device.
12. After that, change directories by typing in the below command:
cd /usr/syno/etc/synovpnclient/openvpn
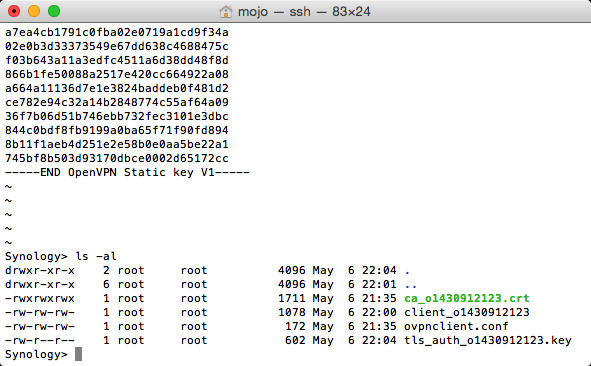
ls -al13. Type in the below command and replace the connection_id with your actual connection ID:
vi tls_auth_connection_id.key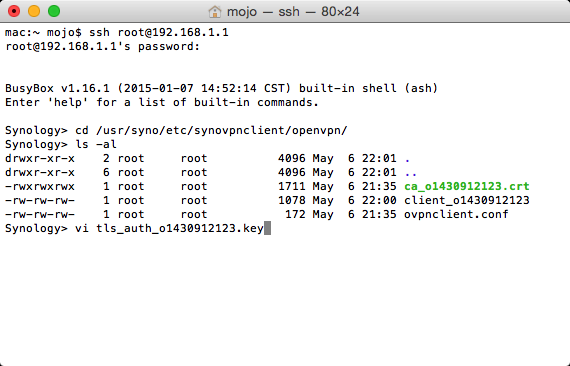
14. Open the directory with the extracted CA certificates, and you'll see the tls-auth.key files there.
15. Select the one key file corresponding to the VPN server you're going to use.
16. Open it in a text editor and copy the content.
17. Launch a terminal window, press 'A,' and paste the content you've copied earlier.
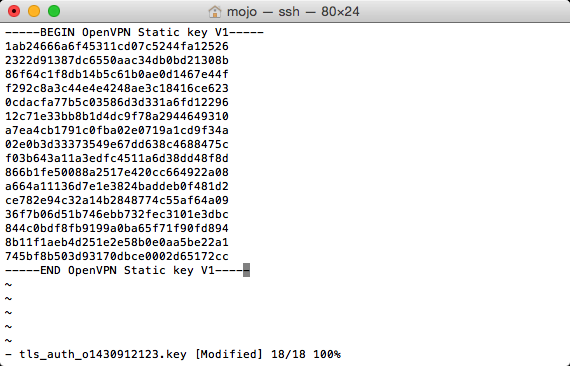
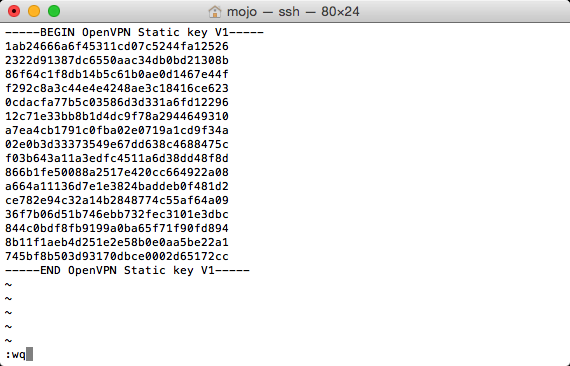
18. Next, press the 'Escape' button and type in :wq.
19. If you're using the ls -al command instead, you'll get a different output like the image below.
20. To finish the client_(connection_id) file, open the file with vi and then paste the below content.
21. Replace the tls-auth.key with the name of the key file you've created before.
cipher AES-256-CBC
remote-cert-tls server
auth SHA512
tls-auth tls_auth_o1430912123.key 1
tun-mtu 1500
tun-mtu-extra 32
mssfix 1450
persist-key
persist-tun
ping 15
ping-restart 0
ping-timer-rem
log-append /volume1/tmp/NordVPN.log
22. Now, save the file by pressing the 'Escape' button and typing :wq.
23. Go back to your web browser and click 'Connect.'
24. Now, NordVPN will be connected to your Synology NAS.
25. To disconnect, simply click the 'Disconnect' button on the Synology Network list.
Why Use NordVPN on Synology?
Look, running a Synology NAS means you've got family photos, backups, and maybe some private files humming away 24/7. But your ISP sees everything - your downloads, remote access, even what Plex streams to guests. So protecting that data should be a priority. Adding NordVPN on top of Synology isn’t just about privacy; it’s about keeping your entire file-sharing environment secure and hidden from unwanted access.
Here’s what NordVPN brings to your NAS:
- Protects your entire network: Set it up once via OpenVPN on DSM 6.1+ (or 7), and every device behind your NAS gets encrypted without installing apps everywhere.
- Encrypted traffic: Everything your NAS sends or receives is locked behind strong encryption ciphers that NordVPN has to offer.
- Kill switch + obfuscation: No leaks if VPN drops; hides NAS traffic from prying eyes (perfect for remote access).
- Secure remote access: Safely access your NAS even when you're away from home.
- 7,400+ servers in 118 countries: Unblock global content for Plex, dodge geo-blocks on file shares, or torrent safely (they're audited no-logs).
Hence, running NordVPN on your Synology dramatically boosts your NAS security and ensures your data stays private, no matter where you access it from. Now that we know this, let's understand what the best practices for VPN + NAS are to make it work smoothly and safely.
Performance Tips for Faster and More Stable NordVPN on Synology
It’s always a good idea to optimize your setup for better speed and reliability. Synology devices can run smoothly over a VPN. You just need the right adjustments. Here’s what we at TechNadu personally recommend:
- Choose a nearby NordVPN server. Distance directly affects speed, so stick to servers close to your region.
- Use OpenVPN UDP instead of TCP. UDP is faster and usually more stable for file transfers and backups.
- Pick low-load servers. NordVPN shows each server’s current load; selecting a lighter one can instantly improve performance.
- Restart your NAS occasionally. It clears cached processes and frees up system resources.
- Disable unused DSM packages. Background services consume CPU and can slow encrypted traffic.
- Experiment with MTU values. If you notice slow uploads or downloads, adjusting the MTU can help reduce packet fragmentation.
- Use a wired connection whenever possible. Ethernet gives you more consistent speeds than Wi-Fi when pushing large files.
With a few smart tweaks, you can enjoy strong security from NordVPN without sacrificing speed on your Synology NAS.
Troubleshooting for Common Issues
Once you set up NordVPN on your Synology NAS, things usually run smoothly, but every now and then, small issues can pop up. The good news? Most of them are easy to fix. Below is a quick breakdown of the most common problems users face, along with simple fixes you can try right away.
Bottom line: Most Synology VPN issues boil down to credentials, certificates, or routing settings. Tweak these areas, and your NordVPN connection typically jumps right back to normal.
Final Thoughts
Setting up NordVPN on your Synology NAS may take a few steps, but it ensures your device remains secure, private, and protected from unauthorized access. Following the guide above lets you encrypt your traffic, enable automatic reconnection, and maintain a stable connection without constant monitoring.
For Synology users, NordVPN is our top recommended VPN. It combines strong encryption, a vast server network, and fast speeds, making it ideal for securing backups, file sharing, and remote access. Its user-friendly setup also means you don’t need advanced technical knowledge to get full protection.
By pairing your NAS with NordVPN, you’re not just adding a VPN, you’re creating a safer, worry-free environment for your personal and professional data. With NordVPN handling your network security, you can focus on using your Synology NAS confidently and efficiently.
That's all! Now you know how to set up and use NordVPN on Synology NAS devices. If you have any extra questions, drop us a comment below. Thanks for reading!
Related